
The second step in this activity is to estimate the stories on the backlog.
Activity: Using estimate buckets to size User Stories
What you'll need: User Stories written on index cards or printed, post-it notes, and black sharpie pens
Setup: A large table that the whole team can fit comfortably around
Remember: Set a time-box before this activity starts
Once you've had the chance to review the backlog, the second step is for you to refine the User Stories further.
A good place to start any refinement is to try to estimate the stories. When you ask for an estimate, it immediately triggers the thought process, "what do we need to do to complete this story?"
The ensuing conversation from your team will give a good indication if the objective of the User Story is clear and the acceptance criteria are well-defined. If they aren't, you won't be able to estimate the User Story and the team will need to go through a series of refinements with the Product Owner before they are ready to try to estimate again.
Bearing that in mind, and also taking into consideration that not everyone has used relative sizing before, we'll take the following approach:
We'll use a system based on t-shirt sizes: XS, S, M, L, and XL. It's OK; we can translate these to another system, such as Story Points, if we want to at a later stage. In this case, t-shirt sizes make the most sense when starting out with relative sizing.
Lay out the table as follows with a column for each t-shirt size:
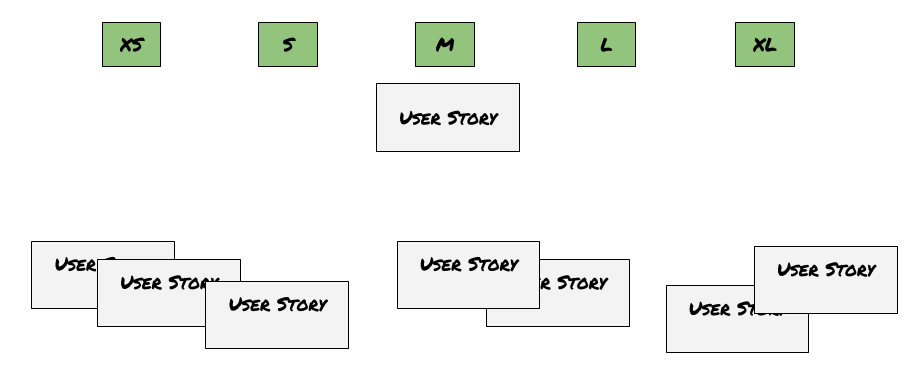
Spread the stories out on the table and take the time to read them and ask questions if necessary. You may refine the User Story or add acceptance criteria at this stage if you wish. The key thing that we're trying to achieve at this juncture is to identify a story which is either small (S), medium (M), or extra-large (XL). Once we've identified the story we think is a good example of one of those sizes, we place it on the table in the appropriate column.
In the preceding example diagram, our team has chosen an example of a "medium" sized story and have placed it in the medium (M) column.
Remember that at this stage, it's not important to be exactly right; it's just good to start somewhere.
The next step is to take another User Story from the unsized pile and compare it to one of the stories you've already sized. We should ask ourselves the following:
- Is it double the effort or more of the already sized story?
- Is it half the effort or less of the sized story?
- Is it a similar effort?
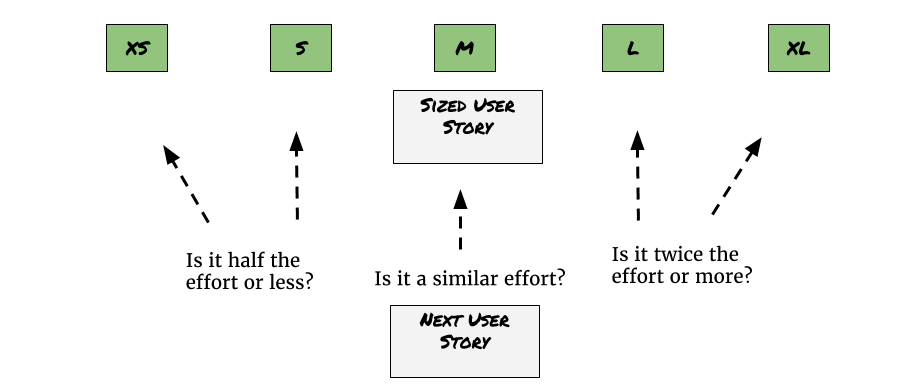
Our team places the story in the appropriate column relative to the already-sized story. You then pick the next story and compare it to the already-sized stories. You decide if it's bigger, smaller, or similarly sized to the currently placed stories. You then put it in the column that's most appropriate and pick the next story card and repeat the process.
Eventually, you will end up with all the stories placed in columns in a similar way to the following diagram:
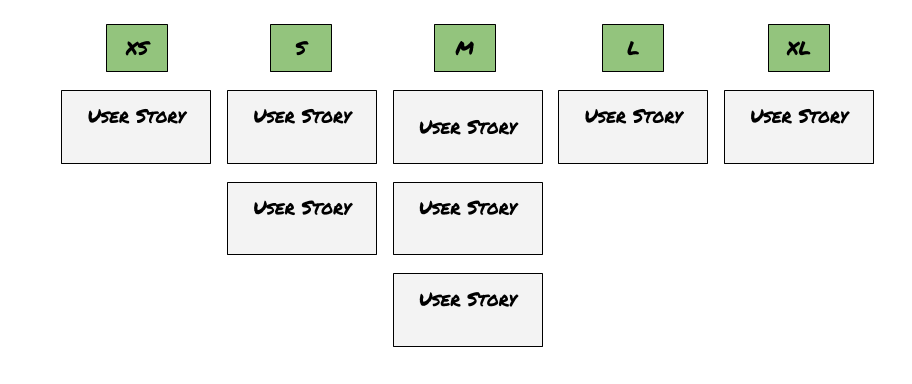
At this point, you should take a step back to admire your work and to decide if you've got it more or less right. Remember that relative sizing is less about precision and more about gut instinct, and most importantly, it's about team agreement.
Once your team is happy with the relative sizing of each story, write its size on the story card in the bottom right-hand corner, as per the following example:
We'll discuss relative sizing in more detail in Chapter 4, Gathering Agile User Requirements.