
- Import the two textures from the assets folder
BTN_StartGameandBTN_Credits. These will be used to build our main menu.You will also notice that these textures are somewhat larger than the buttons they contain. This was done because by default Unity will expect that your textures are some power of 2. We will address this limitation later.

- Create an empty game object called Menu Object.
Going back to our original foray into scripting, we know that we need some game object in our scene in order for our script to run. Since this object doesn't need to be displayed, or have any particular game functionality, we can simply insert an empty game object into the scene and attach our script to that.

- As we are going to be building an immediate mode GUI, it follows that we're going to have some script that drives the display of our GUI. Create a script called
MainMenuand attach it to the MenuObject game object. - Define two public variables in the
MainMenuscript, which will allow us to specify the button textures for the main menu commands.When we originally imported the textures for our buttons Unity imported them as Texture2Ds. If we configure our script to take in Texture2Ds we can use the Unity GUI to configure the textures we want to display as opposed to having to hard code this value in our code. We can accomplish this by defining public attributes on the class which defines our script.
   public Texture2D   mainMenuButton;
   public Texture2D   creditsMenuButton;
- Next we need to update our
OnGUImethod to display the buttons for the main menu. We want the Texture2Ds we imported earlier to show up as buttons in our interface so we need to use the Unity GUI system to render them as buttons.Unity has an easy to use
GUI.Buttonclass that performs this function.GUI.Buttonallows us to create a button on the interface with coordinates that are in screen space. We do this by defining a rectangle (Rect) with the position on the screen where this button will be drawn as the first two arguments and the width and height as the second two components.Rect( x, y, width, height )
When combined with the normal
GUI.Button()method call we get the following:void OnGUI() { GUI.Button( new Rect ( 0, 0, 256, 256 ), mainMenuButton ); }Here we are creating a new button at the upper left corner of the screen with a size of 256x256 and defining the
mainMenuButtonas the Texture2D that should be drawn in this button.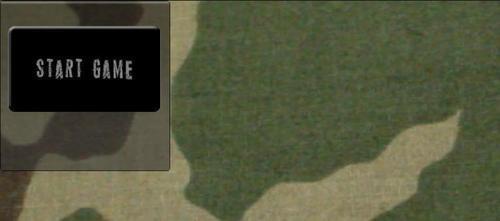
- Next we need to tell the Unity GUI to perform an action in response to someone pressing that button. As in the pseudo code, this involves wrapping the button with an if statement – which will be evaluated in the
OnGUI. - Add the
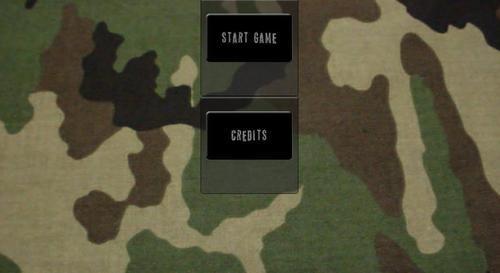
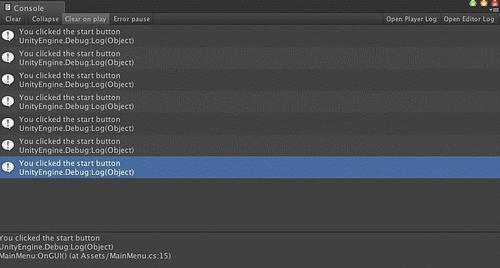
creditsMenuButtonand center the buttons on the screen by updating the Rects for the originalGUI.Buttons.using UnityEngine; using System.Collections; public class MainMenu : MonoBehaviour { public Texture2D mainMenuButton; public Texture2D creditsMenuButton; // Process the GUI void OnGUI () { int componentWidth = 256; int componentHeight = 256; int interfaceOrigin = 0; if (GUI.Button( new Rect ( Screen.width / 2 - componentWidth/2, interfaceOrigin, componentWidth, componentHeight ), mainMenuButton) ) { Debug.Log("You clicked the start button "); } else if (GUI.Button( new Rect ( Screen.width / 2 - componentWidth/2, interfaceOrigin + componentHeight, componentWidth, componentHeight ), creditsMenuButton) ) { Debug.Log("You clicked the credits button "); } } }While there are other ways to do this in Unity using GUI Groups, this will suit our purposes better as an instructional tool. If we render our scene now, we will find two buttons which contain our button textures:
Pressing these buttons will show some debug text in the console:
While this allows our buttons to be rendered, there is more GUI Button being rendered than we want. The Unity GUI has its own style engine defined in
GUIStyle, which determines how a button should be drawn. As we have baked the look and feel of our buttons into the textures themselves, we don't need Unity to display any of this style. - Update the
GUIStyleof theGUI.Buttonsso that they have no associated style.GUIStyledefines aGUIStyle.nonewhich allows us to turn off Unity drawing any of the GUI skin that it is currently drawing.if (GUI.Button( new Rect ( Screen.width / 2 - componentWidth/2, interfaceOrigin, componentWidth, componentHeight ), startButton, GUIStyle.none) ) { Debug.Log("You clicked the start button "); }
By making this simple change we will get the GUI rendered exactly how we intended.
- Update the script to load the Unity levels when the buttons are pressed.
if (GUI.Button( new Rect ( Screen.width / 2 - componentWidth/2, interfaceOrigin, componentWidth, componentHeight ), startButton, GUIStyle.none) ))
{
  Debug.Log("You clicked the start button ");
  Application.LoadLevel("IntroCity");
}
By making the call to Application.LoadLevel as we have previously, we now have a mechanism for pressing a button in the interface and having Unity load a particular scene.
We have just constructed a simple immediate mode GUI to display the main menu for our game. We have accomplished this by using the Unity GUI system and building a script which renders our GUI. Under the covers, what Unity is doing is drawing our scene every frame, based upon the script. It is important to note that if you were to change the script so that, programmatically, it were to display certain things based upon some setting or every third frame, Unity will do that because it is processing the UI script each and every frame. Accordingly it is important to not perform any extremely complex operations in the OnGUI method as it could result in a substantial performance slowdown.
One of the issues with the current implementation of the Unity GUI library is that it was designed for PC users and doesn't take into account any of the limitations of mobile devices. While it performs well enough in some situations, in most situations the number of draw calls it generates are enough to wreck the performance of your game.
In our previous example it is not possible to really see the impact of the performance slowdown because we aren't doing any rendering that is intense enough to impact the frame rate. As our scene is pretty static, one wouldn't be able to visually measure the result. However, if we look at our statistics we can see that even for this very modest GUI we're utilizing three draw calls – one for each GUI component.
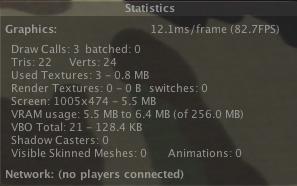
This may not seem like much now, but as you learn more in the chapter on optimization, this is a substantial amount of work that the iOS device is doing. So what if we could accomplish the same amount of work within a single draw call? What if we could have only one draw call regardless of the number of GUI elements we're drawing? Enter Prime31's UIToolkit.