
Apart from playing audio, many games show video clips, for instance, to present intros and cut-scenes. This part of the chapter describes the process of playing the video directly from your application.
In the exemplary game, you will present a video clip showing how the user can calibrate the compass. Such a movie should be presented only when the compass needs a calibration while opening the World screen. In such a case, the user should be directed to the auxiliary page, called Calibration, which presents the movie, together with the description that the user should calibrate the compass, and then press the back button to go back to the screen with the augmented reality feature.
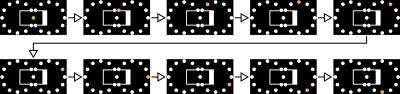
The video clip is prepared as a .wmv file and is very simple. It is composed from a set of images presenting following states of an animation, as presented in the figure:
Playing movies directly by the managed application is really simple, due to availability of the MediaElement control, the same which you used for playing the background music.
At the beginning, let's copy the Calibration.wmv file into the Assets directory (of the SpaceAim3D project), include it in the project, as well as ensure that the Build Action value (in the Properties window) is set to Content.
The movie is shown only in the Calibration screen, which you will create as a new Windows Phone Landscape Page. However, it will be very simple, thus you can even resign from creating the view model dedicated to this page. The most important parts of the XAML code are as follows:
<phone:PhoneApplicationPage (...) >
  <Grid> (...)
    <TextBlock (...) />
    <Border Style="{StaticResource SA3DMainOuterBorder}" (...)>
      <Border Style="{StaticResource SA3DMainInnerBorder}">
        <StackPanel>
          <TextBlock Text="[ localized string ]" (...) />
          <MediaElement Source="Assets/Calibration.wmv"
            MediaEnded="Me_MediaEnded"
            AutoPlay="True" Height="270" Margin="10"/>
        </StackPanel>
      </Border>
    </Border>
  </Grid>
</phone:PhoneApplicationPage>
As you can see, the StackPanel layout control (placed inside Border) contains TextBlock and MediaElement objects. The first one just presents suitable information to the user, while the other displays the video clip.
In case of the MediaElement control, you specify some properties, including a path to the movie file (Source) and a value indicating whether the video clip should be started automatically (AutoPlay). What is more, you decide that the Me_MediaEnded method is called when the movie ends. Thus, you can easily play it in a loop.
Apart from the XAML code, you make some modifications in the code behind. First of all, you add the Me_MediaEnded method, which is called when the whole movie is presented to the user. In such a case, you want to restart it. To do so, you get a reference to the MediaElement control (using the sender parameter) and call the Play method, as shown in the following code:
private void Me_MediaEnded(object sender, RoutedEventArgs e)
{((MediaElement)sender).Play();
}
Playing the video causes the background music to stop. Thus, you need to start it again just after closing the Calibration page. To do so, you override the OnNavigatedFrom method and call the StartBackgroundMusic on the Ap
p instance, as presented in the following block of code:
protected override void OnNavigatedFrom(NavigationEventArgs e)
{
  base.OnNavigatedFrom(e);
  (Application.Current as App).StartBackgroundMusic();
}
After making these changes, the background music is stopped while presenting the video clip, however, it is automatically launched when the player returns to the World screen.
The remaining changes are necessary in the view model class for the World screen. Here, you will present either the augmented reality feature or the Calibration screen, depending on the state of the compass calibration.
At the beginning, you create the private field representing the compass:
private Compass m_compass;Inside the OnNavigatedTo method, you check whether the compass is available in the device. Then, you create a new instance of the Compass class (from the Microsoft.Devices.Sensors namespace) and start using the sensor. You also choose the methods called when the Calibrate and CurrentValueChanged events are fired. They are crucial in case of your solution, because you will use them to decide which operation should be taken. If the CurrentValueChanged is fired, you should initialize the augmented reality feature. Otherwise, your game should present the screen with calibration instructions.
If the device does not support the compass (for example, in the emulator), you skip verification and automatically start the augmented reality feature. The modified code of the OnNavigatedTo method is shown in the following block:
public void OnNavigatedTo(NavigationEventArgs e)
{
  if (Compass.IsSupported
    && e.NavigationMode != NavigationMode.Back)
  {
    this.m_compass = new Compass();
    this.m_compass.Start();
    this.m_compass.Calibrate += this.Compass_Calibrate;
    this.m_compass.CurrentValueChanged +=
    this.Compass_CurrentValueChanged;
  }
  else { this.StartAugmentedReality(); }
}
When the user opened the Calibration screen, but did not successfully calibrate the compass, you also present the augmented reality world. If you require that the compass needs to be calibrated and repeat an action of opening the Calibration screen multiple times, the player can get stuck in this screen and cannot return to the main menu.
The Compass_Calibrate method is called when the compass needs a calibration. In such a case, you stop the compass (by calling the StopCompass method, described later) and navigate the user to the Calibration screen. Of course, you need to use the Dispatcher object to perform this operation, as presented in the following snippet:
private void Compass_Calibrate(object sender,
  CalibrationEventArgs e)
{
  this.StopCompass();
  Deployment.Current.Dispatcher.BeginInvoke(() => {
    this.NavigationService.Navigate(new Uri(
      "/Views/CalibrationPage.xaml", UriKind.Relative));
  });
}
The Compass_CurrentValueChanged method is called when new data from the compass are available. In the current scenario, it should be called only if the compass does not require a calibration. Here, you stop the compass and start the augmented reality feature, as shown as follows:
private void Compass_CurrentValueChanged(object sender,
  SensorReadingEventArgs<CompassReading> e)
{
  this.StopCompass();
  Deployment.Current.Dispatcher.BeginInvoke(() =>
    this.StartAugmentedReality());
}The process of starting the augmented reality feature is the same as described in Chapter 8,
Maps, Geolocation, and Augmented Reality. It is worth mentioning that, in the StartAugmentedReality method, a request to the web service is also sent:
private void StartAugmentedReality()
{
  this.Display.ServiceErrors += this.Display_ServiceErrors;
  this.Display.StartServices();
  this.Display.Orientation =
    ControlOrientation.Clockwise270Degrees;
  SA3DServiceClient ws = new SA3DServiceClient();
  ws.GetPlayersCompleted += this.Ws_GetPlayersCompleted;
  ws.GetPlayersAsync(Settings.Key);
  ws.CloseAsync();
}
The StopCompass method just stops the compass sensor and assigns the null value to the m_compass field, as shown in the following code snippet:
private void StopCompass()
{
  this.m_compass.Stop();
  this.m_compass = null;
}
You have just finished adding video support to your game. Thus, you can launch it and see the video clip instructing how the player can calibrate the compass. Of course, the suitable screen will be presented only if the compass needs a calibration.