
From a web interface perspective, we have a fully functional Login component that navigates users to the /chat page, which contains the chat works! text label. Let's replace this content with a list of chat groups that users can join:
- Import the AngularFireDatabaseModule module into the main application module using the following code:
      import { AngularFireDatabaseModule } from '@angular/fire/database';

      @NgModule({
        // ...
        imports: [
          // ...
          AngularFireModule.initializeApp(environment.firebaseConfig),
          AngularFireAuthModule,
          AngularFireDatabaseModule
        ],
        // ...
      })
      export class AppModule {}
The preceding code is going to enable additional APIs so that we can communicate with Firebase's databases.
- Next, import the following classes into the chat.component.ts file:
      import { AngularFireDatabase } from '@angular/fire/database';
      import { Observable } from 'rxjs';
- Now, let's introduce the groups property, which will hold a list of our group instances. Update the chat.component.ts code so that it looks as follows:
      @Component({...})
      export class ChatComponent implements OnInit {
        groups: Observable<any>;

        constructor(private firebase: AngularFireDatabase) {}

        ngOnInit() {
          this.groups = this.firebase.list('groups').valueChanges();
        }
      }
The AngularFire library is going to watch these changes and automatically update the collection.
- Now, we need some HTML templates to render the list items. For testing purposes, let's output the raw JSON content. Update the chat.component.html file so that it looks as follows:
      <ul>
        <li *ngFor="let group of groups | async">
          {{ group | json }}
        </li>
      </ul>
- Save your changes and run or restart the web server. Then, log in to see the /chat route. You should see a list of objects that contain name and description properties:

As you can see, we can successfully connect to the Firebase realtime database and display the data.
- Let's make the user interface better by utilizing the Material List component. Import the MatListModule and MatIconModule modules into the main application module:
      import { MatListModule } from '@angular/material/list';
      import { MatIconModule } from '@angular/material/icon';
- Replace the content of the chat.component.html file with the Material List implementation, as shown in the following code:
      <mat-list>
        <h3 mat-subheader>Groups</h3>

        <mat-list-item *ngFor="let group of groups | async">
          <mat-icon mat-list-icon>chat</mat-icon>
          <h4 mat-line>{{ group.name }}</h4>
          <p mat-line>{{ group.description }}</p>
        </mat-list-item>
      </mat-list>
- Switch to the running web application and check out what the user interface looks like now:
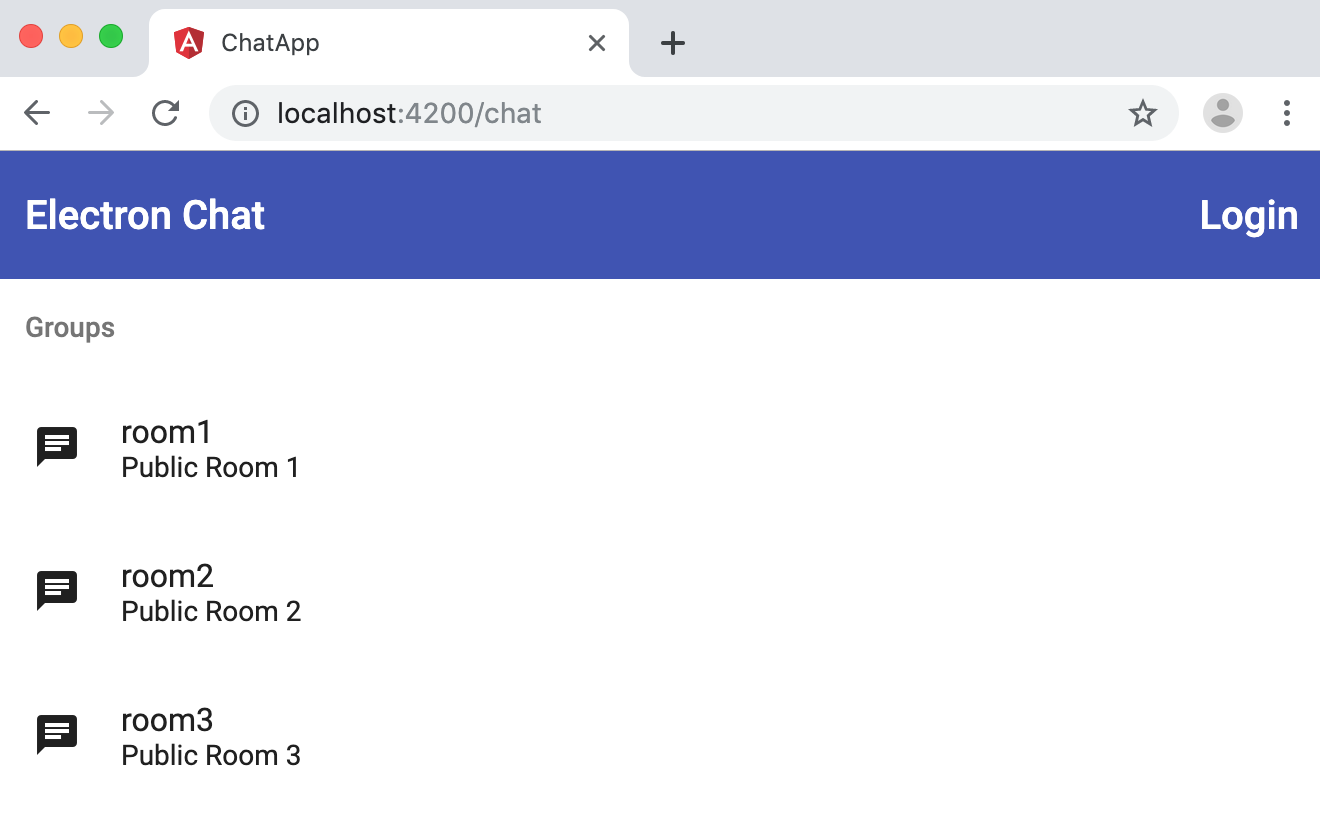
The list of groups now looks perfect. Now, let's learn how the AngularFire library handles real-time updates.