
The first step is to create a new skeleton workflow in Jira:
- Log into Jira with a user that has a Jira Administrator's permission.
- Navigate to Administration > Issues > Workflows.
- Click on the Add workflow button, and name the workflow Simple Workflow.
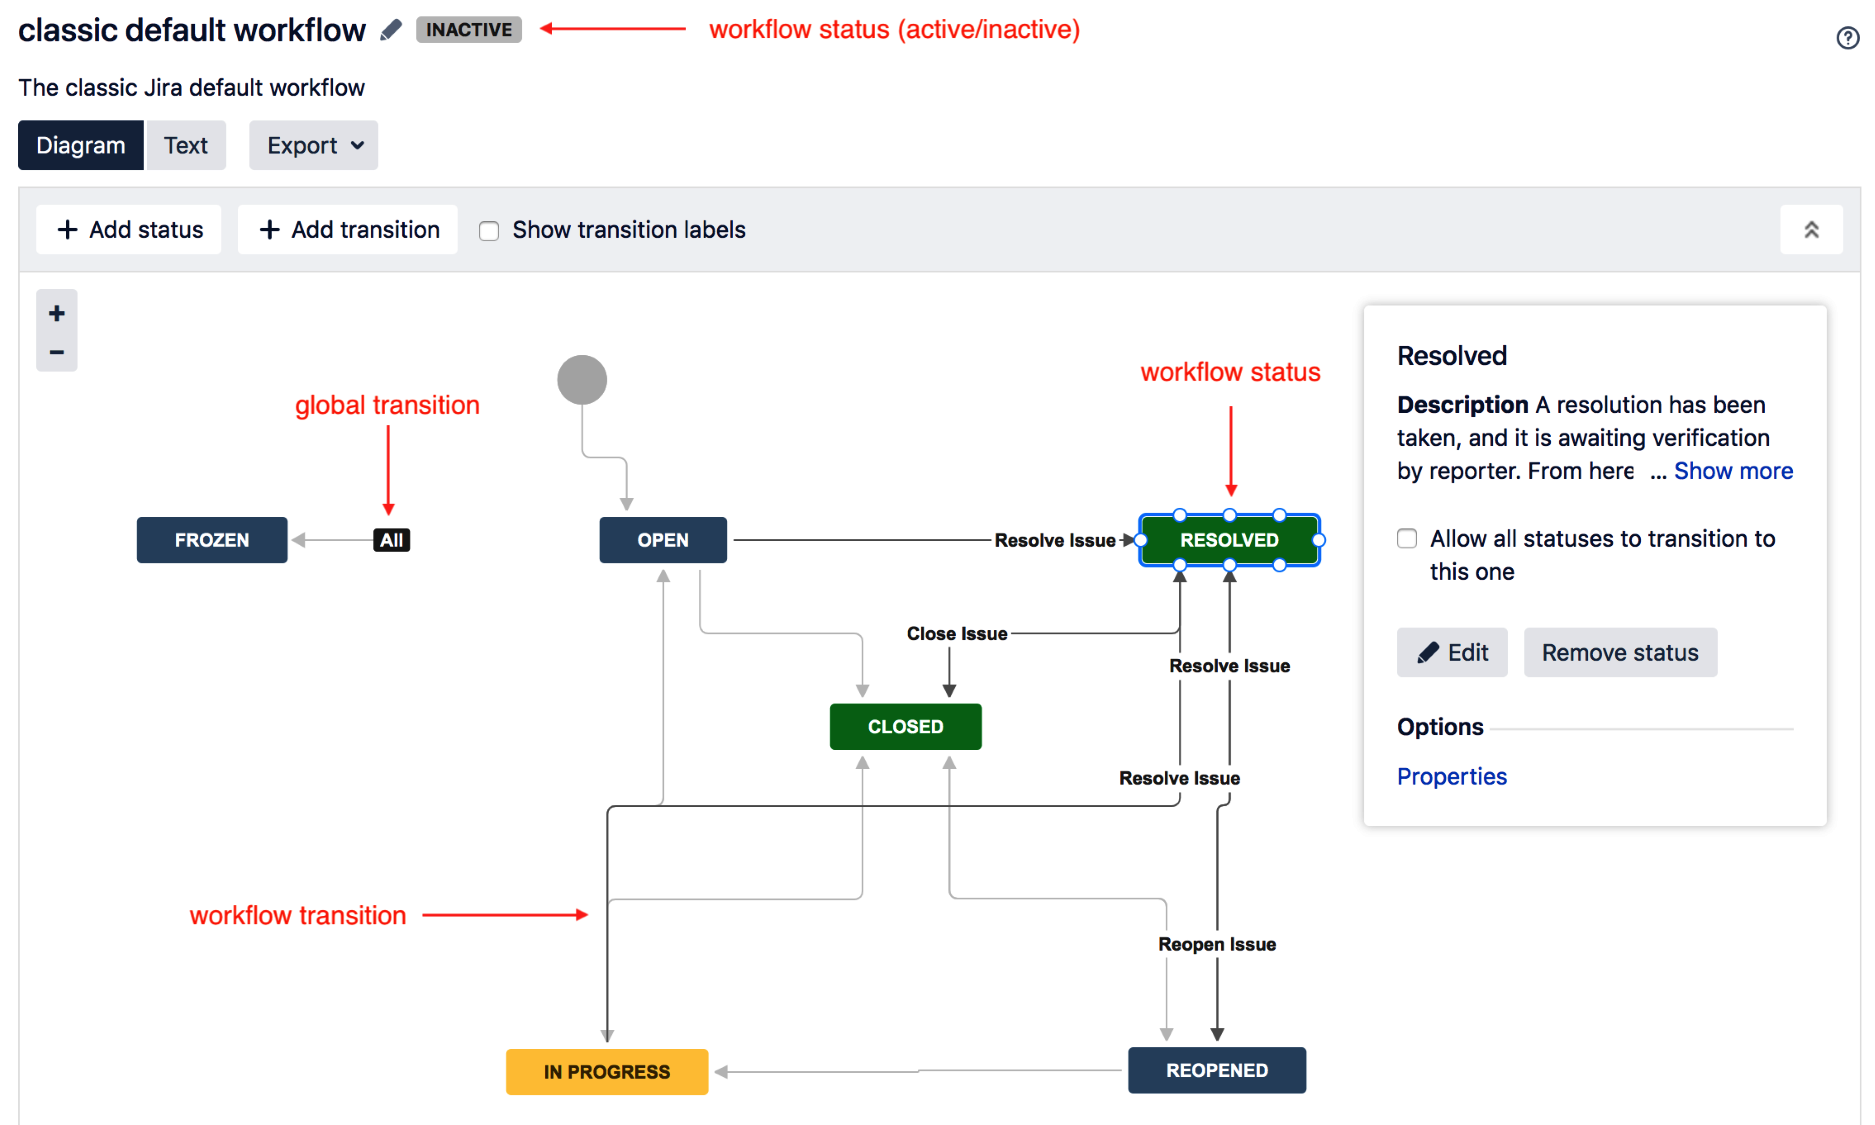
- Click on the Diagram button to use the workflow designer or diagram mode.
The following screenshot explains some of the key elements of the workflow designer:
Now we have created a new, inactive workflow. The next step is to add various statuses for the issues to go through. Jira comes with a number of existing statuses, such as In Progress and Resolved, for us to use:
- Click on the Add status button.
- Select the In Progress status from the list, and click on Add.
- Repeat the steps to add the Closed status.
Once you have added the statuses to the workflow, you can drag them around to reposition them on the canvas. We can also create new statuses, as follows:
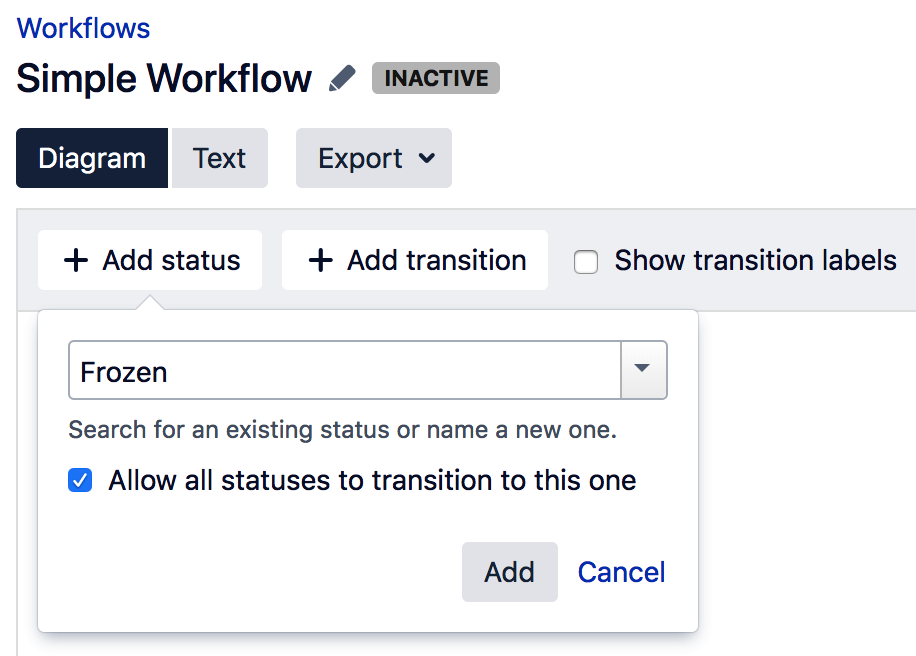
- Click on the Add status button.
- Name the new status Frozen, check the Allow all statuses to transition to this one option, and click on Add, as shown in the following screenshot:
Now that we have added the statuses, we need to link them using transitions:
- Select the originating status, which, in this example, is OPEN.
- Click on the small circle around the OPEN status and drag your cursor onto the IN PROGRESS status. This will prompt you to provide details for the new transition, as shown in the following screenshot:

- Name the new transition Start Progress, and select the None option for the screen.
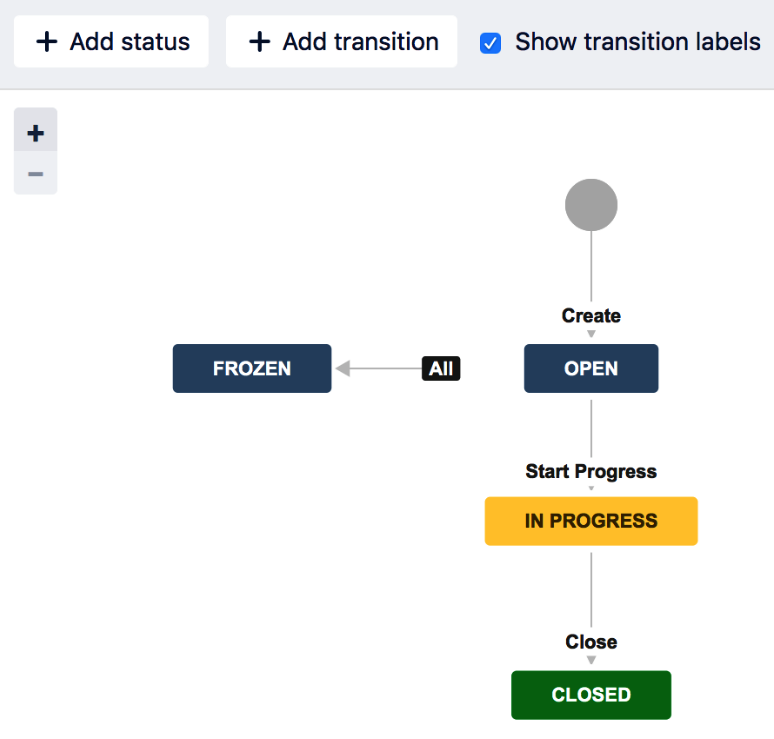
- Repeat the steps to create a transition called Close between the IN PROGRESS and CLOSED statuses.
You should finish with a workflow that looks like the following screenshot:
At this point, the workflow is inactive, which means it is not being used by a project and you can edit it without any restrictions. Workflows are applied on a project and issue type basis. Perform the following steps to apply the new workflow to a project:
- Select the project to apply the workflow to.
- Click on the Administration tab to go to the project administration page.
- Select Workflows from the left-hand side of the page.
- Click on Add Existing from the Add Workflow menu.
- Select the new Simple Workflow from the dialog, and click on Next.
- Choose the issue types to apply (for example, Bug) the workflow to, and click on Finish.
After we have applied the workflow to a project, the workflow is placed in the active state. So, if we now create a new issue in the target project of the selected issue type, our new Simple Workflow will be used.