
The following examples illustrate how we can prepare to deploy the Tic-Tac-Toe application to Azure App Service step by step:
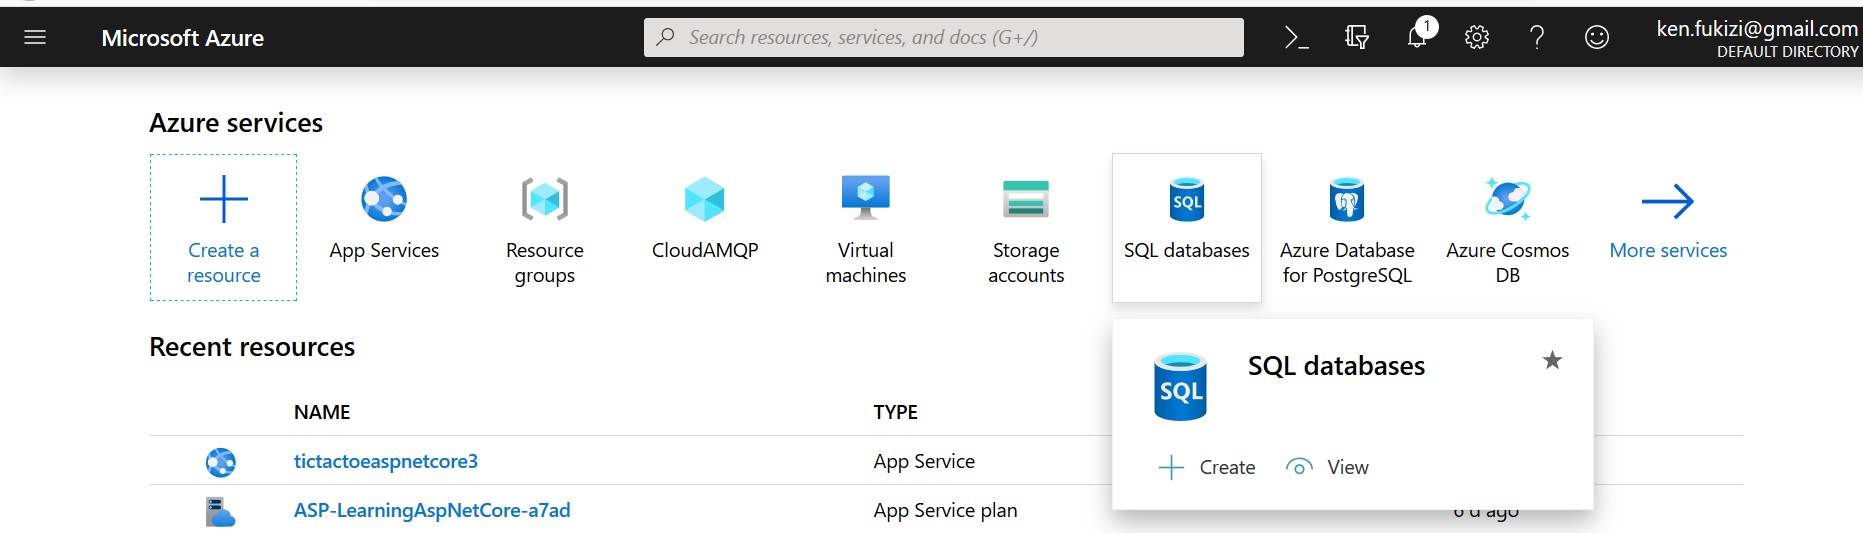
- Go to the Microsoft Azure management portal, and you will find there are many services available for you to use, including the most commonly used ones that are placed prominently on the welcome page, as shown in the following screenshot:
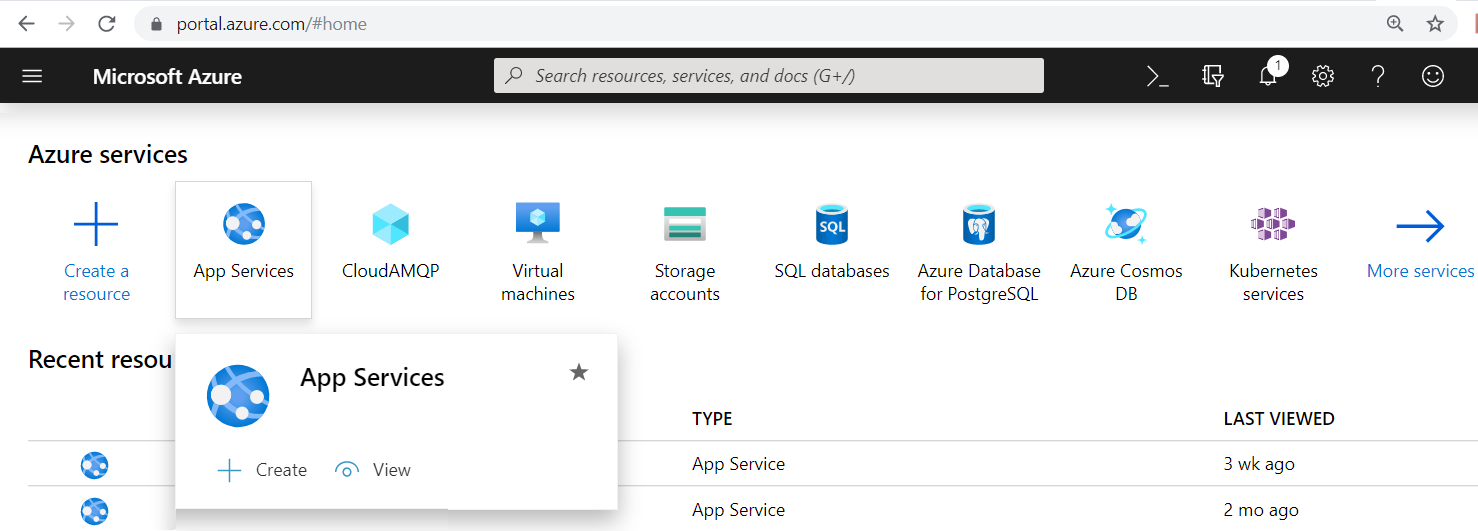
- App Services is the one we need at this point, so hover with your mouse pointer over the App Services icon, and it will show the following popup. Click on Create, as follows:
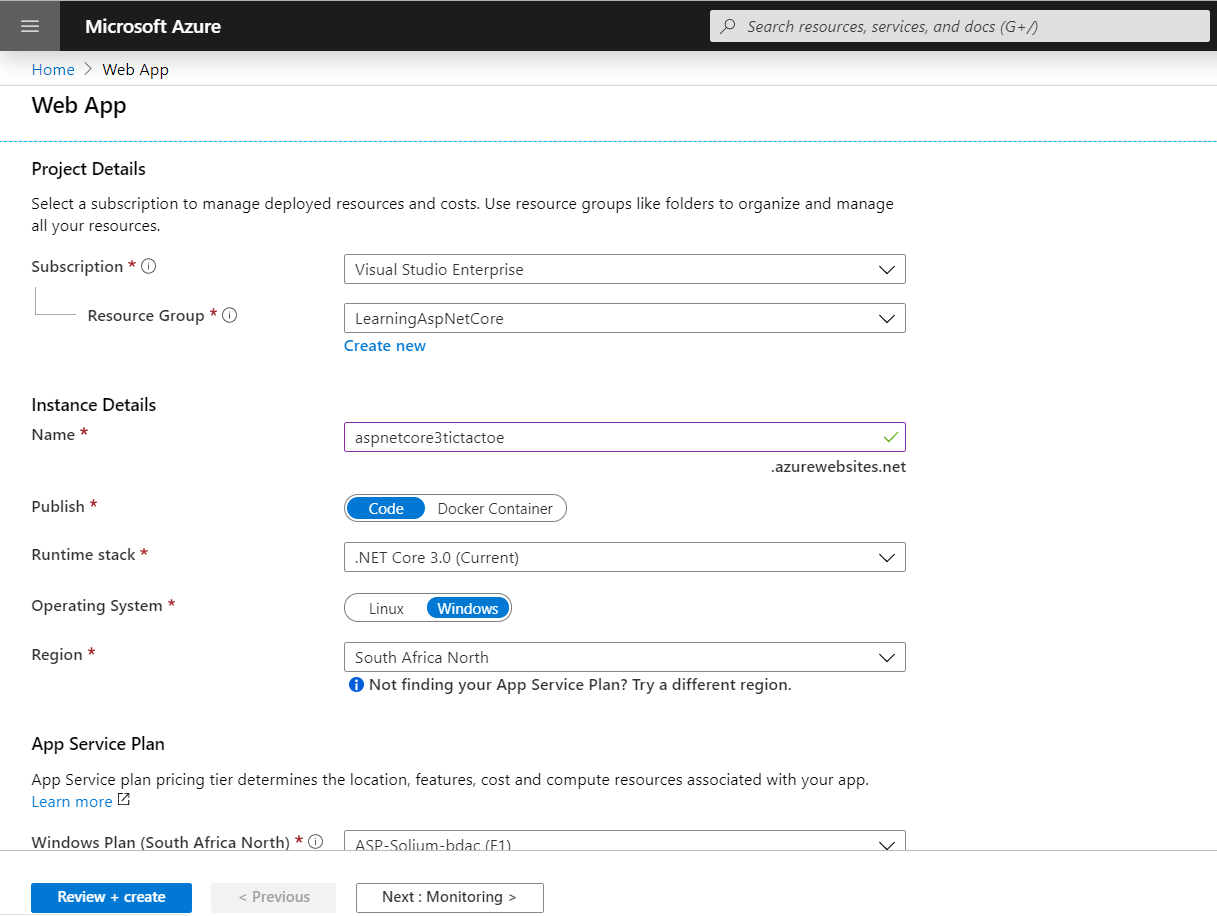
- You will get a new Web App form. Fill in the Project Details. In this screenshot, I already have a Visual Studio Enterprise subscription, but you can use the trial subscription you created or, indeed, any other subscription you may have. I already have a Resource Group created, but as you can see, you can create a new Resource Group; and if you hover on the information icon, it will tell you that a Resource Group is a simple collection of resources that share the same life cycle, permissions, and policies. Fill in a unique name for your application, and choose to publish the application as Code. Choose .NET Core 3.0 (Current) as a runtime stack, and the operating system will automatically be selected for you. For the region, I have chosen South Africa North as it is the one closest to me, but you can choose whatever region you feel is closer to your targeted audience in a real-life app.
If you don't have an App Service Plan that decides what you will be using and paying for, please create it, and be sure to double-check that you have selected a free tier that uses shared infrastructure and allows for up to 1 GB memory, as follows:
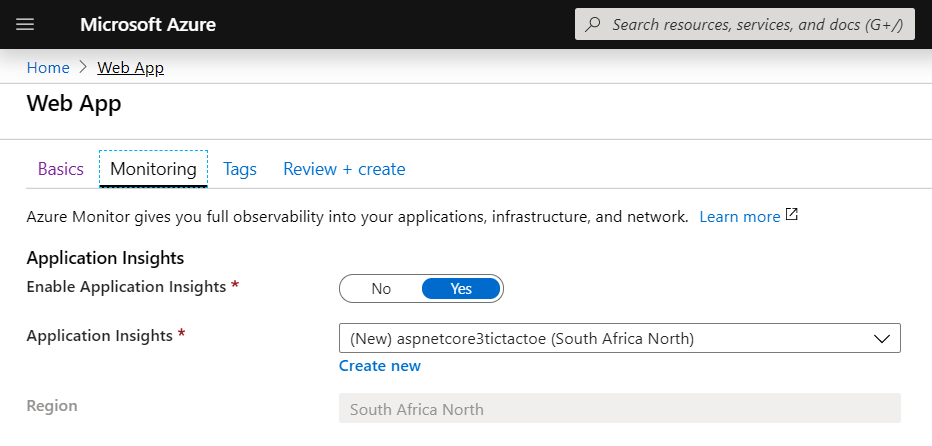
- After filling in the preceding form and clicking on Next: Monitoring, you will get the following screen, where you can choose if you want to enable Application Insights. Select Yes, and then click Next: Tags, as follows:
- After clicking Next: Tags, you will get to the Tags section. We don't need them for this application, so click on the last Next button to review and create, where you will be presented with the following summary:

- Click on the Download a template for automation link, and this will download a template.zip folder, with two files inside: parameters.json and template.json, which we may need for future use. After the download, go back to the web app through the navigation link, and it will still have the summary. Click on Create, and you will get a deployment underway screen and then a deployment complete screen, as follows:

- Click on Go to resource from the preceding screen, and you will then be presented with a dashboard for your deployed application, as follows:

- At this point, if you click on the link with the unique name you created in step 3: https://[your-unique-project-name].azurewebsites.net/, you will see that you already have a website, as shown in the following screenshot:

Congratulations! If you have reached this far, you have a healthy app service running on Azure, but as you will notice, we still don't have our Tic-Tac-Toe demo application running on Azure. Let's see how we can do that next, in the following section.