
We just saw how to create a basic web page. Knowing how to do that technically is one thing, but creating web applications that succeed is a different matter entirely. It is not only about the technical implementation, but also about how to make your application visually appealing and user-friendly. While this book is not about web design and user experiences, we want to give you some quick and easy means for building better web applications in this regard.
For that, we advise using NPM (https://www.npmjs.com/), the most commonly used package manager on the web, in conjunction with ASP.NET Core layout pages.
NPM has had some remarkable success in the web development community in the last few years. It helps to install client-side packages with static content such as HTML, CSS, JavaScript, fonts, and images, including their dependencies.
There is some great integration and support available for NPM in Visual Studio 2019; you just have to configure it correctly in order to use it efficiently. Let's see how to do that:
- Right-click on the Tic-Tac-Toe project, select Add | New Item, enter NPM in the search box, select npm Configuration File, and click on Add:
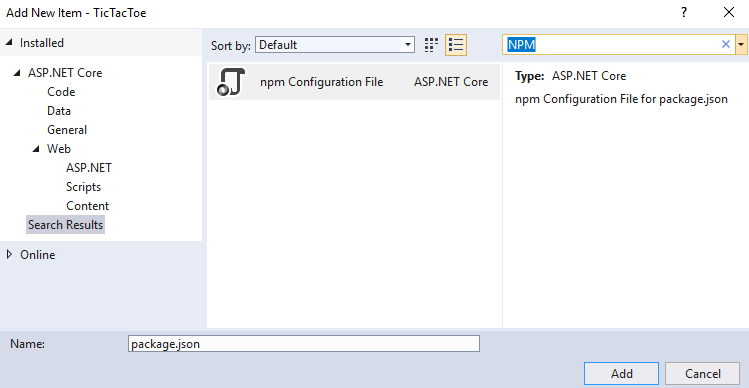
- Adding the npm Configuration File should have added a package.json file. Update this file with the following content:
        {
          "version": "1.0.0",
          "name": "asp.net",
          "private": true,
          "devDependencies": {
            "bootstrap": "4.3.1",
            "jquery": "3.3.1",
            "jquery-validation": "1.17.0",
            "jquery-validation-unobtrusive": "3.2.11",
            "popper.js": "1.14.7"
          }
        }
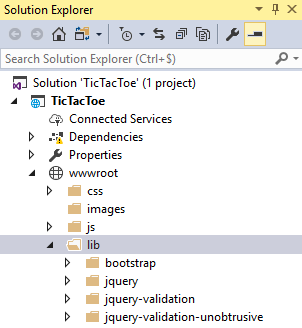
- Build the project and, following a successful build, there will be a folder named npm, which will be created under Dependencies. Right-click on Dependencies and then click on Restore Package:

- The client-side packages (bootstrap, jquery, and more) are then downloaded into the folder you have defined and, by default, it will be (wwwroot/lib). The static content can now be used within your application:
- In the wwwroot folder, create a folder called css. Add a new style sheet called site.css within this folder:
        body {
          padding-top: 50px;
          padding-bottom: 20px;
        }

        .body-content {
          padding-left: 15px;
          padding-right: 15px;
        }

        /* Set width on the form input elements since they're
         100% wide by default */
        input,
        select,
        textarea {
          max-width: 280px;
        }
The preceding CSS styling code allows our views to be a bit more presentable by setting padding to keep content from hitting the edges and setting a custom width that we will use for our input areas, for example, where the user will be typing their name and other details for registration.
For validation styles, add the following code to the same site.css file:
        .field-validation-error {
          color: #b94a48;
        }

        .field-validation-valid {
          display: none;
        }

        input.input-validation-error {
          border: 1px solid #b94a48; }

        input[type="checkbox"].input-validation-error {
          border: 0 none;         }

        .validation-summary-errors {
          color: #b94a48;         }

        .validation-summary-valid {
          display: none;
        }
This will help us to have validation messages with the right look and feel, with a customized color that will make a user automatically recognize that an error has occurred. You might have heard the term UX Design, and this is a simple example of UX (short for user experience) considerations that you will have to make for most applications that you will ever build.
A successful web application should have a common layout with consistent user experience when navigating from page to page. This is key for user adoption and user satisfaction. ASP.NET Core layout pages are the right solution for that.
They can be used to define templates for views in your web applications. All of your views can either use the same template or different templates that can be used depending on your specific needs.