
The previous example used deployment through the Azure DevOps CI/CD functionality. Alternatively, you can use Web Deploy to publish your project to Azure, directly from Visual Studio 2019, so let's do exactly that—prepare the application and deploy it via Visual Studio 2019 into the Microsoft Azure App Service instance you created before, as follows:
- Since App Service is based on IIS as the host for .NET Core applications, you now have to add a web.config file to the TicTacToe project. You should, however, already have done that if you have followed the AWS example from before, as follows:
        <?xml version="1.0" encoding="utf-8"?>
        <configuration>
          <system.webServer>
            <handlers>
              <add name="aspNetCore" path="*"
               verb="*" modules="AspNetCoreModule"
               resourceType="Unspecified" />
            </handlers>
            <aspNetCore processPath="dotnet"
             arguments=".TicTacToe.dll"
             stdoutLogEnabled="true"
             stdoutLogFile=".logsstdout"
             forwardWindowsAuthToken="true" />
          </system.webServer>
        </configuration>
- Furthermore, you have to enable IIS integration; for that, open the Program.cs file and change the WebHost builder configuration to enable IIS integration. You should, however, already have done that if you have followed the AWS example from before, as follows:
public static IHostBuilder CreateHostBuilder(string[] args) => Host.CreateDefaultBuilder(args)
      .ConfigureWebHostDefaults(webBuilder =>
      {
         webBuilder.UseStartup<Startup>();
         webBuilder.CaptureStartupErrors(true);
         webBuilder.PreferHostingUrls(true);
         webBuilder.UseUrls("http://localhost:5000");
         webBuilder.ConfigureLogging((hostingcontext, logging) =>
         {
             logging.AddLoggingConfiguration(hostingcontext.
              Configuration); });
              webBuilder.UseIISIntegration();
      });
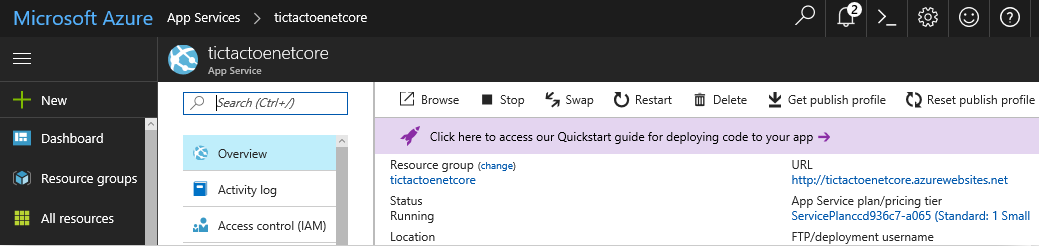
- Go to the Microsoft Azure management portal and click on App Services in the left-hand menu. Select the TicTacToe application you have created before, click on Get publish profile, and download the Azure App Service Publish profile, as follows:
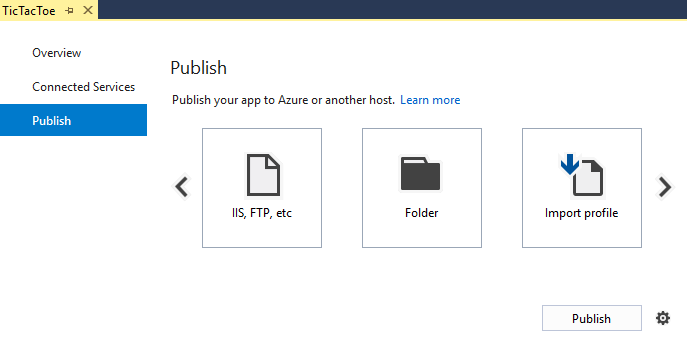
- Right-click on the TicTacToe project, click on Publish in the context menu, then click on the Import profile button, as shown here:
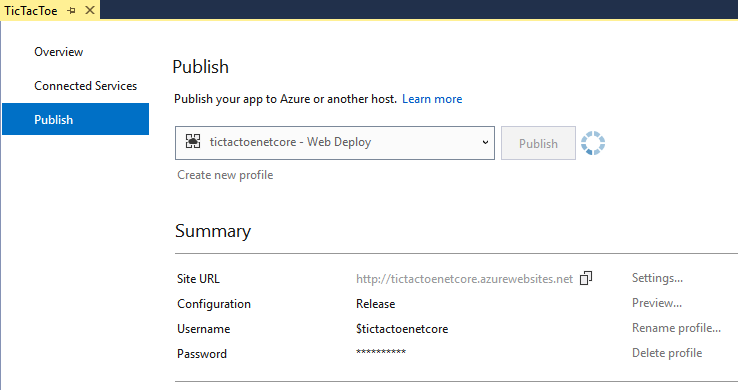
- Select the downloaded Azure App Service Publish profile, and the publish process should start automatically, as follows:
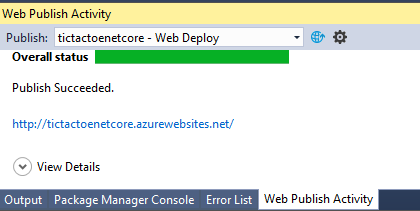
- You can see the publish process in the Web Publish Activity view, as follows:
- Open a browser and go to the application URL in Microsoft Azure, start the application, and try to register a new user.
Note that if the application is not working as expected, you will get a 404 Not Found HTTP response. Everything is working locally and the deployment in Microsoft Azure was successful, but something is wrong. You will see in the next chapter (which is about logging and monitoring) how to analyze, diagnose, understand, and fix this problem.
This concludes the examples for Microsoft Azure. The next section will explain how to deploy your application into Docker containers.