
After having planned and organized your work and created your Git repository, you should now configure an Azure DevOps build pipeline, which will allow you to do CI for your application:
- Open Visual Studio 2019, go to the Team Explorer - Home tab, and then click on the Builds button:

- Next, click on the New Build Definition link:

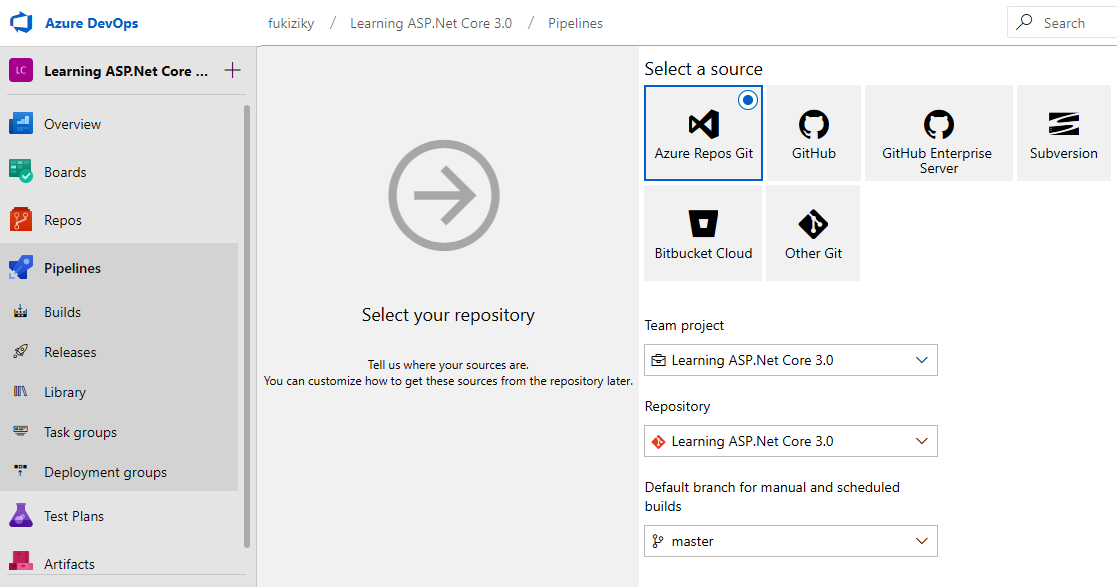
- The Azure DevOps website is opened, and when you click the new pipeline button and then select your source as Azure Repos, you are presented with a choice of build definition templates. Select the ASP.NET Core template:

- In the new build definition, enter a name, and select your default agent pool. We recommend using the option Hosted Windows 2019 with VS2019:
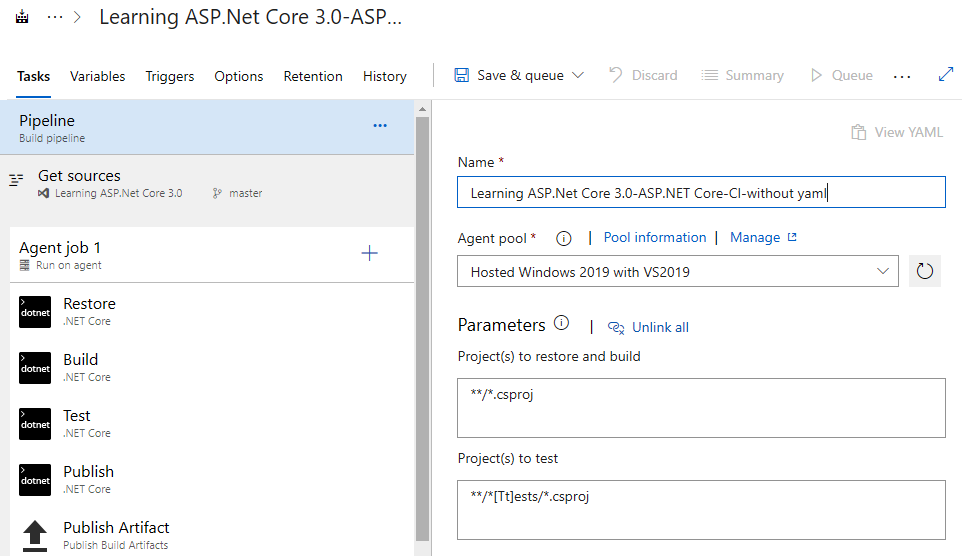
- To choose a source repository, click on Get sources. For our example, we use the default values (this project, branch: master):
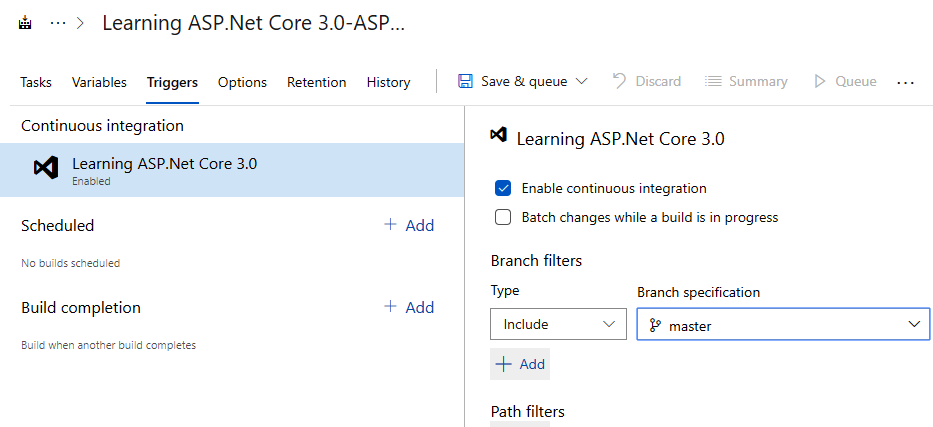
- To enable CI, click on Triggers in the build definition menu, and then tick the Enable continuous integration checkbox:
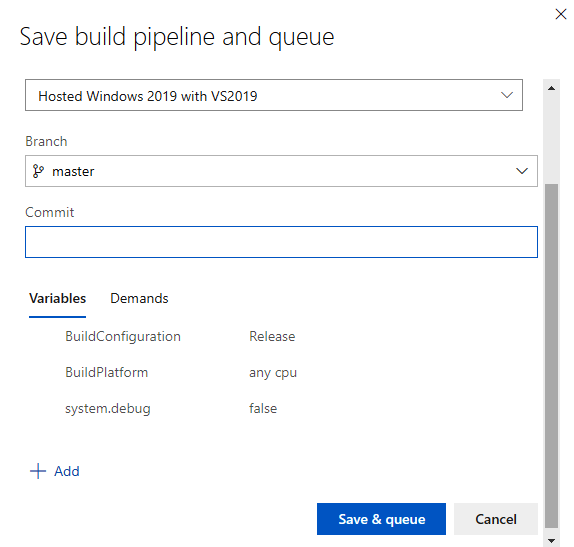
- After verifying that the Git repository and master branch have been selected correctly, click on the Save or Save & queue button. The configuration has been finished, and a build will automatically be triggered each time code is committed to the repository:
Creating a build pipeline is as simple as that. After building, it's only natural that we want to release our code, so we will look at how we can create a release pipeline next, in the following section.