
When developing applications, the question is not whether errors and bugs will occur, but when they will occur. Building applications is a very complex task and it is nigh on impossible to think about all of the cases that might occur during runtime. Even if you think that you have thought about everything, then the environment is not behaving as expected; for example, a service is not available, or processing a request is taking much longer than anticipated.
You have two solutions to this problem, which need to be applied at the same time—unit tests and error handling. Unit tests will ensure correct behavior during development time from an application point of view, while error handling helps you to be prepared during runtime for environmental issues. We are going to look at how to add efficient error handling to your ASP.NET Core 3 applications in this section.
By default, if there is no error handling at all and if an exception occurs, your application will just stop, users will not be able to use it anymore, and, in the worst-case scenario, there will be an interruption of service.
The first thing to do during development time is to activate the default development exception page; it displays detailed information on exceptions that occur. You have already seen how to do this at the beginning of the chapter:
    if (env.IsDevelopment())
    {
      app.UseDeveloperExceptionPage();
    }
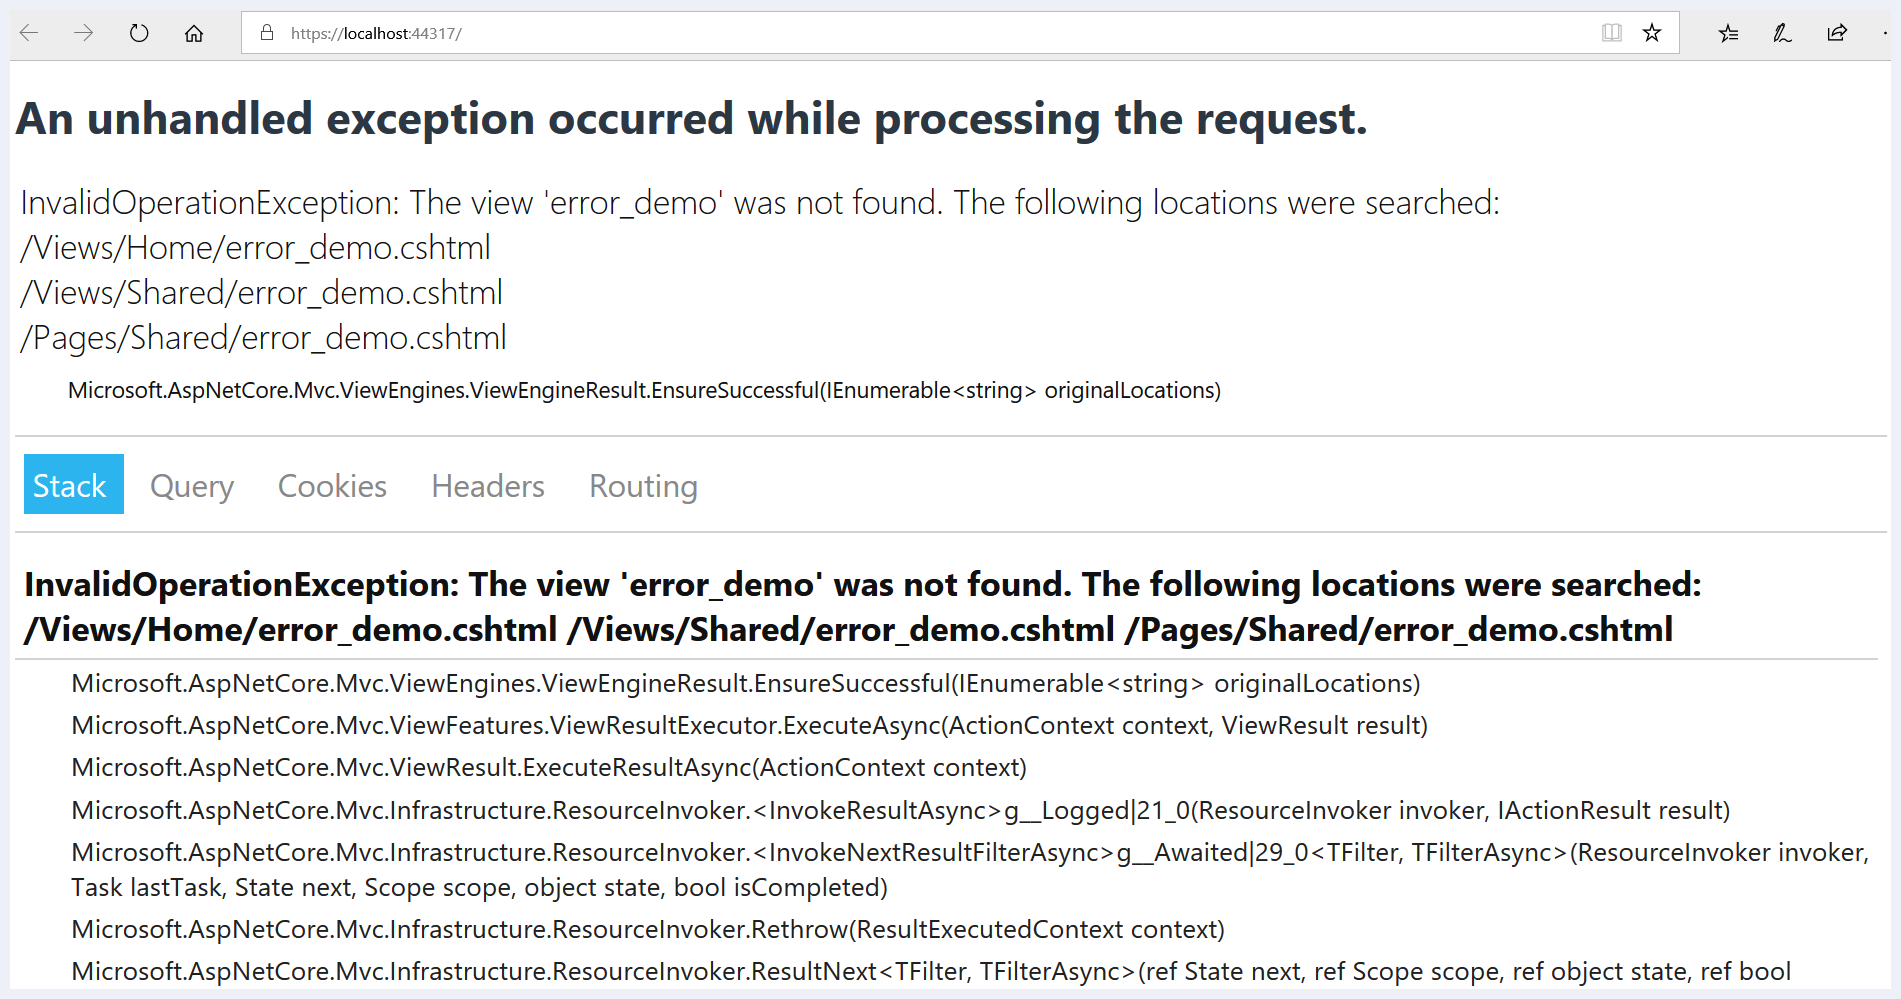
On the default development exception page, you can deep dive into the raw exception details for analyzing the stack trace. You have multiple tabs that allow you to look at query string parameters, client-side cookies, and request headers.
Those are some powerful indicators that enable you to better understand what has happened and why it has happened. They should help you pinpoint problems and resolve issues more quickly during development time.
The following is an example of what happens if an exception has occurred:
However, it is not recommended to use the default development exception page in production environments because it contains too much information about your system, which could be used to compromise your system.
For production environments, it is advised to configure a dedicated error page with static content. In the following example, you can see that the default development exception page is used during development time and that a specific error page is displayed if the application is configured to run in a non-development environment:
    if (env.IsDevelopment())
    {
      app.UseDeveloperExceptionPage();
    }
    else
    {
      app.UseExceptionHandler("/Home/Error");
    }
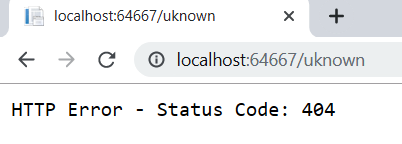
By default, no information is displayed in the case of HTTP error codes between 400 and 599. This includes, for example, 404 (not found) and 500 (internal server error). Users will just see a blank page, which is not very user-friendly.
You should activate the specific UseStatusCodePages middleware in the Startup class. This will help you to customize what needs to be displayed in this case. Meaningful information will help users to better understand what happens within your applications and will lead to better customer satisfaction.
The most basic configuration could be to just display a text message:
    app.UseStatusCodePages("text/plain", "HTTP Error - Status Code:
     {0}");
The preceding code generates the following:
But, you can go even further. For instance, you can redirect to specific error pages for specific HTTP error status codes.
The following example shows how to send a moved temporary 302 (found) HTTP status code to the client and then redirect them to a specific error page:
app.UseStatusCodePagesWithRedirects("/error/{0}");
This example shows how to return the original HTTP status code to the client and then redirect them to a specific error page:
app.UseStatusCodePagesWithReExecute("/error/{0}");
var statusCodePagesFeature =
   context.Features.Get<IStatusCodePagesFeature>();
   if (statusCodePagesFeature != null)
   {
     statusCodePagesFeature.Enabled = false;
   }
Now that we have seen how to handle errors on the outside, let's look at how to handle them on the inside, within your applications.
If we go back to the UserRegisterController implementation, we can see that it has multiple flaws. What if the fields have not been filled in correctly or not at all? What if the model definition has not been respected? For now, we do not require anything and we do not validate anything.
Let's fix that and see how to build an application that is more robust:
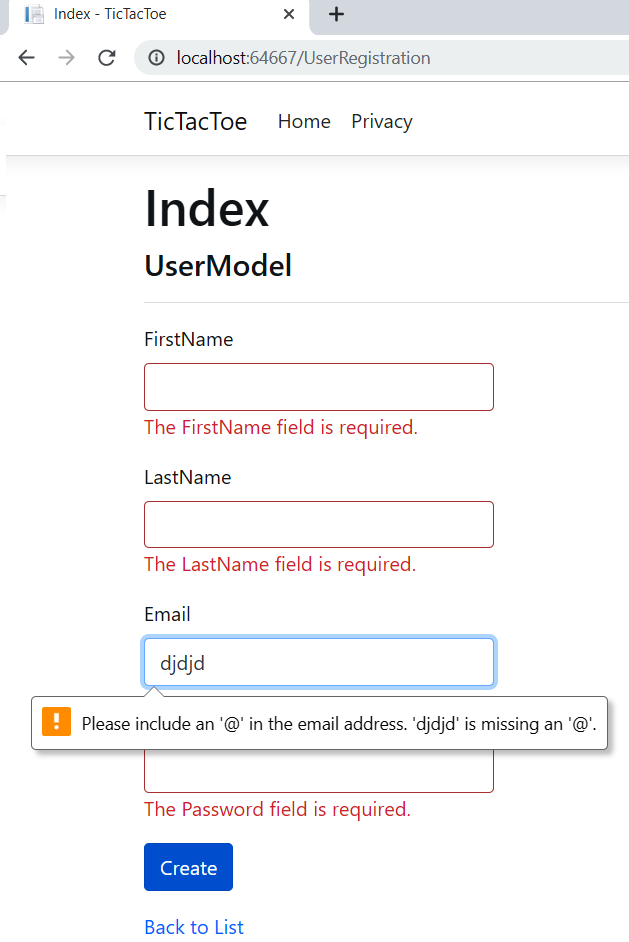
- Update UserModel, and use decorators, otherwise known as attributes, to set some properties such as Required and DataType. The Required attribute denotes that the following field has to have a value, and will cause an error should it not be supplied with one. The DataType attribute specifies that a field requires a certain data type:
        public class UserModel
        {
          public Guid Id { get; set; }
          [Required()]
          public string FirstName { get; set; }
          [Required()]
          public string LastName { get; set; }
          [Required(), DataType(DataType.EmailAddress)]
          public string Email { get; set; }
          [Required(), DataType(DataType.Password)]
          public string Password { get; set; }
          public bool IsEmailConfirmed { get; set; }
          public System.DateTime? EmailConfirmationDate { get;
            set; }
          public int Score { get; set; }
        }
- Update the specific Index method within UserRegistrationController, and then add the ModelState validation code:
        [HttpPost]
        public async Task<IActionResult> Index(UserModel userModel)
        {
          if (ModelState.IsValid)
          {
            await _userService.RegisterUser(userModel);
            return Content($"User {userModel.FirstName}
             {userModel.LastName} has been registered
               successfully");
          }
          return View(userModel);
        }
- If you do not fill the required fields or you give an invalid email address and click on OK, you will now get a corresponding error message:
For us to reach this stage, we have gone through the process of creating a Model such as the UserModel, a View such as the preceding one, and a Controller such as UserRegistrationController. In other words, we have already managed to create a functioning MVC application in a nutshell! Pat yourself on the back for having come this far, and expect more exciting stuff as we will be expounding more on ASP.NET Core MVC applications in the later chapters.