
Before we can implement the user registration feature, we have to understand it and decide how everything should work. We have to define user stories and workflows. For that, we need to analyze the Tic-Tac-Toe game description mentioned previously in more detail, in the preview section.
As explained previously, a user can only create and join games if they have a user account. To create this account, the user has to enter their first name, last name, email address, and a new password. The system will then verify whether the email address entered is already registered. A given email address can only be registered once. If the email address is new, the user account will be generated; if the email address is known, an error will be displayed.
Let's look at the user registration process and the different components that have to interact in order to implement it:
- There will be a home page with a link for user registration, where a new user must click on Register in order to create their player account. Clicking on the user registration link redirects the user to a dedicated registration page.
- The registration page will contain a registration form, where the user must enter their personal information and then confirm it.
- A JavaScript client will validate the form, submit and send the data to a communication middleware, and then await an outcome.
- The communication middleware will receive the request and route it to a registration service.
- The registration service will receive the request, verify the integrity of the data, check whether the email has already been used for registration, and either register the user or return an error message.
- The communication middleware will receive the result and route it to the waiting JavaScript client.
- The JavaScript client will then redirect the user to start playing games if the result is a success, and it will display an error message if the result is a failure.
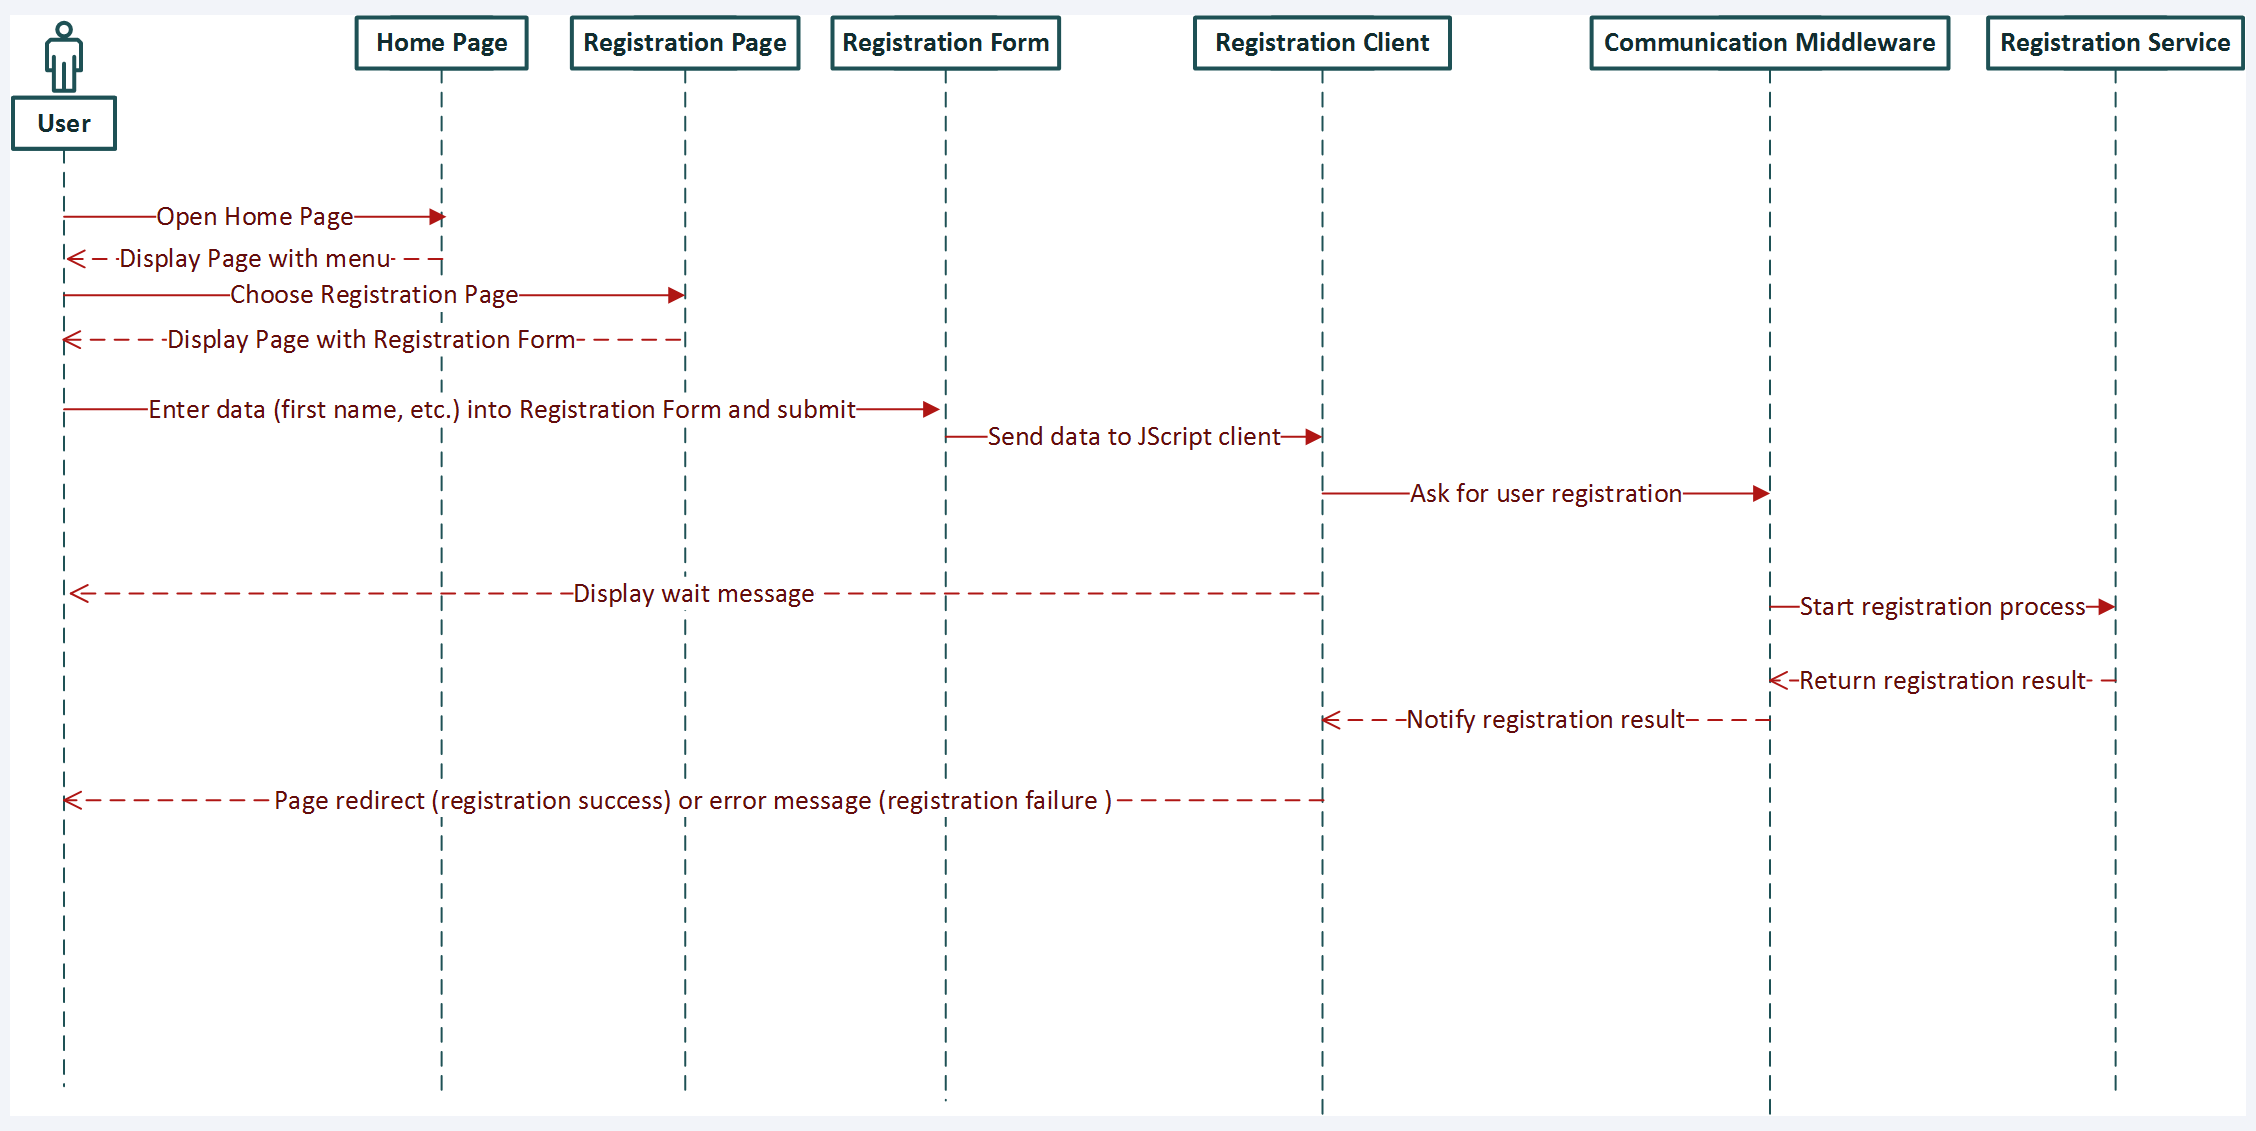
The following sequence diagram shows the user registration process. It is often much easier and quicker to comprehend a process with a more visual representation:
To get started, we need to create a new empty ASP.NET Core 3 web application, which will be used for adding various components and packages in this chapter and during the remainder of the book. We will then add new concepts and functionalities progressively, which will allow you to really understand what is going on and how everything works:
- Start Visual Studio 2019 and click on File | New | Project.
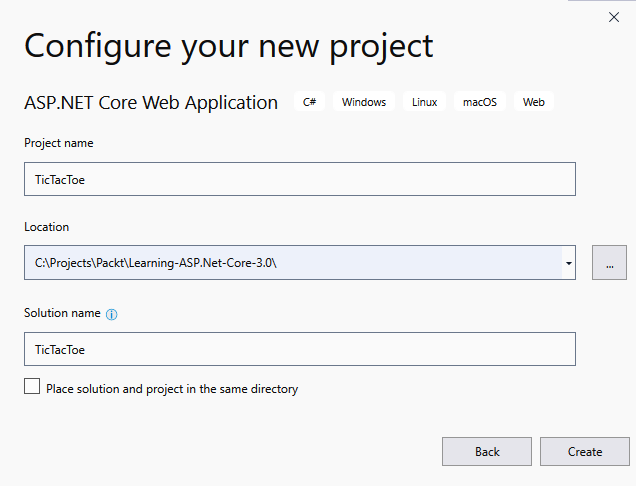
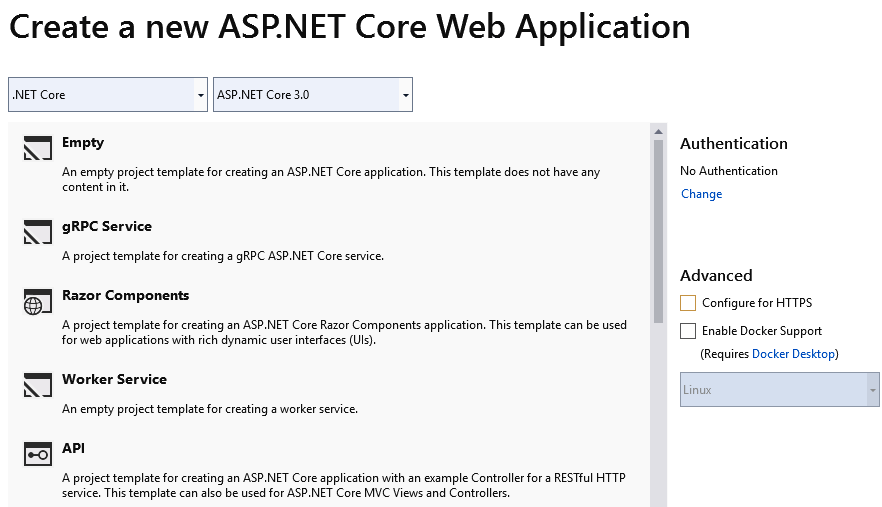
- In the .NET Core section, choose ASP.NET Core Web Application, enter the application name, the location of your repository, the solution name, and then click on Create:
- Choose the Empty template:
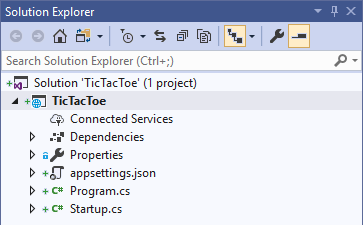
- A new empty ASP.NET Core 3 web application project will be generated, containing only the Program.cs and Startup.cs files:
Great! We have created our project and are now ready to implement our first feature! But, before doing that, let's take some time and see what Visual Studio 2019 has done for us behind the scenes.