By now, you are either playing with the IDEs, or you are ready to move on because you already have preferences. Either way, we want to write some code. There are different purposes behind writing different kinds of code. We will focus on Bash, Python, Ruby, and Go. These languages will give you a good range of general-purpose tools for different tasks on your Pi.
Bash scripting is the purest form of coding on Linux. Bash scripts are essentially command-line commands strung together in a single file that can be executed. You can write scripts that run at the startup to run updates and pull some data onto the Pi. Shell scripts have the file extension sh.
The first line of a script should start with a shebang, which is represented by #!. This character sequence will tell the interpreter to look for the correct software to run the script that you have written. We will do this in bash so that we don't have to call programs with the bash command. Instead, we will run them directly. This is also useful for other languages, such as Ruby and Python.
You can write bash scripts by using whichever editor you like, but you will need to have the following specific line at the top of the script:
#!/bin/bash
I like to use the following script as a basic tool to control the GPIO pins on the Pi:
#!/bin/bash

function gpio()
{
    local verb=$1
    local pin=$2
    local value=$3

    local pins=($GPIO_PINS)
    if [[ "$pin" -lt ${#pins[@]} ]]; then
        local pin=${pins[$pin]}
    fi

    local gpio_path=/sys/class/gpio
    local pin_path=$gpio_path/gpio$pin

    case $verb in
        read)
            cat $pin_path/value
        ;;

        write)
            echo $value > $pin_path/value
        ;;

        mode)
            if [ ! -e $pin_path ]; then
                echo $pin > $gpio_path/export
            fi
            echo $value > $pin_path/direction
        ;;

        *)
            echo "Usage: $0 mode [pin] [in|out]"
            echo "       $0 read [pin]"
            echo "       $0 write [pin] [0|1]"
            echo "If GPIO_PINS is an environment variable containing"
            echo "a space-delimited list of integers, then up to 17"
            echo "logical pins (0-16) will map to the physical pins"
            echo "specified in the list."
        ;;
    esac
}

if [ "$BASH_SOURCE" == "$0" ]; then
    gpio $@
fi
If you add that code to a file called gpio.sh, you can save it and then run it via the command line by passing the file into the bash command, which will tell bash to start reading the script. Scripts are read in the top-down manner, but functions such as the gpio function are reusable code, which won't be executed until it is called. This will cause the script to spit out the generated output:
bash gpio.sh
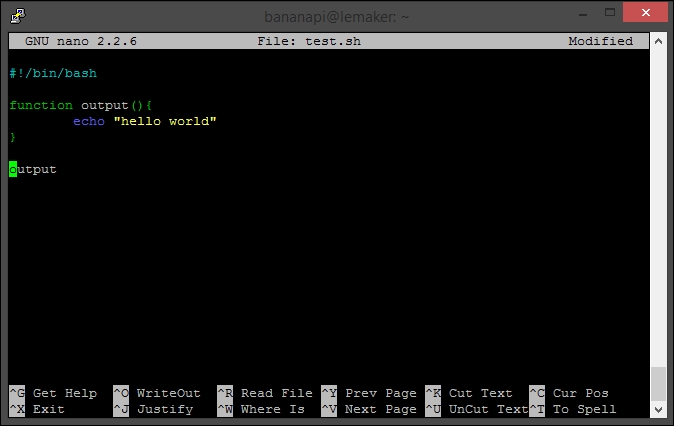
Functions need to be defined before they are called. Otherwise, you will get an error. If you try to execute the following script, it will blow up:
#!/bin/bash
output

function output(){
echo "hello world"
}
This is because you are trying to call the output function, but the function hasn't been read by bash yet. So, it has no idea what you are doing. If you flip them around, you will be able to run it. The following screenshot shows the bash script being written in the nano editor:
Python is one of the most popular languages on Linux. Basically, all Linux developers channel the serpent god. Python is a great general-purpose language, which is installed by default on Linux and is available for you on the Pi right now. You can verify the version of Python that you are using by running a simple command, as follows:
python --version
You will see some output:
Python 2.7.3
The output shows that I am running Python 2.7.3, which is not the latest version of Python, but it is good enough for now. The best thing about everything is that you already got a taste of Python in the previous chapter, when we connected to the GPIO pins. The Python files on the system will have the py file extension. You can start playing with Python by running the python command in the terminal. This will start Python and drop you into a Python prompt, which will look like the following:
Python 2.7.3 (default, Mar 18 2014, 05:13:23)
[GCC 4.6.3] on linux2
Type "help", "copyright", "credits" or "license" for more information.
>>>
From here, you will be able to start writing the Python code. For an example of a Python script, you can refer to the previous chapter.
Ruby is a programming language that is similar to Python. It is also installed on Linux by default. You can check out your Ruby version by running the following command:
ruby -v
You will see some output that identifies the version of Ruby that you are currently using. If you are using the Ruby Version Manager (RVM) to manage your Ruby versions, you can use the following code to check which version you are currently using:
ruby 1.9.3p194 (2012-04-20 revision 35410) [arm-linux-eabihf]
Ruby uses packages called Gems, which can be installed to give your programs additional functionality. There is a Gem called Pi Piper, which can be added for event-driven programming to the Banana Pi GPIO pins. To install it, you will need to install the ruby-dev package:
sudo apt-get install ruby-dev
If you don't install this package, it will fail when you try to add the Ruby Gem. To add the Gem, run the following code:
sudo gem install pi_piper
At this point, you will be able to add the pi_piper Gem to your script and interact with the GPIO pins. The following script is an example that demonstrates how the Ruby code interacts with the GPIO pins, waits for the detection of the pin's state, and then provides the results via the output:
#/usr/bin/env ruby
require 'pi_piper'
include PiPiper

watch :pin => 23 do
  puts "Pin changed from #{last_value} to #{value}"
end

#Or

after :pin => 23, :goes => :high do
  puts "Button pressed"
end

PiPiper.wait
You can run Ruby scripts from the command line by using the ruby command. If you saved the preceding code as gpio.rb, you can run it by issuing the following command:
ruby gpio.rb
The preceding code will tell Ruby that you want it to read and run this file. The code will also cause it to generate any output you have decided it should spit out and in this case, wait for you to press a button on pin 23 on the Pi.
Ruby and Python are almost interchangeable. The language that you choose from the two boils down to your preference. Both have their respective pros and cons, but ultimately, it is nice to be able to use both.
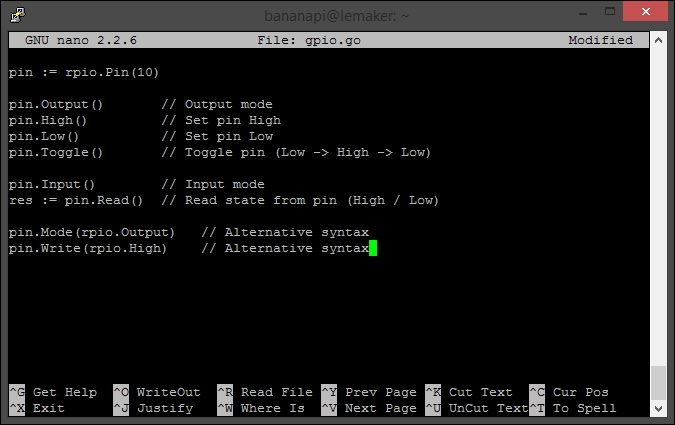
Go is Google's answer to C. It is a general compiled language that is suitable for a lot of different projects, but it is also quite fast and lightweight. The following screenshot shows Go code being written in Nano:
Go does not come installed by default on the Pi, and it requires some setup before you can start working with it. Before we begin, we will need to install the prerequisites, as follows:
sudo apt-get install -y mercurial gcc libc6-dev
Mercurial is similar to Git (although not as cool, am I right?) We will use it to clone the remote repository onto the Pi so that we can compile the language, as follows:
hg clone -u default https://code.google.com/p/go $HOME/go
This may take a while, but will clone the Go repo into the /go directory inside your home directory. If you remember from the previous chapter, you will be able to find this in /home/bananapi/go. If all goes well, you will see some output that looks like the following:
requesting all changes
adding changesets
adding manifests
adding file changes
added 21925 changesets with 76806 changes to 11602 files (+9 heads)
updating to branch default
4441 files updated, 0 files merged, 0 files removed, 0 files unresolved
Once the repo is cloned, we will need to compile the source. First, we will need to change the directories to the source directory, as follows:
cd ~/go/src
Now we will need to compile the source, as follows:
./make.bash
Compiling will take a while. You can check your e-mail or make a cup of coffee while you wait. Once the Go language has been compiled, we can add it to our path so that we can easily call it, as follows:
export PATH=$PATH:$HOME/go/bin
You should now be able to check the Go version by running the following version command:
go version
There is a Go library for the Pi that allows you to interact with the GPIO pins just like we did with Python and Ruby. This package is called Go-RPIO, and it can be added to your project by including it from the beginning, as follows:
import "github.com/stianeikeland/go-rpio"
This will allow you to write the Go code and interact with the Pi. This is a script that will toggle an LED on pin 19. We will import the proper libraries first in the following way:
package main

import (
  "fmt"
  "github.com/stianeikeland/go-rpio"
  "os"
  "time"
)
Now we can proceed to define our pin and write our main function, which will toggle the LED, as follows:
var (
  pin = rpio.Pin(10)
)

func main() {
  if err := rpio.Open(); err != nil {
    fmt.Println(err)
      os.Exit(1)
  }
  defer rpio.Close()
  pin.Output()
  for x := 0; x < 20; x++ {
    pin.Toggle()
    time.Sleep(time.Second / 5)
  }
}
You do not need any other libraries to use the GO-RPIO library. However, we used fmt, os, and time because we are working with time and output. Go is a fast language. Therefore, once it is compiled, it can be executed quickly. Its logo is a Gopher that moves quickly. It can be illustrated in the following way: