3. Browsing the Web
In this chapter, you discover how to browse the World Wide Web using the Chrome browser app that comes with your Galaxy Note 5. Topics include the following:
![]() Bookmarking websites
Bookmarking websites
![]() Using tricks to browse quickly
Using tricks to browse quickly
![]() Keeping track of websites you have visited
Keeping track of websites you have visited
![]() Configuring Chrome to work your way
Configuring Chrome to work your way
Your Galaxy Note 5 comes with not one but two web browsers to enable you to explore the Web on its large screen. This chapter shows you how to use Chrome, a browser developed by Google. Your Galaxy Note 5 also includes the browser usually called simply Internet, but sometimes called (arguably even more simply) Browser, which is developed by Samsung.
Chrome is fast and easy to use. You can bookmark sites you want to revisit, hold your Galaxy Note 5 in landscape orientation so you can see more on the screen, and optionally share your GPS location with sites.
Navigating with Chrome
The Chrome browser app enables you to access sites quickly, bookmark them for future use, and return instantly to the sites you visit most frequently. You can even sync your open Chrome tabs among your Galaxy Note 5, your other portable devices, and your computer.
When you first launch Chrome on your Galaxy Note 5, the app might display the Set Up Chrome screen, which prompts you to select an account and sign in so that you can share your bookmarks, history, passwords, and other settings on all your devices. Signing in is usually helpful, because it enables you to start browsing on one device (such as your desktop computer) and then, on your Galaxy Note 5, to pick up where you left off.
So normally, you would want to select the right Google account (if there’s a choice) and tap the Sign In button. The Hi screen appears, telling you that your data will be synced. From this screen, you can tap Settings to change your settings or tap Done to start browsing with Chrome.
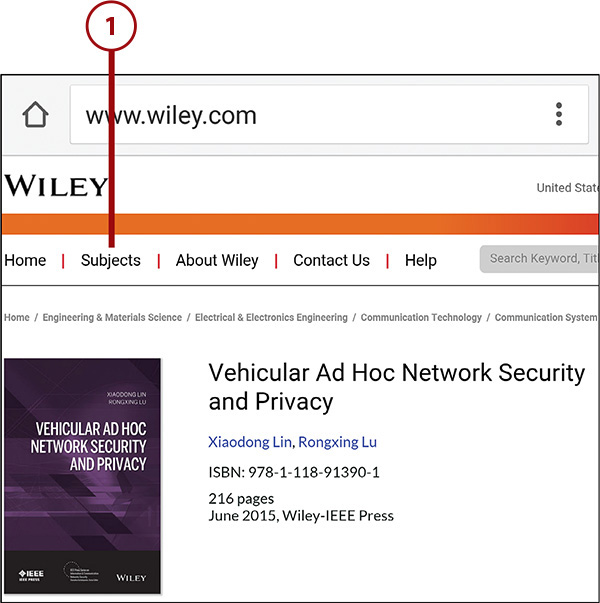
Go to a Web Page by Typing Its Address
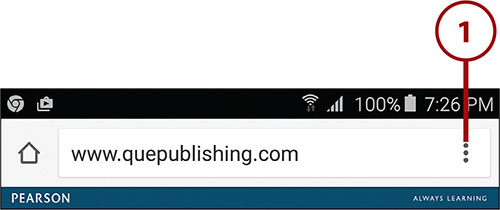
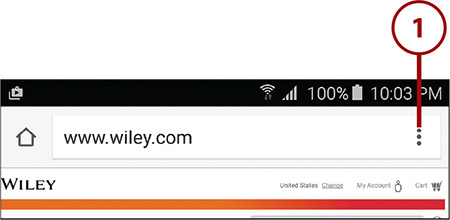
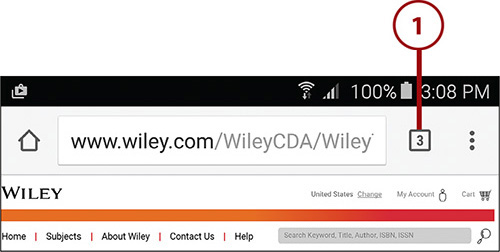
1. Tap the Chrome icon on the Apps screen. Alternatively, if the Chrome icon appears on the Home screen, tap it there, or it might be in the Google folder on the Home screen. Chrome opens and displays either your home page (as in the example shown here) or the last page you visited.

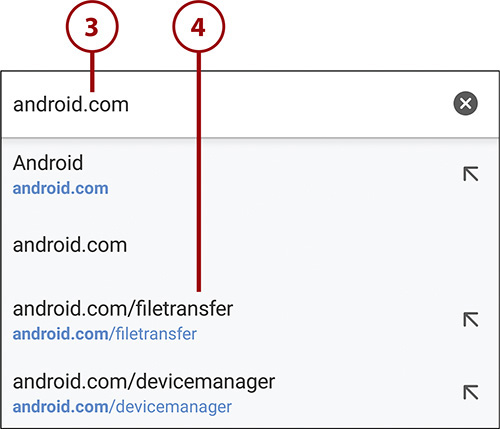
2. Tap the omnibox—a combined address box and search box—to select its contents. If the website has moved the previous page up so that the omnibox is hidden, drag the web page down so that the omnibox appears again.
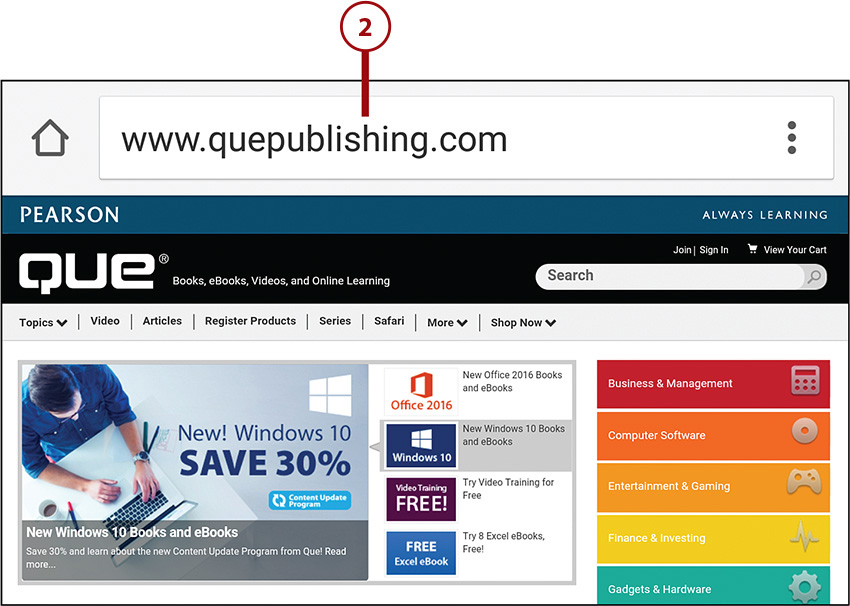
3. Type the web address, such as android.com. Chrome displays any matching results.
4. Tap the result for the web page you want to display. The web page appears.
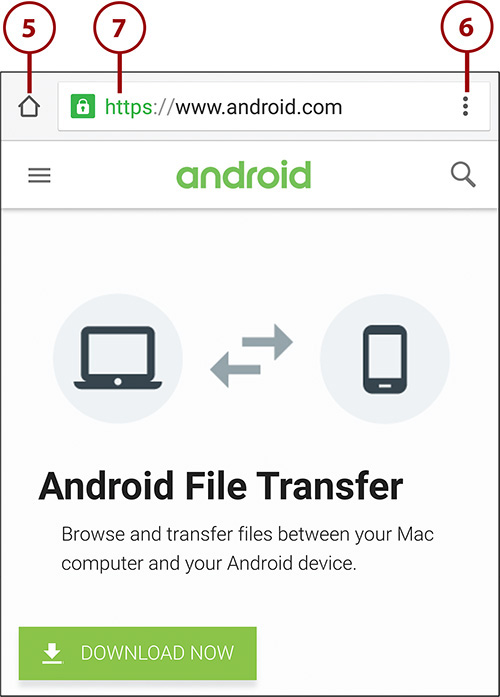
5. Tap Home to go back to your home page.
6. Tap the Menu button to display the menu, which contains many commands. The next section explains these commands.
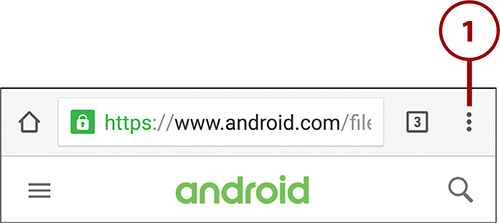
7. If the square green icon bearing a white padlock appears, tap it to display the security information for the website. See the nearby note for more details.
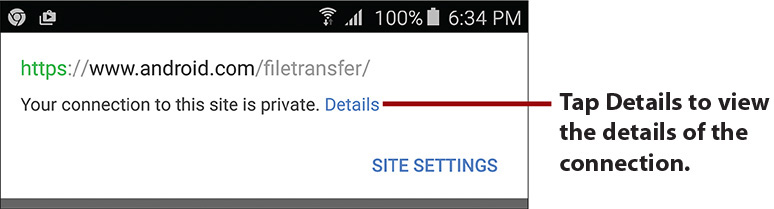
What Does the Green Icon with the White Padlock Mean?
The green icon with the white padlock appears when Chrome has established a secure connection to the website. The omnibox shows the address here starting with https:// to indicate that the connection uses Hypertext Transfer Protocol Secure (HTTPS) instead of regular Hypertext Transfer Protocol (HTTP), which is not secure. Chrome uses technologies called Secure Sockets Layer (SSL) and Transport Layer Security (TLS) to secure the connection using encryption.
When you connect to any site with which you will exchange private or sensitive information, it is best to make sure that the padlock icon appears. But because of the recent furor over government surveillance of the Internet, more and more websites are using encryption as a matter of course, so don’t be surprised to see the padlock icon for “regular” websites.
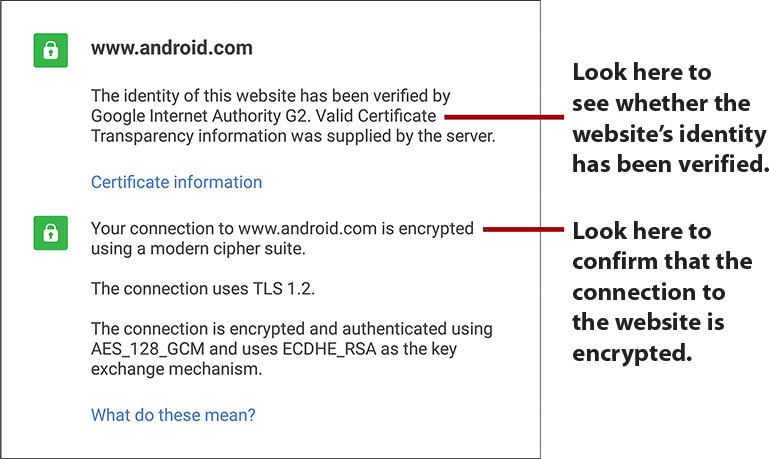
You can tap the padlock icon to display a pop-up window containing details about the website’s identity and the security of your connection to it.
Web Page Options
While a web page is open, you have a number of options, such as opening a new tab, creating a bookmark for the page, and finding text on the page.
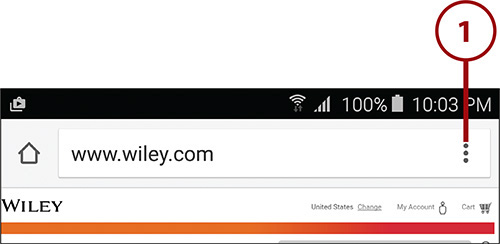
1. Tap the Menu button to display the menu.
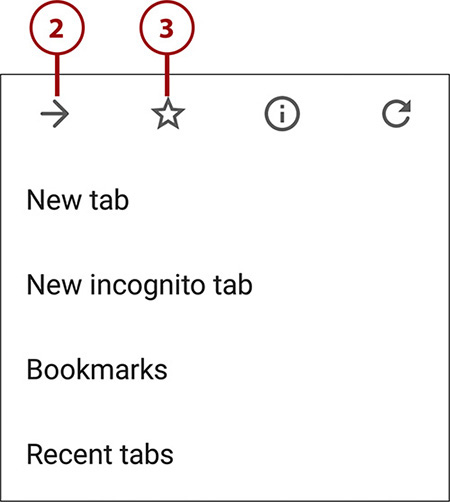
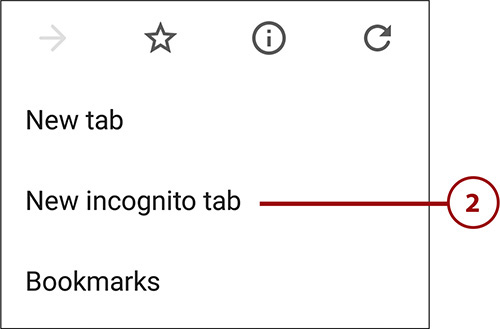
2. Tap the Forward button to return to the previous web page from which you have gone back on this tab. The Forward button is available only when you have visited multiple pages on this tab and have gone back from at least the last page, by tapping the Back button (the soft button below the screen), to an earlier page.
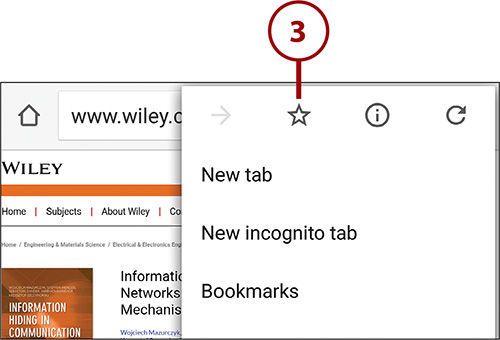
3. Tap the Bookmark star to add a bookmark for this page.
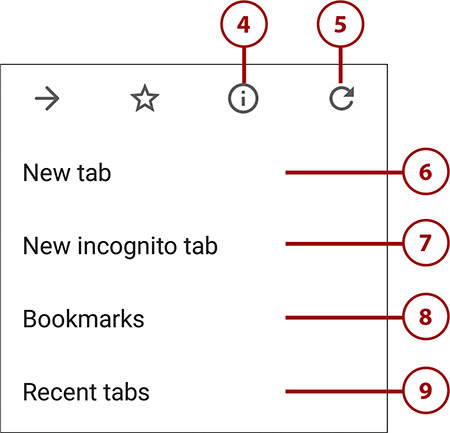
4. Tap the Information icon to display information about the connection to the website on this page. See the first image in the nearby note titled “What Does the Green Icon with the White Padlock Mean?” for an example of the information window that appears. Tap outside the information window to close it.
5. Tap the Refresh icon to refresh the display of the current web page. You’d normally do this either if a page failed to load completely or to load updated information, such as fresh news.
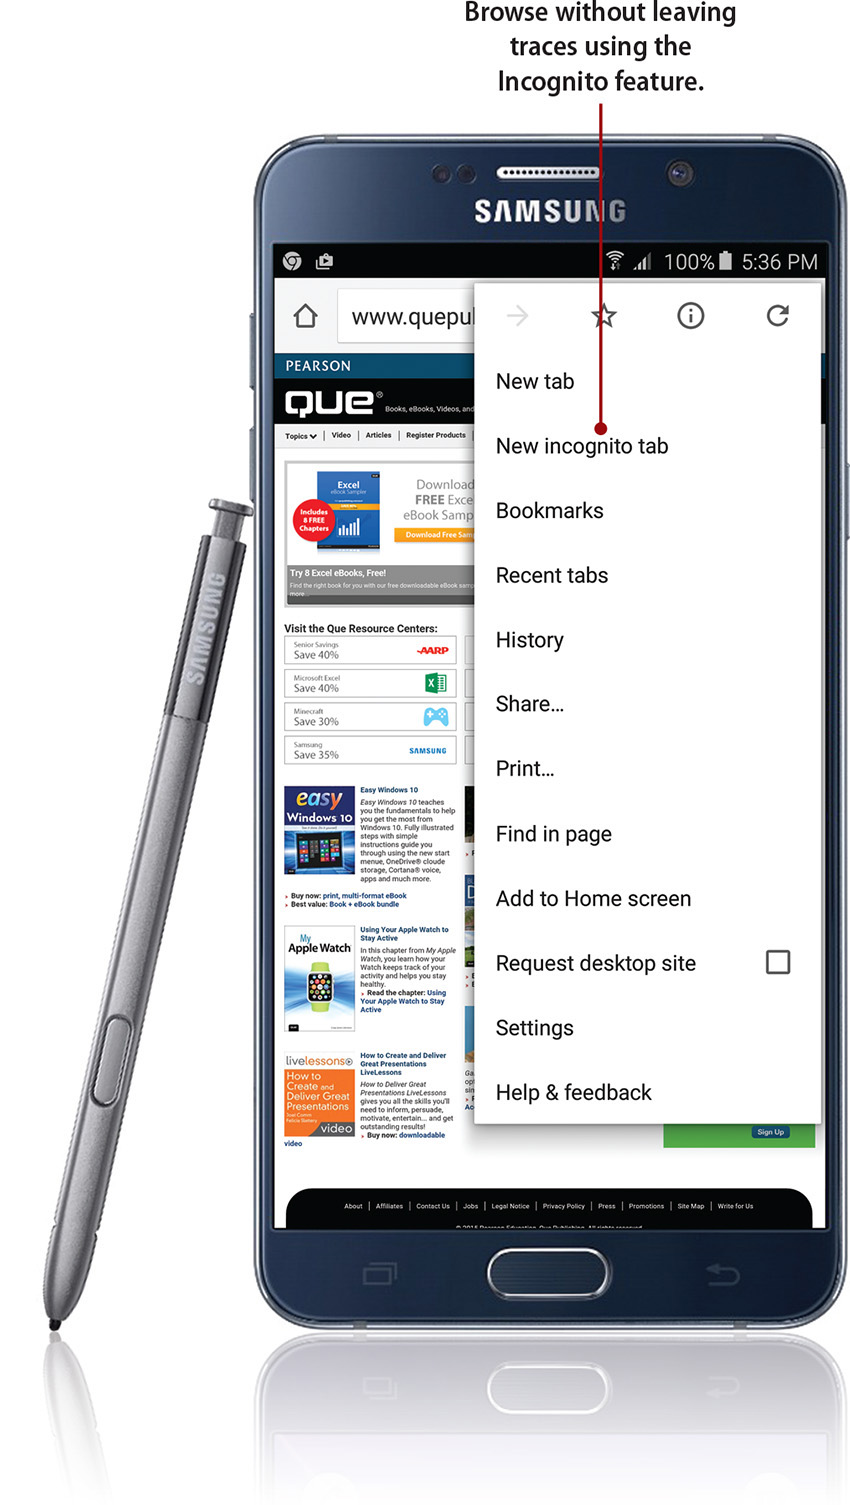
6. Tap New Tab to open a new tab.
7. Tap New Incognito Tab to open a new Incognito tab for private browsing. Incognito tabs are covered later in this chapter.
8. Tap Bookmarks to display your bookmarks.
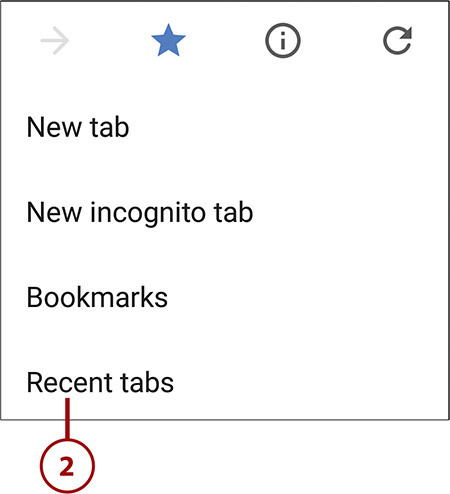
9. Tap Recent Tabs to display your Recent Tabs list. This list includes the Other Devices list, which gives you access to recent tabs on other devices with which you sign in to the same Chrome account.
10. Tap History to display the History screen, which contains a list of the pages you have visited on your Galaxy Note 5.
11. Tap Share to share this web page with other people using apps such as Email, Gmail, Facebook, Messaging, and Twitter. The Share Via dialog shows all the apps you can use to share the web page.
12. Tap Print to start the process of printing the current page.
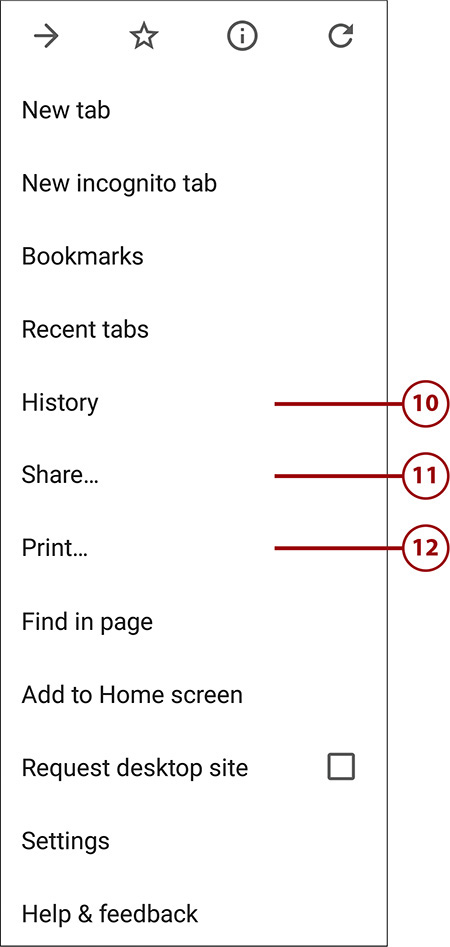
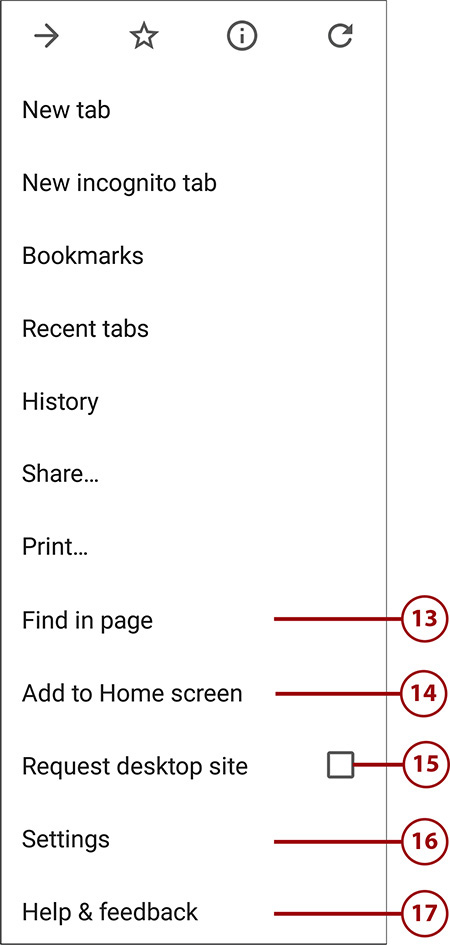
13. Tap Find in Page to search this page for specific text you type.
14. Tap Add to Home Screen to display the Add to Home Screen dialog. You can then type the name to give the icon that Android adds to the Home screen. You can then tap this icon to go straight to the website in your default browser, such as Chrome.
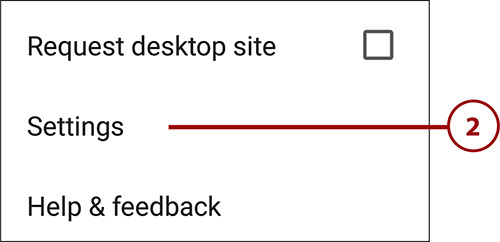
15. Tap Request Desktop Site to enable or disable forcing websites to show the regular view of a web page designed for full-size screens instead of a mobile view designed for small screens. When you change this setting, Chrome reloads the page, displaying the desktop version if it is available.
16. Tap Settings to change the settings for the Chrome browser.
17. Tap Help & Feedback to get help or to vent your frustrations with Chrome.
Browser Tricks
The Chrome browser app has some neat tricks to help you browse regular websites comfortably on your Galaxy Note 5’s screen.
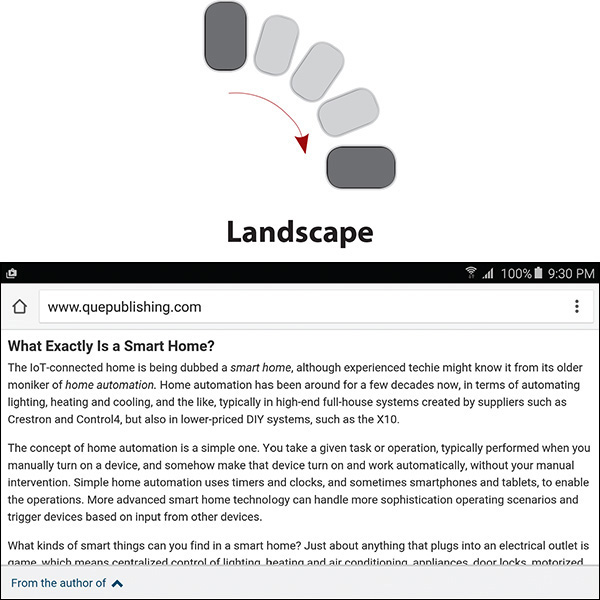
1. Rotate your Galaxy Note 5 so that its long edge is sideways. This puts the screen into what’s called landscape orientation. Your Galaxy Note 5 automatically switches the screen to Landscape mode.

Why Won’t My Screen Rotate?
If Chrome does not switch to landscape mode when you rotate the Galaxy Note 5, you need to turn on screen rotation. Pull down the Notification panel and tap the Screen Rotation icon in the Quick Settings bar, turning the arrow green.
2. If necessary, double-tap the screen to zoom in and out. You can also place your thumb and forefinger on the screen and spread them apart to zoom in or pinch them together to zoom out.
Using Bookmarks, Recent Tabs, and History
Chrome enables you to bookmark your favorite websites for quick access, but it also keeps a list of the sites you visit most often so you can return to them at the tap of an icon. Chrome also syncs your recent tabs among your devices that run Chrome and sign in to the same Google account, so you can quickly pick up browsing on your Galaxy Note 5 exactly where you left it on your desktop computer, laptop, or tablet—or vice versa.

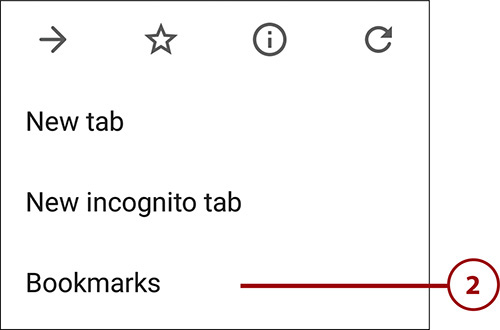
2. Tap Bookmarks. Normally, the Mobile Bookmarks folder opens. If not, you can navigate to it manually.
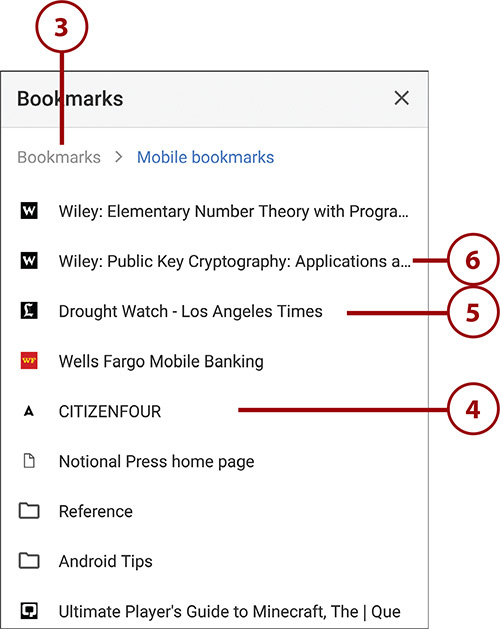
3. Tap Bookmarks to display the main Bookmarks folder. From there, you can tap a bookmark it contains or another bookmarks folder.
4. Tap a bookmarks folder to display the bookmarks it contains.
5. Tap a bookmark to display the web page it marks.
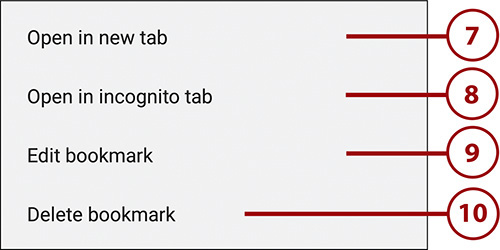
6. Tap and hold a bookmark to display a menu of extra actions you can take with it.
7. Tap Open in New Tab to open the bookmarked web page in a new tab.
8. Tap Open in Incognito Tab to open the bookmark in an Incognito tab.
9. Tap Edit Bookmark to edit the bookmark. For example, you can change the bookmark’s name or move it to a different folder.
10. Tap Delete Bookmark to delete the bookmark.
2. Tap the Menu button to open the menu.

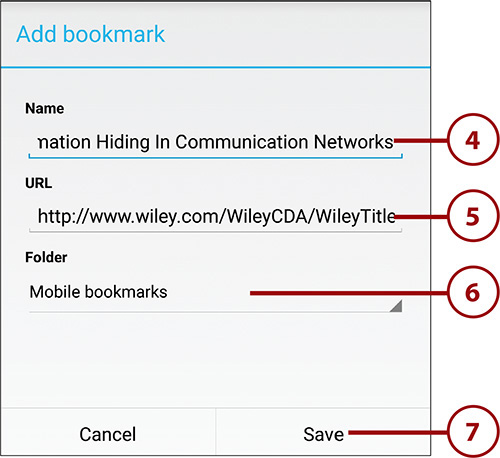
3. Tap the Bookmark star to start creating a new bookmark.
4. Change the bookmark name if you want to. The default is the web page’s title; you might prefer a shorter name.
5. Edit the address if necessary. If you went to the right page in step 1, you do not need to change the address.
6. Select the folder in which to save the bookmark. You can create new folders as needed by tapping New Folder on the Choose a Folder screen.
7. Tap Save to save the bookmark.
Go to a Web Page Using the Recent Tabs List
Chrome’s Recent Tabs list enables you to go back to web pages that you have opened recently on either your Galaxy Note 5 or any other device on which you log Chrome in to the same Google account, such as your Android tablet or your PC or Mac.
1. Tap the Menu button.

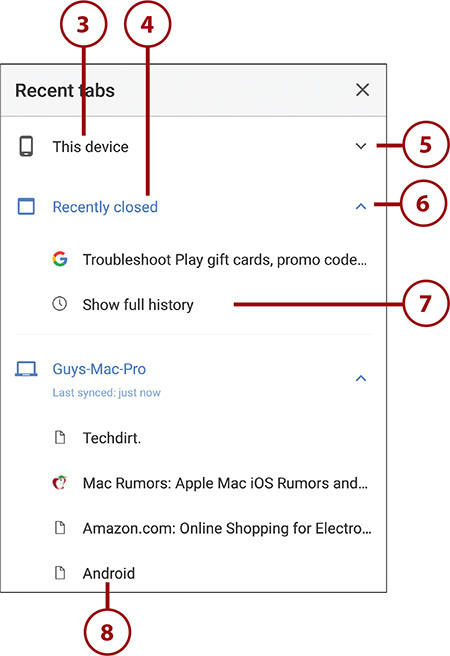
2. Tap Recent Tabs to display the Recent Tabs screen.
3. Look at the This Device list to see tabs that are currently open on your Galaxy Note 5.
4. Look at the Recently Closed list to see tabs you’ve recently closed on your Galaxy Note 5.
5. Tap a downward caret on a heading to expand the list of tabs the computer or device contains.
6. Tap an upward caret on a heading to collapse the list of tabs.
7. Tap Show Full History to display the full history of Chrome browsing on your Galaxy Note 5.
8. Tap a tab name to display the web page.
Go to a Web Page Using Your History
Chrome’s History list enables you to go back to web pages that you have opened in Chrome on your Galaxy Note 5. The History list contains both pages you have bookmarked and pages you have not bookmarked.
1. Tap the Menu button.
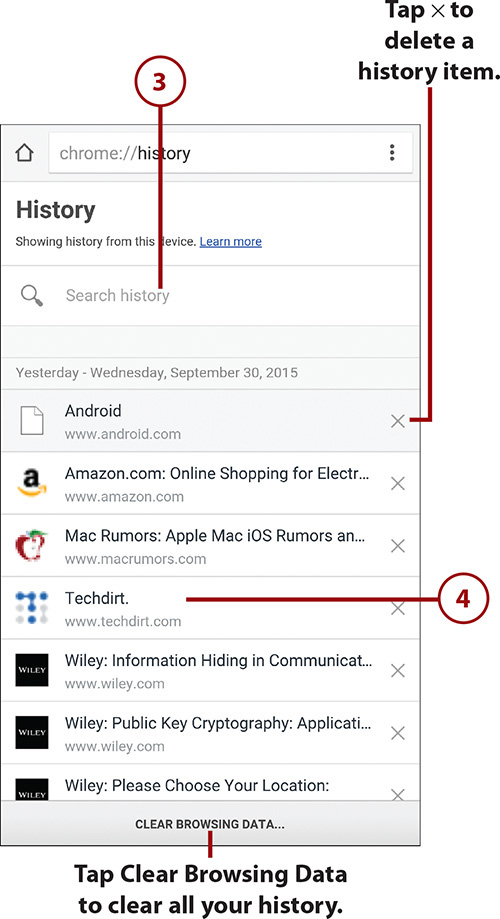
2. Tap History to display the History screen.

3. Tap Search History to search through your history using keywords.
4. Tap the name of the page you want to display.
Delete Individual History Items—or All History Items
Given the nature of the Web, it’s easy enough to browse to a site that you don’t want to keep in your history. When this happens, tap the Menu button, tap History, and then tap the × icon on the right side of the button for the item you want to remove.
If you want to get rid of all your history items, tap the Clear Browsing Data button at the bottom of the History screen to open the Clear Browsing Data screen. Check the Clear Browsing History box and tap Clear to delete your history. From the Clear Browsing Data screen, you can also clear other browsing data than your history; we’ll look at your options later in this chapter.
Browsing with Multiple Tabs
Chrome can have multiple web pages open at the same time, each in a different tab. This enables you to open multiple web pages at once and switch between them without having to reload pages.
You can switch among your open web pages in two ways:
• By using the Recents feature—As you know, the Recents feature (which is called Overview in standard versions of Android) shows you a thumbnail for each app or window you have open. When you have multiple Chrome tabs open, each appears as a separate thumbnail on the Recents screen. So you can tap the Recents button to display the Recents screen, and then tap the window containing the tab you want to view. This is Android’s new method of switching among Chrome tabs, but it’s not necessarily better, faster, or easier than the old method.
• By switching directly within Chrome—If you don’t find it convenient to switch tabs via the Recents screen, you can turn off the Merge Tabs and Apps setting in Chrome. Doing this activates the tab switcher inside Chrome, and you can switch tabs without leaving Chrome. You might find this method of browsing easier, so this chapter shows you how to use it as well as the new method.
Open a New Tab
To make sure that you have multiple tabs among which to switch, open one or more extra tabs by following these steps in Chrome:
1. In Chrome, tap and hold a link on the page that is currently displayed. The pop-up menu of actions appears.
2. Tap Open in New Tab. Chrome opens a new tab and displays the web page in it. Repeat these steps one or more times to open other tabs.

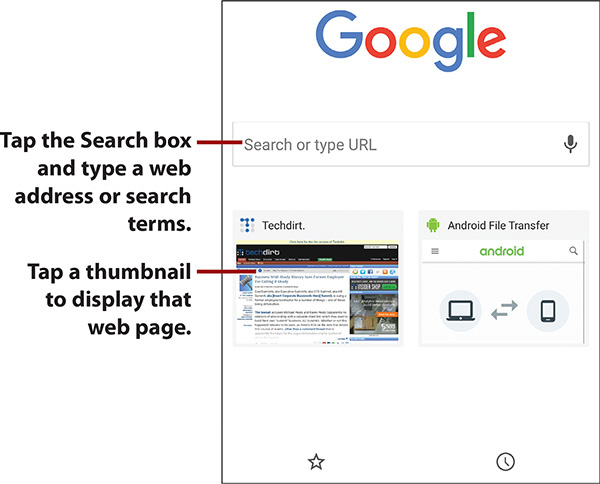
What If the Current Page Has No Links?
If the current page contains no links, tap the Menu button, and then tap New Tab to open a new tab. The new tab normally displays your Most Visited list by default. Tap a page thumbnail to display that page, or tap the Search box, type a web address or search terms, and then tap the search result you want to view.
Browse with Multiple Tabs Using the Recents Screen
By default, Chrome normally has the Merge Tabs and Apps setting enabled, so you use the Recents screen to switch from one tab to another within Chrome.
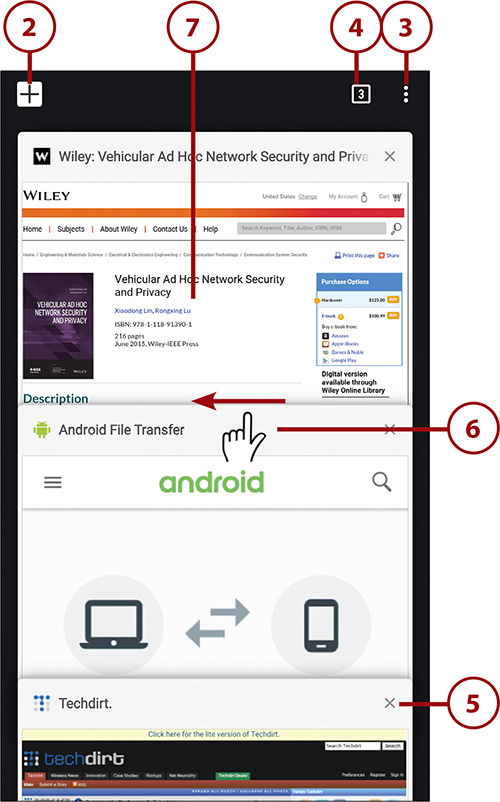
1. After opening multiple tabs, as explained in the previous section, tap the Recents button below the screen. The Recents screen appears, showing a thumbnail for each open app or window, including the Chrome tabs. The most recent items are at the bottom.
2. Scroll down as needed to display the thumbnail for the tab you want, and then tap the thumbnail. Chrome appears full screen showing that page.
Browse with Multiple Tabs Within Chrome
If you find the Recents screen an awkward way to navigate among the tabs you have opened in Chrome, you can enable Chrome’s built-in tab switcher by turning off the Merge Tabs and Apps setting.
Disable the Merge Tabs and Apps Setting
In Chrome, follow these steps to turn off the Merge Tabs and Apps setting and enable the built-in tab switcher:
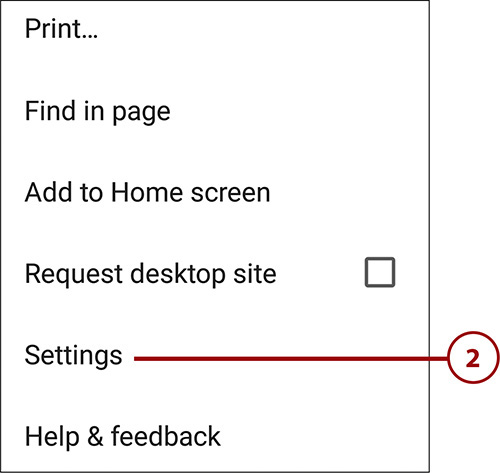
1. Tap the Menu button.
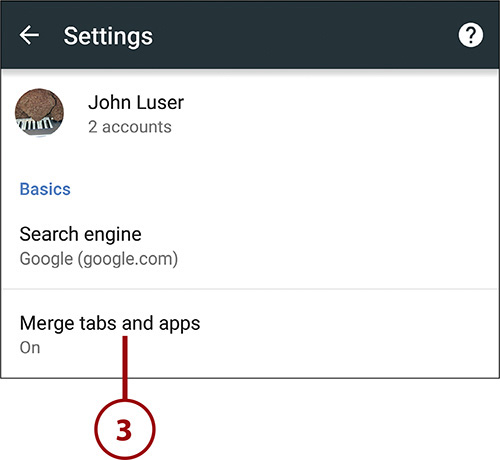
2. Tap Settings to display the Settings screen.
3. Tap the Merge Tabs and Apps button to display the Merge Tabs and Apps screen.
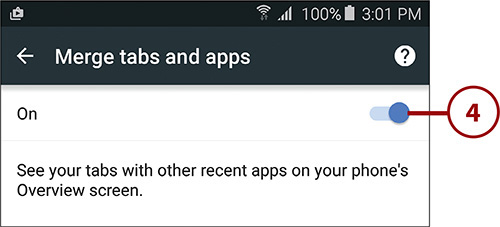
4. Set the Merge Tabs and Apps switch to Off. The Separate Tabs and Apps dialog opens.
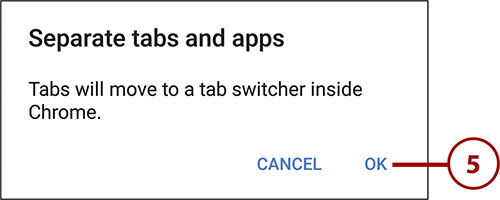
5. Tap OK to close the Separate Tabs and Apps dialog. The Recents screen appears briefly, and then Chrome appears again, showing the web page from where you started—but with the Tabs icon now displayed. The Tabs icon shows the number of open tabs in Chrome.
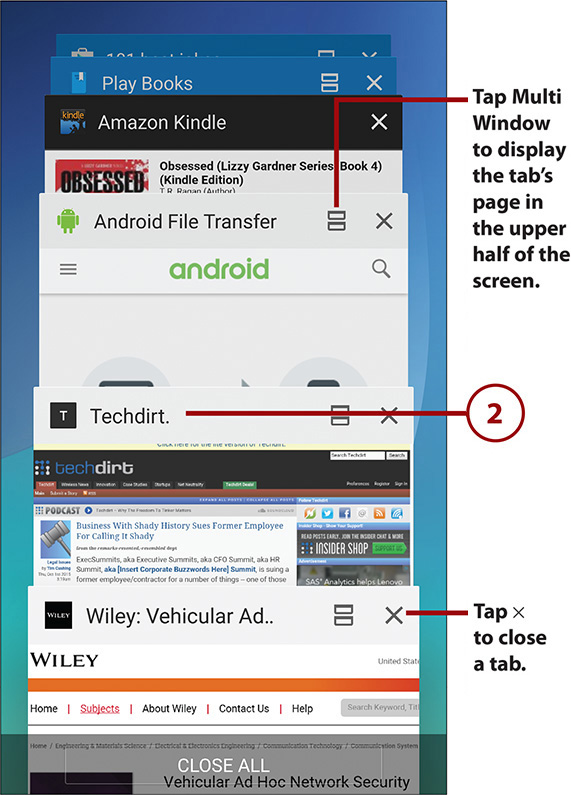
Browse Multiple Tabs Using Chrome’s Built-In Tab Switcher
After enabling Chrome’s built-in tab switcher, you can browse multiple tabs by following these steps:
1. Tap the Tabs icon to display the Tabs screen.
2. Tap New Tab (+) to open a new tab displaying the New Tab screen. You can then navigate to a web page by entering an address, searching, or tapping a thumbnail or bookmark.
3. Tap the Menu button to navigate to a web page via the menu. For example, you may want to tap History on the menu so that you can navigate to a web page you visited earlier.
4. Tap the Tabs button (the button showing the number of tabs) if you want to go back to the page you were viewing before you displayed the Tabs screen. You can also tap the Back button to go back to that page.
5. Tap × to close a tab.
6. Swipe a tab left or right off the list to close it.
7. Tap the tab you want to display.
Browsing in Secret with Incognito Tabs
If you want to visit a website in secret, you can use Incognito tabs. Incognito is a special mode that means that the web pages you visit don’t appear in your browser history or search history and do not leave traces on your Galaxy Note 5 unless you create bookmarks for the pages or download files from them.
1. Tap the Menu button.
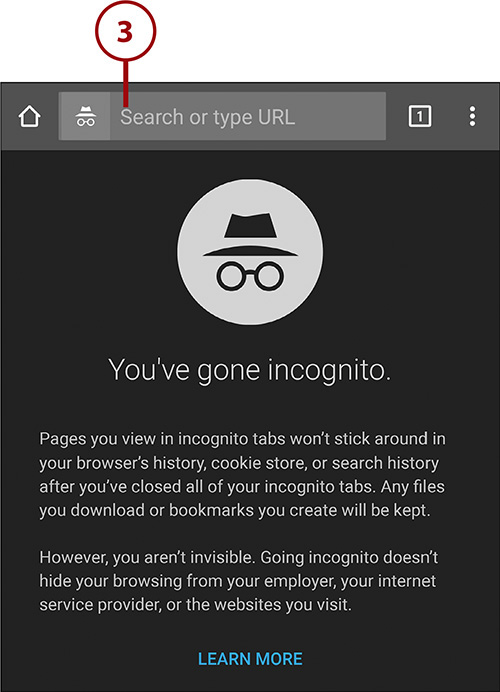
2. Tap New Incognito Tab. Chrome displays the Incognito screen for new tabs, which shows the “You’ve gone incognito” message.
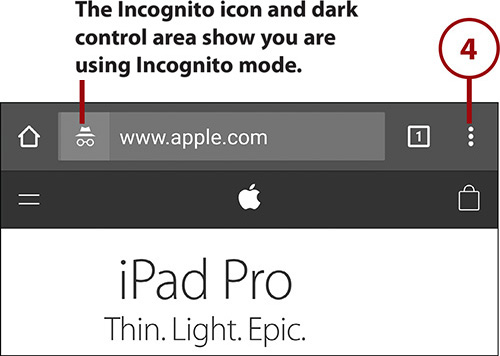
3. Navigate to the web page using normal means. For example, tap Search or Type URL and type your search terms; then tap the appropriate search result.
4. When you want to switch tabs, tap the Tabs icon to display the Tabs screen if you have turned off the Merge Tabs and Apps setting. (If Merge Tabs and Apps is on, tap the Recents button to display the Recents screen, as usual.)
5. Tap and drag the border between the gray Incognito tabs and the light-shaded regular tabs to switch from your Incognito tabs to your regular tabs.

Customizing Browser Settings
You can customize Chrome to make it behave the way you want. Chrome has a wide range of settings, which it breaks up into the categories Basics and Advanced. Chrome also enables you to choose settings for syncing your data among the computers and devices that log in to your Google account.
Choose Sync Settings
1. In Chrome, tap the Menu button.

2. Tap Settings to display the Settings screen.
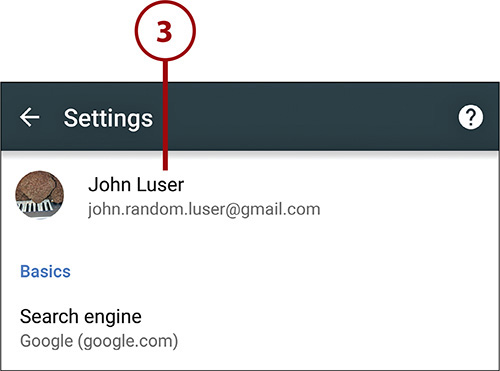
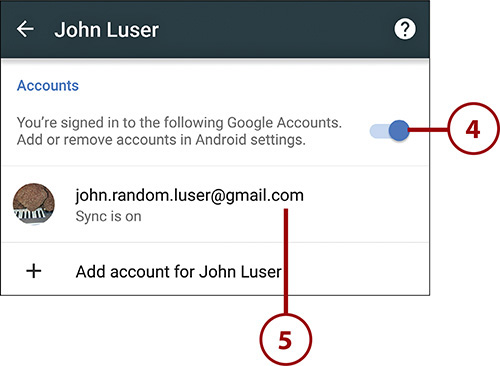
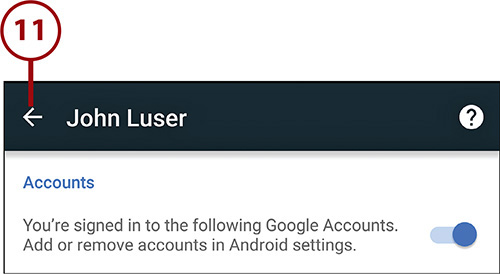
3. Tap your Google account name to display the screen for configuring your account.
4. Move the Accounts switch to On if you want to sign in to your account or to Off if you don’t want to sign in.
5. Tap your Google account’s email address to display the Sync screen.
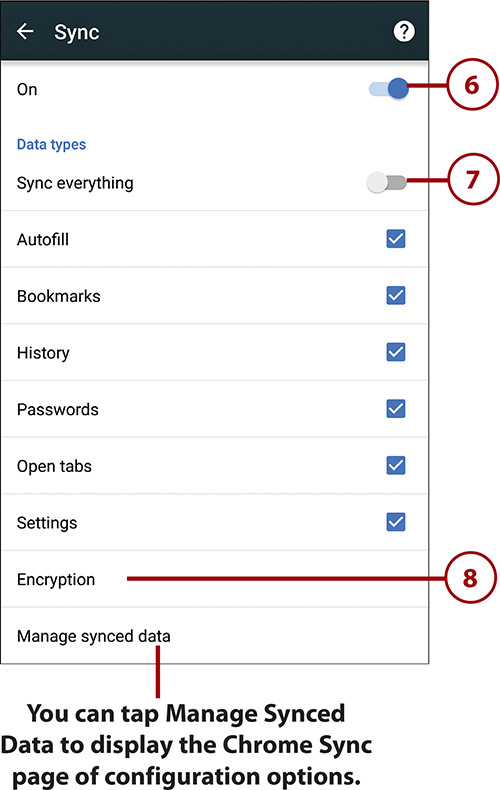
6. Move the Sync switch to On or Off, as needed. To get the most out of Chrome, set the switch to On, as in this example, and then choose which items to sync.
7. Move the Sync Everything switch to On if you want to sync all the available items. Otherwise, check the Autofill box, the Bookmarks box, the History box, the Passwords box, the Open Tabs box, and the Settings box as needed.
8. Tap Encryption to display the Encryption dialog.
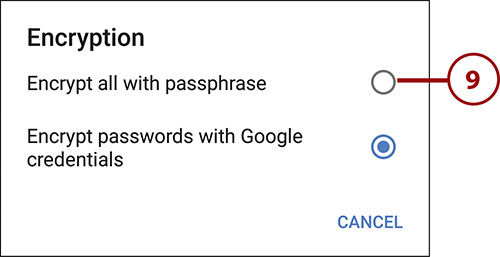
9. Tap the Encrypt All with Passphrase radio button and then enter the passphrase when prompted. Make sure your password is strong enough by using at least eight characters (preferably 12 to 20), combining uppercase and lowercase letters with numbers and symbols (such as $ or %), and avoiding any word or misspelling of a word in any language.
Why (and How) You Should Encrypt Your Chrome Sync Data
Browsing the Web often involves private or sensitive data, even when you don’t buy anything or do anything embarrassing. So it is a good idea to encrypt your Chrome sync data to prevent others from being able to read it if they intercept it.
The Encryption dialog contains two options: the Encrypt Passwords with Google Credentials radio button and the Encrypt All with Passphrase radio button. Normally, you should choose the Encrypt All with Passphrase radio button, because it encrypts all the data that Chrome syncs instead of encrypting only the passwords.
10. Tap the arrow or the Back button to return to the account screen.
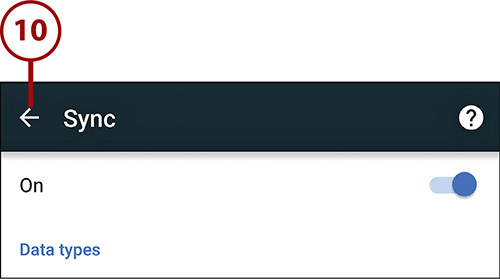
11. Tap the arrow or the Back button to return to the Settings screen.
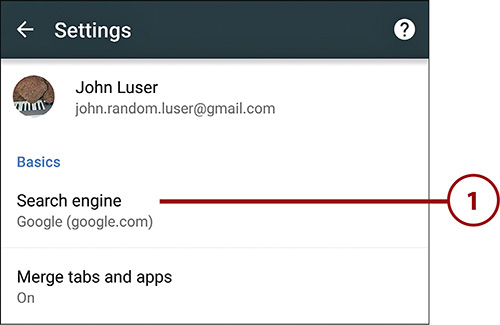
Choose Basics Settings
Chrome’s basic settings include choosing your search engine and home page, deciding whether to use the Autofill Forms feature, and managing your saved passwords.
1. From the Settings screen, tap Search Engine to display the Search Engine dialog.
2. Tap the search engine you want to use.
3. Tap Close to close the Search Engine dialog and return to the Settings screen.
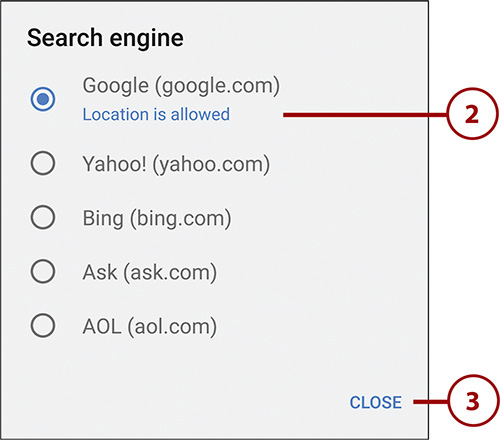
Choosing Whether the Search Engine Can Access Your Location
If, when you tap the search engine you want in the Search Engine dialog, you see blue text saying “Location is blocked,” you might want to enable location access so that the search engine can give you more targeted search results. To enable location access, tap the Location Is Blocked message. Android displays a screen on which you can enable location access for the search engine.
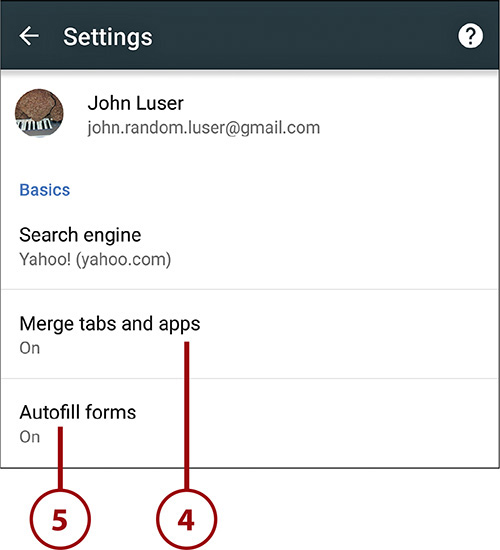
4. Tap Merge Tabs and Apps to control whether Chrome tabs appear on the Recents screen (when the Merge Tabs and Apps setting is enabled) or within the app (when the setting is disabled).
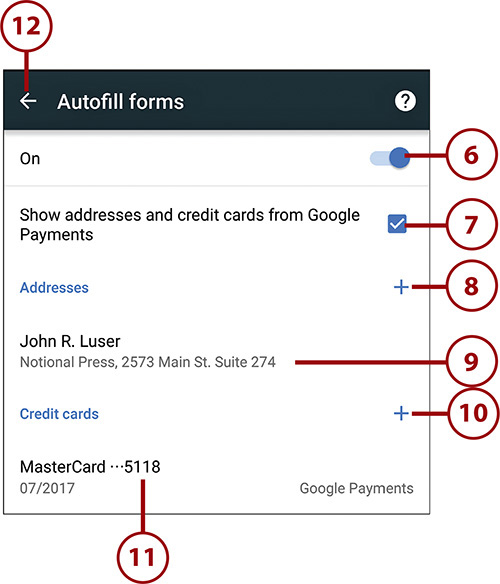
5. Tap Autofill Forms to display the Autofill Forms screen.
6. Set the Autofill Forms switch to On to enable the use of Autofill Forms.
7. Check the Show Addresses and Credit Cards from Google Payments box if you want this screen to show your details and cards from Google Payments.
8. Tap Add (+) on the Addresses heading to display the Add Address screen, where you enter the name and address details you want Autofill Forms to use.
9. Tap an existing address if you need to edit it.
10. Tap Add (+) on the Credit Cards heading to display the Add Credit Card screen, where you enter the details of the credit cards you want to use.
11. Tap an existing credit card if you need to edit its details. For example, you might need to update the expiration date when you receive a replacement card.
12. Tap the arrow or the Back button to return to the Settings screen.
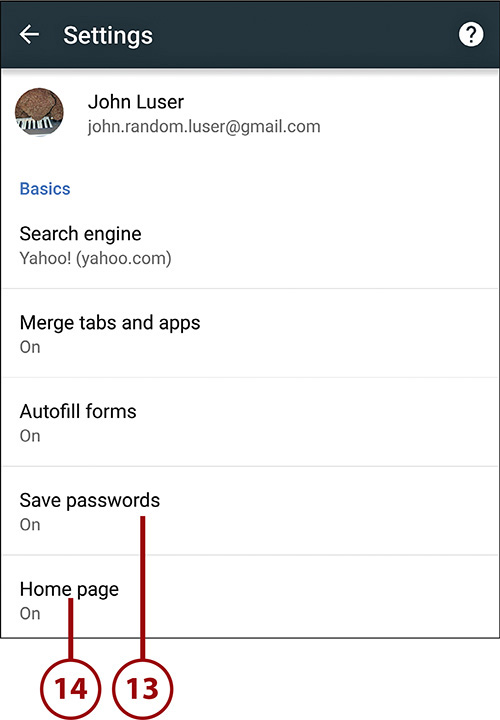
13. Tap Save Passwords to display the Save Passwords screen. Here, you can move the Save Passwords switch to On or Off to enable or disable Chrome’s ability to save your passwords so it can enter them for you. You can also manage the passwords on the Saved Passwords list and the Never Saved List.
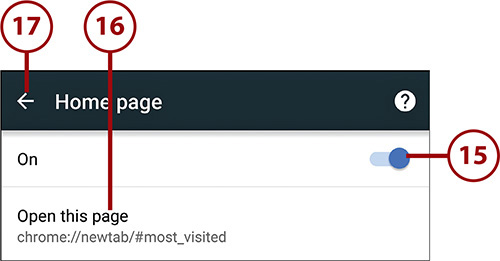
14. Tap Home Page to display the Home Page screen.
15. Set the Home Page switch to On if you want to use a home page. If you don’t want a home page, set this switch to Off; this makes Chrome remove the Home Page icon from the area to the left of the omnibox.
16. Tap Open This Page to display the Edit Home Page screen. You can then type or paste the address of the page you want to use as your home page, and then tap Save.
17. Tap the arrow button or the Back button to return to the Settings screen.
Choose Advanced Settings
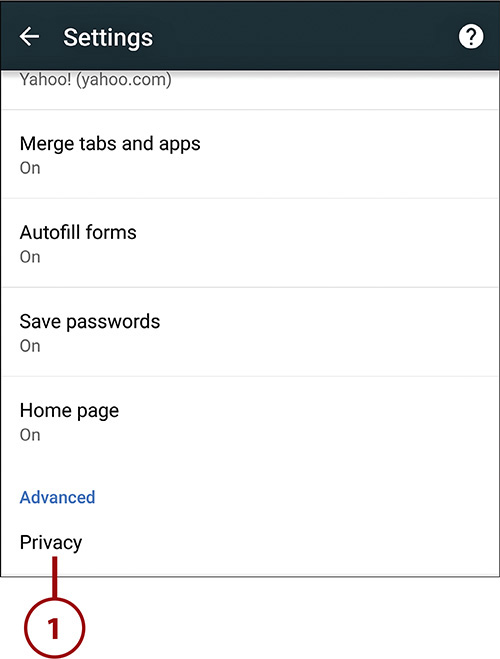
In the Advanced section of the Settings screen in Chrome, you can choose settings in three categories: Privacy, Accessibility, and Site Settings. You can also turn on or off the Data Saver feature and view the About Chrome information, which may be useful for troubleshooting problems.
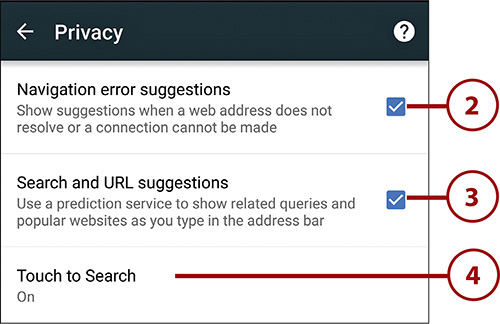
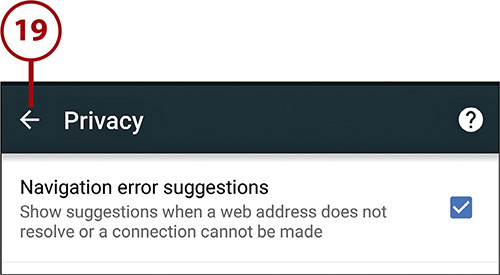
1. On the Settings screen, tap Privacy to display the Privacy screen.
2. Check or uncheck the Navigation Error Suggestions box to enable or disable showing suggestions for web addresses that you enter incorrectly or that Chrome cannot locate.
3. Check or uncheck the Search and URL Suggestions box to enable or disable showing related queries and popular websites similar to those you type in the omnibox.
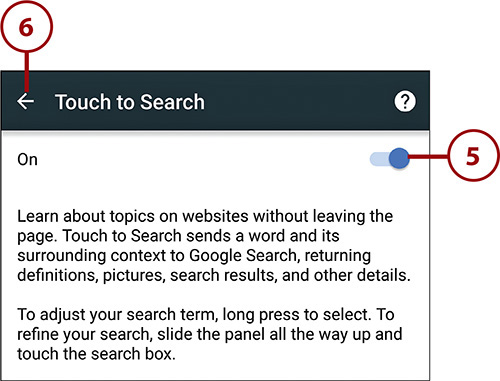
4. Tap Touch to Search to display the Touch to Search screen.
5. Set the Touch to Search switch to On if you want to be able to search by tapping and holding a word on a web page. If you don’t need this capability, set the switch to Off.
6. Tap the arrow button or the Back button to return to the Privacy screen.
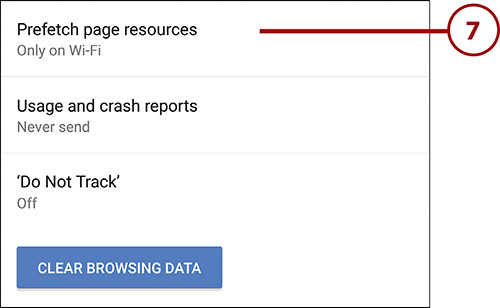
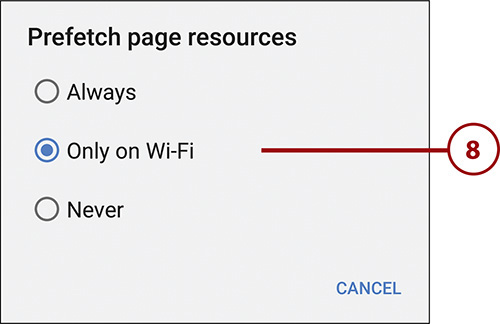
7. Tap Prefetch Page Resources to display the Prefetch Page Resources dialog.
8. Tap the Always radio button, the Only on Wi-Fi radio button, or the Never radio button, as needed. See the “What Does Prefetch Page Resources Do?” sidebar for details.
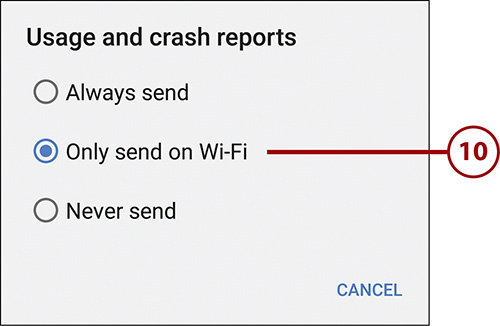
9. Tap Usage and Crash Reports to display the Usage and Crash Reports dialog.
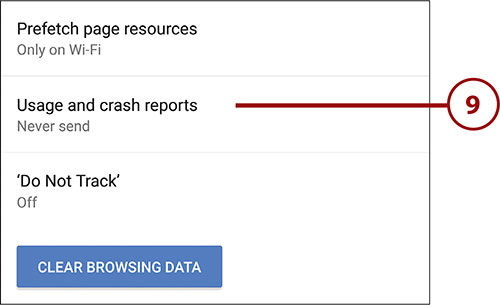
10. Tap the Always Send radio button, the Only Send on Wi-Fi radio button, or the Never Send radio button. If you are happy to provide usage and crash data, choosing Only Send on Wi-Fi is usually the best choice because it prevents the reports from consuming your cellular data allowance.
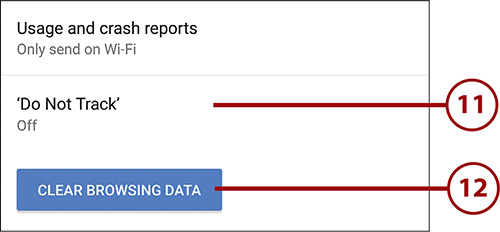
11. Tap ‘Do Not Track’ to display the Do Not Track screen, where you can choose whether to turn on the Do Not Track feature. This feature requests that the websites you visit not track you, but websites are not bound to honor the request.
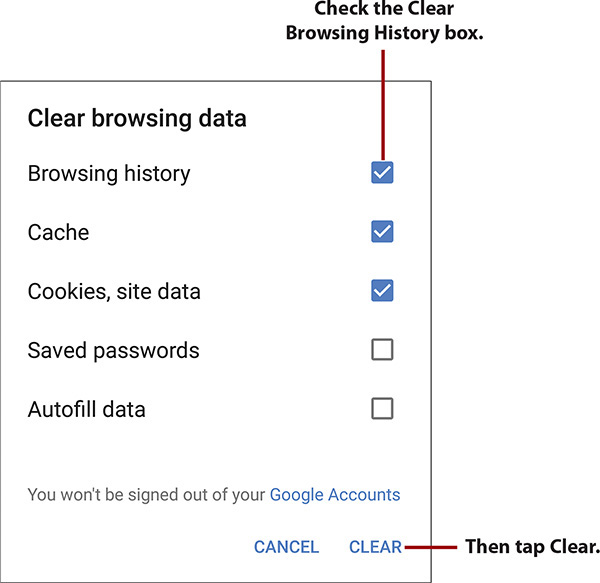
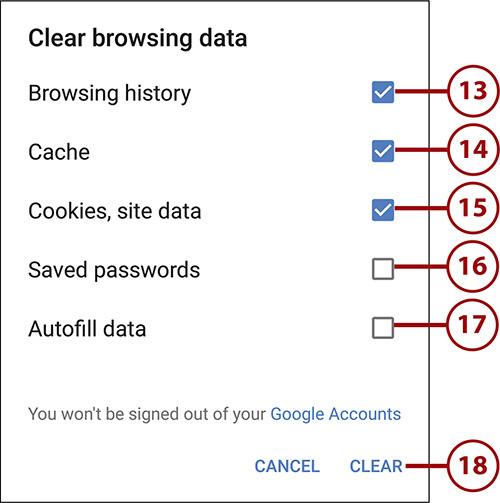
12. Tap Clear Browsing Data to display the Clear Browsing Data dialog.
13. Check the Browsing History box if you want to clear your browsing history. This clears the history of websites you have visited using the Chrome app on your Galaxy Note 5.
14. Check the Cache box to clear the cache. The cache contains data that Chrome stores so that it can redisplay web pages more quickly when you visit them again.
15. Check the Cookies, Site Data box if you want to clear your cookies and website data. Browser cookies are used by websites to personalize your visit by storing information specific to you in the cookies.
16. Check the Saved Passwords box if you want to clear your saved passwords.
17. Check the Autofill Data box if you want to clear your Autofill data.
18. Tap Clear to clear the items whose boxes you checked in the Clear Browsing Data dialog.
19. Tap the arrow button or the Back button to return to the Settings screen.
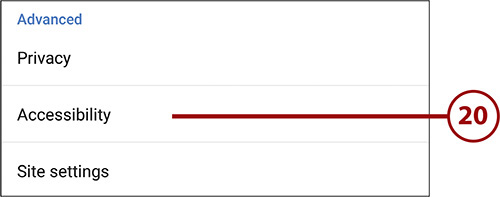
20. Tap Accessibility to display the Accessibility screen.
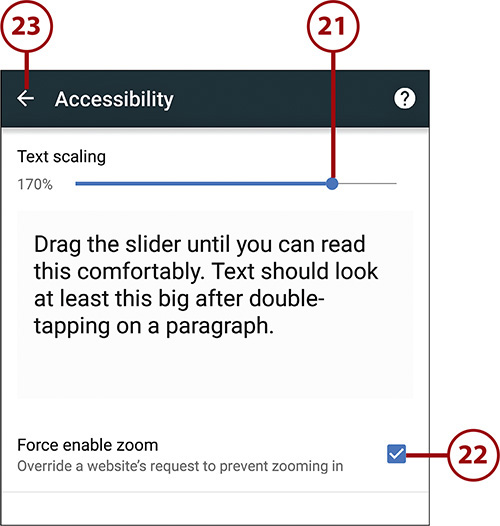
21. Drag the Text Scaling slider to make the text in the Preview box appear at a comfortable size for reading. This is the minimum size to which the Chrome app zooms the text when you double-tap a paragraph.
What Is Text Scaling?
When you use text scaling, you instruct your Galaxy Note 5 to always increase or decrease the font sizes used on a web page by a specific percentage. For example, you can automatically make all text 150% larger than was originally intended.
22. Tap Force Enable Zoom to turn on or off Chrome’s ability to zoom in on a website that prevents zooming. Some websites turn off zooming because their creators consider design to be more important than readability.
23. Tap the arrow button or the Back button to return to the Settings screen.
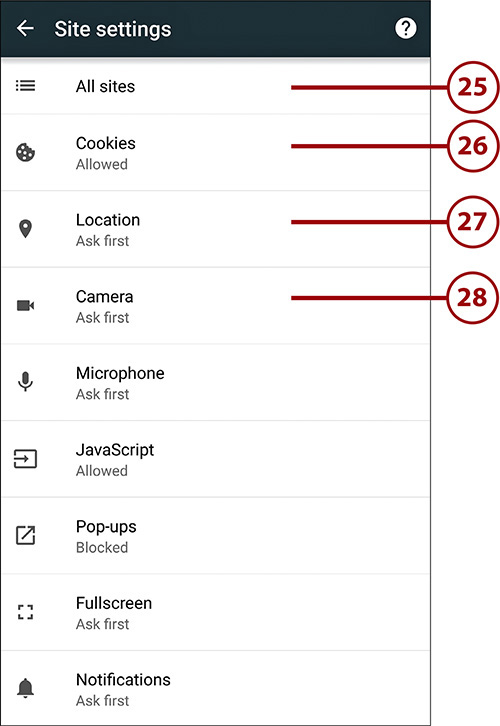
24. Tap Site Settings to display the Site Settings screen.

25. Tap All Sites if you want to review the list of sites that have stored data on your Galaxy Note 5 via Chrome. From there, you can tap a site to display the Site Settings screen, on which you can see how much data the site has stored; you can also clear and reset the data if you want.
26. Tap Cookies to display the Cookies screen. Here, you can set the Cookies switch to On or Off to control whether Chrome accepts cookies (see the nearby Note). If you set the Cookies switch to On, you can check or uncheck the Allow Third-Party Cookies box to control whether Chrome accepts cookies from third-party sites as well as from the sites you actually visit.
27. Tap Location to display the Location screen. Here, you can set the Location switch to On to make Chrome prompt you before it supplies your location to a website that requests it.
28. Tap Camera to display the Camera screen. Here, you can set the Camera switch to On to make Chrome prompt you before it lets a website use the camera. You’ll almost certainly want to know when a website is trying to use the camera.
Which Cookies Should You Accept?
Browser cookies are used by websites to personalize your visit by storing information specific to you in the cookies. Normally, you want to set the Cookies switch on the Cookies screen to On, because if you set your browser to refuse all cookies, many websites do not work correctly. But it is best to uncheck the Allow Third-Party Cookies check box on the Cookies screen to prevent third-party cookies, which are often used for advertising, for tracking your movements from site to site, or both.
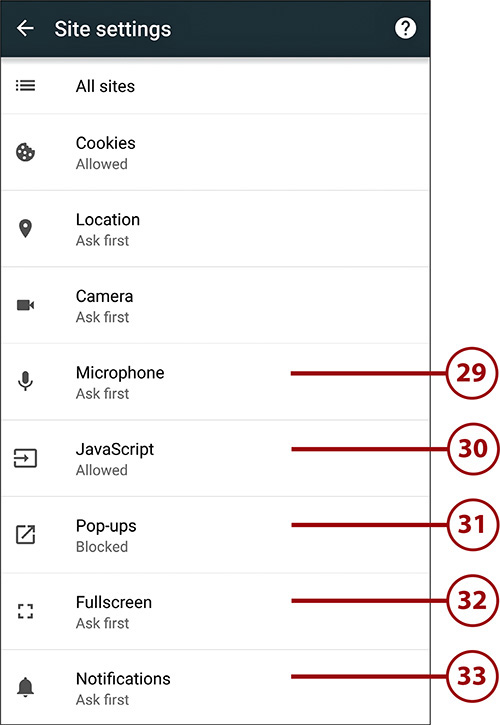
29. Tap Microphone to display the Microphone screen. Here, you can set the Microphone switch to on to make Chrome prompt you before it lets a website use the microphone. Like the camera, the microphone is something over which you’ll want to keep control.
30. Tap JavaScript to display the JavaScript screen. Here, you can set the JavaScript switch to On or Off to enable or disable JavaScript. JavaScript is used on many web pages for formatting and other functions, so you might want to leave this enabled.
31. Tap Pop-Ups to display the Pop-Ups screen. Here, you can set the Pop-Ups switch to On if you want to enable pop-up windows or to Off if you want to block them. Pop-up windows are almost always advertisements, so usually you would want to block them; however, some websites might not work correctly if pop-up blocking is on.
32. Tap Fullscreen to display the Fullscreen screen. Here, you can set the Fullscreen switch to Off if you want Chrome to get your permission before allowing an app to switch to full-screen mode. Set the Fullscreen switch to On if you want apps to be able to switch to full-screen mode without your approval.
33. Tap Notifications to display the Notifications screen. Here, you can set the Notifications switch to On to make Chrome prompt you before allowing websites to send notifications. Reviewing requests to send notifications is almost always a good idea, so normally you wouldn’t want to set the Notifications switch to Off.
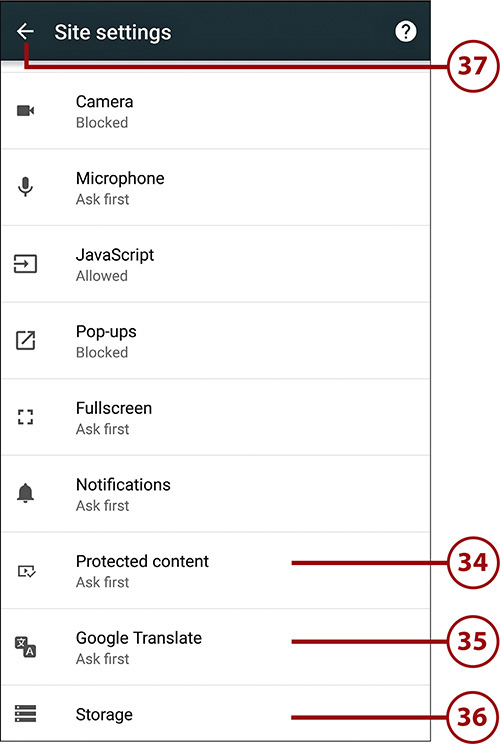
34. Tap Protected Content to display the Protected Content screen. Here, you can set the Protected Content switch to On or Off, as needed, to control whether Chrome asks your permission when a website wants to authenticate your Galaxy Note 5 to verify it is authorized to play premium videos. Tap the Learn More link if you want to learn more about protected content.
35. Tap Google Translate to display the Google Translate page, where you can enable or disable the Google Translate service for translating web pages. You can tap Reset Translate Settings if you need to reset your settings for Google Translate.
36. Tap Storage to display the Storage screen. Here, you can view the list of websites that are storing data on your Galaxy Note 5. You can then clear the data for a specific website if necessary.
37. Tap the arrow button or the Back button to return to the Settings screen.
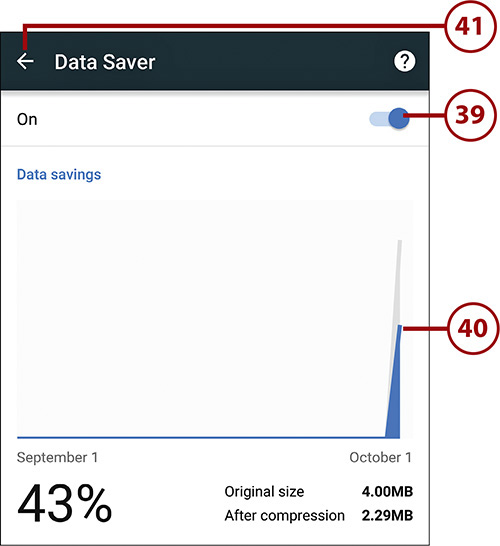
38. Tap Data Saver to display the Data Saver screen.
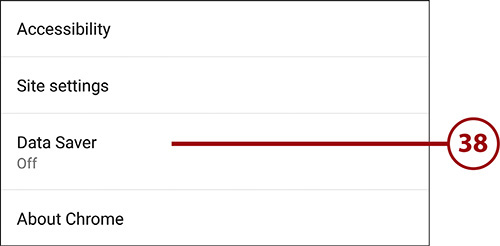
39. Set the Data Saver switch to On if you want Chrome to use Google’s servers to compress web pages other than pages you load via secure HTTP or in Incognito tabs.
40. After turning on Reduce Data Usage and doing some browsing, you can look at the Data Savings histogram to see how much data the compression has saved you.
41. Tap the arrow button or the Back button to return to the Settings screen.