Enabling features for Adobe Reader or adding special features for Reader users is a means whereby certain features not appearing in the default Adobe Reader program can be added to PDF documents. This enabling function can be handled by one of two applications. You can use a server product such as the Adobe LiveCycle Reader Extensions Server (LCRE) or Adobe Acrobat 9 Standard, Pro, and Pro Extended.
Prior to Acrobat 9, Acrobat Standard users were left out of the enabling arena. Using Acrobat 9 and greater, you have one of two available enabling features. Acrobat 9 Standard can enable forms for saving form data and signing documents with digital signatures. Acrobat Pro and ProExtended can enable forms for saving data and signing documents with digital signatures and enable PDF documents for commenting.
In this chapter, you discover some of the issues related to enabling files for Adobe Reader users and some reasons why you might extend enabling for comments.
We refer to enabled forms as forms that have special features that were added in Acrobat 9 Standard and above or Acrobat Professional 7.0 and above. Adobe Readers users can add the following special features to a PDF file:
There are some limitations to the programs that can enable files and the kinds of files that can be used by different viewer versions. The following applies to enabled files and the viewers:
Acrobat Professional 7: You can only enable PDFs for comment and markup.
Acrobat Professional 8 and above: You have all enabling features available.
Acrobat 9 Standard: You can only enable files for saving edits related to adding data in form fields and apply digital signatures with Acrobat Standard version 9.0 and above.
Adobe Reader 7.0: You can add comments and markups.
Adobe Reader 7.05: Adobe Reader 7.05 and above is required for using enabled forms.
Adobe Reader 8.0 and above: You can digitally sign a document anywhere on a page requires Acrobat 8.0 or greater.
Adobe Designer XML Forms: All enabling features are available except digitally signing a document anywhere on a page when using a dynamic XML form. When using a static XML form, digital signatures can be used anywhere on the form.
Submitting entire PDFs: One of the options you have available when setting up a submission button is to permit the form recipient to send the entire PDF back to you. Adobe Reader users version 7.05 and greater can return a PDF file to you when the PDF has been enabled.
PDF forms authors should plan on enabling all forms that are used within the Adobe's licensing restrictions. As a matter of course, you should plan on enabling PDF forms as the last task you perform in your editing session.
You must obey some limitations when enabling PDF documents for Adobe Reader users for forms enabling rights. Enabling forms for comment and markup do not carry the same limitations as do enabling forms for forms rights.
The limitations imposed on forms enabling features are defined in the End User License Agreement (EULA) you agree to when installing Acrobat. Just in case you are confused about language in the agreement after reading it, let us paraphrase the licensing agreement and amplify some of the conditions. In addition to what is covered in this chapter, you should carefully read the agreement and understand the limitations of use.
The language in the EULA suggests that you can enable PDF forms with forms saving and digital signatures for Adobe Reader users for up to 500 instances of returning form data back to you for a given document. The document usage can be done one of two ways. You can distribute an unlimited number of enabled forms, but you can only aggregate up to 500 responses per form template/design; this is useful when you're hosting a form on your Web site or on Acrobat.com where you might get fewer than 500 registrants for, say, a conference. The other instance is distributing forms to 500 named individuals, and you can aggregate any number of those forms. This is useful for something like expense accounts that people fill out and return monthly for an organization of fewer than 500 employees.
To help clarify the issues, let's say I'm going to distribute a form to a limited number of known people. For example, suppose I work at a small company of fewer than 500 employees. There is no limit to the number of times that form is submitted—ever—because it is coming from only 500 known persons. Think of an expense report form that is sent in monthly, or the annual benefits signup.
In another scenario, I'm going to distribute a form to an unknown number of people. For example, I'm posting it on my Web site. I can collect only 500 responses from that single form—ever. However, I can have five forms on my Web site (one for the East Coast, one for the West Coast, one for Canada, and so on), and I can collect 500 responses from each of those forms. Think of a conference registration or a one-time survey.
You can create an unlimited number of form templates with Adobe Acrobat. You can distribute these forms anywhere, anyhow. The data collection itself is what is limited:
I have only 500 people in my "circle of trust," and I can collect from those people as much as necessary, or
I need to collect feedback from some people (known/unknown), and I can collect only 500 responses in the lifetime of that single form.
Note
For an up-to-date description of the Acrobat EULA or any other Adobe product, visit www.adobe.com/products/eulas. On the opening Web page, you'll find links to Acrobat and other Adobe products specifying the conditions of the license agreements.
Adobe uses no special coding or technology to ensure that users are complying with the licensing agreement. Adobe believes that the enforcement for restricting users to the limitations is vested in the amount of work people need to perform. For limited use, the enabling features in Acrobat 9 serve a need for many PDF authors. However, enterprise uses require using a form server product for more robust forms processing and data collection.
When you use Acrobat to enable forms, you are limited to the enabling features that Acrobat provides. You may have some other types of enabling features that you would like to include for Adobe Reader users. For example, you may want to spawn new pages on a PDF form. In a sense, LiveCycle Designer can spawn new pages as data flow into a document; however, Acrobat PDF forms don't have this type of dynamic feature. Using a form server from Adobe or Adobe partners, you can add additional rights such as spawning pages on your forms that can be handled by Adobe Reader users.
In the area of data collection, the Acrobat EULA limits you to collecting 500 responses per form template. Even if the EULA provided you unlimited use of enabled forms, the practicality for using Acrobat would be useless for more than about 300 responses. Acrobat would take forever to aggregate data on more than 500 form responses. To manage form data for great numbers of forms, you need a server product.
When it comes to enabling features not found in Acrobat and managing volumes of PDF forms, a forms server product is what you need. You can use Adobe's product LCRE (www.adobe.com/products/livecycle/readerextensions/) or third-party form servers such as FormRouter (http://www.formrouter.com), or other products designed to collect and route data as well as enable PDF files.
One thing to be certain of is that you won't want to let the job of routing form data be a task for your IT department. IT departments won't be able to enable forms unless they are licensed by Adobe to offer enabling features, and they won't provide you with the robust options you have with commercial products for handling data. The easiest way for you to tackle industrial jobs is to use a server product provided by Adobe or an authorized Adobe partner.
Note
For more information on form servers and LCRE, see Chapter 34.
In Acrobat 9 Standard, Pro, and Pro Extended, you can enable PDF documents with special usage rights for Adobe Reader users to save form data from forms created in Acrobat or LiveCycle Designer and apply digital signatures to those forms. Adding comments in Adobe Reader is possible if the forms are enabled in the Acrobat products, with the exception of Acrobat Standard.
Note
When enabling PDF forms for Adobe Reader users with Acrobat Standard, you must have a signature field on the form in order for a Reader user to digitally sign the form. When using Acrobat Pro or Pro Extended, you can enable a form so a Reader user can apply a signature anywhere on the form without needing a signature field.
How you go about enabling files from Acrobat is handled through menu commands or through a wizard when you distribute forms. You choose one of several methods for adding special features to PDF documents for Adobe Reader users.
Note
Adding usage rights is also handled when setting up shared reviews via a wizard.
Enabling a file for Adobe Reader users is handled via a simple menu command. In any Acrobat 9 or greater commercial viewer, select Advanced

Figure 10.1. Select Advanced
Note
If you're an Acrobat Standard user, you choose Advanced
Click Save Now, and all the features listed in the dialog box are enabled in the PDF file for Adobe Reader users. This option provides a complete set of enabling features, including the following:
Save form data (for fillable PDF form only): Adobe Reader users can add data to PDF forms containing form fields and save the edited file.
Commenting and drawing mark-up tools: The same comment and markup tools are available to Adobe Reader users as when enabling files for Comment & Markup and Review & Comment. All comments can be saved (Acrobat 9 Pro/Pro Extended).
Sign an existing signature field: Adobe Reader users can add a digital signature to a signature field on a form and save the edits.
Digitally sign the document on the page (supported in Adobe Reader 8 only): This feature, available only to users of Adobe Reader 8 and above, allows users to sign a document without the appearance of a signature file and save the edits (Acrobat 9 Pro/Pro Extended).
When you click Save Now, the file is enabled with the usage rights. Forms authors might use this menu command to e-mail a form to a client, to use a form for in-house usage such as HR or accounting forms, or to add a form to a PDF Portfolio.
If you want to distribute forms and collect data from form recipients, you can waive this step in your editing workflow. When you set up forms for distribution, the wizards you use in Acrobat add the enabling features when you distribute a form.
It's not very likely that you'll use the enabling for commenting feature often as a PDF author. Enabling forms for commenting cannot be performed in Acrobat Standard, and you don't need to enable files separately for commenting and for form saves. Using the Advanced
You may have some isolated needs for enabling a form for commenting. If you need to have approval for a form design from other departments or coworkers in your company, but you don't want any Reader users to save the data from, you could send a form out for a comment review. However, if a form needs to be tested before deployment, you'll want all the enabling features for forms added to a document before sending it out for review.
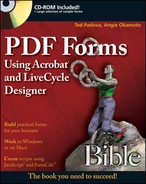
If a rare occasion exists when you want only commenting enabled for Adobe Reader users, then choose Comments
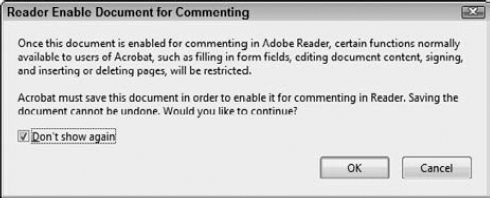
Figure 10.2. Choose Comments
Click OK in the application alert dialog box, and a Save As dialog box opens. Type a new name for your file to avoid overwriting the original, and click Save. The PDF is now enabled with Adobe Reader usage rights for commenting and markup.
When an Adobe Reader user opens the enabled PDF document, the Comment & Markup tools are accessible. You can add the same kinds of comments as you can with either Acrobat Standard or Acrobat Pro. After adding comments, the Reader user also has access to a File
As a general rule, messages and notes can be used in application alert dialog boxes rather than using comment notes. Notes and comments can clutter a form, and they add a little more to the file size. But sometimes you may want to have comment tools available to users. One good example is using a Stamp comment. You can use a variety of comment stamps that Acrobat provides, or you can create custom stamps to suit your own needs. If you want Adobe Reader users to add stamp comments to a form, all Reader users of Adobe Reader 7.5 and above can add stamp comments to forms enabled with Reader usage rights.
Custom stamps can add a little benefit to form approvals. A quick glance at a form immediately tells you if a form has been approved or meets some other condition. Acrobat has a number of preset stamps that can be used for approval, signing, initialing, marking completed, for public release, and so on.
To view stamps, you need to open the Comment & Markup toolbar. Choose Tools

Figure 10.3. Open the Stamps pull-down menu, and choose a category. A submenu displays stamps available from the selected category.
If one of the preset stamps from the different menus doesn't meet your needs, you can create a custom stamp. Custom stamps can be created from any file you can convert to PDF using the File
To create a custom stamp, try following these steps.
Note
You can use any file you can convert to PDF for a custom stamp. If you don't have a file handy, use the globalStampSigned.pdf file contained in the Chapter 10 folder on the book's CD-ROM.
STEPS: Creating a Custom Stamp
Open the Comment & Markup toolbar in Acrobat. Choose Tools

Select an image for the custom stamp. From the Stamp tool pull-down menu, choose Create Custom Stamp. The Select Image for Custom Stamp dialog box opens. Click the Browse button, and locate a file you want to use as a custom stamp. You can choose any file that Acrobat can convert to PDF. When you select the file and click Select, you return to the Select Image for Custom Stamp dialog box. A preview of your stamp appears in the Sample window in the Select Image for Custom Stamp dialog box, as shown in Figure 10.4.
Select a category for the new stamp. Click OK in the Select Image for Custom Stamp dialog box, and the Create Custom Stamp dialog box opens. Here you can choose a category to organize your custom stamps or create a new category. If you want a new category to store the stamp in, type a name for the category in the Category text box. In our example, we added a new category name, and typed My Stamps in the Category text box, as shown in Figure 10.5. If you want to use an existing category, open the pull-down menu adjacent to the Category text box and choose one of the existing categories.
Name the stamp. Type a name for the new stamp in the Name text box. In our example, we typed Global Stamp in the Name text box, as shown in Figure 10.5. Click OK, and you return to the document pane.

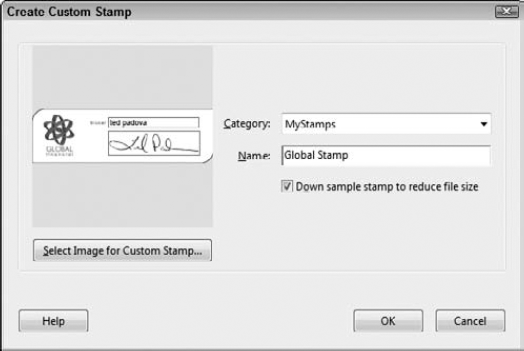
At this point, your new stamp is available from the Stamp tool pull-down menu. If you added a new category, the stamp appears in a submenu off the category name, as shown in Figure 10.6. You click the stamp from the submenu, and the cursor is loaded with the selected stamp. Click anywhere on the page, and the stamp is added to your form.
After you add a custom stamp to the Stamp pull-down menu, it's a matter of selecting the stamp and clicking on a form. If you followed the steps to add a custom stamp, do the following to apply your new stamp to a form.
Note
For these steps, we use the generalApplication.pdf file in the Chapter 10 folder on the book's CD-ROM.
STEPS: Adding a Stamp to a Form
Open a file where you want to add a custom stamp. In our example, we use the generalApplication.pdf file on the book's CD-ROM. The design of this form displays an area at the top-right of the first page where a stamp should be applied.
Select a stamp. Open the Stamp pull-down menu, and choose the category where the stamp is stored that you want to add to the form. In our example, we opened the My Stamps custom category we added to the Stamps menu. From the submenu, click the stamp you want to use. In our example, we clicked the Global Stamp.
Add the stamp to the form. When you select a stamp, the cursor is loaded with the selected stamp, much like you load the cursor with Form tools in Form Editing Mode. Move the cursor to the area where you want to add the stamp, and click to drop it on the form.
Resize the stamp. When a stamp is added to your form, the stamp appears with handles on the bounding box. Click a handle, and drag in or out to size the stamp.
Add a comment note. Stamps are comments. Each stamp has an associated comment note. To open the note pop-up window, double-click the stamp. When the note pop-up opens, type a message in the window, as shown in Figure 10.7.
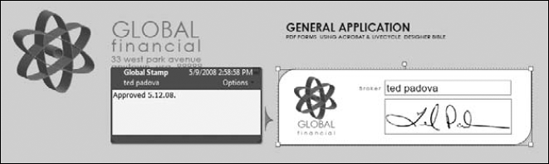
Figure 10.7. Double-click the stamp to open a pop-up note window. Click the cursor in the note window, and type a message.
When you create custom stamps, try using vector art files such as those you can create in Adobe Illustrator. If you want to size a stamp after adding it to a form, vector art files appear crisp and without any resolution loss at any size. If you want to use raster images such as Adobe Photoshop files for photographic images, sizing the stamps up eventually pixelates the image. If you want to use raster images, try to anticipate the largest size you might size the stamp up. Use a resolution that won't fall below 72 pixels per inch (ppi) for screen displays. For example, if you intend to size a stamp up 400 percent, you need to create a stamp at 288-ppi. As you size the stamp up, the resolution drops. Hence, a 288-ppi stamp sized up to 400 percent renders a 72-ppi image (288/4 = 72).
Another menu command you can use to enable PDF documents is the Distribute Form command found in either Form Editing Mode or in Viewer mode. Choose Forms from either menu, and choose Distribute Form. Additionally, you have a button for Distribute Form in the Form Edit toolbar. Choose either menu option or click the Distribute Form button, and the Distribute Form wizard opens, as shown in Figure 10.8.
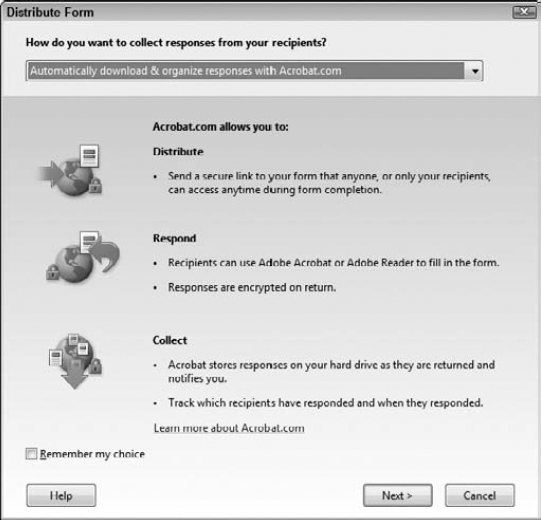
Figure 10.8. Choose a command or click the Distribute Form button in Form Editing Mode to open the Distribute Form wizard.
If you use Acrobat 8, you also can distribute a form via a menu command in the Forms menu or by clicking the Distribute Form tool in the Forms toolbar. Users of Acrobat earlier than version 8 do not have the same choices for distributing forms.
You have several options for distributing forms. Regardless of the option you choose, the form is enabled for Adobe Reader users when you complete the last step in the wizard.
Note
We cover more on distributing forms in Chapter 15. For now, be aware that you have the option for enabling forms for Adobe Reader users when choosing the Distribute Form command.
When you open an Adobe LiveCycle Designer form in Acrobat, you have very limited editing opportunities. However, adding Reader extensions via the Comments menu and the Advanced menu is not restricted in Acrobat. You can enable forms, and you can distribute forms. You cannot enable a form with Reader Extensions directly in Adobe LiveCycle Designer, per se. You can select File
When you enable a form using the Comments
Note
For more information on Adobe LiveCycle Designer, see Parts VI through IX. For more information on using digital signatures, see Chapter 12.
Occasionally, you may enable a PDF document using any one of the enabling options available in Acrobat and then later decide you want to edit the file. When you enable a PDF document and try to edit it in Acrobat, an application alert dialog box opens, as shown in Figure 10.9.
The best way to handle editing forms is to always save a backup copy of your original form before deployment. If you enable a PDF and later want to modify the form before sending it to recipients or hosting the form on a Web server, you can return to the original un-enabled form. Perform your edits and save the original, and then enable the final form while saving under a new filename.
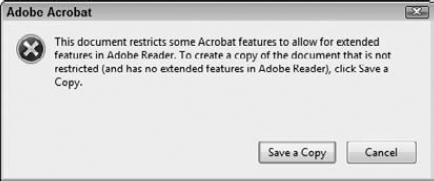
Figure 10.9. If you try to edit an enabled file in Acrobat, an alert dialog box opens informing you that you can't edit the file.
At times, the dialog box shown in Figure 10.9 that opens when you try to edit an enabled form becomes annoying when modifying the form. Additionally, sometimes you can find some problems associated with files that have been saved as copies after enablement. To guard against potential problems and save yourself some aggravation, always keep a backup of the original form.
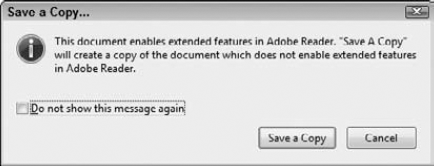
To edit an enabled file in Acrobat you first need to save a copy of the document. When you open non-enabled forms, the File menu lists commands for Save and Save As. When you open an enabled file in Acrobat, you find the commands Save, Save As, and Save a Copy. The addition of the Save a Copy command is unique to enabled forms, and only this command will remove the restrictions applied when the PDF was enabled. The usage rights are removed when you save a copy, so after editing you need to re-enable the form.
Select File
You'll find that most of the kinds of editing you typically perform on a form aren't available with enabled documents. Items such as changing any of the Document Properties (Description, Security, Initial View, Custom, and Advanced), adding headers and footers, changing backgrounds, adding comments, editing form fields, and changing JavaScripts are all unavailable to you when working on an enabled PDF form. To edit any of these items, select File
When you create PDF Portfolios, you may want to enable a PDF document with Adobe Reader usage rights or edit an enabled PDF document after you create the portfolio.
PDF Portfolios are available in Acrobat 9 and take the place of PDF Packages introduced in Acrobat 8. In Acrobat 8, you worked within the Acrobat User Interface (UI) to edit and manage files within a PDF Package. In Acrobat 9, the UI changes, and you lose access to many of Acrobat's tools and menus when viewing files in the basic layout interface.
To change the view of a file from the layout view to a document view within the PDF Portfolio interface, double-click the file. The form opens, but it's still within the PDF Portfolio in a Preview mode interface shown in Figure 10.11. When you view files outside the layout view, you have access to the menu commands for enabling the file. Acrobat makes it easy for you to enable files within the PDF Portfolio. When you choose an enabling command from either the Comments menu or the Advanced menu and save your file, you're not prompted to type a name or browse your hard drive. The file is enabled without any fuss.
If you use Acrobat 8 and PDF Packages, you need to enable a file and then replace the original file with the enabled file. Unlike PDF Portfolios, Acrobat opens a Save As dialog box when enabling forms within PDF Packages. When you click Save, the file is saved as a new file while the original file within the PDF Package remains unaltered. You then need to choose Document
Note
For more information on replacing pages, see Chapter 4. For more information on using PDF Portfolios, see Chapter 13.

Using batch sequences provides you a means for automating certain editing tasks. Several batch sequences are available from preset options that you can use with forms, and you can create custom sequences by writing JavaScripts. Although you don't have a batch sequence for enabling forms, we tossed in using batch sequences in this chapter as it relates to comments and several other batch sequence commands available for working with forms.
Batch sequences are available only in the Acrobat Pro and Pro Extended products. You won't find batch sequences in Acrobat Standard.
You set up a batch sequence by choosing Advanced
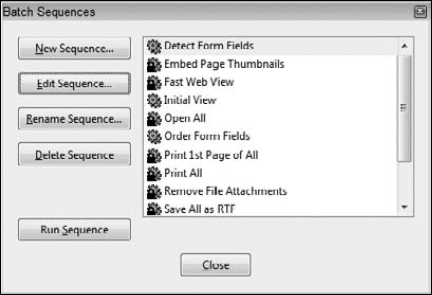
Figure 10.12. Choose Advanced
In this chapter, we talked about adding comments to forms. If you add comments and later want to delete comments from forms, you can use a batch sequence to delete all comments on forms within a folder on your hard drive. The batch sequence is run without the files open in Acrobat, thereby saving you much editing time. To see how a batch sequence is created for the purpose of deleting comments, do the following.
STEPS: Creating a New Batch Sequence
Choose Advanced
Document ProcessingBatch Processing. The Batch Sequences dialog box opens.Create a new sequence. Click New Sequence in the Batch Sequences dialog box. The Name Sequence dialog box opens. Type a name for your sequence, and click OK. In our example, we typed Delete Comments in the Name Sequence dialog box.
Select commands. The next dialog box that opens is the Edit Batch Sequence – (name of sequence) dialog box. In our example, the title of the dialog box is Edit Batch Sequence – Delete Comments. The last part of the dialog box title uses the name you typed in the Name Sequence dialog box.
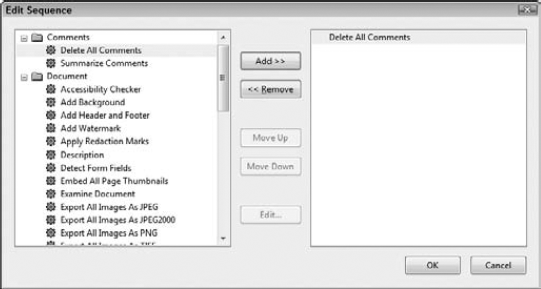
Click the Select Commands button, and the Edit Sequence dialog box opens. In this dialog box, you select from the list of preset commands in the list window on the left. In our example, we choose Delete All Comments, as shown in Figure 10.13. After a command is selected in the left list window, click the Add button to move the command to the right window.
Define the run conditions. Click OK, and you return to the Edit Batch Sequence – (name of sequence) dialog box. You have two more choices to make. From the Run commands on the pull-down menu, choose a menu item to run the sequence. Your choices are to run the sequence on Selected Files, Selected Folder, Ask When Sequence Is Run, and Files Open in Acrobat. These choices should be self-explanatory.
The second item to address is selecting the output options. From the Select output location options pull-down menu, choose Specific Folder, Ask When Sequence Is Run, Same folder as originals, or Don't Save Changes. The last item among these choices is one you might choose if you run a sequence on files open in Acrobat and want to check the files after running the sequence before saving them.
Choose Output Options. In the Output Options dialog box, you have choices for file naming, using the PDF Optimizer, and export formats. Make choices in this dialog box, and click OK.
When you click OK, you return to the Batch Sequences dialog box, and your sequence is ready to run. Click the Run Sequence button, and the sequence is run on the files you selected and saved according to the options you chose for the output. In terms of deleting comments, we could delete comments from an entire folder of files without having to open each file separately.
Note
For more information on using the PDF Optimizer, see the section "Using the PDF Optimizer" later in this chapter.
Deleting comments is but one of several sequences you might choose to use on PDF forms. Other presets help you perform some automated tasks that can help you batch process folders of files. You find the preset options all listed in the Edit Sequence list window. If you don't find a sequence listed in the window that you want to use on forms, you can write custom JavaScripts.
The PDF Optimizer enables you to reduce files sizes and clean up documents by eliminating unnecessary information to reduce file sizes. You can downsample images, remove hidden text, and perform cleanups on forms to get the file sizes smaller. PDF forms authors might use the PDF Optimizer to repurpose files that were prepared for commercial printing.
Whereas commercial printing requires high-resolution image files, viewing forms onscreen requires much lower resolution images. You can use the PDF Optimizer to downsample high-resolution images that can significantly reduce file sizes. If your form recipients will be downloading forms from Web sites, you'll want to minimize the download time by keeping your forms small in file size.
A built-in preset for optimizing files is handled by clicking the Output Options button in the Edit Sequence – (name of sequence) dialog box. Click Output Options, and the Output Options dialog box opens. In this dialog box, you find a direct link to the PDF Optimizer. Check the PDF Optimizer box, and click Settings to open the PDF Optimizer, as shown in Figure 10.14.

Note
You also can open the PDF Optimizer by choosing Advanced
The PDF Optimizer has a list of items on the left side of the dialog box similar to the Preferences dialog box. Click an item in the left list, and the pane on the right changes. In Figure 10.14, the Discard Objects pane is open. One item you find in this pane is the Flatten form fields option. If Flatten form fields is checked and you run the PDF Optimizer, the form fields are removed from the file while the data contained in the form fields are retained. You might use this feature to get rid of form fields on a form with many columns and rows to post results on a Web page.
When form fields are eliminated from a form, the file size can be reduced considerably. However, if you repurpose a form to reduce the file size or use other settings in the PDF Optimizer, be certain to disable the check mark for forms you intend to distribute. If you lose the field objects, form recipients can't fill in your forms.
Another item you find in the PDF Optimizer is the Make compatible with pull-down menu. The default is Retain existing, which is used to preserve the compatibility of the files you optimize. From this menu, you have choices to change the Acrobat compatibility to versions 4 through 9.
When a form recipient opens your Acrobat 9 forms in a version of Acrobat earlier than 9.0, a dialog box opens informing the user that the form was created in a newer format than the version used that opens the file. Also in the application alert dialog box is a recommendation that the user upgrade to a newer version of Acrobat, as shown in Figure 10.15. This warning is a good thing because it informs users that they should look into upgrading to newer versions of Acrobat/Reader that can take advantage of features in newer viewers.
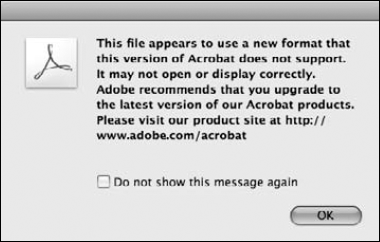
Figure 10.15. When form recipients open PDF documents that were created in versions later than the form recipient's version of Acrobat, a dialog box recommends the user upgrade to a newer version of Acrobat.
In some enterprises, users are at the mercy of IT departments and decision makers who control the versions of the software you use. Employees may not have the luxury to routinely upgrade software until approved by management. If you know that form recipients need to work in an earlier version of Acrobat than the version you use, you can change the compatibility in the PDF Optimizer. When you save the file from the PDF Optimizer in an older format compatibility, the dialog box won't appear when form recipients use a version of Acrobat or Adobe Reader equal to or greater than the compatibility settings you chose when you optimized the file.
You must thoroughly test any forms you optimize in earlier versions of Acrobat/Reader to be certain everything on your form works. There are settings and edits you can make in one version of Acrobat that won't be accessible in earlier versions.
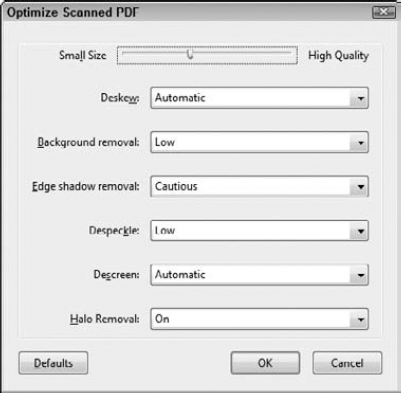
Another built-in batch sequence you find in the Edit Batch Sequence dialog box is the Optimize Scanned PDF setting. Choose this option, and add it to the list on the right in the Edit Sequence dialog box. When you double-click the item after adding it to the right pane, the Optimize Scanned PDF dialog box opens. Here you can make some adjustments to improve scanned forms, such as adjusting file size, removing halos, de-skewing the scans, removing edge shadow, and more, as shown in Figure 10.16.
Another preset found in the Batch Sequences dialog box is the Detect Form Fields item. This choice is the same as opening a file in Form Editing Mode, where Acrobat uses auto field detection to populate a form.
You could set up a workflow where you add the Optimize Scanned PDF item, add another item also found in Batch Sequences – Recognize Text Using OCR, and then add the Detect Form Fields item. The order of the options should follow the same order noted here. You first polish up a scanned image, then use Acrobat's OCR engine, and finally detect fields.
Note
Using Detect Form Fields requires PDF forms to have text in the document. If you scan a form, the scanned document is an image file. You always need to use Recognize Text Using OCR if you want the Detect Form Fields command run on a scanned form. Be certain to add the Recognize Text Using OCR first, followed by Detect Form Fields if you are converting scanned image files to PDF forms.
As you create sequences, note that you can nest the settings in a list order in the right window in the Edit Sequence dialog box. The order you see in the list window is the same order in which the actions are run.
Note
For more information on using auto field detection, see Chapters 5 through 7. For more information on scanning paper forms and using OCR, see Chapter 6.
The last item pertaining to form editing in batch sequences is the Order Form Fields item. Use this option to change the tab order on multiple files. If you know ahead of time that the tab orders are scrambled, run a sequence for changing the tab order.
Note
For more information on setting tab orders, see Chapter 7.
The preset sequences can be a huge help to forms authors when a sequence exists to help you speed up your form editing. However, sometimes you won't find a preset listed in the batch sequences that serves your needs. If this is the case, you might be able to write a JavaScript to perform the action you want run on multiple files in a folder.
As an example, let's look at adding a stamp comment to a folder of files. For this kind of action, you need to create a custom sequence command using a JavaScript. To add a custom JavaScript to a batch sequence, follow these steps.
STEPS: Creating a Custom Batch Sequence
Chose Advanced
Document ProcessingBatch Processing. The Batch Sequences dialog box opens.Add a new sequence. Click New Sequence, and name the sequence when the Name Sequence dialog box opens. Click OK, and the Edit Batch Sequence dialog box opens.
Select a command. Click Select Commands to open the Edit Sequence dialog box.
Add the Execute JavaScript command. Scroll the list of commands, and click Execute JavaScript. Click the Add button to move the command to the right window.
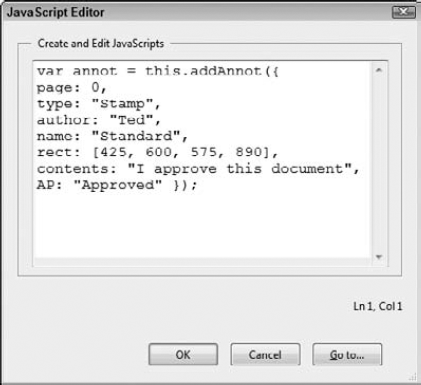
Write a JavaScript. Double-click the Execute JavaScript command in the right window, and the JavaScript Editor opens. Type the following code in the JavaScript Editor.
1. /* adds a stamp to the first page */
2. var annot = this.addAnnot ({
3. page:0,
4. type: "Stamp",
5. author: "Your Name",
6. name: "Standard",
7. rect: [400, 700, 600, 790],
8. popupOpen: false,
9. contents: "First Approval",
10. AP: "Approved"});
Exit the JavaScript Editor. Click OK to return to the Edit Sequence dialog box. Click OK and OK again to return to the Batch Sequences dialog box.
Note that the line numbers in the code are not used when you write a JavaScript. The script should be written similar to what you see in Figure 10.17. The code in this script uses a Stamp comment and adds the Approved stamp from the Standard Business stamps. The contents item adds the text within the quote marks in a pop-up note. When you run the script on a folder of files, you add the same stamp to all files in the folder. The location of the stamp on the form is defined by the coordinates described in line 7.
If you want to use a custom stamp in a batch sequence, your easiest way to handle it is to open your Acrobat folder and locate the Standard Business Stamps file. On Windows, the path is Acrobat 9.0/Acrobat/plug_ins/Annotations/Stamps/ENU/ (where ENU is the English installation of Acrobat).
On the Macintosh, you need to open a context menu on the Adobe Acrobat Pro application icon found in the Adobe Acrobat 9 Pro folder in your Applications folder. From the context menu commands, choose Show Package Contents. The path you follow to open the Stamps folder is Contents/Plug-ins/Comments.acroplugin/Stamps/ENU (for English language installations).
Be sure to back up this file on your hard drive. Move the file out of the folder, and open it in Acrobat. You have 14 stamps in this file. Choose a stamp that you're not likely to use, and choose Document
When you write a JavaScript, use the original name for the stamp. For example, if you replace the Approved stamp, use Approved in the JavaScript code as we described in the steps for creating a custom batch sequence. When you run the sequence, your custom stamp is added to the selected files.
Note
For more information on JavaScript, see Part V and Chapter 29.
PDF documents can be enabled with special features for Adobe Reader users in version 9 of Acrobat Standard, Acrobat Pro, and Acrobat Pro Extended that enable Adobe Reader users to save form data and add digital signatures.
Only Acrobat Pro and Pro Extended can enable files for comment and review.
Adobe LiveCycle Designer forms are enabled in Acrobat.
When you distribute a form, Acrobat enables the form with Reader usage rights in a wizard.
Licensing restrictions do apply with adding special features to PDF files for Adobe Reader users.
Form servers are used to add more features to PDF forms and aggregate data on more than 500 responses.
In order to edit an enabled form, you need to save a copy and edit the copy that has been stripped of the enabling rights.
PDF files can be enabled for Reader usage rights from within PDF Portfolios.
Some commenting features can be used by forms authors. One of the more useful comment tools for forms authors is the Stamp tool.
You can create custom stamps from any file supported by Acrobat for PDF creation.
Batch sequences are helpful for automating tasks for forms authors.
You can change Acrobat compatibility and save forms in earlier compatible versions of Acrobat from the PDF Optimizer.
You can choose from a number of preset commands designed to work with forms to create batch sequences.
Custom batch sequences are created with JavaScripts.