
The chapters ahead cover many things you need to know to become a real PDF forms specialist. But now it's 4:45 p.m. on a Wednesday afternoon, and the boss wants you to hand over a fillable form to the IT department for hosting on the company's Web site. You have 15 minutes before jumping in the car, speeding home to make dinner, and trying to get a little recreational time before you face another day's work. Can you do it?
Fortunately, you've picked just the right tool whether it be Adobe Acrobat Standard, Acrobat Professional, or Acrobat Professional Extended on Windows or Adobe Acrobat Professional on the Macintosh. You also picked the right book because we'll show you how to create that form in just 15 minutes with time to spare.
The first thing you need to do to begin your tour of Acrobat Forms is to start with a PDF file. All documents you open in any Acrobat viewer, including the free Adobe Reader software, begin with an authoring application document that is converted to a PDF file. Your favorite authoring tool can be used to construct the layout and look of your form designs, and from there you convert your file to a PDF document.
If you're starting with a Microsoft Office program, the process of converting the original Office document to a PDF file is made very easy after you install Adobe Acrobat. All Office programs include a button, installed by Adobe Acrobat, to convert your Office document to a PDF file.
If you're using Office 2007, click the Acrobat tab in the Ribbon, and the Ribbon changes to show all the options you have for working with PDF documents, as shown in Figure 1.1.

Figure 1.1. Click the Acrobat tab in the Ribbon, and the Ribbon displays options for creating Adobe PDF files.
To convert to PDF, click the Create PDF button on the far left side of the Ribbon. The Save Adobe PDF File As dialog box opens. Locate the target folder where you want to save your PDF document, and click Save.
If you're using Office 2003, you have similar options using a Create Adobe PDF button. Just click the button, and save the file as a PDF document.
Note
Windows users don't need to convert Office documents to PDF when creating a form. You can use Acrobat's Start Form Wizard command and convert native file documents when creating a PDF form. On the Macintosh, you need to start with a PDF document.
On the Macintosh, choose File
After you convert a document to a PDF document, it's time to add form fields in Adobe Acrobat. Acrobat enables you to add form fields automatically via a menu command or add fields by manually drawing field objects on a page. In Acrobat 9, you perform all your form editing work in the new Acrobat 9 Form Editing mode.
To open Form Editing mode and add fields to your form, follow these steps.
Note
The book's CD-ROM contains all the files you need to follow the steps in this book. Open the Chapters folder, and inside the Chapters folder, open the Chapter01 folder. To follow the steps here, open the seminar.pdf file.
STEPS: Adding Field Objects to a Form
Open the form in Acrobat (Standard, Pro, or Pro Extended).
Note
Windows users can select a native Office document and choose the Start Form Wizard command to convert to PDF and edit a new form.
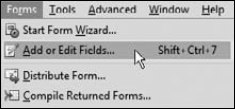
Open the PDF in Form Editing mode. Choose Forms

Auto Field Detection. As the form opens in Form Editing mode, a dialog box prompts you to have Acrobat automatically detect fields on your form. Click Yes, and Acrobat detects areas on your form and adds appropriate fields.
Review the field objects created by Acrobat. A Welcome to Form Editing Mode dialog box opens, providing some information about form editing. Click OK in the dialog box, and look over the field objects created by Acrobat. In our example, Acrobat created all field objects perfectly. However, two fields added to the form were non-usable, as you can see in Figure 1.3.
Delete all unwanted field objects. In our example, two fields on the form need to be deleted. Click the fields (refer to Figure 1.3), and press the Delete/Backspace key.
View the form in Viewer mode. When you edit a form, you enter Form Editing mode. All other work you perform in Acrobat is handled in a mode we refer to in this book as Viewer mode. To exit the Form Editing mode and change to the Viewer mode, click the Close Form Editing button in the top-right corner of the Form Editing mode workspace.
Save the form. Choose File

Note
There's an art to using Acrobat's auto-field detection features, knowing when to use them and when not to use them. For more information, look over Chapters 5 through 8.
One field object still needs to be added to our example form: a button for a user to click to submit form data. Although you create forms in Form Editing Mode, you don't need to return to the mode if you want to add a button field. You can remain in Viewer mode when you need to add a button field to a form. To add a button field, do the following.
STEPS: Adding a Submit Form Button to a Form
Open the Advanced Editing toolbar while in Viewer mode. If the Advanced Editing toolbar is not open, open a context menu on the Toolbar Well and choose Advanced Editing or open the Tools menu, choose Advanced Editing, and choose Show Advanced Editing Toolbar.
Select the Button tool. Open the Add New Field pull-down menu, and choose Button. The cursor is loaded with the Button tool.
Tip
If you don't have the Advanced Editing toolbar open and you want to select one of the tools such as the Button tool, you can choose Tools
Add a button to the form. Move the cursor to the Submit Form button design on the page, and click in the top-left corner of the button graphic.
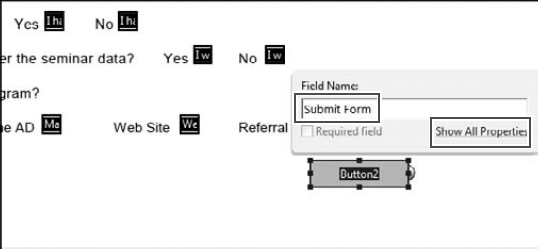
Name the field. A mini Properties window opens. Type a name for the button field in the Field Name text box, as shown in Figure 1.4.
Open the Properties dialog box. Click Properties in the window shown in Figure 1.4. The Button Properties dialog box opens. The default tab in the Button Properties dialog box is General.
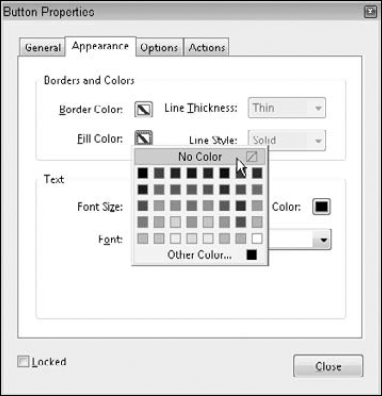
Change the button appearance. By default, button fields have a gray fill. Because our form design has a graphic for the Submit Form button, we don't need to add any appearance properties such as a border or fill color to the field. Click the Appearance tab, and click the Fill swatch. From the pop-up color palette, click No Color, as shown in Figure 1.5.
Add an Action. The purpose of this button is so users can submit data back to you. For this, we need to assign an action to the button. Click the Actions tab, and choose Submit a form from the Select Action pull-down menu, as shown in Figure 1.6. Click the Add button to add the action.
Define the Submit Form attributes. When you click the Add button, the Submit Form Selections dialog box opens. At the top of the dialog box, enter mailto: followed by your e-mail address, as shown in Figure 1.7. Click the radio button beside PDF The complete document, and click OK to set the action to submit the form back to you.
Close the Button Properties dialog box. After clicking OK in the Submit Form Selections dialog box, you are returned to the Button Properties dialog box. Click Close in this dialog box.
Save the form.
Note
You have many options for changing field Properties. For an in-depth look at all the properties options for each field type, see Chapter 9.
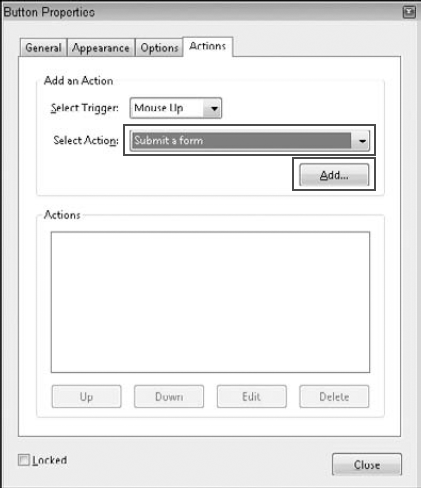
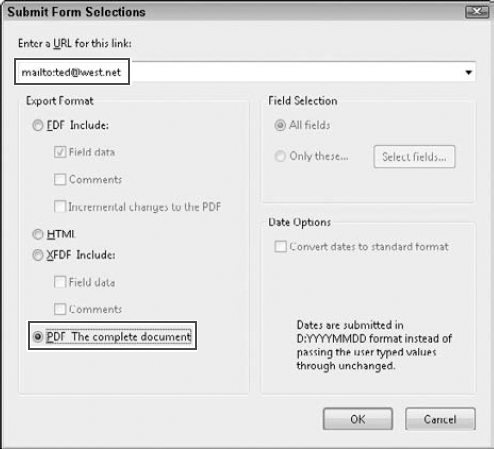
Figure 1.7. Add mailto: followed by your e-mail address, and click the PDF The complete document radio button.
After saving the form, be sure to test the form by filling in the field objects with data. Fill in the form like a form recipient would populate your form, and test it to be certain that all field objects are properly formatted.
Our sample form is almost ready for deployment, but one feature is still needed if your forms are to be filled in by an Adobe Reader user.
An ordinary PDF document cannot be edited in Adobe Reader, and form data, by default, cannot be saved by the form recipient using Adobe Reader. Furthermore, a PDF document cannot be submitted back to you with data from an Adobe Reader user without adding special features to the PDF document.
Using Acrobat viewers, you add special features to a PDF file that permit an Adobe Reader user to save form data, add a digital signature, and submit the entire PDF document back to you.
To add special features to a PDF for these purposes, choose Advanced

Tip
When you click Save Now in the Enable Usage Rights in Adobe Reader dialog box, a Save As dialog box opens that enables you to modify the filename and locate a target folder for your saved file. We like to add an extension to the filename to keep the enabled file separate from the original form—something like: seminar_enabled.pdf where _enabled is added to our original filename. If you need to edit a form later, you can't edit an enabled file, and Acrobat prompts you to save a copy of the form before editing it. By keeping the original file unenabled, you can always return to it, edit the form, and re-enable the form.
If you followed the steps throughout this chapter and create a form, form recipients would be e-mailing the form back to you. As you collect forms from your e-mail attachments, save the forms to a common folder. After you collect all the returned forms, you may want to assemble the data in a more appropriate format, such as a Microsoft Excel spreadsheet.
To aggregate data from several forms, follow these steps.
Note
To follow these steps, use the files in the completedForms folder inside the Chapter 01 folder on the book's CD-ROM.
STEPS: Merging Data into Spreadsheets
Save all collected forms to a common folder with each filename having a unique name. When you collect the forms from your e-mail attachments, you need to rename the forms so each form has a unique name.
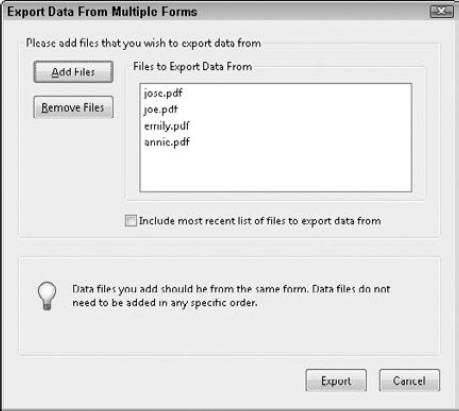
Add files to merge. Choose Forms
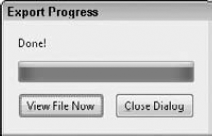
Export the data. After adding the files for the data merge, click Export. Pause a moment for Acrobat to complete the export. The Export Progress dialog box displays the progress and reports Done when finished, as shown in Figure 1.10.
View the data in a spreadsheet. Click View File Now, and your aggregated data appear in a new Excel worksheet window, as shown in Figure 1.11.

Note
You can deploy PDF forms in many ways. In addition to sending files via e-mail and hosting forms on a Web server, you can take advantage of the Acrobat.com service for hosting forms, collecting data, and tracking forms, as we explain in Chapter 15.
After you combine the data from the distributed forms, you can sort and rearrange columns and rows in Excel to organize the data according to your needs. In our example, we created a form for a free seminar. We can sort the data according to seminar dates and print lists that we can use to check off people as they register at the event.
It's now 4:55 p.m. and you have 5 minutes to spare. Your form is ready for deployment. Hand it over to the IT department, and you've finished your work for the day.
If all you want to do is to create simple forms, use Acrobat's automatic field recognition capabilities, and aggregate data into Excel worksheets, you're finished with this book. The rest of the pages can be used as a paperweight.
However, if you're willing to travel on a journey with us and experience all the possibilities that Adobe Acrobat and Adobe LiveCycle Designer offer you for creating dynamic interactive forms, add scripts for enhancing your forms, merge data to back-end databases, and so much more, then read on. After all, this is a Wiley Bible. It's complete, it's comprehensive, and it's your ultimate resource for working with Acrobat Forms and LiveCycle Designer XML forms.
Go home now. Come back in the morning to talk to Miyagi.
PDF forms begin with a document created in an authoring program. The original authoring documents are converted to PDF and edited in Adobe Acrobat to populate forms with field objects.
You can open many forms in Acrobat and use Acrobat's automatic field recognition features to populate a form with field objects.
Forms are edited in Form Editing mode. Other Acrobat editing occurs in Viewer mode.
You add fields manually in Form Editing mode by choosing form tools from the Add New Field pull-down menu.
Form recipients using Adobe Reader need to work with forms that carry special features for Adobe Reader. Enabling a PDF file with special features is handled via a menu command in Acrobat.
Data from populated forms can be aggregated into spreadsheet applications.