In this lab, you have the opportunity to practice several ways of serving up content that's free from the traditional bulleted-list structure.
You are creating slides for a computer technology teacher to use in a class on PC hardware. The lecture she is preparing for involves safety issues when working on a PC.
In this lab session, you create a set of starbursts and use them as text boxes.
Level of difficulty: Moderate
Time to complete: 10 to 20 minutes
Open the file Lab1A.pptx from the Labs folder (from the CD) and save it as MyLab1A.pptx.
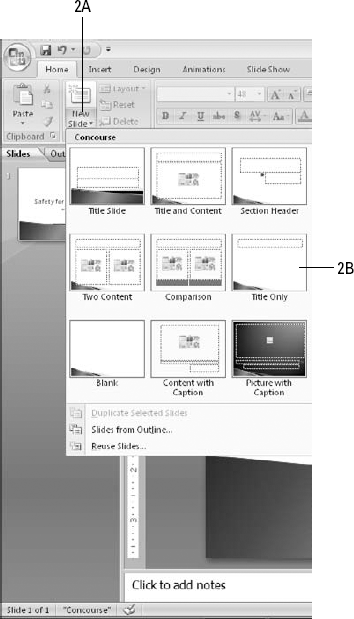
Insert a new slide that uses the Title Only layout.
On the Home tab, click the down arrow below New Slide.
Click Title Only.
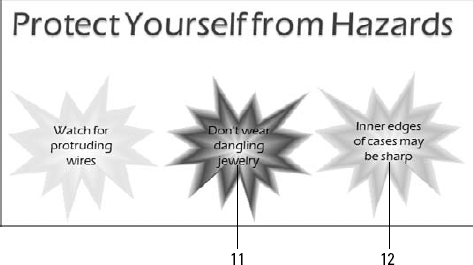
In the title box, type Protect Yourself from Hazards.
Draw an Explosion shape on the slide.
On the Insert tab, open the Shapes gallery and choose Explosion 1 from the Stars and Banners section.
Drag on the slide to create the shape (any size).

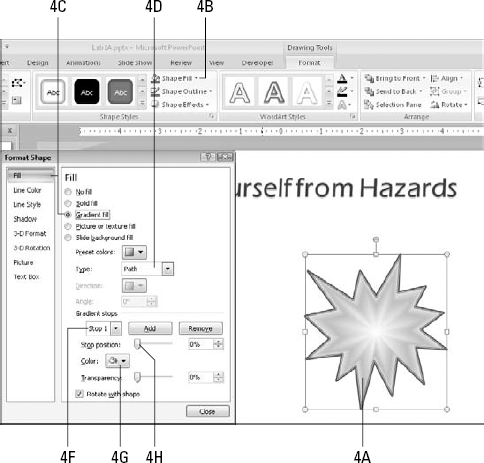
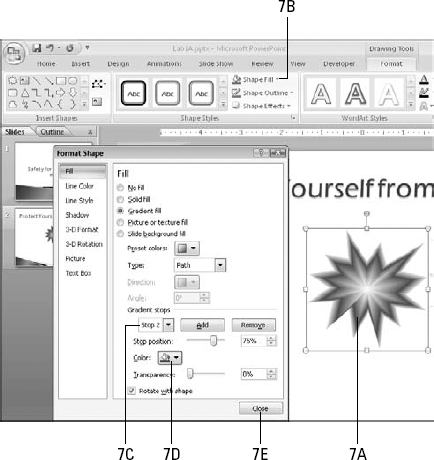
Apply an orange and white Path gradient to the shape and remove the outline.
Click the shape to select it.
On the Drawing Tools Format tab, open the Shape Fill buttons menu and select Gradient

Click Fill, and then click Gradient Fill.
Set the Type to Path.
In the Gradient Stops section, open the Color buttons menu and choose white.
Open the Gradient Stops list and choose Stop 2.
Open the Color buttons menu and choose the bright orange Standard color.
Drag the Stop Position slider to 75%.
Click the Line Color category at the left.
Click No Line.
Click Close.

Size the shape to 3" X 3" and position it below the word Hazards.
Click the shape to select it.
On the Drawing Tools Format tab, in the Size group, set the Height and Width values to 3" each.
Drag the shape so that it is about 1/2 inch below the word Hazards and centered beneath it horizontally.

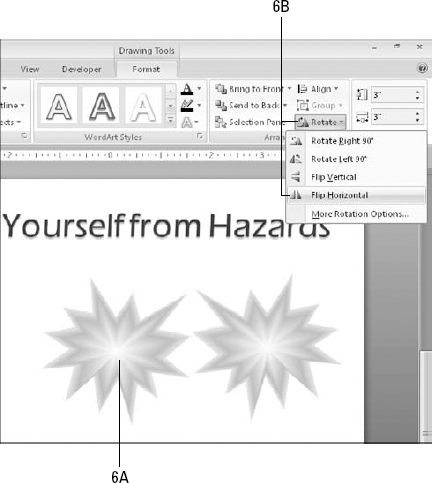
Create a copy of the shape, and flip it horizontally.
Hold down the Ctrl key and drag the shape to the left, creating a copy next to the original.
On the Drawing Tools Format tab, click Rotate, and click Flip Horizontal.
Modify the gradient for the copy so that it uses bright red instead of orange.
Select the copy you just made.
Open the Shape Fill buttons menu and choose Gradient
Open the Gradient Stops menu and choose Stop 2.
Open the Color buttons menu and choose the bright red Standard color.
Click Close.
Create a copy of the orange shape, and place it to the left of the red shape.
Hold down the Ctrl key and drag the shape to the left of the red shape.
Modify the gradient for the new shape so that it uses bright yellow instead of orange.
Select the shape.
Open the Shape Fill buttons menu and choose Gradient
Open the Gradient Stops menu and choose Stop 2.
Open the Color buttons menu and choose the bright yellow Standard color.
Click Close.

In the yellow shape, type Watch for protruding wires and change the text color to black.
Click the yellow shape.
Type Watch for protruding wires. The text appears in white.
Select the text you just typed.
On the Drawing Tools Format tab, in the WordArt Styles group, click Text Fill and change the text to the black swatch in the color theme.

In the red shape (center), type "Don't wear dangling jewelry" and change the text color to black.
In the orange shape (right), type "Inner edges of cases may be sharp" and change the text color to black.
Apply custom animation so that each shape pinwheels in individually when you click the mouse.
Select the yellow shape.
On the Animations tab, click Custom Animation.
Click Add Effect.
Click Entrance.
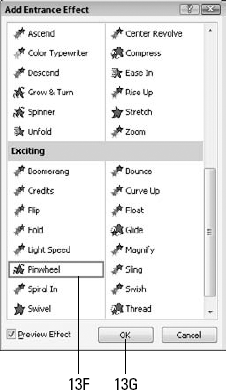
Click More Effects.

In the Add Entrance Effect dialog box, choose Pinwheel.
Click OK.
Apply the same pinwheel entrance effect to the red and orange shapes (individually).
Select the red shape.
Click Add Effect.
Click Entrance.
Click More Effects.
Choose Pinwheel.
Repeat steps 14a through 14e for the orange shape.
Check the animation in Slide Show view.
Click the Slide Show View button in the status bar.
Click the mouse and watch the first shape appear. Repeat for each shape.
Press Esc to return to Normal view.
Save your work and close the presentation file.
You should have saved the file in step 1 as MyLab1A.pptx, so you can simply resave with the Save button on the Quick Access Toolbar.
If a presentation is already set up using bulleted lists, you might not want to take the time to retype them in shapes. You can easily convert a bulleted list to SmartArt in PowerPoint 2007, making the list appear more graphical and interesting. In this exercise, you create a bulleted list and then convert it to SmartArt.
Level of difficulty: Easy
Time to complete: 5 to 10 minutes
Open the file Lab1B.pptx from the Labs folder (from the CD) and save it as MyLab1B.pptx.
Convert the content on slide #2 to SmartArt.
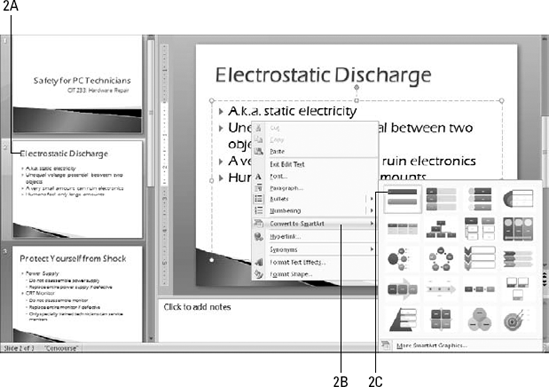
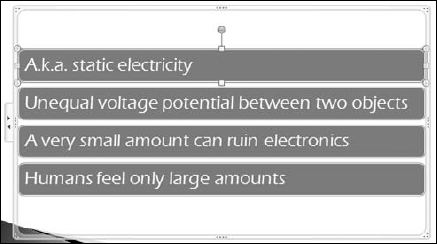
Display slide #2 (Electrostatic Discharge).
Right-click the slide content and choose Convert to SmartArt.
Click the Vertical Bullet List type (leftmost on the top row). The list is converted to a SmartArt diagram.
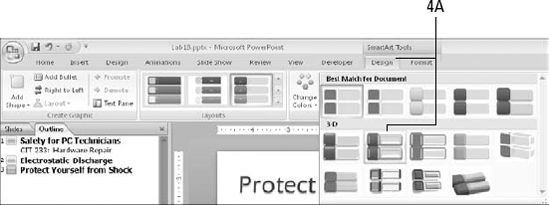
Convert the content on slide #3 to SmartArt.
Display slide #3 (Protect Yourself from Shock).
Right-click the slide content and choose Convert to SmartArt.
Click the Vertical Block List type (second from the left on the top row).

Apply a Quick Style to the SmartArt on slide #3.
On the SmartArt Tools Design tab, open the SmartArt Styles gallery and click the second 3-D style.
Change the colors for the SmartArt on slide #3 to Colorful - Accent Colors.
On the SmartArt Tools Design tab, click Change Colors and click the first color set in the Colorful section.

Save your work and close the presentation file.
You should have saved the file in step 1 as MyLab1B.pptx, so you can simply resave with the Save button on the Quick Access Toolbar.