When you create user-interactive presentations that contain many slides, it is considered courteous to provide your audience with a navigation system so that they can browse through the presentation without having to view every single slide. Menu systems can be as simple or as complex as you like and can be integrated into the slide design.
In this project lab, you learn how to create a navigation system in a presentation that is designed to teach computer technicians about safety issues for working on PCs. You modify the presentations layout and design to make room for a menu system, and then you create navigational hyperlinks on the Slide Master.
In this lab session, you start with a plain-looking presentation and modify its Slide Master to make room for a menu system on the left side of the slide.
This lab session includes some cleanup work on a "messy" PowerPoint file that is missing a layout needed for some of the slides. This session simulates the type of cleanup situations you might run into in everyday work on older presentation files.
Level of difficulty: Moderate
Time to complete: 15 to 30 minutes
Open the file Lab03A.pptx from the Labs folder (from the CD accompanying the book) and save it as MyLab03A.pptx.
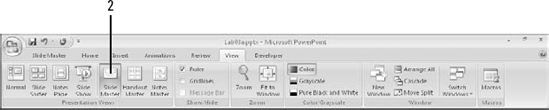
Display the Slide Master. On the View tab, click Slide Master.
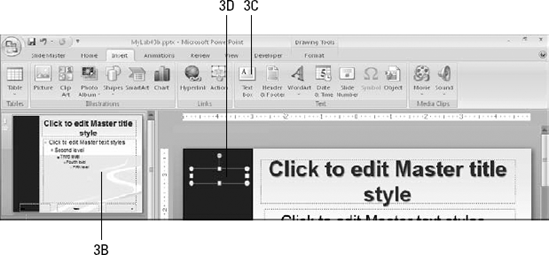
On the top-level Slide Master, draw a rectangle that covers the entire slide vertically and stops at the 3" mark on the ruler.
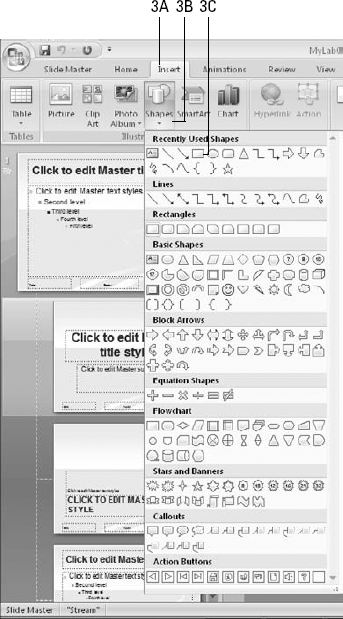
Click the Insert tab.
Click Shapes.
Click a rectangle.
Draw a rectangle that covers 2" at the left of the slide.

Bring the text boxes to the front so that the rectangle overlaps.
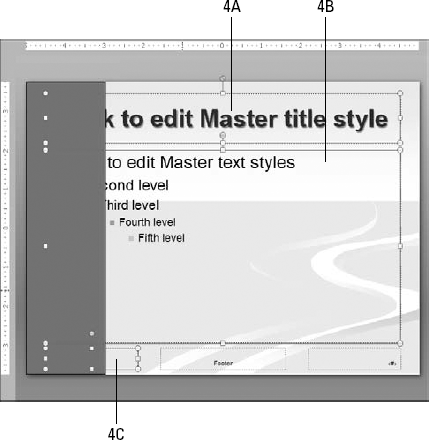
Click the Title placeholder box.
Hold down the Shift key and click the Content placeholder box.
Hold down the Shift key and click the Date placeholder box.
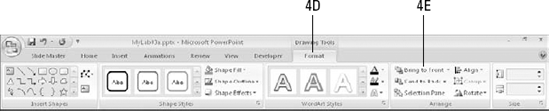
Click the Drawing Tools Format tab.
Click Bring to Front.
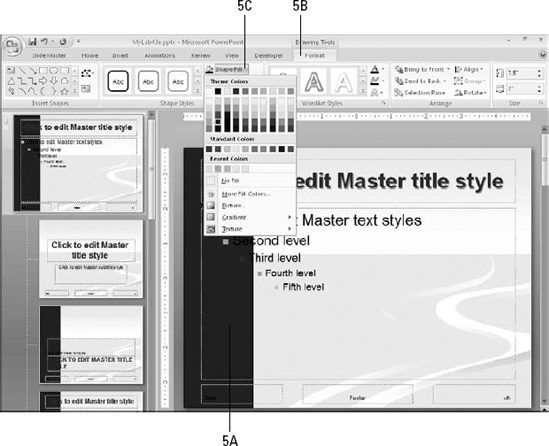
Change the color of the rectangle to a dark blue shade from the second column of the color palette.
Select the rectangle.
On the Drawing Tools Format tab, click Shape Fill.
Click the second square from the bottom in the second column in the Theme Colors section.
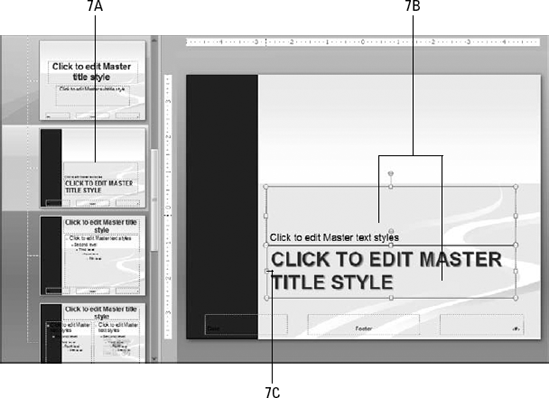
Move the left borders of the title and content placeholder boxes to the right so that they do not overlap the rectangle.
Select the main Slide Master (top slide).
Click the title placeholder.
Hold down the Shift key and click the content placeholder.
Drag the left border of the content placeholder to align with the 3 1/4" mark on the horizontal ruler.

Repeat step 6 for the individual slide layouts that were not affected by step 6.
Select the Section Header Layout master (the second slide layout in the list).
Select the title and text placeholders.
Drag the left border to the right to the 3 1/4" mark on the horizontal ruler.
Select the Title, Text, and Content layout (bottom slide layout).
Select the left content placeholder.
Drag the left border to the right to the 3 1/4" mark on the horizontal ruler.

Exit from Slide Master view and clean up the presentation so that all slides use valid layouts and no content overflows or overlaps.
Click Close Master View.

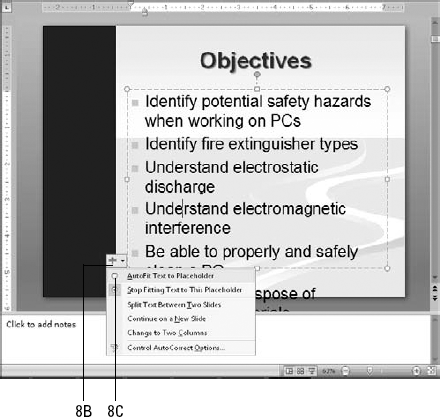
On slide #2, click inside the text box and then click the AutoFit Options button.
Click AutoFit Text to Placeholder.
Select slides 4 and 5.
On the Home tab, click Layout.
Click Title and Text.

Resize and reposition the graphics so that they do not overlap with the text.
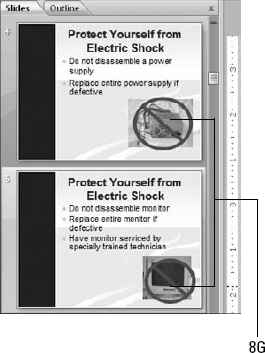
Repeat steps 8e through 8g for slides 11, 21, 23, 25, 27, and 29, and repeat steps 8b and 8c for slide 22.
Note
Slide #25 has an unusual layout. Only the first bullet is in a placeholder box; the other one is in a manual text box. Adjust as needed.
Save your work.
In this lab session, you start with a presentation that has an area cleared for a navigation bar (from Lab 3A) and you create hyperlinks on the Slide Master that link to the section titles within the presentation.
Level of difficulty: Moderate
Time to complete: 15 to 20 minutes
Open the presentation file if it is not already open. Start in your completed file from the previous project (MyLab3A.pptx), or open Lab3B.pptx from the Labs folder if you did not do the previous lab.
Save the file as MyLab3B.pptx.
Display the Slide Master and create a text box on top of the blue rectangle.
On the View tab, click Slide Master.

Click the top-level slide master.
On the Insert tab, click Text Box.
Drag to create a text box near the top of the blue rectangle.
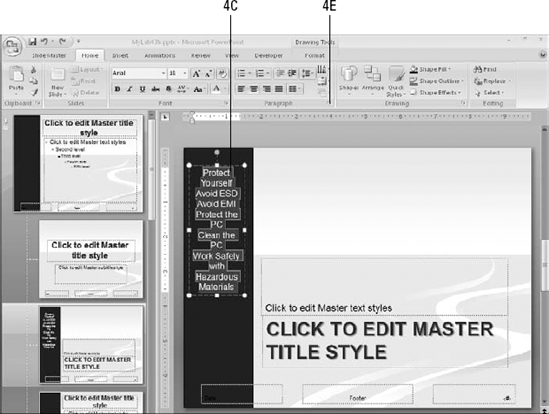
Type the names of the section titles in white, from the presentation into the new text box.
Click in the new text box.
If the insertion point does not appear, right-click the text box and choose Edit Text to make it appear there.
On the Home tab, open the Font Color list and click the white square in the Theme Colors section.

Type the following list into the text box:
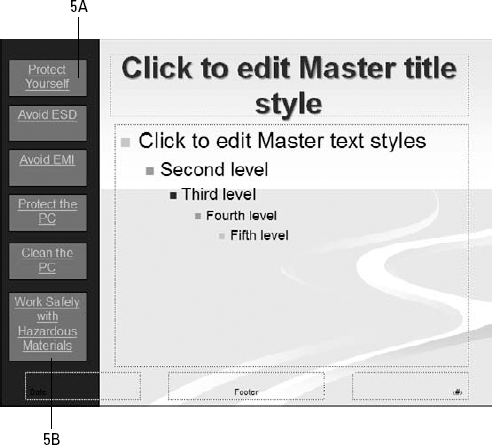
Protect Yourself
Avoid ESD
Avoid EMI
Protect the PC
Clean the PC
Work Safely with Hazardous Materials
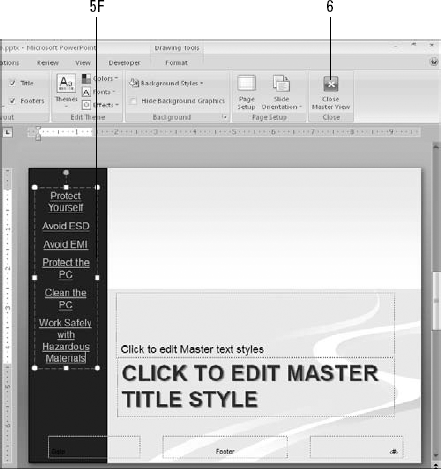
With the insertion point inside the text box, press Ctrl+A to select all of the text in it.
Click the dialog box launcher in the Paragraph group on the Home tab. The Paragraph dialog box appears.
In the Spacing section, set the Before value to 12 pt.
Click OK.

Hyperlink each of the paragraphs you just typed to the corresponding slide.
In the text box, select Protect Yourself.
On the Insert tab, click Hyperlink. The Insert Hyperlink dialog box appears.
Click Place in This Document.
On the Slide Titles list, click Protect Yourself (slide #3).
Click OK.

Repeat steps 5a through 5e for each of the other section title slides:
Avoid ESD: Slide #8
Avoid EMI: Slide #13
Protect the PC: Slide #16
Clean the PC: Slide #19
Work Safely with Hazardous Materials: Slide #28
Exit from Slide Master view. On the Slide Master tab, click Close Master View.
Try out the presentation in Slide Show view and click each of the links to make sure they work.
Save your work.
In this lab session, you learn how to create a navigation bar similar to the one in Lab 3B except you use shapes for buttons instead of text-based hyperlinks.
Level of difficulty: Moderate
Time to complete: 20 minutes
Open the presentation file if it is not already open. Start in your completed file from the previous project (MyLab3B.pptx), or open Lab3C.pptx from the Labs folder if you did not do the previous lab.
Save the file as MyLab3C.pptx.
Display the Slide Master.
On the View tab, click Slide Master.
Click the slide master (topmost slide).
Replace the text Protect Yourself with a rectangle containing that text.
Move the text box down 1/2" to make room above it for the rectangle.
On the Insert tab, click Shapes, and click a rectangle.

Draw a rectangle above the text box.
Select the Protect Yourself text in the text box and press Ctrl+X to cut it to the Clipboard.

Click the rectangle and press Ctrl+V to paste the text into it.

Repeat step 4 for each of the other text hyperlinks, to create the rest of the buttons.
Move the text box off of the blue rectangle as needed to make room for the buttons.
Note
To duplicate the size of the original rectangle, you can copy and paste it or you can Ctrl+drag it instead of drawing new ones each time. Alternatively you can draw them, and then use the Size group on the Drawing Tools Format tab to standardize the size.
You might need to change the size of the button(s) to make all of the text fit.
Format the buttons to make them more attractive.
Select all of the buttons. Hold down the Shift key as you click each one.
On the Drawing Tools Format tab, open the Shape Effects menu, click Shadow, and click the first Shadow setting (top left).

Open the Shape Effects menu, click Bevel, and click the first bevel style (top left).

Save your work.
Tip
If you prefer buttons that do not have the text underlined, you can set them up differently. Instead of using the existing hyperlink text, you remove the hyperlink from the text to make it ordinary text typed in a shape, and then set the button as a graphical hyperlink.