Understanding and Working with Out of the Box Lists and Libraries
Everything in SharePoint is stored in lists. Libraries are lists that can store documents, videos, audio, and other types of files. In this discussion the term “list” refers to both lists and libraries. You can consider lists and libraries to be the basic data structure for storing data in SharePoint. Data in SharePoint lists is stored in the form of rows and columns. The column of a list can be a site column that is a column created at the site level that can be reused across multiple lists. Or the column can be a list column specific to the list and cannot be reused at other places.
Columns are usually associated to the lists through content types, which you can consider a collection of columns with a lot of other things added to them such as workflows, event receivers, and so on. A list can contain multiple content types.
A list can also contain versioning settings, workflows, event receivers, views and more. Views in SharePoint lists enable you to see data from different perspectives. You can have a view that shows items created by you or assigned to you. Another view might show data sorted according to importance. You can also have views that display data in graphical format.
As you go further into your SharePoint journey you realize the importance of understanding the lists and libraries. Although Hour 10, “Managing Data in SharePoint 2010,” discusses custom lists and libraries in depth, this hour looks at some of the out of the box list and library templates.
Custom Lists
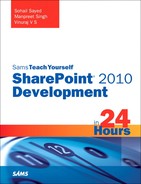
This is the most basic list template in SharePoint. A custom list contains a single column called Title. This list template must be used when you want to create a list customized according to your requirements. You can create a new custom list by going to Site Actions, View All Site Content. On this page click Create and a pop-up appears. Click List in the left menu to just see the available list templates. You can see the option to create a new custom list as well as many other types of lists as shown in Figure 4.1.
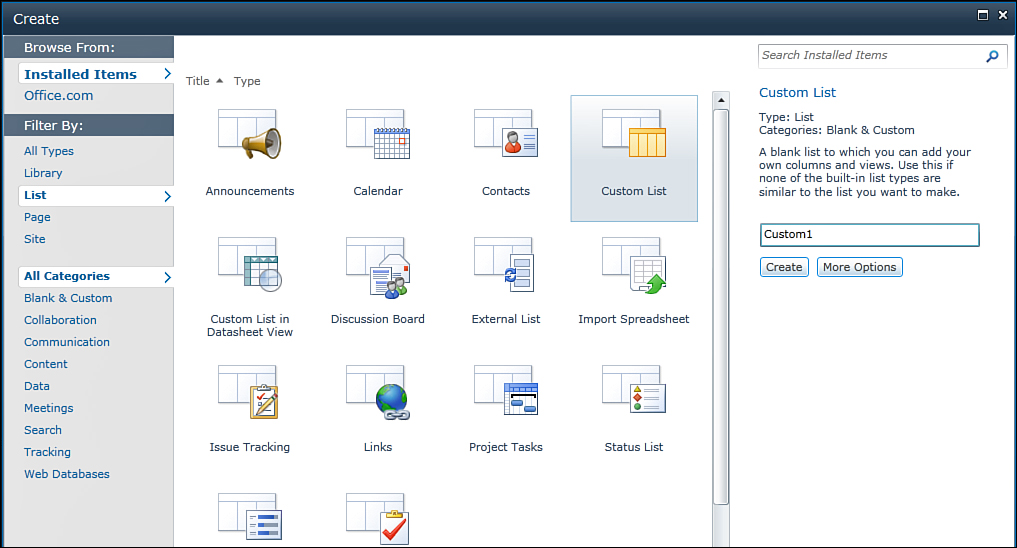
Figure 4.1. Creating a custom list
The type of lists available for creation varies based on the site template of the parent site.
Click More Options to see more configuration options for creating the list as shown in Figure 4.2.
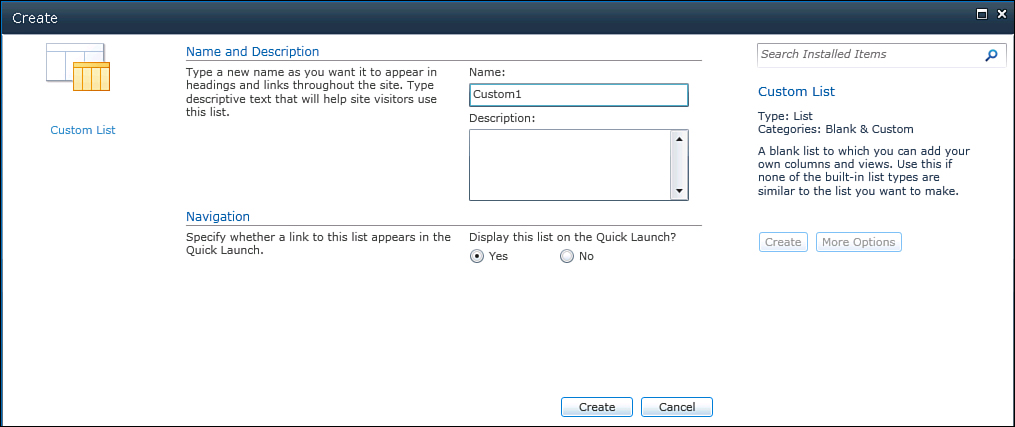
Figure 4.2. Configuration options for creating a custom list
Announcements
The Announcement list as the name suggests is used for storing and displaying announcements. The Announcement list contains a Title, Body, and an Expires date time field.
Document Library
A document library is a list based on documents. You can upload documents to a document library and add metadata for the document. You can create a new document library by going to Site Actions, View All Site Content. On this page click Create and a pop-up appears. Click the Library link in the left menu to just see the available library templates. You can see the option to create a new document library as well as many other types of libraries. This is shown in Figure 4.3.
Figure 4.3. Creating a document library
Click More Options to see more configuration options for the library. Here you can configure the versioning settings and the document template for the document library as shown in Figure 4.4.

Figure 4.4. Configuration options for creating a document library
Calendar List
The Calendar list is used to create and track events and meeting information. It can show the scheduled meeting and event information in various views. You can create a single event or a recurring event. Figure 4.5 shows the New Item screen for the Calendar list.
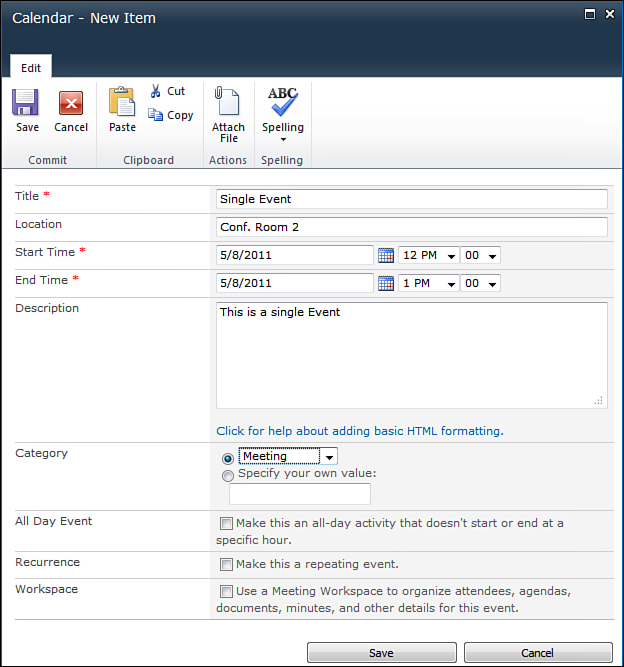
Figure 4.5. Creating a new event in a Calendar list
You can also create a recurring event. In addition you can associate the event with a meeting workspace, which enables you to store additional information such as agenda and documents for the meeting.
Try It Yourself: Create a Recurring Event in the Calendar List
1. If not already created, create a Calendar list.
2. Create a new event and check the Make This a Repeating Event box and the Use a Meeting Workspace to Organize Attendees, Agendas, Documents, Minutes, and Other Details for This Event box (see Figure 4.6). Click Save.
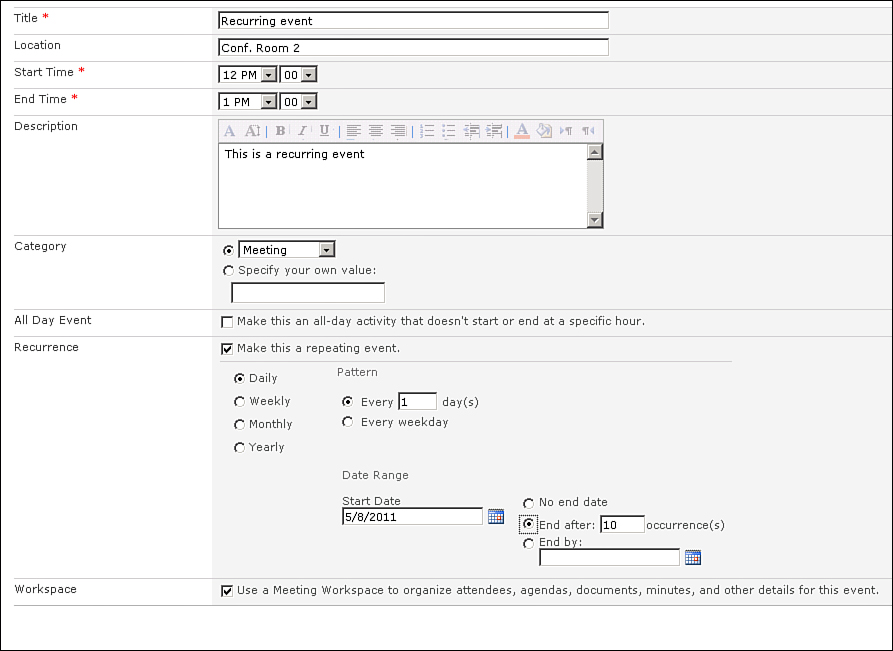
Figure 4.6. Creating a recurring event
3. You are prompted to create a new meeting workspace as shown in Figure 4.7. Enter the desired title and URL for the meeting workspace and click OK.

Figure 4.7. Creating a new meeting workspace for a calendar event
4. You are now prompted to select a template for the meeting workspace as shown in Figure 4.8. You learn more about these templates later in this hour. For now select the Basic Meeting Workspace template and click OK.

Figure 4.8. Selecting the Basic Meeting Workspace template
5. You see the home page for the meeting workspace and a navigation pane on the left showing various dates, as shown in Figure 4.9.
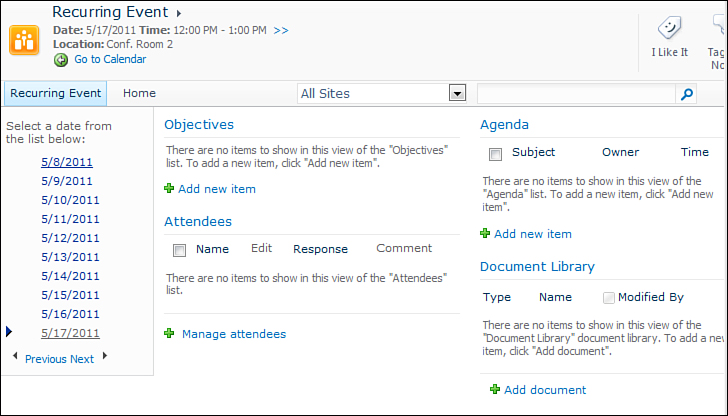
Figure 4.9. Meeting workspace linked to a calendar event
6. Add a new item to the Objectives list. Then navigate to another date. The item cannot be seen when you navigate to another date. Navigate back to the previous date, and you can see the item you created. This is a useful feature of the meeting workspace that allows you to associate list data with specific instances of the meeting.
In addition to the preceding steps you can also sync the calendar information to Outlook. To do this, go to the Calendar tab in the ribbon and click the Connect to Outlook button. You can now see a new calendar in Outlook.
Discussion Board
The Discussion Board list allows creating newsgroup style discussions. The discussion board makes it easy to manage discussion threads. In addition you have content approval enabled for all the posts.
Tasks
The Tasks list allows you to manage tasks. You can create new tasks, specify the dependency on other tasks, and track the completion of the tasks. Figure 4.10 shows the New Item screen for the Tasks list.
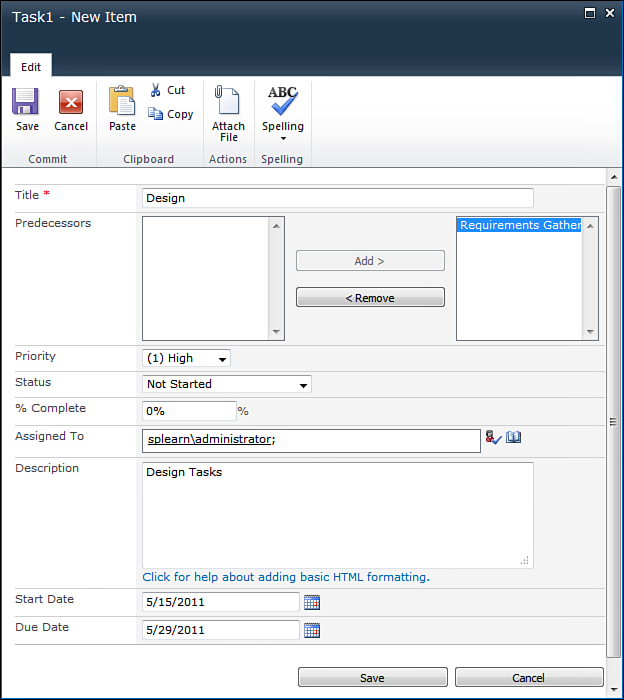
Figure 4.10. Creating a new Tasks list
You can create a Gantt View to see the tasks in an intuitive Graphical format. To Create a Gantt View go to the Tasks list. In the List tab of the ribbon click Create View, as shown in Figure 4.11.
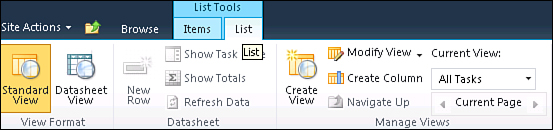
Figure 4.11. The List tab in the ribbon
Click the Gantt View (see Figure 4.12).
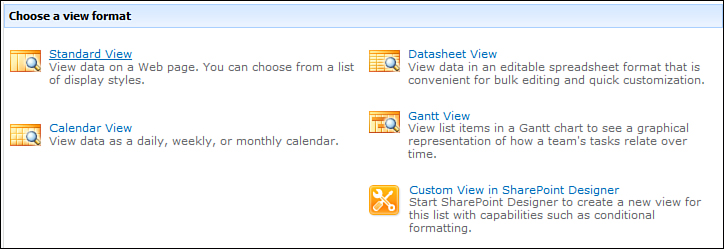
Figure 4.12. Creating a Gantt View
Give an appropriate name to the view, as shown in Figure 4.13.
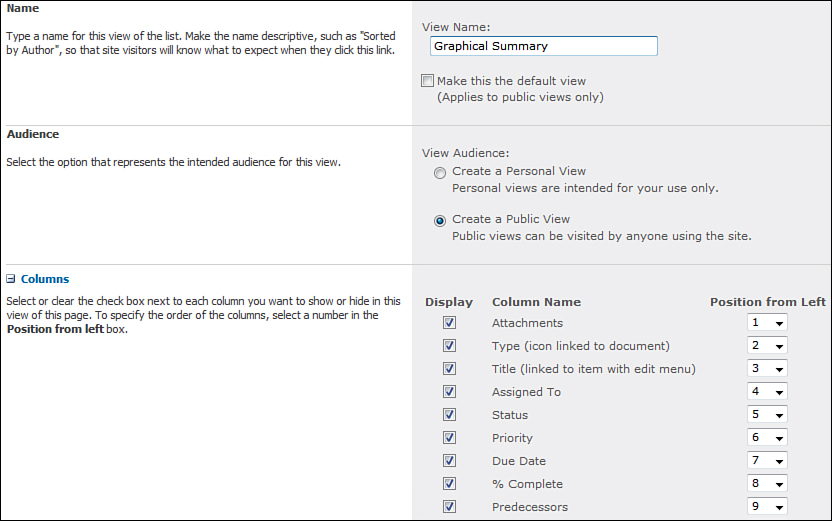
Figure 4.13. Options for creating a new view
Select Gantt Columns as shown in Figure 4.14 and click OK.

Figure 4.14. Selection of columns for the Gantt View
You can now see the Gantt View for the tasks as shown in Figure 4.15.

Figure 4.15. Gantt View for the Tasks list
In addition to tracking personal tasks, the Tasks list is also used by workflows to track workflow tasks, which you see in subsequent hours.
Contacts List
The Contacts list allows you to store contact information. This information can be synced with Outlook. Figure 4.16 shows the New Item form for the Contacts list.
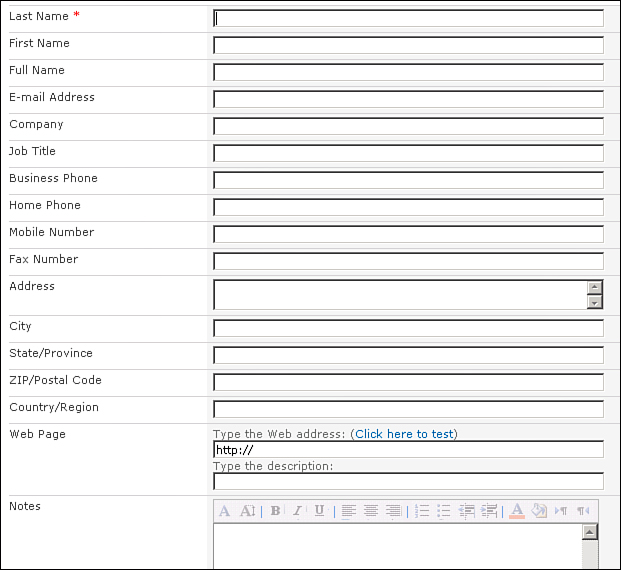
Figure 4.16. Creating a new item for a Contacts list
Survey List
The Survey list allows you to quickly and easily create surveys. Create a new survey named Survey1, as shown in Figure 4.17.
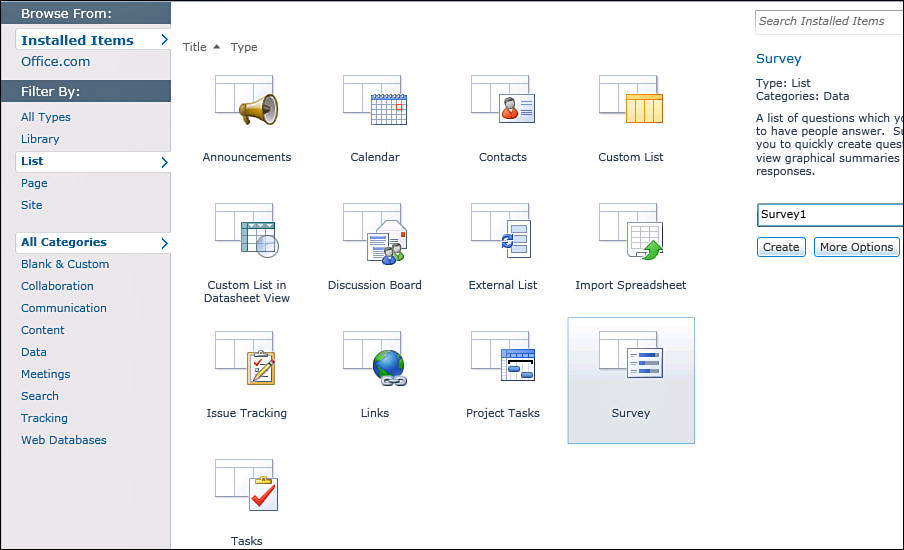
Figure 4.17. Creating a new survey
After clicking on the Create button you are presented with a screen to create the survey questions. Here you can specify the question text, type of question, branching logic, and so on. Enter a few questions as shown in Figure 4.18.
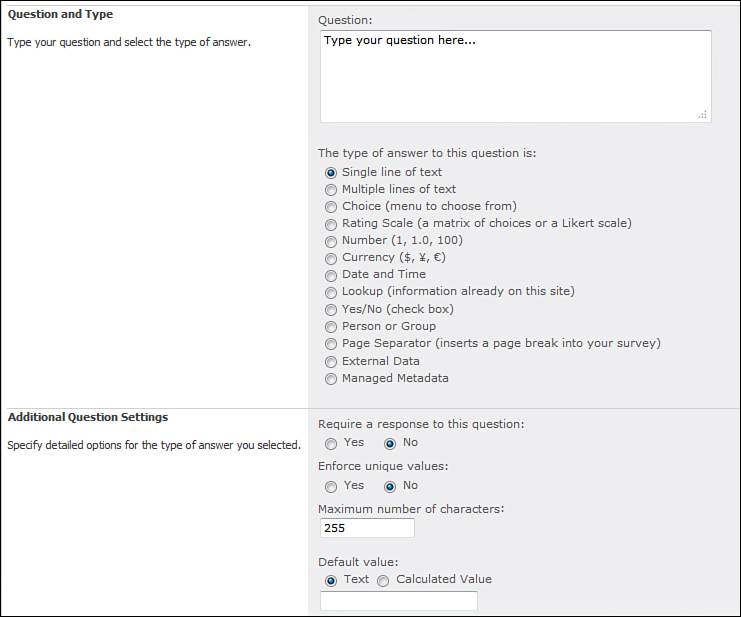
Figure 4.18. Creating a new question for a Survey list
After you have set up the survey click Finish. You are presented with a screen that allows you to respond to the survey. This is shown in Figure 4.19.
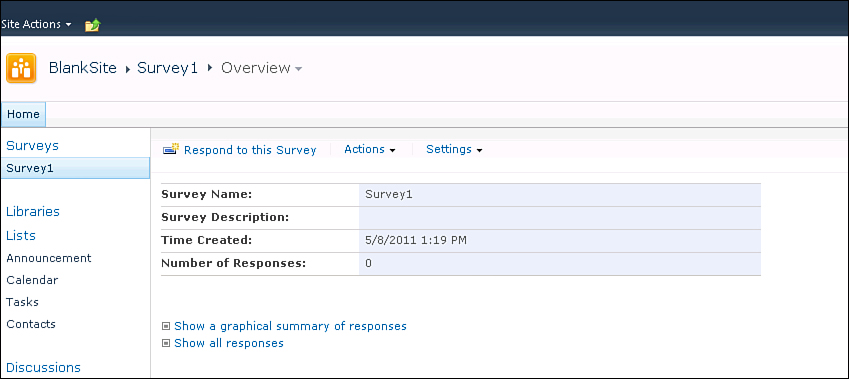
Figure 4.19. Survey overview
Respond to the survey. You can see the Number of Responses field changes to 1 after you respond. In addition you can see the individual response by clicking on Show All Responses. You can also see a graphic summary of the responses by clicking on Show a Graphical Summary of Responses as shown in Figure 4.20.
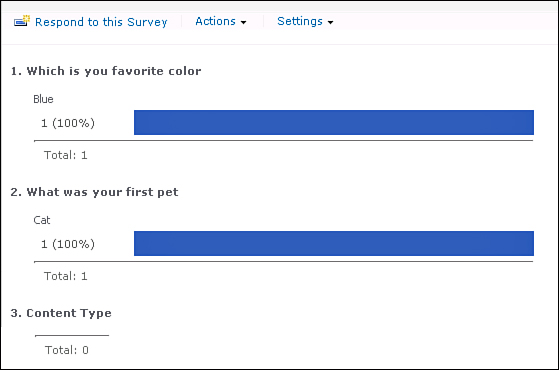
Figure 4.20. Graphical summary for a Survey list
Lists in Meeting Workspaces
The meeting workspaces contain a few special lists available only within the Meeting Workspace templates. These include the Attendees list, Objectives list, Agenda list, and Decisions list. By default the lists in the meeting workspaces link data to a meeting instance. For example, if a meeting workspace is linked with multiple events or a recurring event, any data you create will be associated to the currently selected event date. Navigating to different dates shows different data based on the association. You can also make the list a series item, that is, the data will be shared across the meeting instances. To do this go to the list settings; from the List tab in the ribbon, go to Advanced Settings.
Select Yes for Share List Items Across All Meetings (Series Items), as shown in Figure 4.21.
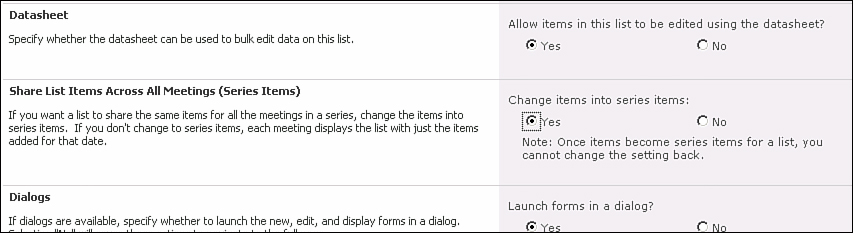
Figure 4.21. Converting a list to a Series Items list
In addition to the list templates discussed previously, the Asset library is used to store digital assets such as video and audio files and the Picture library stores image files. Now is a good time for you to play around with the out of the box lists and libraries.