
You can tag selected icons with one of seven different labels, each of which has both a text label and a color associated with it. There’s nothing exactly like it in Windows, but it can be very handy.
To do so, highlight the icons. Open the File menu (or the
![]() menu, or the shortcut menu that appears when
you right-click the icons). There, under the heading Label, you’ll see
seven colored dots, which represent the seven labels you can use.
Figure 3-6 shows the
routine.
menu, or the shortcut menu that appears when
you right-click the icons). There, under the heading Label, you’ll see
seven colored dots, which represent the seven labels you can use.
Figure 3-6 shows the
routine.
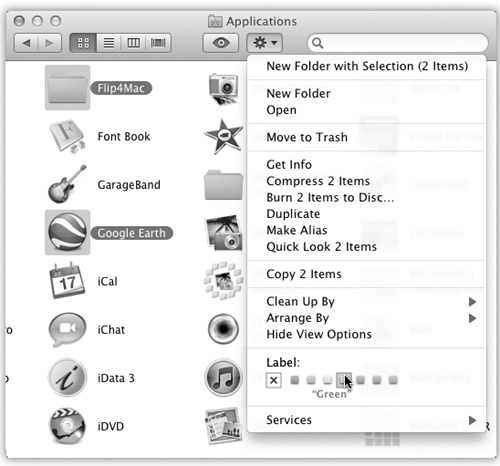
Figure 3-6. Use the File menu, ![]() menu, or shortcut menu to apply label tags to
highlighted icons. You can even apply a label within an icon’s Get
Info dialog box. Instantly, the icon’s name takes on the
selected shade. In a list or column view, the entire row takes on
that shade, as shown in Figure 3-7. (If you choose the little X, you
remove any labels you may have applied.)
menu, or shortcut menu to apply label tags to
highlighted icons. You can even apply a label within an icon’s Get
Info dialog box. Instantly, the icon’s name takes on the
selected shade. In a list or column view, the entire row takes on
that shade, as shown in Figure 3-7. (If you choose the little X, you
remove any labels you may have applied.)
After you’ve applied labels to icons, you can perform some unique file-management tasks—in some cases on all of them simultaneously, even if they’re scattered across multiple hard drives. For example:
Round up files with Find. Using the Find command described on Kind, you can round up all the icons with a particular label. Thereafter, moving these icons at once is a piece of cake—choose Edit→Select All, and then drag any one of the highlighted icons out of the results window and into the target folder or disk.
Using labels in conjunction with Find like this is one of the most useful and inexpensive backup schemes ever devised: Whenever you finish working on a document that you’d like to back up, right-click it and apply a label called, for example, Backup. At the end of each day, use the Find command to round up all the files with the Backup label—and then drag them as a group onto your backup disk.
Sort a list view by label. No other Mac sorting method lets you create an arbitrary order for the icons in a window. When you sort by label, the Mac creates alphabetical clusters within each label grouping, visible in Figure 3-7.
This technique might be useful when, for example, your job is to process several different folders of documents; for each folder, you’re supposed to convert graphics files, throw out old files, or whatever. As soon as you finish working your way through one folder, flag it with a label called Done. The folder jumps to the top (or bottom) of the window, safely marked for your reference pleasure, leaving the next unprocessed folder at your fingertips, ready to go.
Track progress. Use different-colored labels to track the status of files in a certain project. For example, the first drafts have no labels at all. Once they’ve been edited and approved, make them blue. Once they’ve been sent to the home office, make them purple.
(Heck, you could have all kinds of fun with this: Money-losing projects get red tints; profitable ones get green; things that make you sad are blue. Or not.)
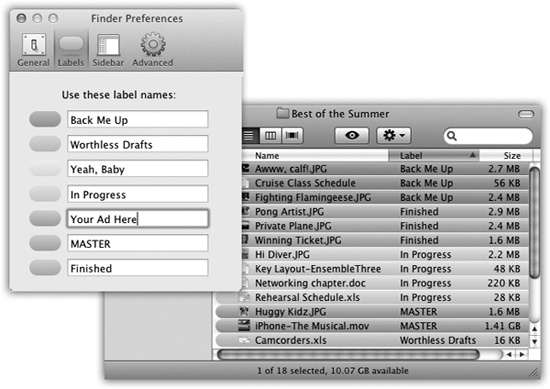
At the outset, the seven labels in the File menu are named for the colors they show: Red, Orange, Yellow, and so on. Clearly, the label feature would be much more useful if you could rewrite these labels, tailoring them to your purposes.
Doing so is easy. Choose Finder→Preferences. Click Labels. Now you see the dialog box shown in Figure 3-7, where you can edit the text of each label.