
Back in Chapter 4, Gathering Agile User Requirements, we discussed an activity for very quickly putting together a Product Backlog by brainstorming a potential set of User Stories for our product.
The first step was to write down a simple sentence or stub on an index card—one idea per index card—so that we could create a broad picture of the product. We then started to flesh out the ideas, creating fully-formed User Stories with Acceptance Criteria and so on. We aimed to get as much of our product on paper (index cards) as possible, so that we didn't lose any of our ideas.
When we use this technique for creating a physical Product Backlog for the first time, we may notice a few things about it that make it very powerful. The nature of having the backlog on index cards spread out before us on a table, or perhaps a wall or the floor, means that suddenly we can see the complete picture.
Also, our product suddenly feels somewhat tangible; this is its first physical incarnation. It suddenly becomes much more straightforward to pick up User Stories, examine them, and shuffle the cards around to group them by feature, Epic, or workflow. We can easily rearrange the cards to prioritize and lay out our release strategy to maximize value creation. For example, if we're using the Lean Startup approach, we can use the index cards to map out a possible Minimum Viable Product (MVP) and its subsequent Minimum Marketable Product (MMP).
The simplified technique we briefly describe here, and in more detail in Chapter 4, Gathering Agile User Requirements, is known as Task Brainstorming and is one way to start a User Story Map. It's mainly useful when we know what we want to build or can easily imagine it.
However, it's not always easy to know where to start. Sometimes we have to put ourselves in the shoes of the people who are going to use our software and work out, from their perspective, what we need to build.
One way to do this is to imagine ourselves using our software and to build up a narrative or story timeline, which focuses on how our user carries out a particular end-to-end journey.
This approach is known as User Story Mapping, and the result is known as a User Story Map. As well as being a potent visual prioritization tool to shape the initial Product Backlog, it also lays out our Agile Roadmap in such a way that we can comfortably manage it.
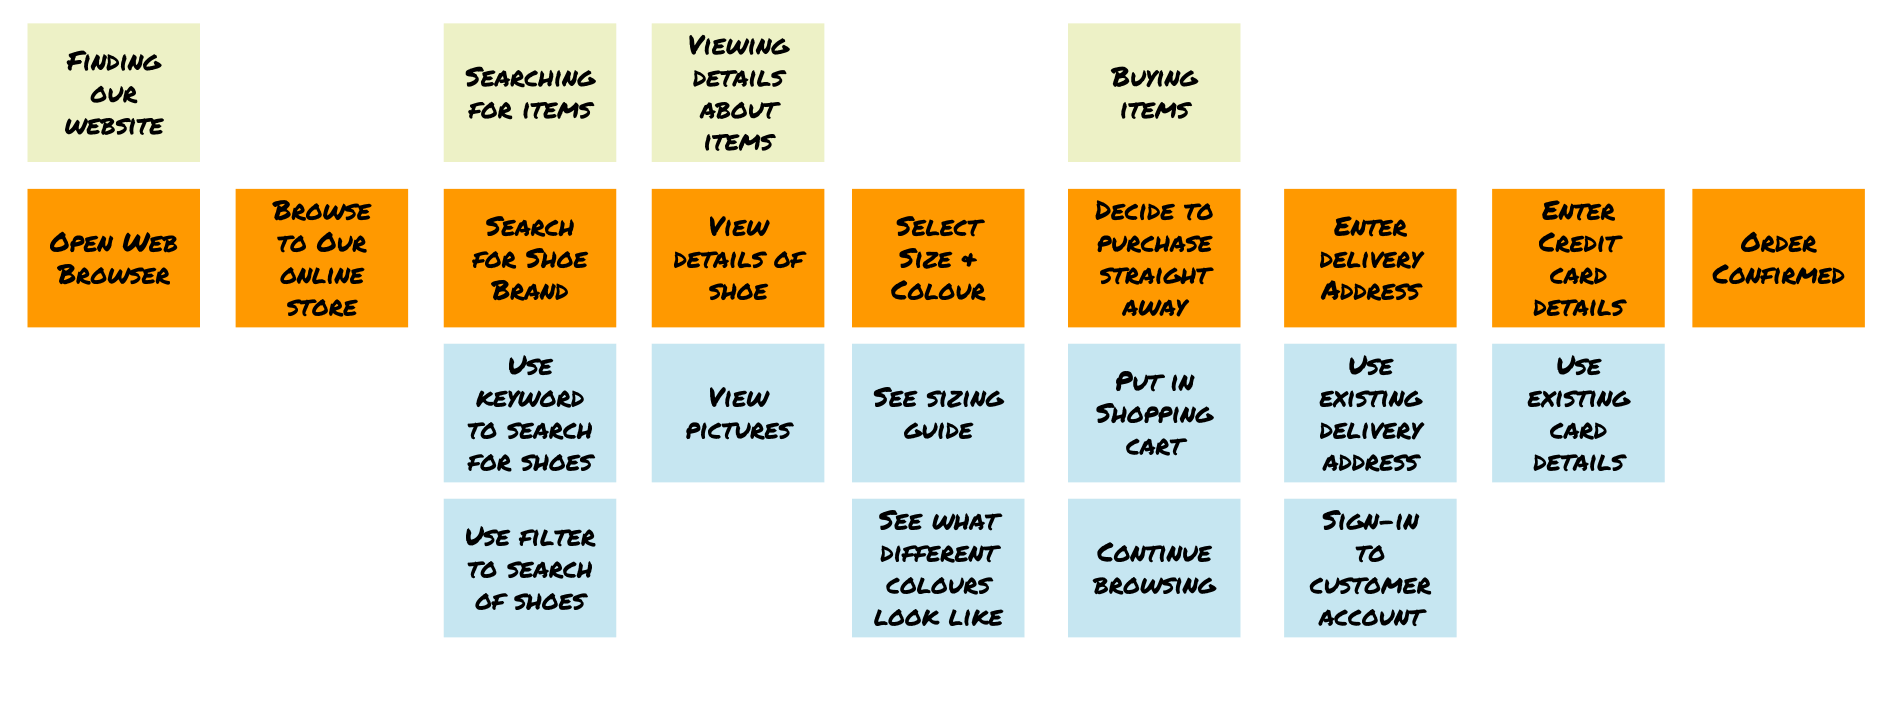
The following illustration shows a User Story Map for the checkout process of an online retail store:
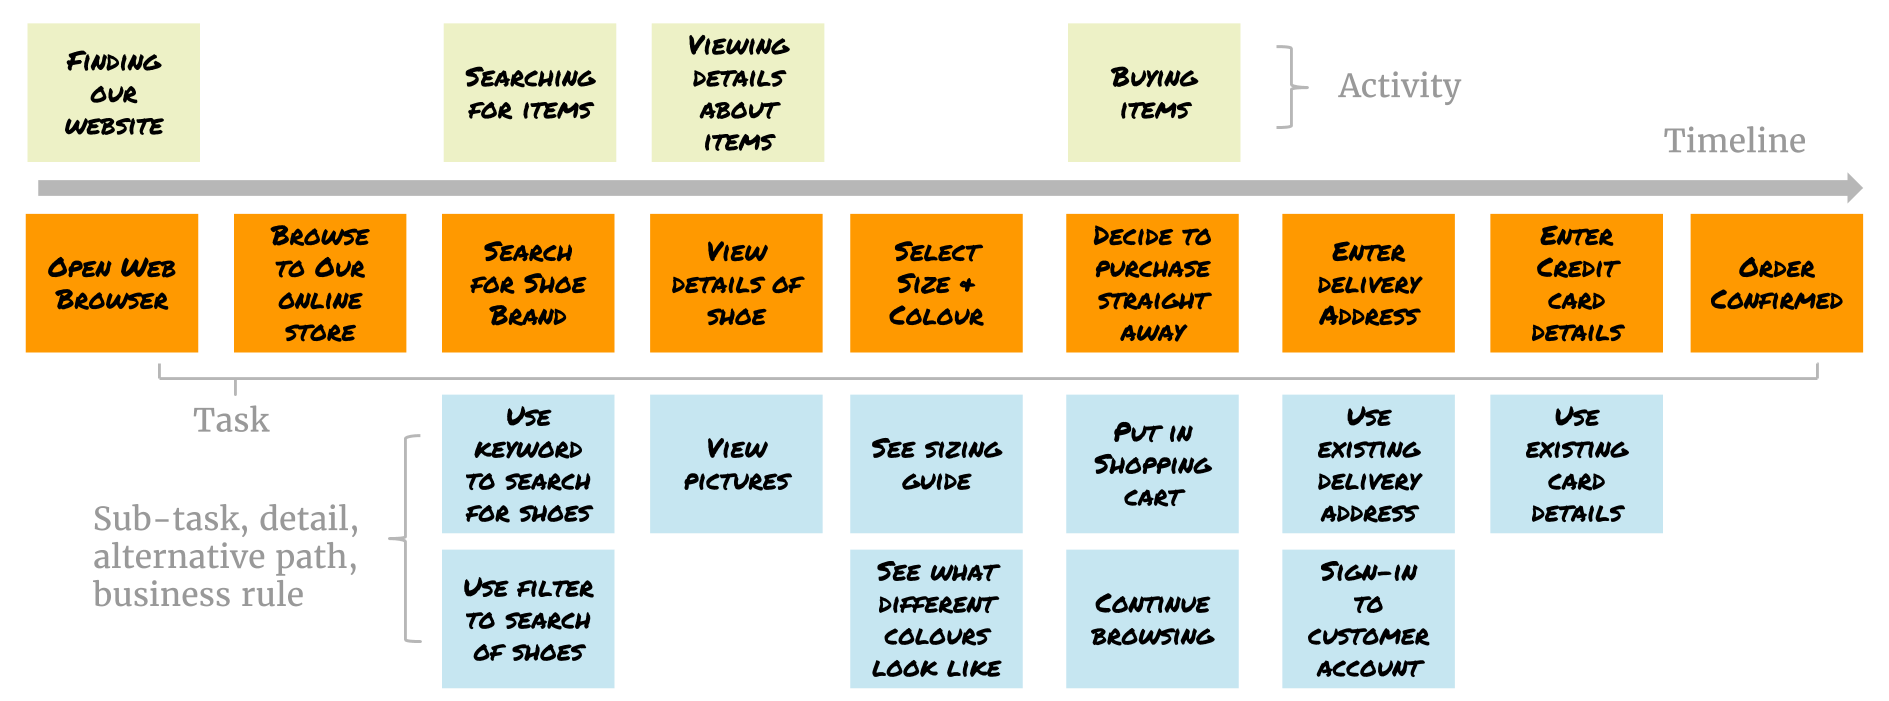
Here's the same User Story Map, this time annotated so we can see what each area represents:
The tasks that are on the timeline tell the story, which in this instance begins with OPEN WEB BROWSER and ends with our ORDER CONFIRMED.
We sometimes call this a User Journey because it describes a step-by-step journey that our customer must go on to achieve a particular outcome. The User Journey forms the backbone of the User Story Map.
One last thing to note before we get started: if you already have a product, but don't have a User Story Map for it, don't worry, you don't have to begin by creating a complete User Story Map before you can start using this technique. You could use this method just to map a small part of your system, such as a new feature that you want to create.
Even if we have a set of features already in mind, taking time to flesh out the key user narratives for our product is still a worthwhile and valuable exercise.
In the following section, we'll learn, in detail, how to create a User Story Map.