Using LAB inversions
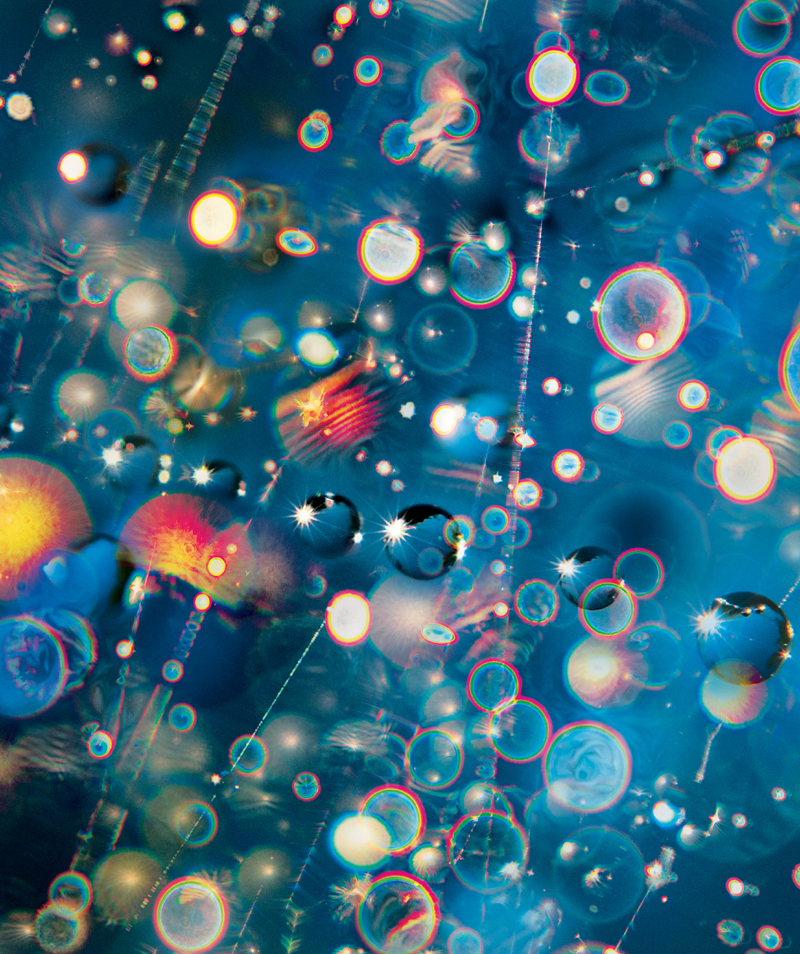
To make this image I used a macro lens, and shot twenty-one exposures of a wet spider web in the early morning sun. Most were underexposed to bring out the color saturation and to let the background go dark. I combined the exposures as layers in Photoshop using a variety of blending modes, and was pleased to see that the result was essentially an abstraction.
105mm macro lens, twenty-one exposures, each exposure at 1/3200 of a second, f/3.5 and ISO 200, tripod mounted; exposures combined in Photoshop.
Work in as wide a gamut as you can, for as long as you can.
—Harold Davis
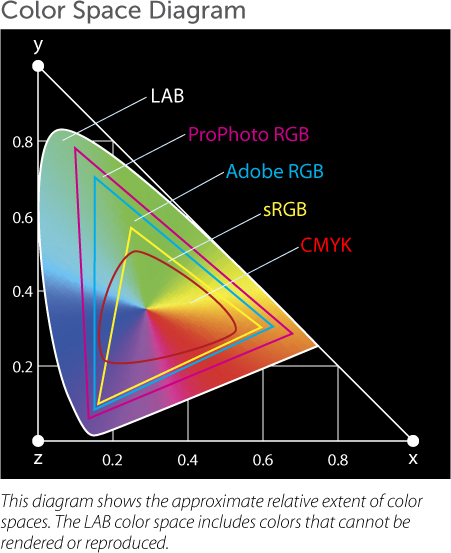
The colors you see in a photo, or on display in a program like Photoshop, are created using a color model (sometimes called a color space)—by whatever name a domain of color value described using a mathematical formula, most significantly a color’s channels.
You are probably familiar with RGB color, in which the Red, Green, and Blue channels are added together to create colors that are displayed on computer monitors, or on the Web.
Another familiar color model is CMYK. In CMYK, Cyan, Magenta, Yellow, and Black channels are used subtractively to render color imagery in books like this one.
LAB is yet another color model, with some very interesting characteristics from the viewpoint of photography that I’ll get to in a moment. The underlying color calculations in Photoshop are performed in LAB, but it is largely a theoretical color space in the sense that you can’t print a LAB image or display it on the web without first converting it back to CMYK or RGB.
It’s worth noting that LAB has the widest gamut—or range of colors—of any color space (see the color gamut drawing below). In fact, there are colors that can be specified in LAB that cannot be perceived, rendered, or reproduced.
Meditation
If a color can’t be seen or reproduced, what does it look like?
Understanding the LAB color model
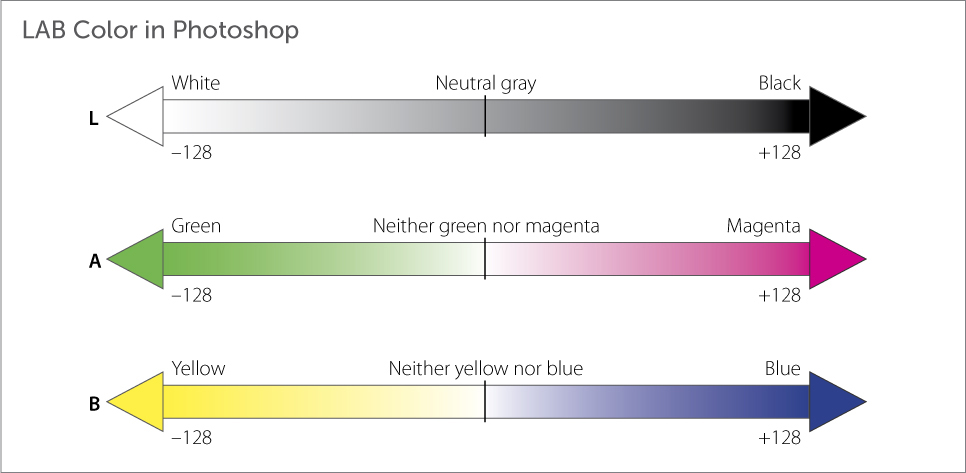
In LAB, there are three channels: L or Lightness, which contains the grayscale information; A, which contains magenta and green information; and B, which contains yellow and blue information as shown in the diagram below. There are two notable points about this setup:
![]() Lightness, also called luminance or grayscale, information is separated from the color information in the image. This means it can be operated on independently of the color information.
Lightness, also called luminance or grayscale, information is separated from the color information in the image. This means it can be operated on independently of the color information.
![]() Each channel is color-opponent. This means that small adjustments on a channel can have big effects on the color values of an entire image.
Each channel is color-opponent. This means that small adjustments on a channel can have big effects on the color values of an entire image.
LAB adjustments
The easiest and most spectacular adjustment that can be made on an image in the LAB space is the inversion. You can invert an entire image, or just one channel (usually the L channel).
To apply a LAB inversion, first make sure that your image is in the LAB color space by choosing Image ![]() Mode
Mode ![]() LAB Color.
LAB Color.
To invert the entire image, choose Image ![]() Adjustments
Adjustments ![]() Invert.
Invert.
If you want to invert a single LAB channel, select the channel in the Channels panel. Make sure that all channels are visible (see page 54 to find out how to work with selection and visibility in the Channels panel). Once again, choose Image ![]() Adjustments
Adjustments ![]() Invert.
Invert.
If this sounds easy, it is—and, at the same time, an image modification technique with tremendous power if used judiciously in support of one’s vision!
For example, the image of a spider web and water drops shown on page 154 seemed so abstract to me that I thought it would be fun to try further abstractions—and apply both an overall inversion (below) and an L-channel LAB inversion Page 158).
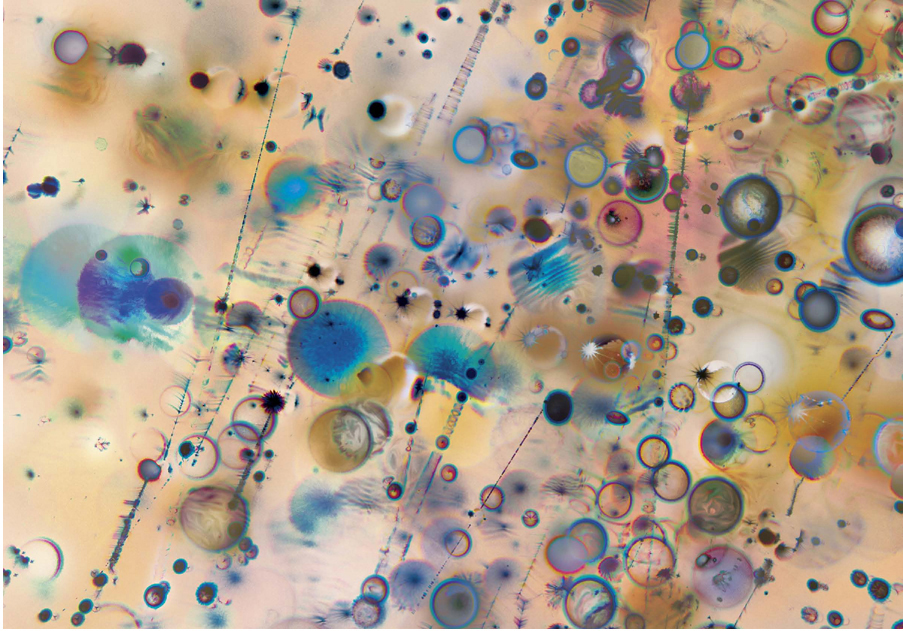
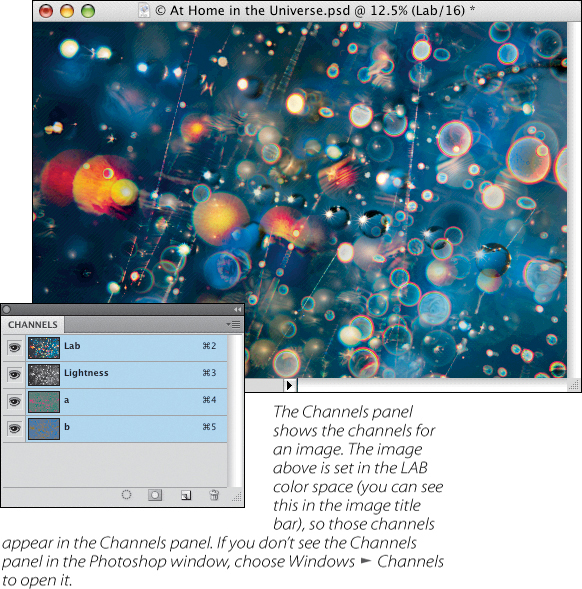
This image was created by converting the image shown on page 154 to LAB color. Then, after making sure all the channels were selected in the Channels panel, I chose Image ![]() Adjustments
Adjustments ![]() Invert to create this image that shares the content of the original image, but not the color.
Invert to create this image that shares the content of the original image, but not the color.
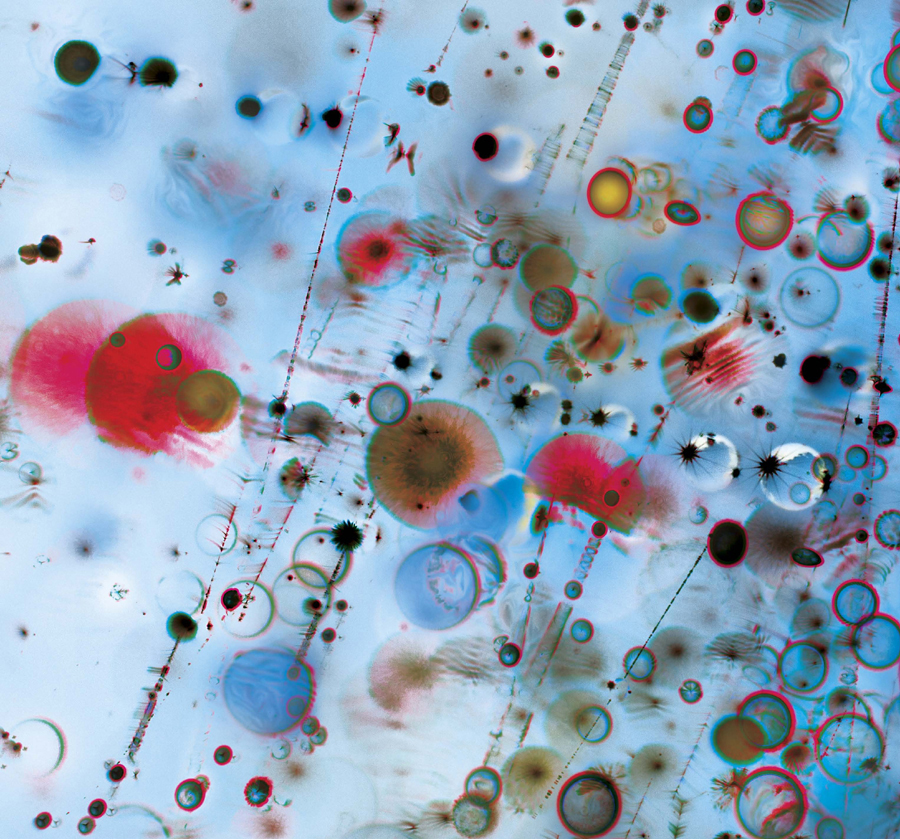
This image was created by inverting the L or Lightness channel of the waterdrops image shown on page 154. By inverting the L channel, the grayscale information was reversed; meaning that black became white, white became black, and all the grays inverted to their darker or light counterpart. The form of the abstract image is the same, but the colors are different, creating a new look.
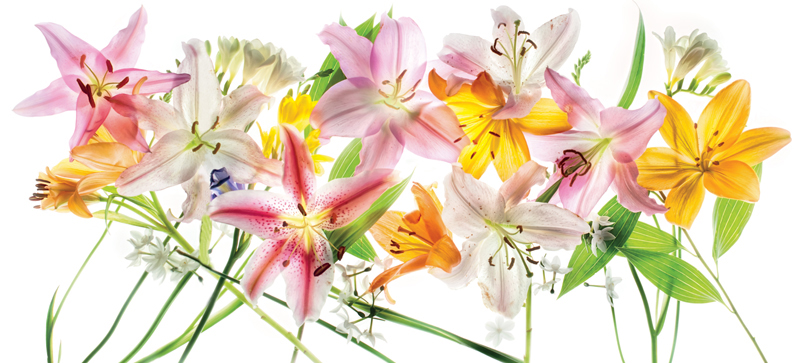
Using a light box, it is possible to shoot images of great delicacy and translucency.
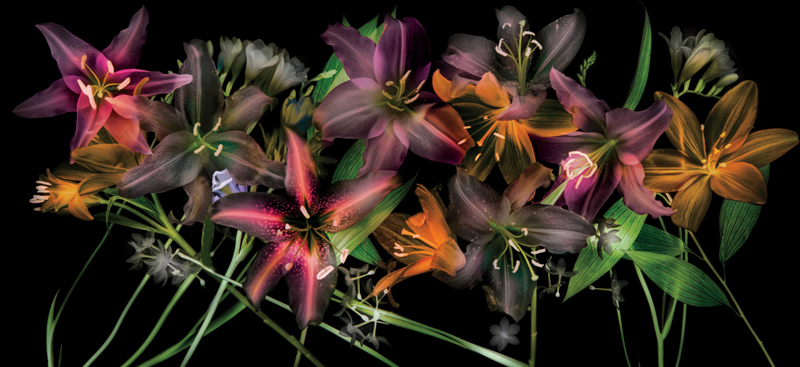
This is an L-channel inversion of the Lilies panorama, which creates a unique composition with striking lighting and effects.
40mm macro lens, panorama shot in three panels, each panel consisting of five exposures with shutter speeds ranging from 1 second to 1/60 of a second, each exposure shot at f/8 and ISO 100, tripod mounted; exposures and panels combined in Photoshop.
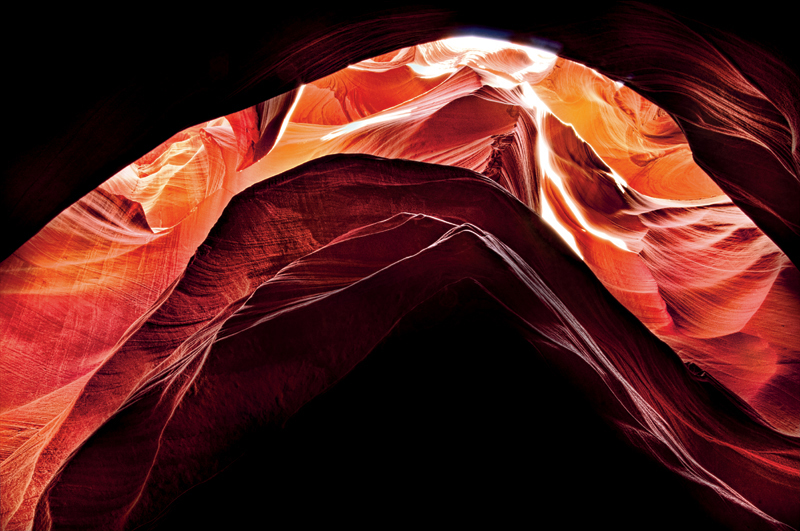
Looking up toward the sky from the floor of a slot canyon near Page, Arizona, I saw the canyon structure above me as a sculptural ribbon of light. To render the dynamic range of this light ribbon, I shot five exposures and later combined them in Photoshop.
26mm, five exposures at shutter speeds at shutter speeds from 4 seconds to 1/4 of a second, each exposure at f/25 and IDO 200, tripod mounted; exposures combined in Photoshop.
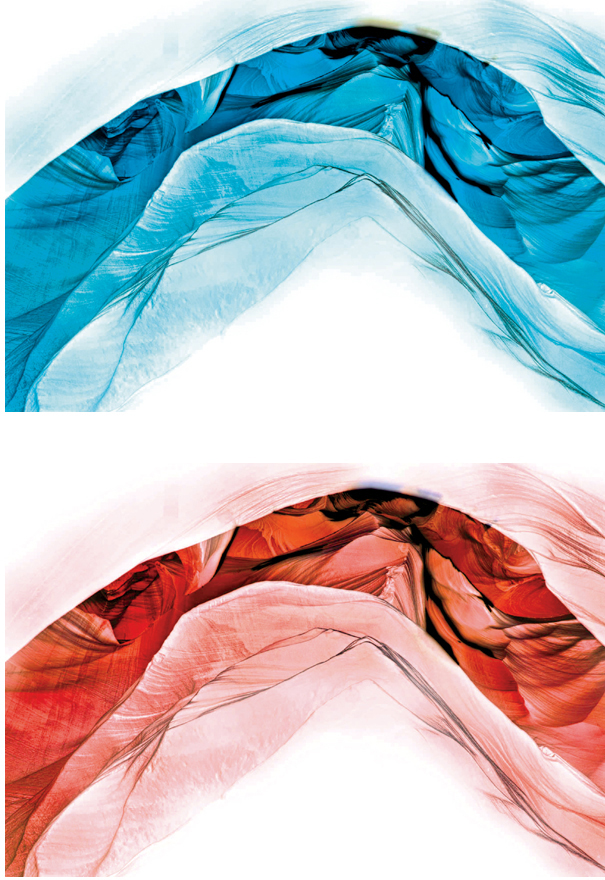
One day I started playing with inversions of the Antelope Canyon image shown to the left. These inversions led to a fantasy image shown on pages 162–163.
Top: I created this version by selecting all the channels in the Channels panel and then inverting them.
Bottom: Then I created this version by selecting only the L (Lightness) channel and inverting it.
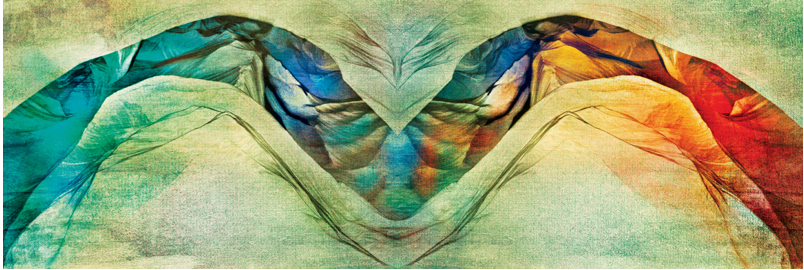
I started with the canyon image shown on page 160, and after duplicating the image, I started playing with channel inversions (page 161). Using these inversions as a color palette for a new image, I combined the L-channel version (on the left) with the horizontally flipped LAB inversion on the right. This created a very wide horizontal image with patterns that I had not necessarily anticipated (some people have told me that they see a face in the center of the image).
After combining the two inversions, I used blending modes, layer masks, and painting to add the kaleidoscope of colors. (Turn to pages 33–53 to find out more about these techniques.) Finally, I used a layer mask to brush in a texture to add more depth and contrast. (For more about textures and adding them to your images, turn to pages 175–183.)