Multi-RAW processing
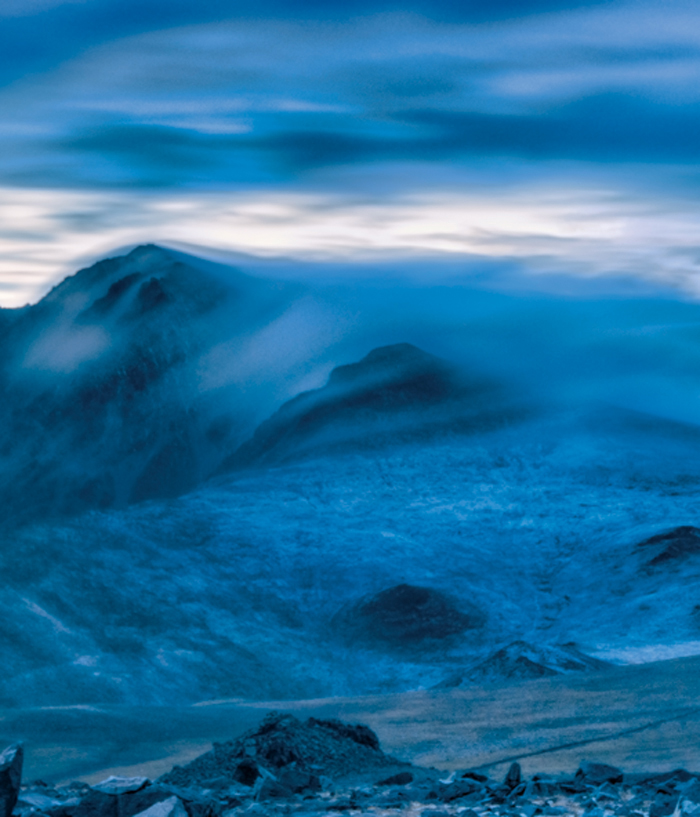
In the gathering twilight, I could see the clouds swirling as a storm swept across White Mountain Peak in eastern California. The foreground and mountain were quite dark in contrast to the bright sky. I knew that there was no way I could get the image properly exposed with just one shot. But I did know that I could use multi-RAW processing to perfectly expose for both the sky and the foreground in post-processing. So I took my 2-minute exposure with confidence.
70mm, 2 minutes at f/5.6 and ISO 200, tripod mounted.
“This is the purpose of all Zen teaching—to make you wonder and to answer that wondering with the deepest expression of your own nature.”
—Richard Baker
The way of the digital photographer as artist is to use concepts such as layers, layer stacks, and layer masks, and techniques such as painting on a layer mask to modify digital imagery. The first part of this book showed you how to understand and work with these concepts and tools. My hope is that you internalized this information, to the point that you can now draw upon it to inform the way you compose and expose digital photos at the time of their making.
All this, however, begs an important question: where does the source material—the photos—come from?
Early on, I explained the difference between JPEG and RAW files (see page 22). If you shoot photos as JPEGs, then you are done—meaning, you have your source material. But if you shoot RAW files, then it is time to derive your images by taking advantage of this hugely flexible format, using the tools I’ve explained to you earlier in this book.
Processing a RAW file once is good. Most likely you will do a better job of this conversion than your camera. Processing the RAW file two—three, four, or more—times is even better!
The first, and arguably most important, application of multi-RAW processing is to expand tonal range in an image. This means that from a single RAW file, you can create an image that is perfectly processed for each significant area in the image. For instance, you can make an image that has a perfectly exposed sky and a perfectly exposed landscape. It’s not magic—it’s multi-RAW processing.
Expanding tonal range with multi-RAW processing
The easiest way to expand the tonal range via multi-RAW processing is to process the same photo twice. This creates two images. For example, one image can be processed for a bright sky, and the other image can be processed for a dark landscape.
The two images created from the same RAW file can then be easily combined in Photoshop using the layer and layer-masking techniques you’ve already learned about in The Way of the Digital Photographer. Here’s how.
1. In Adobe Bridge, double-click on the image you want to open and process in Adobe Camera RAW (ACR).
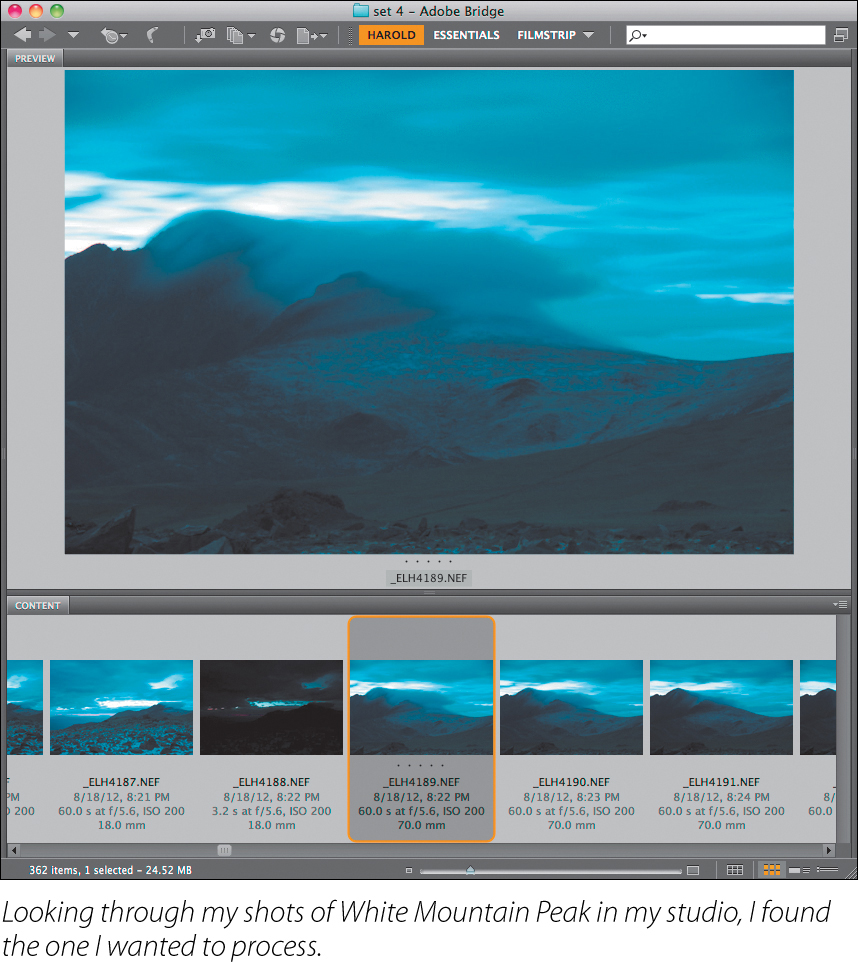
2. Move the Exposure slider to the right to “expose” this version of the image for the foreground (about +2EV). The sky will become overexposed, but don’t worry!
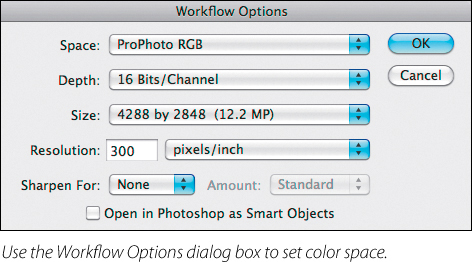
3. Click the underlined color space and resolution information at the bottom of the ACR screen. This will open a Workflow Options dialog box.

4. Using the Workflow Options dialog box, set the Space to ProPhoto RGB, and then click OK.
By the way, I like to set the Depth to 16 Bits/Channel and the Resolution to 300 pixels/inch.
5. When you are satisfied with the exposure for the foreground, hold down the Alt key and click Open Copy to open the image file as a copy in Photoshop.
6. Return to Adobe Bridge and double-click on the same original RAW image a second time.
7. In ACR, use the Exposure slider to “expose” for the sky. The foreground will become underexposed, but don’t worry about it!
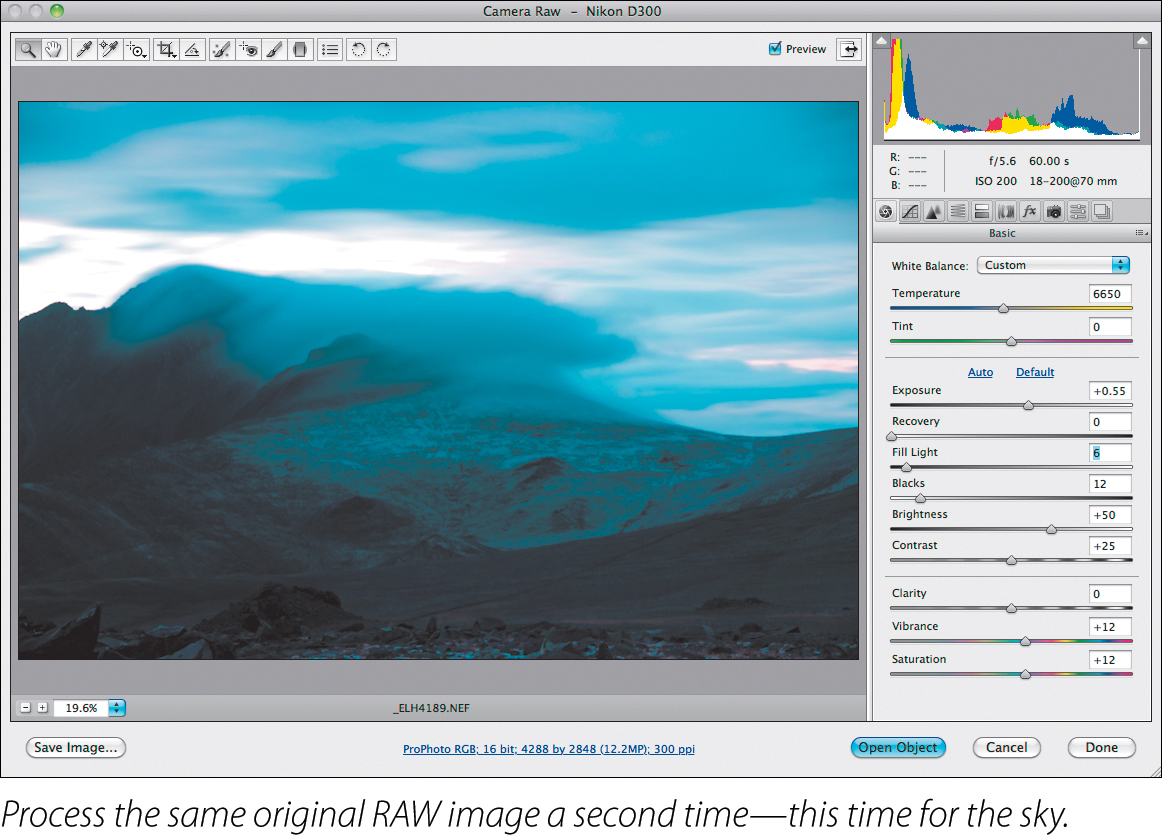
8. When you are satisfied with the exposure for the sky, hold down the Alt key and click Open Copy to open the image file as a copy in Photoshop.
You will now have two images open in Photoshop, one processed for the sky and one processed for the foreground.
9. Copy the image processed for the sky into the image window containing the image processed for the foreground (top right). (See pages 44–45 for copying an image into another image window.)
For this example, I named the layers “sky” and “foreground.

10. Make sure the “sky” layer is selected in the Layers panel, and add a black Hide All layer mask to the layer. (Turn to page 45, step 2 for directions on how to do this.)

11. With the black Hide All layer mask selected, use the Gradient Tool to drag a white to black gradient from the top of the image window down to the bottom (right). (Take a look at page 61 for directions on how to do this.)
The two layers will now be seamlessly blended, and the image will show only the best of each layer—a perfectly exposed sky and a perfectly exposed foreground. The finished image is shown on page 106.
All roads lead to Photoshop
The saying is that “All roads lead to Rome.” Well and good—but the implication is that there are many of these roads leading to Rome. In this case, “Rome” for those needing to work with layers is Photoshop. Following the metaphor, it is true that there are a number of alternative ways to open and process RAW files (in addition to the technique I just showed you on pages 108–110) before you load them as layers in Photoshop. (But all roads do lead eventually to Photoshop!)
Using Smart Objects
An alternative workflow that uses ACR to open multiple versions processed from a RAW file in Photoshop uses so-called Smart Objects. Smart Objects “remember” their own history, and provided the layer stack isn’t merged down, you can alter the properties (such as the ACR exposure settings) used to create the object after it has been opened.
Here’s how you can use Smart Objects in a multi-RAW processing workflow:
1. Open the image you want to process in ACR normally, but when it comes time to save it, hold down the Shift key to open it as a Smart Object (or in the Workflow Options dialog box, shown on page 109, select the Open in Photoshop as Smart Objects setting).
2. Copy the Smart Object in Photoshop by choosing Layer ![]() Smart Objects
Smart Objects ![]() New Smart Object via Copy.
New Smart Object via Copy.
3. With the copied Smart Object active in the Layers panel, choose Layer ![]() Smart Objects
Smart Objects ![]() Edit Contents (or double-click on the Smart Object’s thumbnail in the Layers panel).
Edit Contents (or double-click on the Smart Object’s thumbnail in the Layers panel).
4. Change the exposure settings using the ACR controls on the copied layer.
5. Align the copied Smart Object in a stack on top of the original Smart Object as if they both were normal layers, and proceed with masking in a normal fashion.
Using Lightroom
You can use Lightroom instead of ACR to do the initial multiple processing of RAW files, even though the files will ultimately need to be worked on in Photoshop for blending. Here’s how:
1. Open the image in Lightroom.
2. Use the Develop module to process a version for the “foreground” layer.
3. Next, make a virtual copy of the image.
4. Send the virtual copy through the Develop module, processing it for the “sky” layer.
5. Open both virtual copies in Photoshop, and proceed as if they had been created in ACR by combining layers, masking, and so on, starting with step 9 on page 110.

Meditation
The foolish reject what they see, not what they think; the wise reject what they think, not what they see.
—Huangbo Xiyun
Zen is simply a voice crying, “Wake up! Wake up!”
—Maha Sthavira Sangharakshita
Adjusting exposure selectively
You don’t have to make fantastic landscape images worthy of an Ansel Adams or Edward Weston to get benefits from using multi-RAW processing. Multi-RAW processing can salvage grab shots with just as much élan as it makes great photos greater.
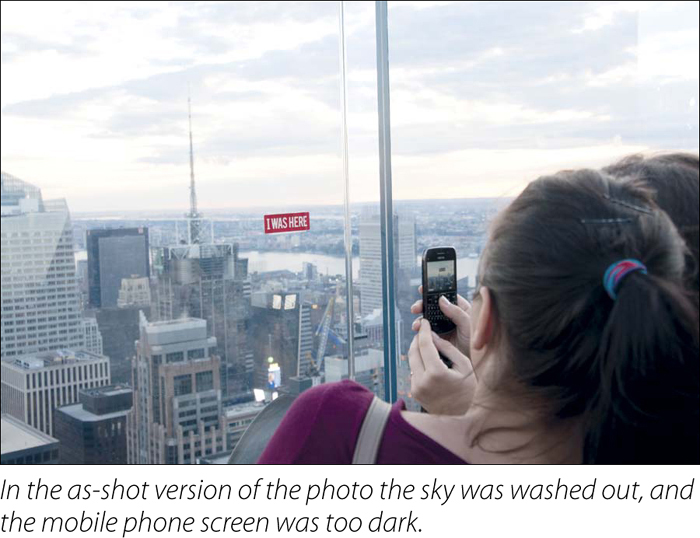
As an example, consider the snapshot of tourists on an observation deck shown at the bottom of page 113. The image seemed funny to me at the time I snapped it, but I didn’t have much time to compose this image or worry about exposure.
When I looked at the RAW image, it still seemed humorous to me, but the sky was washed out and the I-Was-Here sign wasn’t really readable on the phone screen in the tourist’s hands (above right). These problems were easily fixed using multi-RAW processing.
I started with the RAW capture in ACR and processed three versions from the same original RAW file: the first version was processed for the buildings, the second for the sky, and the third for the LCD screen on the mobile phone. (Find out more about processing multiple versions of an image from one RAW file on pages 107–110.)
In Photoshop, I copied the images and combined them as layers into a layer stack (below).

Next, I added two black Hide All layer masks, one to the “Sky” layer and one to the “LCD Screen” layer.
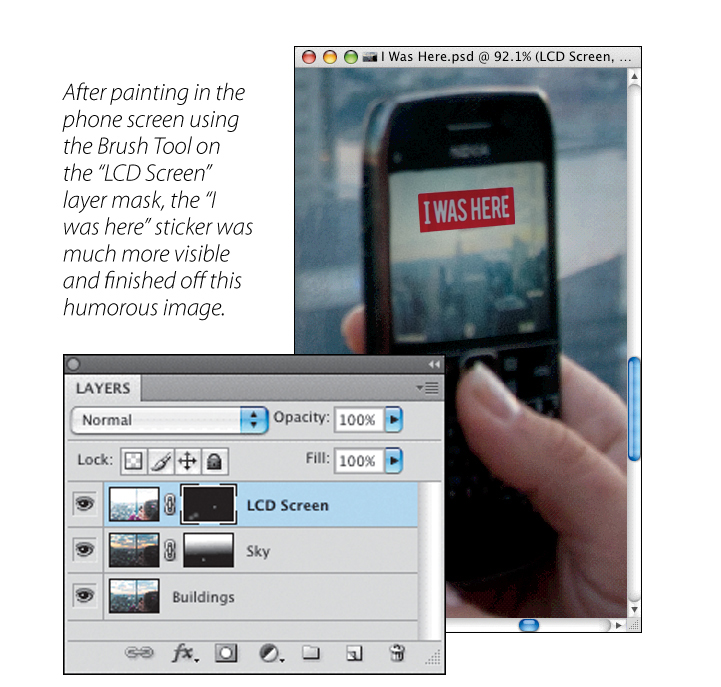
With the layer mask selected on the “Sky” layer, I used the Gradient Tool to drag a white-to-black gradient from the top to the bottom of the image window. This seamlessly blended the best parts of the “Sky” and “Buildings” layers. (Turn to pages 59–61 to find out more about the Gradient Tool.)
Finally, I selected the layer mask on the “LCD Screen” layer and used the Brush Tool set with white as the Foreground color to just paint in the area on the phone’s LCD screen. (Turn to page 56 for details about painting on a layer mask.)

At sunset on the Rockefeller Center observation deck in New York City, I was looking for photo opportunities. I thought that this scene showing tourists capturing an “I Was Here” sticker was really rather humorous, so I snapped a quick picture. To make the photo work, I used multi-RAW processing to bring out the fact that you can see the sticker in the LCD screen.
29mm, 1/50 of a second at f/7.1 and ISO 200, handheld.
Meditation
The Zen ways and arts draw a bridge from real artistic creation (in painting, architecture, poetry) to artistic skills like flower arrangement and gardening, and ultimately to all of everyday life.
—Heinrich Dumoulin

This ornate, multi-story bridge runs across a street in midtown Manhattan between two older office buildings.
The challenge with taking this photograph was that the bridge was essentially in a darkened “canyon” between the two tall office buildings. Bright sunlight was touching a part of the bridge roof, but the rest of the structure was in shadow.
I knew that if I exposed the photo correctly for the bridge, the sky would get completely blown out—and you can never get any kind of detail out of a blown-out area in a RAW file no matter how you process it.
Instead, I decided to expose the photo correctly for the sky, leaving the bridge quite underexposed. I knew this wouldn’t be a problem in post-processing, though, because I could easily process a version of the RAW file that would correctly render the details and colors in the bridge.
Back in my studio, I processed two versions of the image from the one RAW file: one version that correctly “exposed” for the sky and one that “exposed” for the bridge. Then, I combined these two versions in Photoshop using a layer mask and the Brush Tool.
170mm, 1/250 of a second at f/8 and ISO 200, handheld.