
Backgrounds and textures
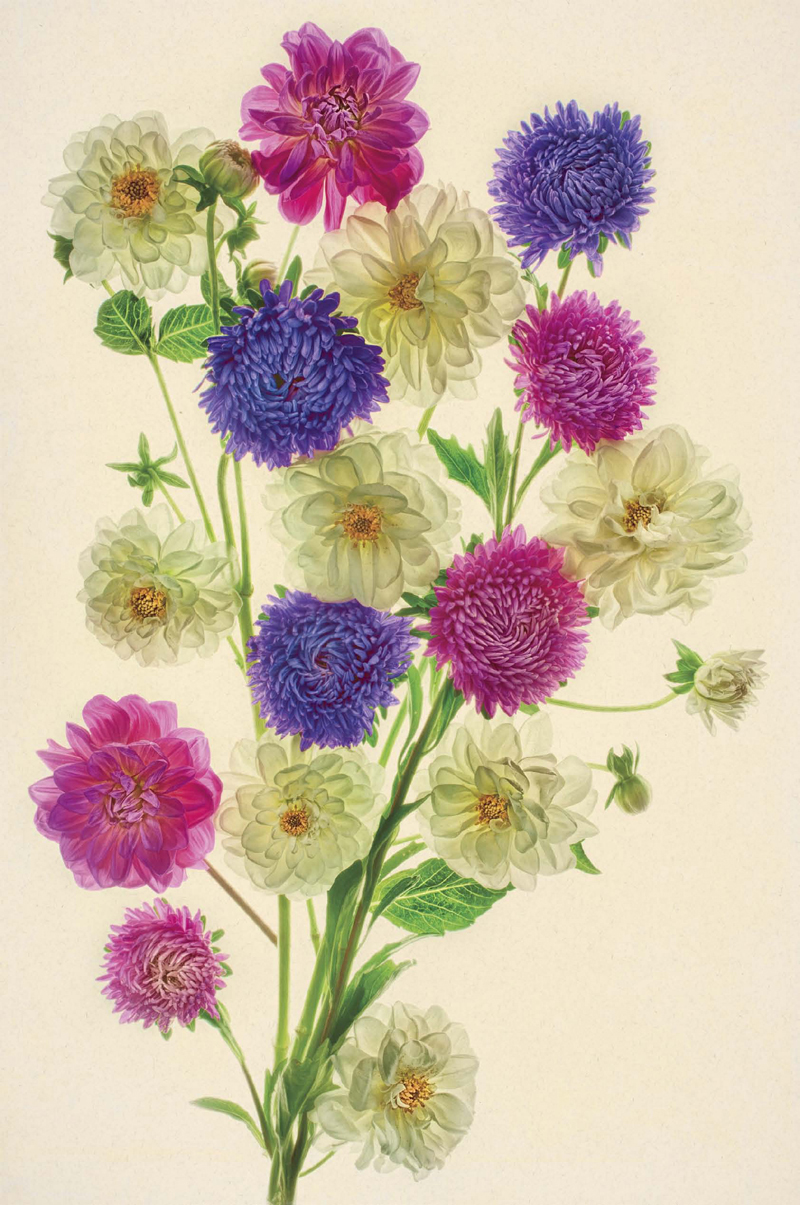
I have several raised flower beds that I use to grow flowers specifically for photography. Starting in January each year, I visit several local horticultural nurseries in my area, looking for interesting seedlings that will (hopefully) grow into beautiful flower-bearing plants that I might like to photograph a few months later. Even though I put markers in when I plant, some become lost over time and I forget what each plant is exactly. Walking outside with my pruning shears one day in early autumn, I discovered some beautiful white dahlias in full bloom.
Looking at these flowers, it seemed to me that they would be more appealing by adding some color. So besides the white dahlias, I cut some nearby purple and pink asters, and a few pink dahlias.
Back inside in my studio, I arranged the flowers on a light box for transparency, taking care to make a coherent internal structure so it looked like all the flowers were part of one bouquet.
I shot a series of bracketed exposures going from the “average” exposure to way overexposed (see pages 120–121 for more information about this technique).
I combined the resulting exposures, starting with the lightest on the bottom of the layer stack. Each successively darker layer was painted in at moderate opacity using layer masks and the Brush Tool.
After combining the layers, I had the result on white (shown on page 176). This image, while quite beautiful, was also a bit more stark than I wanted in order to create a botanical print. So to finish the image, I layered it over a scanned paper background.
40mm macro lens, seven exposures at shutter speeds from 4 seconds to 1/30 of a second, each exposure at f/16 and ISO 200, tripod mounted; exposures combined in Photoshop, and added to a scanned paper background.
One of the easiest ways to add a bit of pizzazz to an otherwise finished image is to add a background or texture. Images appear placed on a background, whereas a texture is intended to add patterns, marks, or color swatches across an image rather than function as a backdrop.
In either case, the most effective technique is often to overlay the background or texture and use a blending mode other than Normal to create the desired effect. Alternatively, you can place your image on a background that is textured.
Examples of images that use textured backgrounds and overlays can be found on pages 18–19, 128–129, 136–137, 162–163—throughout The Way of the Digital Photographer.
One way to create image files that can be used as a background or texture is to scan them. Anything you can place on a flatbed scanner can, most likely, be scanned—specialty papers such as Japanese washi or fabrics such as canvas, linen, or silk. You can also create textures by shooting an image, most often—but not always—of something textural. If you want to shoot an image for use as a texture or background, the best practice is to use a fast shutter speed and a wide-open aperture for minimal depth-of-field. You can also license images to use as textures, such as the Florabella Textures collections.
Meditation
The perfect is the enemy of the good ... but that shouldn’t stop us from seeking perfection.
Blending a background with an image
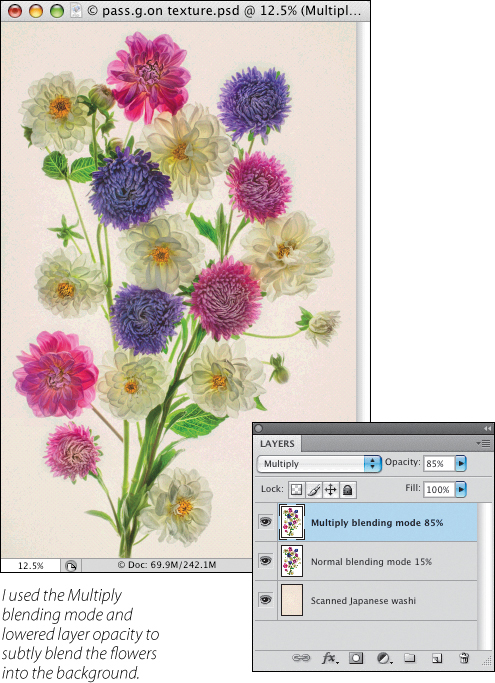
With the image of dahlias and asters shown to the right, I assembled a composition and shot a series of bracketed photos straight down on a light box.
After processing the flower image, I wanted to enhance it a bit more and give it the look of a botanical print. So I found a piece of Japanese washi rice paper and scanned it on a standard flatbed scanner.
As you can see from the layer stack shown below in the Layers panel, I put the scanned washi on the bottom of the stack, and then added the aster composition first using Normal blending mode with the layer set to 15% Opacity. Finally, I duplicated the aster layer, set the blending mode to Multiply and lowered the duplicate layer’s Opacity to 85%. This gently blended the flowers into the washi background.

Often an inversion of an image on a light background can create a very attractive and distinctive image that stands in its own right. For instance, after converting the dahlias and asters image shown on page 174 to the LAB color space, I inverted the L channel creating the luscious and painterly effect shown in this composition.
To enhance the painterly qualities of the image, I added a canvas-textured overlay that incorporated large brush strokes.
An L-channel inversion of the image is shown on page 174. For more information about LAB inversions, turn to pages 155–163. Additional texture overlay was added in Photoshop using a layer mask and the Brush Tool (see pages 43–56 for details about this layering technique).

Using textures to change the scene
This photo of glamour model Jade Vixen was certainly intriguing, but the beige paper background with footprints on it left something to be desired (top right).
I decided that adding some texture to the background would move the model away from the studio shot to an image that would be reminiscent of an old-fashioned 19th-century photograph.
1. To get started, I looked through my files of textures and found an Artiste texture from one of the Florabella Texture packs (see the Resources section for info about these textures) that appeared to have broad brush strokes and a similar golden-brown tonality to the model (below right).
I opened the Artiste texture in Photoshop and created a layer stack by copying the texture into the image window containing the model. I named the layer “Artiste.” (For directions on how to copy an image and create a layer stack, turn to pages 44–45.)

2. Then I added a white Reveal All layer mask (page 47) to the “Artiste” layer and changed the blending mode to Soft Light (turn to pages 71–95 for info about working with blending modes). I used a black brush set to a low opacity to blend the texture into the model “Background” layer. (Turn to pages 43–56 to learn about the Brush Tool and painting on a layer mask.)
The texture was still too strong on the model’s skin, so the next step would be to correct it.

3. To correct the skin texture problem, I duplicated the “Background” layer and put it at the top of the layer stack (right). I then added a black Hide All layer mask.
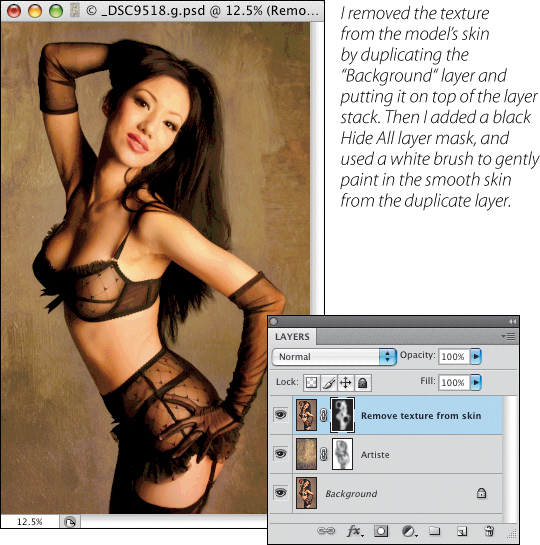
4. Next, using a white brush, I carefully painted on the layer mask to reveal the smooth skin of the duplicated layer, leaving the texture of the “Artiste” layer visible.
At this point, I saved a copy of the image as a checkpoint (in case I made a mistake and needed to go back later). (To find out about checkpoints and file management, turn to pages 139–140.)
5. To add a more antique feel to the image, I duplicated the “Background” layer and applied Nik’s Film Efex Vintage #2 filter to the duplicate (middle right). To blend the vintage layer in with the “Background” layer, I used a white Reveal All Layer mask, and used black to paint out the effect on the model. I then changed the layer Opacity to 51%.

6. Finally, I added another Florabella texture, Patina Warm, to the top of the layer stack (below), blended the texture in using a layer mask and painting, and lowered the layer Opacity to 14%. The final image is shown on page 180.


I shot this glamour model in a studio on a beige background (original photo page 178, top). Looking at the image on my computer in my studio, it seemed to me that the contrast between the model and the background was simply too stark. So I used the techniques shown in this section to add a texture overlay to the image that somewhat resembles a painted wall.
To make sure that the texture overlay did not interfere with the fine quality of the model’s skin, I masked out the model when I added the texture overlay.
It’s often been my experience that adding a texture can increase the attractiveness of many kinds of photos.
36mm, 1/160 of a second at f/6.3 and ISO 200, handheld; texture overlay added in Photoshop.
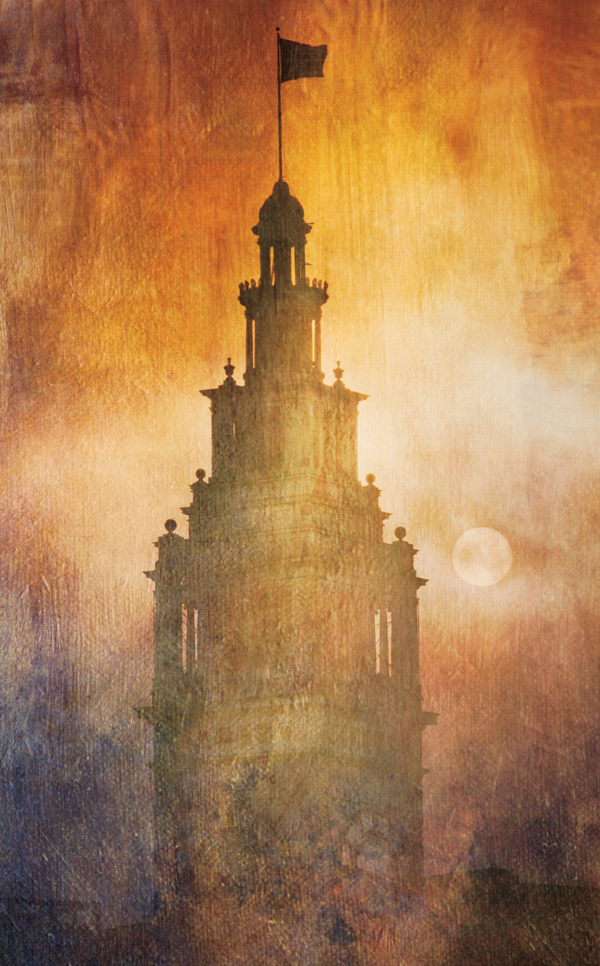
In my life, I have traveled and photographed in quite a few exotic locations. So it’s no wonder when folks see this image that they think I shot it somewhere off the beaten path. In fact, this is the Ferry Building in San Francisco at sunset, just a few miles from where I live.
Adding a texture overlay helped make what would otherwise be a rather normal-looking photo into something that resembles an attractive oil painting.
150mm, 1/2000 of a second at f/16 and ISO 200, tripod mounted, texture overlay added in Photoshop.
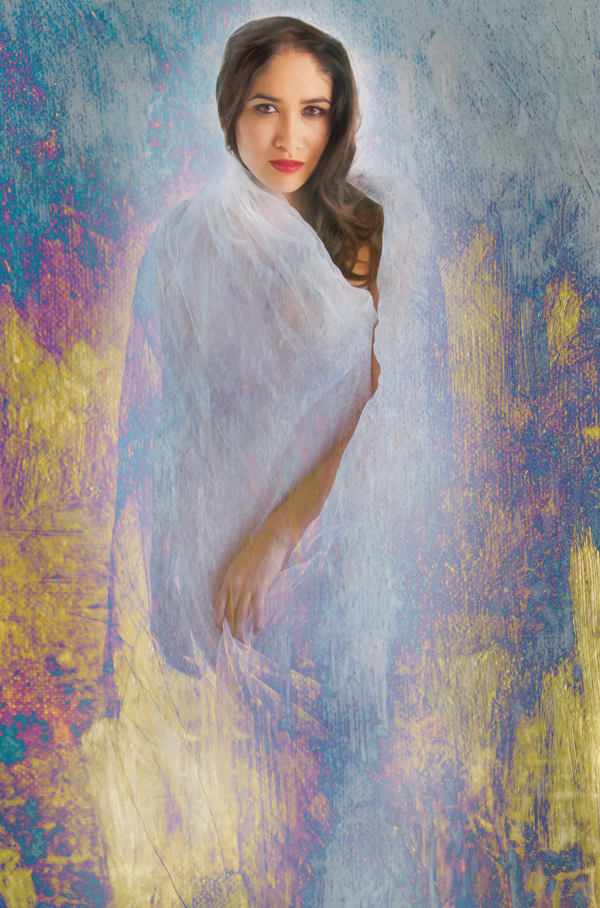
The idea behind this photo is to show the model emerging from a background. To make it, I shot the model on a white background. She was wrapped in sheer, white gauze. In post-production, I placed the model image as a layer on a canvas background, and then added a series of textures on top of the Photoshop composite.
42mm, 1/160 of a second at f/9 and ISO 100, handheld; scanned canvas background and texture overlays added in Photoshop.

To shoot this wet maple leaf, I positioned the camera on a tripod inside looking out—so the image is looking through a wet window to the leaf on the exterior of the glass. I used a macro lens, and shot two exposure sequences, one at moderate depth-of-field (f/10) for the window glass, and one stopped down (to f/22) to get the leaf itself maximally in focus. After processing the image, I duplicated the layers and used the Topaz Simplify Woodcarving filter (see page 151) to increase the sense of texture in the leaf and window.
40mm macro lens, six exposures, four exposures shot using shutter speeds between 1/15 of a second and 2.5 seconds at f/10, and two exposures shot at shutter speeds of 2 seconds and 5 seconds with an aperture of f/25, all exposures at ISO 200, tripod mounted; exposures combined using Nik HDR Efex Pro and Photoshop.