Working with layer masks
I was walking around an industrial neighborhood in West Oakland, California, when I came across a fenced-in lot filled with giant pipes and an ancient-looking rusty crane.
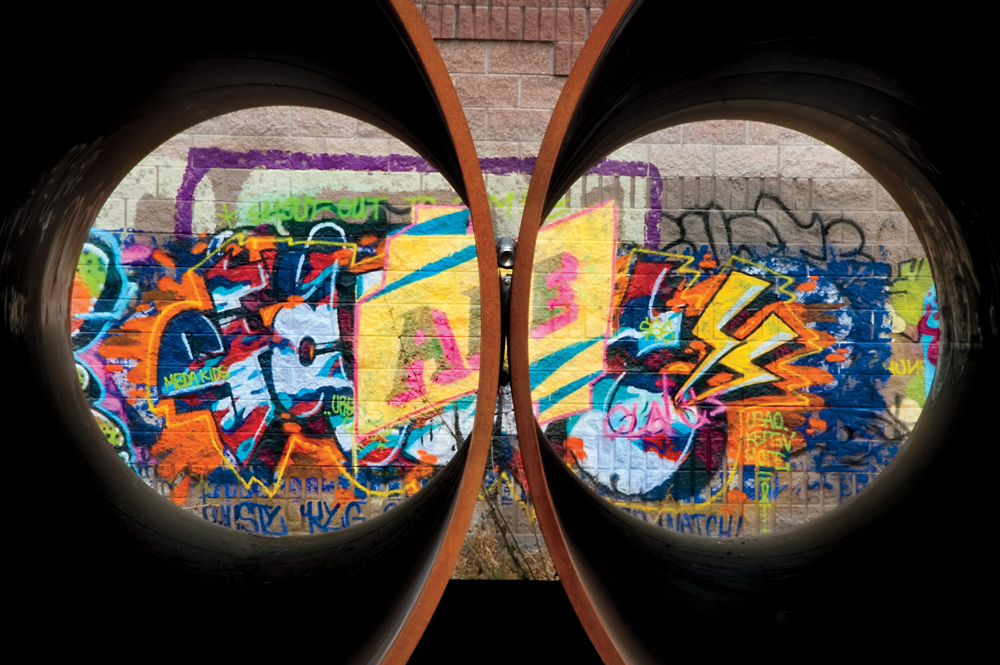
I found a large man-sized hole in the fence, so I walked in and started to explore. I liked looking through the pipes to view the graffiti and got to thinking about the image I wanted to create. I realized that I needed to underexpose to capture the vibrant colors of the graffiti, while at the same time I wanted to see the contours of the pipes. How did I solve this exposure challenge?
The point of using aligned layers in a layer stack becomes apparent when one uses layer masks to control which parts of each layer are shown in the final image.
To add a Hide All layer mask to a layer, with the layer selected, choose Layer ![]() Layer Mask
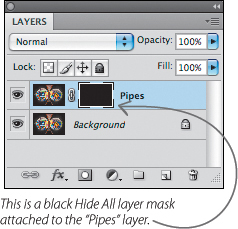
Layer Mask ![]() Hide All. A layer mask that is entirely black appears attached to your layer, as you can see below. This means that the layer will be entirely cloaked or hidden until you begin to reveal it by painting in white or gray on the layer mask.
Hide All. A layer mask that is entirely black appears attached to your layer, as you can see below. This means that the layer will be entirely cloaked or hidden until you begin to reveal it by painting in white or gray on the layer mask.
To add a Reveal All layer mask to a layer, with the layer selected, choose Layer ![]() Layer Mask
Layer Mask ![]() Reveal All. A layer mask that is entirely white will be added to your layer. This means that the layer will be entirely revealed until you partially conceal it by painting in black or gray on the layer mask.
Reveal All. A layer mask that is entirely white will be added to your layer. This means that the layer will be entirely revealed until you partially conceal it by painting in black or gray on the layer mask.

By the way, you can’t attach a layer mask to a Background layer because this layer automatically is locked by Photoshop. In order to attach a layer mask, you need to change the Background layer to a regular layer by selecting Layer ![]() New
New ![]() Layer From Background.
Layer From Background.
White or black? That is the layer mask question. Actually, the two can be thought of as logically equivalent: in any layer stack the same visual effect can be achieved using either a Hide All (black) or Reveal All (white) layer mask if you shift the order of the layers. So the question essentially comes down to asking which path is more natural, and involves less effort. Which type of layer mask will require less work?
I was shooting in a decayed industrial neighborhood in West Oakland, California, when I came across the large pipes and graffiti shown in the final images on pages 42 and 48‘49.
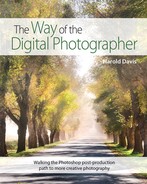
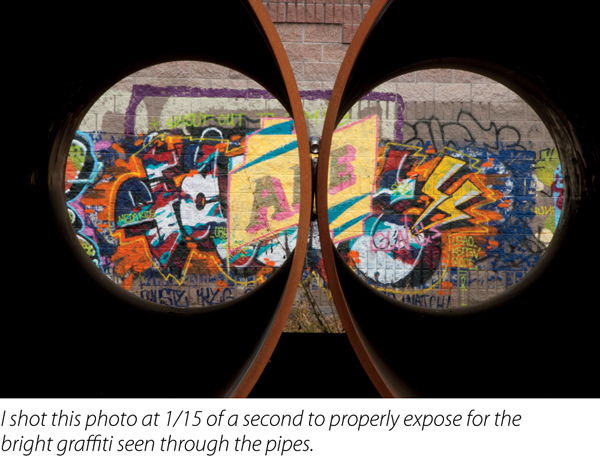
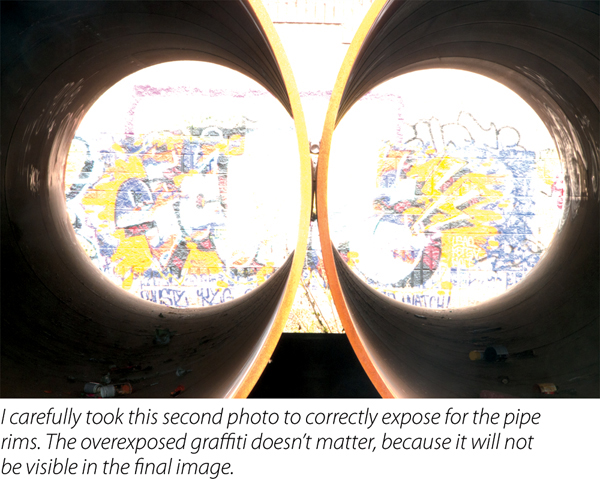
It was clear to me that I needed to underexpose to fully capture the vibrant colors and saturation of the graffiti art. At the same time, I knew I would want to see some details in the contour and rim of the pipe. Planning for this digital exposure challenge, I shot twice: once for the art (at 1/15 of a second, top right), and once for the pipe rim (at 1/4 of a second, right).
When I got the images home, the fun started in Photoshop.
1. First, open both images in Photoshop. This means that each image will be in a separate image window. (If your images open in a single, tabbed window in Photoshop, reset this default by selecting Photoshop ![]() Preferences
Preferences ![]() Interface on Mac or File
Interface on Mac or File ![]() Preferences
Preferences ![]() Interface in Windows and then unchecking Open Documents as Tabs.)
Interface in Windows and then unchecking Open Documents as Tabs.)
2. Select the Move Tool from ![]() the Tool panel.
the Tool panel.
3. Click the image window that contains the photo you would like on the top of the layer stack. This will be the source layer. For this example, the lighter pipe rim photo is the source layer.
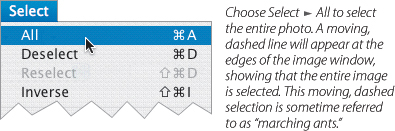
4. Choose Select ![]() All to select the entire pipe rim photo.
All to select the entire pipe rim photo.
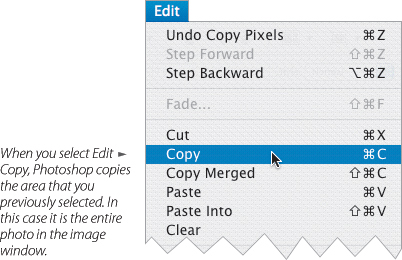
5. Next, select Edit ![]() Copy to copy the entire image.
Copy to copy the entire image.
6. Click the image window that contains the photo that will be on the bottom of the layer stack to make it active. This will be the target layer. For this example, the graffiti photo is the target layer.
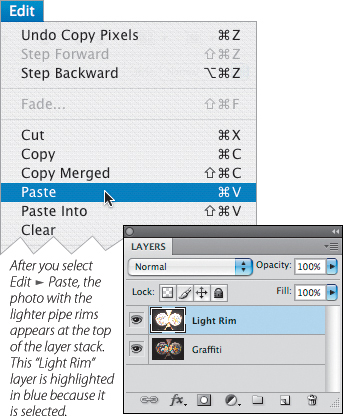
7. Choose Edit ![]() Paste to copy the pipe rim photo into the graffiti photo window. You now have two layers in the Layers panel. For this example, the layers are named “Light Rim” and “Graffiti.” At this point, only the “Light Rim” layer is visible in the image window. The “Graffiti” image is hidden underneath.
Paste to copy the pipe rim photo into the graffiti photo window. You now have two layers in the Layers panel. For this example, the layers are named “Light Rim” and “Graffiti.” At this point, only the “Light Rim” layer is visible in the image window. The “Graffiti” image is hidden underneath.
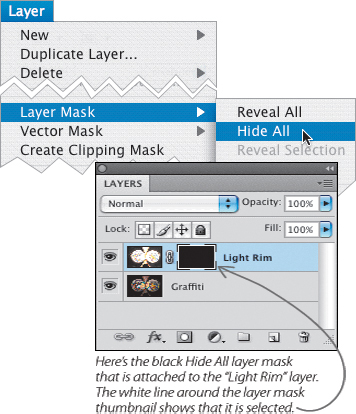
In the next set of steps, you will use a black Hide All layer mask attached to the “Light Rim” layer to let you decide which portions of the upper “Light Rim” layer will be visible in the final image.
Combining two exposures with a Hide All layer mask
1. Click on the “Light Rim” layer in the Layers panel to make sure it is selected. (When it is selected, it is highlighted in blue, as shown above right in the Layers panel.)
2. Select Layer ![]() Layer Mask
Layer Mask ![]() Hide All. A black Hide All layer mask will appear attached to the “Light Rim” layer. Also, since the Hide All layer mask hides the layer it is attached to, the “Light Rim” layer will no longer be visible in the image window. (It’s still there, though!) You will now be able to see the “Graffiti” layer in the image window.
Hide All. A black Hide All layer mask will appear attached to the “Light Rim” layer. Also, since the Hide All layer mask hides the layer it is attached to, the “Light Rim” layer will no longer be visible in the image window. (It’s still there, though!) You will now be able to see the “Graffiti” layer in the image window.
Meditation
Is there ever a reason to create a layer stack in which the layers are not precisely aligned?
3. Select the Brush Tool from the Tool panel and set the Brush Tool ![]() to the width of the pipe rims. Set the Foreground color in the Tool panel to white and the Brush Tool’s Hardness setting to 0%. Then, use the Options Bar to set the brush Opacity to 50% and the Flow to 50%. (For more about the Brush Tool and its settings, turn to pages 51–57.)
to the width of the pipe rims. Set the Foreground color in the Tool panel to white and the Brush Tool’s Hardness setting to 0%. Then, use the Options Bar to set the brush Opacity to 50% and the Flow to 50%. (For more about the Brush Tool and its settings, turn to pages 51–57.)
4. With the black Hide All layer mask selected in the Layers panel, use the Brush Tool to paint in the image window along the pipe rims (don’t try to paint on the layer mask thumbnail in the Layers panel).
Zoom in as close as you need to in order to see the pipes. As you paint with white on the black layer mask, the area on the “Pipe Rim” layer will become visible. If you need to, you can also alter the size and opacity of the brush as you paint.
When you are finished painting, the layer mask will probably look something like the one shown to the right.
The finished Oakland Pipes image is shown on pages 48–49.

Pages 48–49: Wandering around a deserted industrial area near the West Oakland docks, I came across some large, apparently abandoned pipes in a field covered with weeds and surrounded by walls that had been painted with graffiti. I used a telephoto focal length to compress a composition showing the saturated graffiti, making several exposures to get the details I wanted. In Photoshop, I processed one of the images for the fully saturated paintings, then painted in the outline of the pipes from a lighter exposure (as explained in the text).
130mm, two exposures, one at 1/4 of a second (lighter) and one at 1/15 of a second (darker), both exposures at f/36 and ISO 200, tripod mounted; exposures combined in Photoshop.
Meditation
Since you can get equivalent results using a black Hide All layer mask as shown above or using a white Reveal All layer mask as shown on page 47 if you reverse the order of the layer stack, which one is best to use?
Hint: It is always important to have a plan that is coherent and makes sense in relationship to a particular image. How much are you going to have to paint if one layer is on the top of the layer stack instead of the other layer?
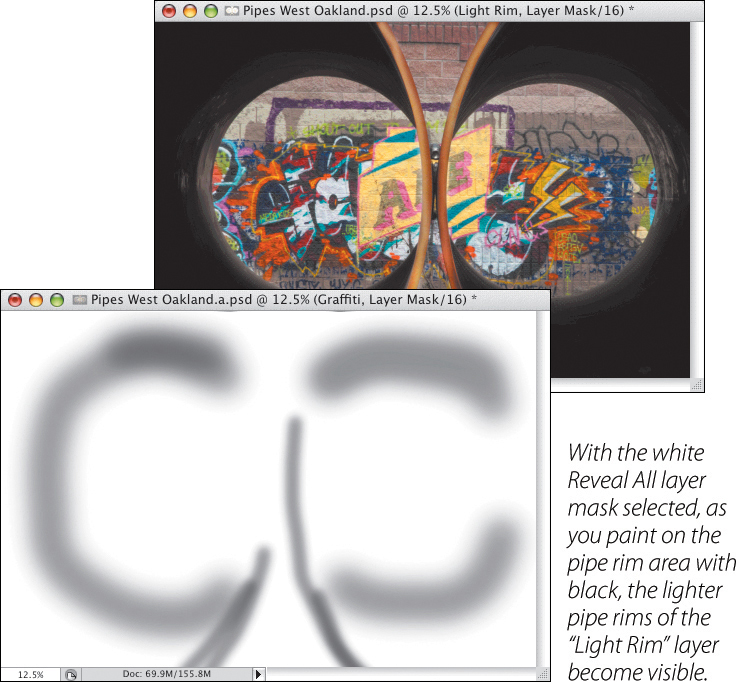
Using a Reveal All layer mask to combine two exposures
As I noted back on page 43, if you reverse the order of your layers in the stack—putting the “Graffiti” layer on top and the “Light Rim” layer underneath—you could use a white Reveal All layer mask and come up with the same results as shown on page 46.
To demonstrate this with the Oakland Pipes image:
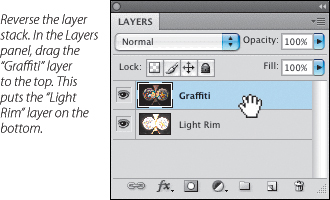
1. Put the “Graffiti” image on the top of the layer stack by dragging the layer up in the Layers panel. This leaves the “Light Rim” layer on the bottom.
2. With the “Graffiti” layer selected in the Layers panel, select Layer ![]() Layer Mask
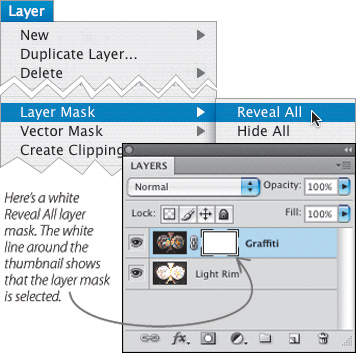
Layer Mask ![]() Reveal All. A white Reveal All layer mask will appear attached to the layer. The layer mask makes the “Graffiti” layer visible and hides the “Light Rim” layer underneath.
Reveal All. A white Reveal All layer mask will appear attached to the layer. The layer mask makes the “Graffiti” layer visible and hides the “Light Rim” layer underneath.
3. Select the Brush Tool from the Tool panel and set the Brush Tool ![]() to the width of the pipe rims. Set the Foreground color in the Tool panel to black and the Brush Tool’s Hardness setting to 0%. Then, use the Options Bar to set the brush Opacity to 50% and the Flow to 50%.
to the width of the pipe rims. Set the Foreground color in the Tool panel to black and the Brush Tool’s Hardness setting to 0%. Then, use the Options Bar to set the brush Opacity to 50% and the Flow to 50%.
4. With the white Reveal All layer mask selected in the Layers panel, paint in the image window along the pipe rims. As you paint with black the lighter pipe rims from the “Light Rim” layer will become visible.
It is worth taking a moment or two to compare the two scenarios—using a black Hide All layer mask (page 46) and a white Reveal All layer mask—until you are sure you understand why the two approaches lead to an identical result. The finished image is shown on pages 48–49.