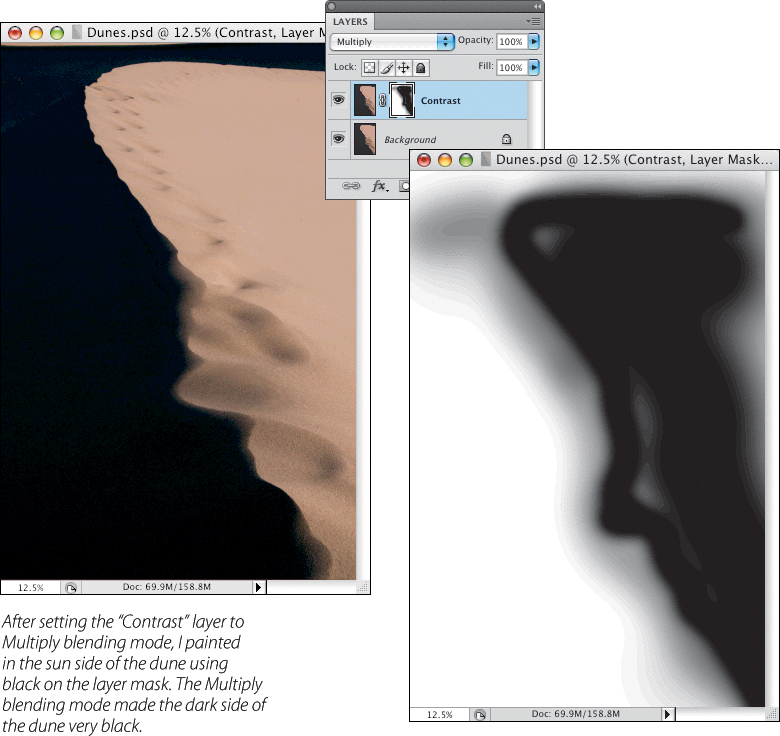
Multiply blending mode
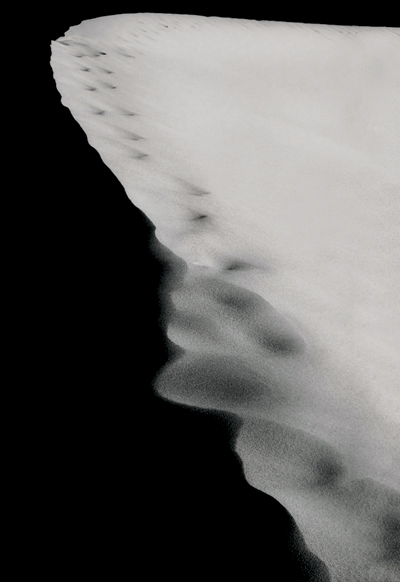
High in Death Valley’s Eureka Dunes I saw this high-contrast composition in the late afternoon sun. It was bitterly cold with a strong, gusting winter wind. Tiny pellets of blowing sand stung my cheeks and hands with every gust. Even though I was wearing cold-weather gear, it was hard to stay warm.
It’s always windy at the Eureka Dunes and as the wind strikes the dunes, it hits harmonics, sounding musical notes. The pitch of the note depends on how much moisture is in the sand. The drier the sand, the higher the pitch of the resulting harmonic. So the sands sang to me as I pre-visualized this photo.
My idea was to exaggerate the demarcation line between the side of the dune in shadow and the side in sunshine.
I knew I could achieve this effect in post-processing by duplicating the “Background” layer, changing the duplicate layer to Multiply blending mode, and then using a layer mask to “protect” the part of the dune in sunshine from the effects of the darkened, Multiply layer (see pages 43–47 for details about layer masks and how to work with them).
With these thoughts in my head, I carefully pulled out my camera and shielded it as best I could from the sand. I didn’t want sand to get in my camera, so I had to work fast. No tripod setup here (even though I had lugged it up the dune with the rest of my equipment!). I set my camera to a fast shutter speed and quickly shot a series of images. Then I capped my lens.
After trudging back down the dune, it was a relief to get into the quiet of my van, out of the wind. I immediately set to work, cleaning out the sand from my camera, bag, the rest of my gear, and my hiking boots.
52mm, 1/500 of a second at f/25 and ISO 320, handheld.
Just about as common as wanting to lighten an image is the need to darken it. When I want to selectively darken an image, most often I reach for the Multiply blending mode.
This blending mode compares the two layers being blended and multiplies each pixel on the bottom layer with its corresponding pixel on the upper (blending) layer, creating a darker color.
The only color in an image that the Multiply blending mode does not work on, meaning darken, is white. You can multiply white with white all you like, and it will still just be white!
By using a layer mask and controlling the opacity of the Multiply blended layer, I can add drama and tonal range to any photo.
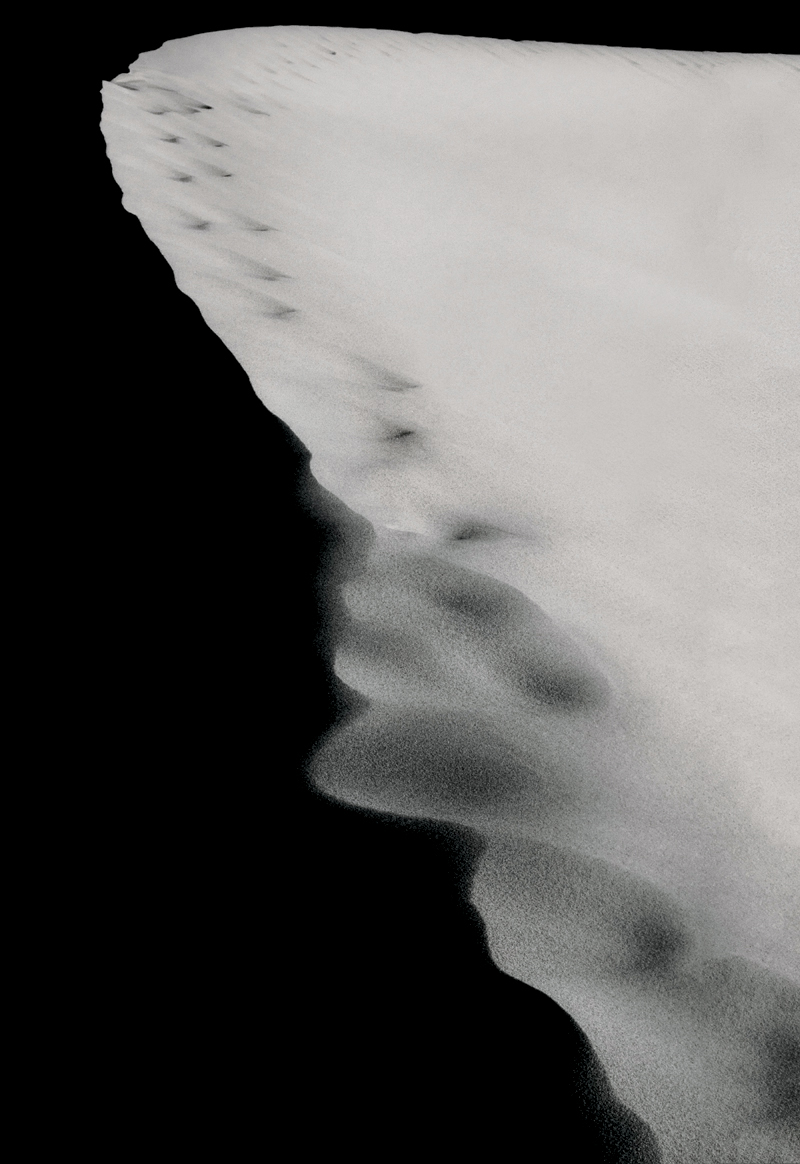
For example, high in Death Valley’s Eureka Dunes, I looked across the top edge of a large dune and pre-visualized this high-contrast composition in the late afternoon sun (left). My idea was to exaggerate the demarcation line between the side of the dune in shadow and the side in sunshine. I knew I could achieve this effect in post-processing using the Multiply blending mode, so I planned my shots with this in mind and took them accordingly.
Back at my studio, I started by duplicating the “Background” layer and naming the duplicate “Contrast.” For information about how to duplicate a Background layer, see page 55, step 3.
Then I changed the “Contrast” layer’s blending mode to Multiply. Changing blending modes is explained on page 75.
Next, I added a white Reveal All layer mask (for information on working with Reveal All layers masks, see page 47) and used the Brush Tool with the Foreground color set to black (to carefully paint the line of the dune and the sun side of the dune on the right. (I show you how to use the Brush Tool on pages 51–52).
These steps allowed the brighter, sun side of the dune on the Background layer to be visible, and the darker, shadowed side of the dune to become really dark where the layer mask allowed the Multiply blending mode version of the layer to come through.
Since this kind of high-contrast image works well in black and white, I converted the image to monochrome using Nik Silver Efex Pro. You’ll find information about converting an image to black and white in post-production on pages 167–173.
The final image of the crest of the Eureka Dunes is shown to the right and on page 82.
Using the Multiply blending mode let me make the shadowed side of the dune very dark, adding to the contrast and shape of the dune line.
52mm, 1/500 of a second at f/25 and ISO 320, handheld.

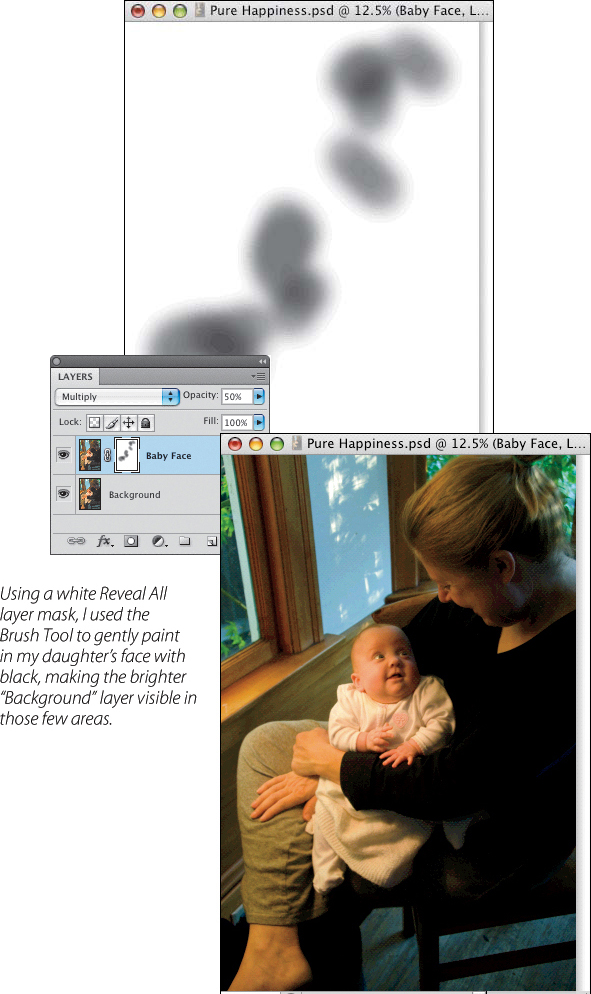
For another example, in this image of my wife and daughter (left), I wanted to emphasize the glowing expression on the face of my little girl. To achieve this result, I needed to darken the surrounding image so that extraneous details wouldn’t visually clutter the image (original photo below left).
As a first step, I duplicated the background layer that I wanted to darken and named it “Baby Face.” Next, I changed the “Baby Face” layer to Multiply blending mode. This created an effect of overall darkness.
I added a white Reveal All layer mask, and used the Brush Tool to paint out the areas that I wanted to stay bright, primarily the baby’s face (below right).
Finally, I took down the opacity of the “Baby Face” layer to the point where it looked attractive rather than too dark—about 50% opacity.

This image has emotional impact because of the glowing light on my daughter’s face, emphasizing her wonderful expression. To achieve this lighting effect in post-processing, I used the Multiply blending mode on a duplicate of the Background layer and selectively lightened my daughter’s face using a layer mask and the Brush Tool.
32mm, 1/80 of a second at f/5.6 and ISO 800, handheld.