
In this recipe, we will take advantage of Unity Pro's ability to render camera views into textures to make a rearview mirror.
In order to follow this recipe, please use the example scene mirrorPackage, available in the Unity Package format in the 0423_11_02 folder.
To create a rearview mirror, perform the following steps:
- Import mirrorPackage and open the scene named mirrorScene, from the 11_02 folder.
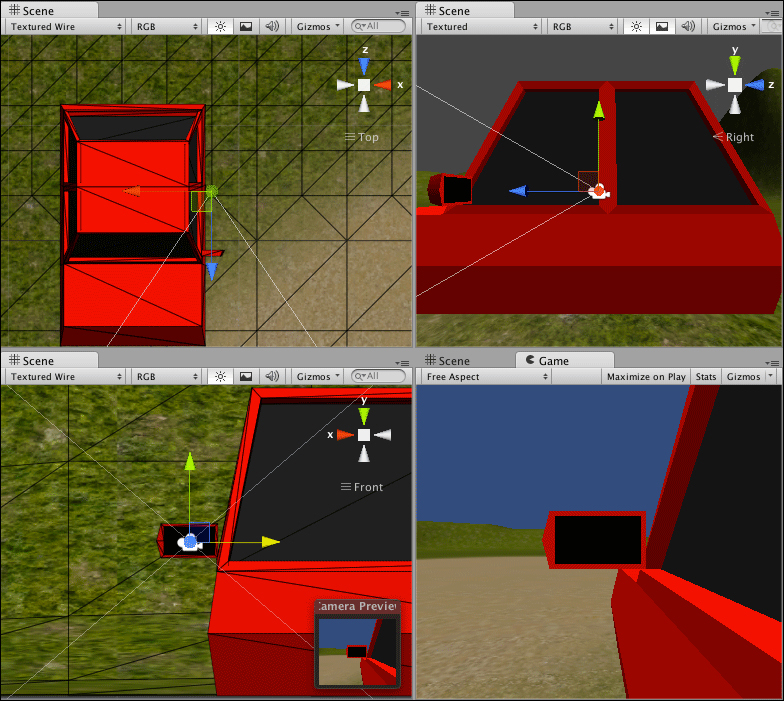
- Using the Transform tools (Move and Rotate), place the Main Camera next to the left-hand side of the car, as shown in the following screenshot. Make sure the rearview mirror is framed.
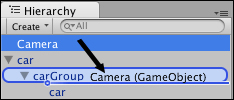
- In the Hierarchy view, expand the car object. Then, drag the camera into the carGroup sub-object, making it a child of the carGroup:
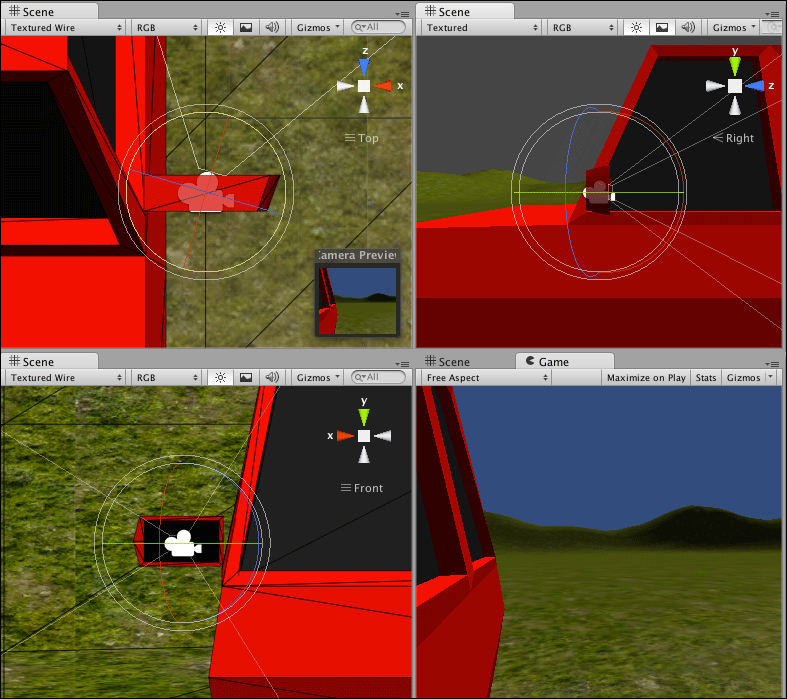
- In the Hierarchy view, access the Create drop-down menu to add a Camera to the scene. Change its name to
mirrorCamand in the Inspector view, disable its Audio Listener property. - Position and rotate the camera as if it is inside the rearview mirror object:
- Expand the car object and then the carGroup sub-object. Make the mirrorCam a child of carGroup.
- Now, let's create a new material for the mirror. In the Project view, select the Create drop-down menu and choose Material. Name it as
mirrorMaterial. Next, select the Create drop-down menu one more time and choose Render Texture. Rename it tomirrorTex. - In the Inspector view, set the mirrorText size to 1024 x 512.
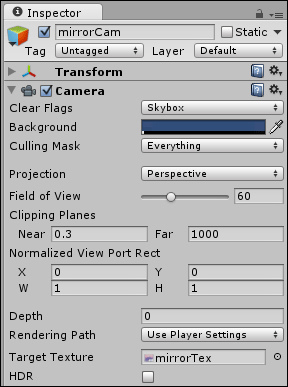
- Select the mirrorCam object. In the Inspector view, change the value of Target Texture field to mirrorTex.
- Select mirrorMaterial and change its Main Color texture to mirrorTex. This can be done by dragging the mirrorTex material from the Project view into the Main Color texture slot.
- In the Hierarchy window, select the mirror sub-object. Then apply the mirrorMaterial by dragging it from the Project view into the Inspector view (below its current material).
- Now, the map must be flipped horizontally (more precisely, mirrored). In the Project view, select mirrorTex and change its Wrap Mode to Repeat.
- Select mirrorMaterial and change its x Tiling value to
-1: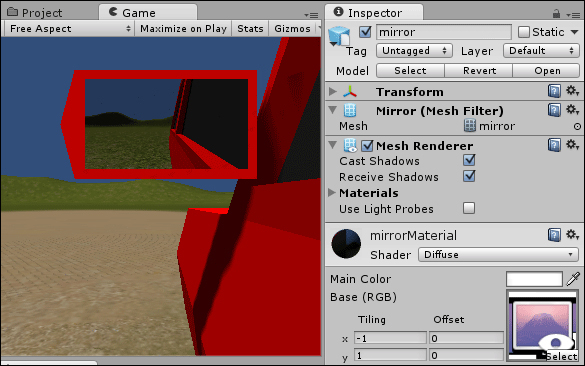
As you have learned from the recipe, the mirror's camera view is actually being rendered into the Render Texture in real time.
The following is a list of interesting things that can be done with Render To Texture:
..................Content has been hidden....................
You can't read the all page of ebook, please click here login for view all page.