
TV sets projectors, monitors... If you want complex animated materials in your level, you can play video files as texture maps. In this recipe, we will learn how to apply a video texture to a cube. We will also implement a simple control scheme that plays or pauses the video when the cube is clicked.
Unity imports video files through
Apple Quicktime. If you don't have it installed on your machine, please download it at http://www.apple.com/quicktime/download/. Also, if you need a video file to follow this recipe, please use the videoTexture.mov file included in the 0423_11_03 folder.
To play a video inside a scene, perform the following steps:
- Create a cube by navigating to Game Object | Create Other | Cube.
- In the Project view, use the Create drop-down menu to create a new material. Rename it as
videoMaterial. - We now need to import our video texture. Navigate to Assets | Import New Asset... and browse to your video file (it will import and convert any video file QuickTime is capable of reading).
- Unity will convert your file to the OGG/Theora format.
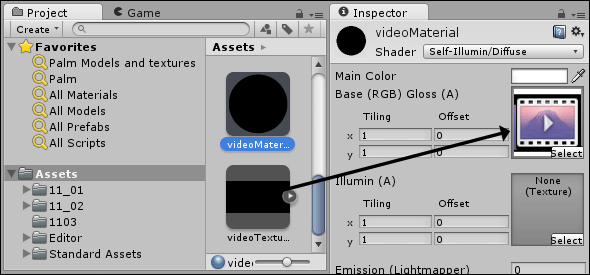
- In the Project view, select videoMaterial. Then, in the Inspector view, change its Shader to Self-Illumin/Diffuse.
- Apply the videoTexture on the Main Color of videoMaterial by dragging it from the Project view into the appropriate slot:
- Apply videoMaterial to the cube you have created. That will give you an idea of how the video should be displayed.
- Select the cube. Make sure there is a Collider component in the Inspector. In case here isn't one, add it by navigating to Component | Physics | Box Collider. Colliders are needed for mouse collision detection.
- Now we need to create our script. In the Project view, click on the Create drop-down menu and choose C# Script. Rename it as
PlayVideoTextureand open it in your editor. - Replace your script with the following code:
using UnityEngine; using System.Collections; [RequireComponent (typeof (AudioSource))] public class PlayVideoTexture : MonoBehaviour { public bool loopVideo = true; public bool startPlaying = true; public MovieTexture videoTexture; void Start(){ videoTexture.loop = loopVideo; renderer.material.mainTexture = videoTexture; audio.clip = videoTexture.audioClip; if(startPlaying) ControlMovie(); } void OnMouseUp(){ ControlMovie(); } void ControlMovie(){ if(videoTexture.isPlaying) videoTexture.Pause(); else { videoTexture.Play(); audio.Play(); } } } - Save your script and apply it to the cube (in the Hierarchy view).
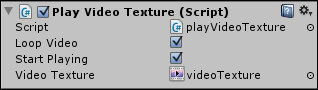
- Select the cube and, in the Inspector view, under the Play Video Texture component, select the videoTexture movie texture from the Video Texture field:
- Test your scene. You should be able to see the movie being played in the cube face, and also pause/play it by clicking on it.
By default, our script makes the movie texture play in the Loop mode. There is, however, a Boolean variable that can be changed through the Inspector view, where it is represented by a checkbox. Likewise, there is a checkbox that can be used to prevent the movie from playing when the level starts.
There are some other movie texture commands and parameters that can be played with. Don't forget to check out Unity's scripting guide at http://docs.unity3d.com/Documentation/ScriptReference/MovieTexture.html.