
- Open the file
ch7_Multitexture.htmlwith your choice of HTML editor. - At the top of the script block, add another texture variable:
var texture2 = null;
- At the bottom of the
configurefunction, add the code to load the second texture. As mentioned earlier, we're using a class to make this process easier, so the new code is as follows:texture2 = new Texture(); texture2.setImage('textures/light.png'), - The texture we're using is a white radial gradient that simulates a spot light:

- In the
drawfunction, directly below the code that binds the first texture, add the following to expose the new texture to the shader:gl.activeTexture(gl.TEXTURE1); gl.bindTexture(gl.TEXTURE_2D, texture2.tex); gl.uniform1i(Program.uSampler1, 1);
- Next, we need to add the new sampler uniform to the fragment shader:
uniform sampler2D uSampler1;
- Don't forget to add the corresponding string to the
uniformListin theconfigurefunction. - Finally, we add the code to sample the new texture value and blend it with the first texture. In this case, since we want the second texture to simulate a light, we multiply the two values together as we did with the per-vertex lighting in the first texture example.
gl_FragColor = texture2D(uSampler, vTextureCoord) * texture2D(uSampler1, vTextureCoord);
- Note that we're re-using the same texture coordinate for both textures. It's convenient to do so in this case, but if needed, a second texture coordinate attribute could have been used, or we could even calculate a new texture coordinate from the vertex position or other criteria.
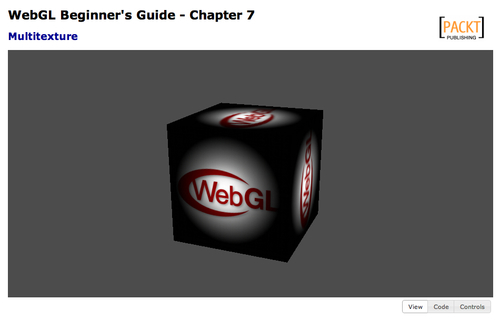
- Assuming that everything works as intended, you should see a scene that looks like this when you open the file in your browser:
- You can see the completed example in
ch7_Multitexture_Finished.html.
We've added a second texture to the draw call and blended it with the first to create a new effect, in this case simulating a simple static spotlight.
It's important to realize that the colors sampled from a texture are treated just like any other color in the shader, that is as a generic 4-dimensional vector. As a result, we can combine textures together just like we would combine vertex and light colors, or any other color manipulation.
Multiplication is one of the most common ways to blend colors in a shader, but there's really no limit to how you can combine color values. Try experimenting with some different algorithms in the fragment shader and see what effect it has on the output. What happens when you add values instead of multiply? What if you use the red channel from one texture and the blue and green from the other? Or try out the following algorithm and see what the result is:
gl_FragColor = vec4(texture2D(uSampler2, vTextureCoord).rgb - texture2D(uSampler, vTextureCoord).rgb, 1.0);