- Open the file
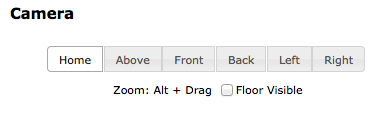
ch9_Car_Showroom.htmlusing your favorite code editor. - We will assign a different home for the camera when we load the Ford Mustang. To do so, please check the
cameraHome, cameraAzimuth, andcameraElevationglobal variables. We set up the camera home position by using this variable inside theconfigurefunction like this:camera.goHome(cameraHome); camera.setAzimuth(cameraAzimuth); camera.setElevation(cameraElevation);
Let's use this code to configure the default pose for the camera when we load the Ford Mustang. Go to the
loadMustangfunction and append these lines:cameraHome = [0,0,10]; cameraAzimuth = -25; cameraElevation = -15; camera.goHome(cameraHome); camera.setAzimuth(cameraAzimuth); camera.setElevation(cameraElevation);
- Now save your work and load the page in your web browser. Check that the camera appears in the indicated position when you load the Ford Mustang.
- We can also set up the lighting scheme on a car-per-car basis. For instance, while low-diffusive, high-specular lights work well for the BMW I8, these configurations are not as good for the Audi R8. Let's take for example
light1in theconfigurefunction. First we set the light attributes like this:light1.setPosition([-25,25,-25]); light1.setDiffuse([0.4,0.4,0.4]); light1.setAmbient([0.0,0.0,0.0]); light1.setSpecular([0.8,0.8,0.8]);
Then, we add
light1to theLightsobject:Lights.add(light1);
Finally, we map the light arrays contained in the
Lightsobject to the respective uniform arrays in our shaders:gl.uniform3fv(Program.uLightPosition, Lights.getArray('position')); gl.uniform3fv(Program.uLa , Lights.getArray('ambient')); gl.uniform3fv(Program.uLd, Lights.getArray('diffuse')); gl.uniform3fv(Program.uLs, Lights.getArray('specular'));Notice though that we need to add
light1toLightsonly once. Now check the code for the one in theupdateLightPropertyfunction at the bottom of the page:function updateLightProperty(index,property){ var v = $('#slider-l'+property+''+index).slider('value'), $('#slider-l'+property+''+index+'-value').html(v); var light; switch(index){ case 1: light = light1; break; case 2: light = light2; break; case 3: light = light3; break; case 4: light = light4; break; } switch(property){ case 'a':light.setAmbient([v,v,v]); gl.uniform3fv(Program.uLa, Lights.getArray('ambient')); break; case 'd':light.setDiffuse([v,v,v]); gl.uniform3fv(Program.uLd, Lights.getArray('diffuse')); break; case 's':light.setSpecular([v,v,v]); gl.uniform3fv(Program.uLs, Lights.getArray('specular')); break; } render(); }Here we are detecting what slider changed and we are updating the correspondent light. Notice that we refer to
light1, light2, light3, orlight4directly as these are global variables. We update the light that corresponds to the slider that changed and then we map theLightsobject arrays to the correspondent uniform arrays. Notice that here we are not addinglight1or any other light again to theLightsobject. The reason we do not need to do this is that the Lights object keeps a reference tolight1and the other lights. This saves us from having to clear theLightsobject and mapping all the lights again every time we want to update one of them.Using the same mechanism described in
updateLightProperty, update the loadAudi function to set the diffuse terms of all four lights to[0.7,0.7,0.7]and the specular terms to[0.4,0.4,0.4].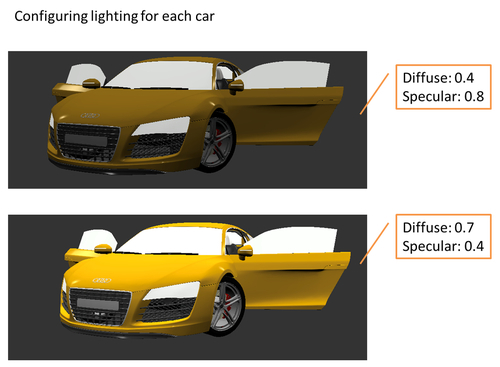
- Save your work and reload the page on your web browser. Try different lighting schemes for different cars.
We have built a demo that uses many of the elements that we have discussed in the book. For that purpose, we have used the infrastructure code writing three main functions: configure, load, and render. These functions define the lifecycle of our application.
On each of these functions, we have used the objects defined by the architecture of the examples in the book. For example, we have used a camera object, several light objects, the program, and the scene object among others.
We want to animate the camera to produce a fly-through effect. You will need to consider three variables to be interpolated: the camera position, elevation, and azimuth. Start by defining the key frames, these are the intermediate poses that you want the camera to have. One could start for instance by looking at the car in the front view and then flying by one of the sides. You could also try a fly-through starting from a 45 degree angle in the back view. In both cases, you want to make sure that the camera follows the car. To achieve that effect, you need to make sure to update the azimuth and elevation on each key frame so the car keeps in focus.
Hint: Take a look at the code for the animCamera function and the functions that we have defined for the click events on the Camera buttons: