
- Open the file
ch10_PostProcess.htmlin an HTML5 browser.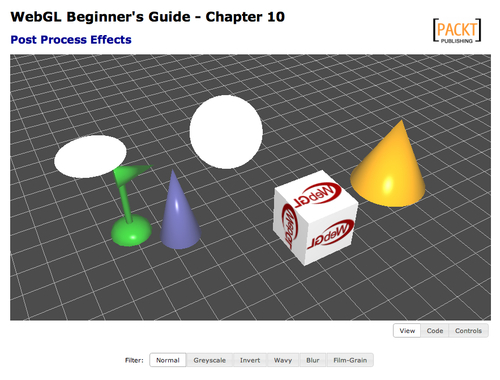
The buttons at the bottom allow you to switch between several sample effects. Try each of them to get a feel for the effect they have on the scene. We've already looked at grayscale, so let's examine the rest of filters individually.
- The invert effect is similar to grayscale, in that it only modifies the color output; this time inverting each color channel.
uniform sampler2D uSampler;
varying vec2 vTextureCoord;
void main(void)
{
vec4 frameColor = texture2D(uSampler, vTextureCoord);
gl_FragColor = vec4(1.0-frameColor.r, 1.0-frameColor.g, 1.0-frameColor.b, frameColor.a);
}
- The wavy effect manipulates the texture coordinates to make the scene swirl and sway. In this effect, we also provide the current time to allow the distortion to change as time progresses.
uniform sampler2D uSampler;
uniform float uTime;
varying vec2 vTextureCoord;
const float speed = 15.0;
const float magnitude = 0.015;
void main(void)
{
vec2 wavyCoord;
wavyCoord.s = vTextureCoord.s + (sin(uTime+vTextureCoord.t*speed) * magnitude);
wavyCoord.t = vTextureCoord.t + (cos(uTime+vTextureCoord.s*speed) * magnitude);
vec4 frameColor = texture2D(uSampler, wavyCoord);
gl_FragColor = frameColor;
}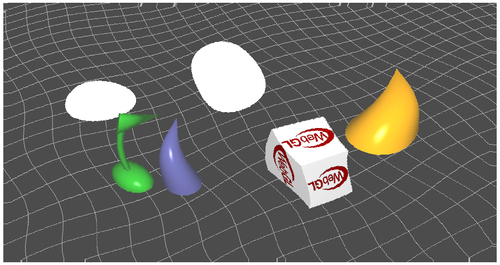
- The blur effect samples several pixels to either side of the current one and uses a weighted blend to produce a fragment output that is the average of it's neighbors. This gives a blurry feel to the scene.
A new uniform used here is
uInverseTextureSize, which is 1 over the width and height of the viewport, respectively. We can use this to accurately target individual pixels within the texture. For example,vTextureCoord.x + 2*uInverseTextureSize.xwill be exactly two pixels to the left of the original texture coordinate.uniform sampler2D uSampler; uniform vec2 uInverseTextureSize; varying vec2 vTextureCoord; vec4 offsetLookup(float xOff, float yOff) { return texture2D(uSampler, vec2(vTextureCoord.x + xOff*uInverseTextureSize.x, vTextureCoord.y + yOff*uInverseTextureSize.y)); } void main(void) { vec4 frameColor = offsetLookup(-4.0, 0.0) * 0.05; frameColor += offsetLookup(-3.0, 0.0) * 0.09; frameColor += offsetLookup(-2.0, 0.0) * 0.12; frameColor += offsetLookup(-1.0, 0.0) * 0.15; frameColor += offsetLookup(0.0, 0.0) * 0.16; frameColor += offsetLookup(1.0, 0.0) * 0.15; frameColor += offsetLookup(2.0, 0.0) * 0.12; frameColor += offsetLookup(3.0, 0.0) * 0.09; frameColor += offsetLookup(4.0, 0.0) * 0.05; gl_FragColor = frameColor; }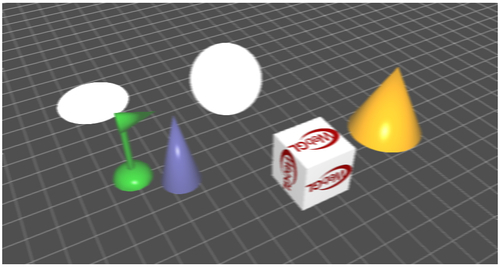
- Our final example is a film grain effect. This uses a noisy texture to create a grainy look to the scene, which simulates the use of an old camera. This example is significant because it shows the use of a second texture besides the framebuffer when rendering.
uniform sampler2D uSampler;
uniform sampler2D uNoiseSampler;
uniform vec2 uInverseTextureSize;
uniform float uTime;
varying vec2 vTextureCoord;
const float grainIntensity = 0.1;
const float scrollSpeed = 4000.0;
void main(void)
{
vec4 frameColor = texture2D(uSampler, vTextureCoord);
vec4 grain = texture2D(uNoiseSampler, vTextureCoord * 2.0 + uTime * scrollSpeed * uInverseTextureSize);
gl_FragColor = frameColor - (grain * grainIntensity);
}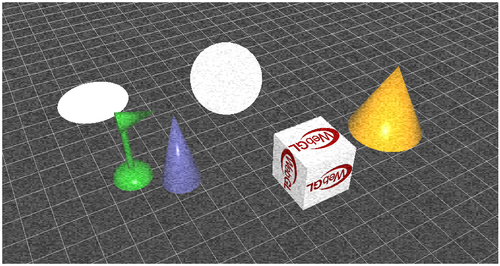
All of these effects are achieved by manipulating the rendered image before it is output to the screen. Since the amount of geometry processed for these effects is quite small, they can often be performed very quickly regardless of the complexity of the scene itself. Performance may still be affected by the size of the canvas or the complexity of the post-process shader.