
- Open the file
ch7_Cubemap.htmlusing your HTML5 internet browser. Once again, this contains a simple textured cube example on top of which we'll build the cube map example. We want to use the cube map to create a reflective-looking surface. - Creating the cube map is a bit more complicated than the textures we've loaded in the past, so this time we'll use a function to simplify the asynchronous loading of individual cube faces. It's called
loadCubemapFaceand has already been added to theconfigurefunction. Below that function, add the following code which creates and loads the cube map faces:cubeTexture = gl.createTexture(); gl.bindTexture(gl.TEXTURE_CUBE_MAP, cubeTexture); gl.texParameteri(gl.TEXTURE_CUBE_MAP, gl.TEXTURE_MAG_FILTER, gl.LINEAR); gl.texParameteri(gl.TEXTURE_CUBE_MAP, gl.TEXTURE_MIN_FILTER, gl.LINEAR); loadCubemapFace(gl, gl.TEXTURE_CUBE_MAP_POSITIVE_X, cubeTexture, 'textures/cubemap/positive_x.png'), loadCubemapFace(gl, gl.TEXTURE_CUBE_MAP_NEGATIVE_X, cubeTexture, 'textures/cubemap/negative_x.png'), loadCubemapFace(gl, gl.TEXTURE_CUBE_MAP_POSITIVE_Y, cubeTexture, 'textures/cubemap/positive_y.png'), loadCubemapFace(gl, gl.TEXTURE_CUBE_MAP_POSITIVE_Y, cubeTexture, 'textures/cubemap/positive_y.png'), loadCubemapFace(gl, gl.TEXTURE_CUBE_MAP_NEGATIVE_Y, cubeTexture, 'textures/cubemap/negative_y.png'), loadCubemapFace(gl, gl.TEXTURE_CUBE_MAP_POSITIVE_Z, cubeTexture, 'textures/cubemap/positive_z.png'), loadCubemapFace(gl, gl.TEXTURE_CUBE_MAP_NEGATIVE_Z, cubeTexture, 'textures/cubemap/negative_z.png'),
- In the
drawfunction, add the code to bind the cube map to the appropriate sampler:gl.activeTexture(gl.TEXTURE1); gl.bindTexture(gl.TEXTURE_CUBE_MAP, cubeTexture); gl.uniform1i(Program.uCubeSampler, 1);
- Turning to the shader now, first off we want to add a new
varyingto the vertex and fragment shader:varying vec3 vVertexNormal;
- We'll be using the vertex normals instead of a dedicated texture coordinate to do the cube map sampling, which will give us the mirror effect that we're looking for. Unfortunately, the actual normals of each face on the cube point straight out. If we were to use them, we would only get a single color per face from the cube map. In this case, we can "cheat" and use the vertex position as the normal instead. (For most models, using the normals would be appropriate).
vVertexNormal = (uNMatrix * vec4(-aVertexPosition, 1.0)).xyz;
- In the fragment shader, we need to add the new sampler uniform:
uniform samplerCube uCubeSampler;
- And then in the fragment shader's main function, add the code to actually sample the cubemap and blend it with the base texture:
gl_FragColor = texture2D(uSampler, vTextureCoord) * textureCube(uCubeSampler, vVertexNormal);
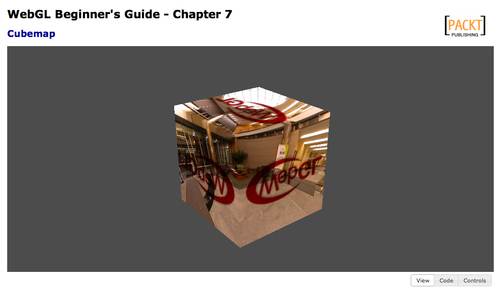
- We should now be able to reload the file in a browser and see the scene shown in the next screenshot:
- The completed example is available in
ch7_Cubemap_Finished.html.
As you rotate the cube, you should notice that the scene portrayed in the cube map does not rotate along with it, which creates a "mirror" effect in the cube faces. This is due to multiplication of the normals by the normal matrix when assigning the vVertexNormal varying, which puts the normals in world space.
Using cube maps for reflective surfaces like this is a very common technique, but not the only use for cube maps. Other common uses are for skyboxes or advanced lighting models.
..................Content has been hidden....................
You can't read the all page of ebook, please click here login for view all page.