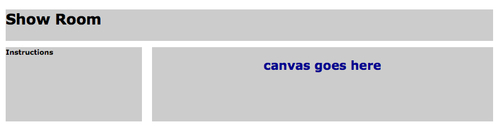
We will define a very simple layout for our application. The title will go on top, and then we have two div tags. The div on the left will contain the instructions and the tools we can use on the scene. The canvas will be placed inside the div on the right, shown as follows:
The code to achieve this layout looks like this (css/cars.css):
#header
{
height: 50px;
background-color: #ccc;
margin-bottom: 10px;
}
#nav
{
float: left;
width: 28%;
height: 80%;
background-color: #ccc;
margin-bottom: 1px;
}
#content
{
float: right;
margin-left: 1%;
width: 70%;
height: 80%;
background-color: #ccc;
margin-bottom: 1px;
}
And we can use it like this (taken from ch9_GUI.html):
<body>
<div id="header">
<h1>Show Room</h1>
</div>
<div id="nav">
<b>Instructions</b>
</div>
<div id="content">
<h2>canvas goes here</h2>
</div>
</body>
Please make sure that you include cars.css in your page. As you can see in ch9_GUI.html, cars.css has been included in the header section:
<link href='css/cars.css' type='text/css' rel='stylesheet' />
Now let's add the canvas. Replace:
<h2>canvas goes here</h2>
With:
<canvas id='the-canvas'></canvas>
inside the content div.
Now, please check the source code for ch9_Scaffolding.html. We have taken ch9_GUI.html which defines the basic layout and we have added the following:
- References to the elements defined in our architecture:
Globals.js, Utils.js, Program.js, and so on. - A reference to
glMatrix.js, the matrix manipulation library that we use in our architecture. - References to JQuery and JQuery UI.
- References to the JQuery UI customized theme that we used in the book.
- We have created the scaffolding for the three main functions that we will need to develop in our application: configure, load and render.
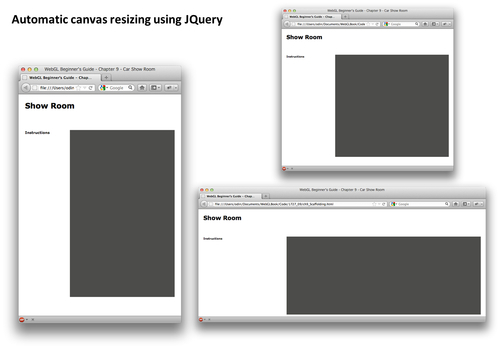
- Using JQuery we have included a function that allows resizing the canvas to its container:
function resizeCanvas(){
c_width = $('#content').width();
c_height = $('#content').height();
$('#the-canvas').attr('width',c_width);
$('#the-canvas').attr('height',c_height);
}
We bind this function to the
resizeevent of thewindowhere:$(window).resize(function(){resizeCanvas();});This function is very useful because it allows us adapt the size of the canvas automatically to the available window space. Also, we do not need to hardcode the size of the canvas.
- As in all previous exercises, we need to define the entry point for the application. We do this here:
var app;
function runShowRoom(){
app = new WebGLApp("the-canvas");
app.configureGLHook = configure;
app.loadSceneHook = load;
app.drawSceneHook = render;
app.run();
}
And we bind it to the
onLoadevent:<body onLoad='runShowRoom()'>
Now if you run ch9_Scaffolding.html in your HTML5-enabled web browser, you will see that the canvas resizes according to the current size of content, its parent container, shown as follows: