After you’ve decided on a transfer method, Windows Easy Transfer takes you through the steps required to complete your transfer. In the examples that follows, you see how to transfer files from one Windows 8 computer to another Windows 8 computer using the External Hard Disk or USB Flash Drive transfer option. This way you can see how the interface looks on the new Windows 8 Windows Easy Transfer.
1. On the Windows 8 PC that you want to transfer files from, display the Windows Start screen show the Charms Bar and choose Search. Type trans and click Windows Easy Transfer on the Apps screen.
Tip
If you happen to be transferring files from a different version of Windows, the Windows Easy Transfer tool on Windows 8 asks you whether you have installed the Windows Easy Transfer software on your old PC and prompts you to select an external hard drive, shared network folder, or USB flash drive. It will then copy the software to the specified location, and you can use that software to install on your old PC. Run MgSetup.exe from the target location to install the software.
2. The program will take you step-by-step through the rest of the process. Make sure you read all the text on a page and accurately answer any questions before you click Next (or any other button) at the bottom of a page. You might notice the following things along the way:
- If you left any other programs open before you started Easy Transfer, you’ll be prompted to close them. Click Close All and, if prompted, save any unsaved work you left behind.
- If asked for permission to work through your firewall, click Yes or OK. Don’t worry — you’re not making your computer vulnerable to hackers or malware. You’re just giving Easy Transfer the right to do what it needs to do and nothing more.
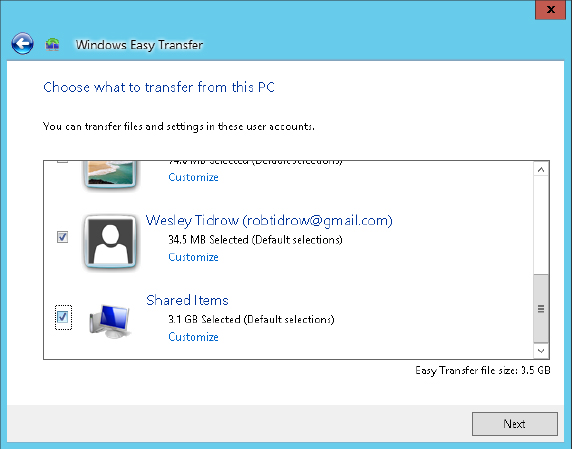
Regardless of which method you use, you’ll eventually come to a page like the one in
Figure 14.2.
3. Choose which user account files and shared items to transfer. To choose only certain items under each account or under the Shared Items, click the Customize link under the item to open the pop-up menu shown in
Figure 14.3. You can simply check/uncheck items to specify whether they are included, and also click the Advanced link at the bottom of the pop-up window to open a File Explorer–like dialog box in which you can choose or exclude individual folders and files.
4. After you’ve made your selection, you’re back to just reading and following instructions on the screen. In our example, you would click Next and then enter a password if you want to password-protect your files and settings that you transfer. If you do not want to password-protect them, leave the password box blank. Click Save to continue.
The instructions will be tailored to the method you’re using and the files you’re transferring. If you are transferring using the network, Windows Easy Transfer will issue you a key, for example. You enter this key in Windows Easy Transfer on the new computer to enable it to connect to your old one and begin the transfer.