
Running Programs and Apps
You can start any program or app that’s installed on your computer by finding the program’s icon on the Start screen or by searching for it using the Search app, and then clicking that icon. There are other ways to start programs as well. For example, if you see an icon for the program pinned to the taskbar, you can click that. If you see a shortcut icon to the program on the desktop or pinned to the taskbar, you can click (or double-click) that icon to start the program.
Every time you start a program or app, an instance of that program opens in a program window. No rule exists that says you can have only one program open at a time. Some programs even enable you to open multiple copies of the same program. (New Windows 8 apps, however, limit you to running only one copy of that app at a time.) You can have as many programs open simultaneously as you can cram into your available memory (RAM). Most programs allow you to run multiple instances. The more memory your system has, the more stuff you can have open without much slowdown in performance.
Most programs you open show their own name somewhere near the top of the program window. Figure 4.10 shows Microsoft PowerPoint open on the desktop. You see its name in the title bar at the top of the window, appearing either by itself or as part of a string of items.
FIGURE 4.10 Sample title bar and taskbar button

Most items that you open also have a taskbar button. The name in the taskbar button matches the name of the item. For example, the taskbar button for the open PowerPoint program also shows the name of the PowerPoint presentation we’re editing on the taskbar. You can click the PowerPoint taskbar button to make the open window appear and disappear. That’s a good thing to know because sometimes you want to get something off the screen temporarily so that you can see something else on the screen.
When you have multiple program windows open, they stack up on the desktop the way multiple sheets of paper on your real desktop stack up. When you have multiple sheets of paper in a pile, you can’t see what’s on every page. You can see only what’s on the top page because all the other pages are covered by that page.
It works the same way with program windows. When you have multiple program windows open, you can see only the one that’s on the top of the stack. We call the program that’s on the top of the stack the active window.
The active window
When two or more program windows are open on the desktop, only one of them can be the active window. The active window has some unique characteristics:
- The active window is usually on the top of the stack. Any other open windows will be under the active window so that they don’t cover any of its content. The exception is a window configured for Always On Top, as described previously.
- The taskbar button for the active window is highlighted with a brighter foreground color.
- Anything you do at the keyboard applies to the active window only. You cannot type in an inactive window.
Switching among open programs
Whenever you have two or more programs open at the same time, you want to be able to easily switch among them. You have several ways to switch among open programs, as discussed in the sections that follow.
Switching with taskbar buttons
As mentioned, almost every open program has a button on the taskbar. When you have multiple open programs, you have multiple taskbar buttons. To make any one particular program active, click its taskbar button. If you’re not sure which button is which, point to each button. You see the name and a miniature copy of the program that the button represents, as in Figure 4.11. You also see a full-size preview of the window.
FIGURE 4.11 Pointing to a taskbar button

Switching with the keyboard
If you prefer the keyboard to the mouse, you can use Alt+Tab to switch among open windows. Hold down the Alt key and then press the Tab key. You see a thumbnail image for each open program window, as in the example shown in Figure 4.12. Keep the Alt key pressed down and keep pressing Tab until the name of the program you want to switch to appears above the icons. Then release the Alt key.
FIGURE 4.12 Alt+Tab window

The last (rightmost) item in the Alt+Tab window represents the desktop rather than an open program. If you release the Alt key with that selected, all windows are minimized to the taskbar. But you can still bring up any open program by clicking its taskbar button.
Arranging program windows
You can use options on the taskbar shortcut menu to arrange all currently open program windows. To get to that menu, right-click an empty portion of the taskbar, or right-click the clock in the lower-right corner of the screen. Figure 4.13 shows the options on the menu.
FIGURE 4.13 Taskbar shortcut menu
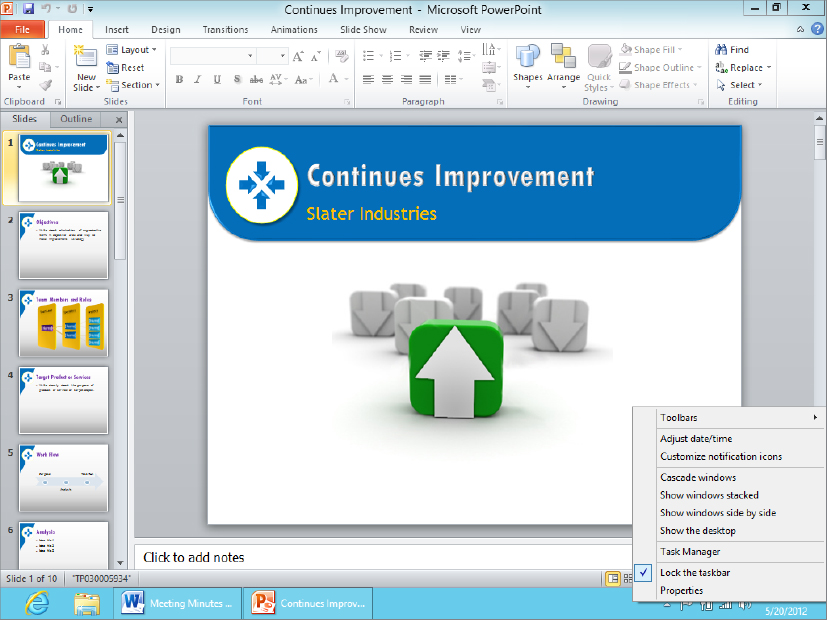
The four options that apply to program windows on the desktop are similar to the options you get when you right-click a taskbar button that represents multiple instances of one program:
- Cascade Windows: Stacks all the open windows like sheets of paper, fanned out so that all their title bars are visible, as in Figure 4.14.
FIGURE 4.14 Cascaded program windows

- Show Windows Stacked: Arranges the windows in rows across the screen, or as equal-sized tiles.
- Show Windows Side By Side: Arranges the windows side by side. As with the preceding option, if you have too many open windows to show that way, they’ll be displayed in equal-sized tiles.
- Show The Desktop: Minimizes all open windows so that only their taskbar buttons are visible. You can see the entire desktop at that point. To bring any window back onto the screen, click its taskbar button. To bring them all back, right-click the clock or taskbar again and choose Show Open Windows.
The only way to truly appreciate these options is to try them out for yourself. Open two or more programs. Then try each of the options described to see their effects on your open program windows.
Sizing program windows
As a rule, program windows can be any size you want them to be, but this rule has a few exceptions. For example, the tiny Calculator program can’t be sized at all. Some programs, such as Windows Media Player and Windows Media Center, will shrink down only so far. But in general, most open program windows can appear in three categories of sizes:
- Maximized, in which the program fills the entire screen above the taskbar, covering the desktop
- Minimized, in which only the program’s taskbar button is visible, and the program window takes up no space on the desktop
- Any size in between those two extremes
Often, you’ll want to work with two or more program windows at a time. Knowing how to size program windows is a critical skill for doing so, because working with multiple program windows is difficult if you can’t see at least some portion of each one.
Maximize a program window
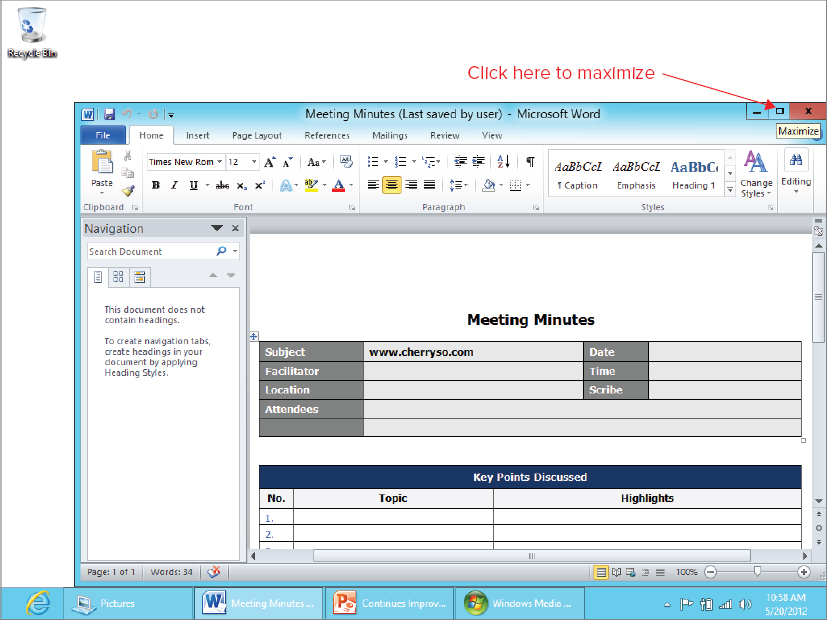
A maximized program window enlarges to its greatest window size, which in many cases causes it to fill all the space above the taskbar. This makes it easy to see everything inside the program window. If a program window isn’t already maximized, you can maximize it in several ways:
- Click the Maximize button in the program’s title bar (see Figure 4.15).
FIGURE 4.15 Maximize button in a title bar
- Grab the title bar and move the window to the top of the screen. Pause for a moment and then release the mouse button. The window maximizes.
- Double-click the program’s title bar.
- Click the upper-left corner of the window you want to maximize and choose Maximize. Optionally, right-click anywhere near the center top of the window and choose Maximize.
Minimize a program window
If you want to get a program window off the screen temporarily without losing your place, minimize the program window. When you minimize the program window, the program remains running. However, it takes up no space on the screen and therefore can’t cover anything else on the screen. When minimized, only the window’s taskbar button remains visible. You can minimize a window in several ways:
- Click the Minimize button in the program’s title bar (see Figure 4.16).
FIGURE 4.16 Minimize button in a title bar

- Click the upper-left corner of the window you want to minimize (or right-click anywhere near the center top of the window) and choose Minimize.
- Click the program’s taskbar button once or twice. (If the program isn’t in the active window, the first click just makes it the active window. The second click then minimizes the active window.)
- Right-click the program’s taskbar button or title bar and choose Minimize.
Size at will
Between the two extremes of maximized (hog up the entire desktop) and minimized (not even visible on the desktop), most program windows can be any size you want them to be. The first step to sizing a program window is to get it to an in-between size so that it’s neither maximized nor minimized. To do that:
- If the program window is currently minimized, click its taskbar button to make it visible on the screen.
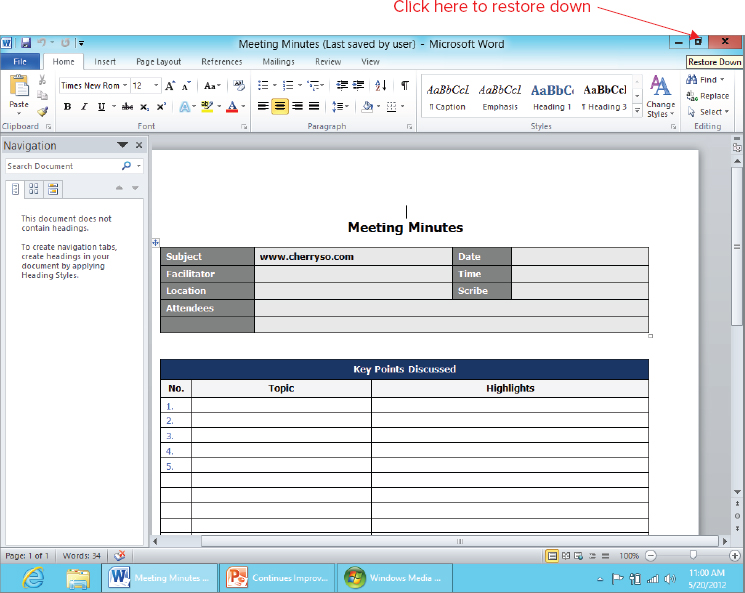
- If the program window is currently maximized, double-click its title bar or click its Restore Down button to shrink it down a little. Figure 4.17 shows the tooltip that appears when you point to the Restore Down button. Optionally, use the Cascade Windows option described earlier to get all open program windows down to an in-between size.
FIGURE 4.17 The Restore Down button in a maximized program window
After the program window is visible but not hogging up the entire screen, you can size it to your liking by dragging any edge or corner. You have to get the tip of the mouse pointer right on the border of the window you want to size so that the pointer turns into a two-headed arrow, as in Figure 4.18.
FIGURE 4.18 Mouse pointer positioned for sizing a window

When you see the two-headed arrow, hold down the left mouse button without moving the mouse. After the mouse button is down, drag in the direction you want to size the window. Release the mouse button when the window is the size you want.
You can also size a program window using the mouse and the keyboard. Again, the program window has to be at some in-between size to start with. Also, note that you always begin the process from the program window’s taskbar button. Here are the steps:
Moving a program window
You can easily move a program window about the screen just by dragging its title bar. However, you can’t start with a minimized window. You have to get the program window to an in-between size or maximized size before you even get started. Then just get the mouse pointer somewhere near the top center of the window you want to move, hold down the left mouse button, and drag the window around. Release the mouse button when the window is where you want it on the desktop. This works for both in-between sized and maximized windows.
Dialog boxes work the same way. You can’t size or minimize a dialog box, and dialog boxes don’t have taskbar buttons. But you can easily drag a dialog box around the screen by its title bar.
Moving and sizing from the keyboard
As you’ve seen, most of the techniques for moving and sizing program windows rely on the mouse. There are some keyboard alternatives, but they’re not available in all program windows. The only way to find out whether these work in the window you’re using at the moment is to press Alt+Spacebar and see whether a system menu drops down from the upper-left corner, as in Figure 4.19.
FIGURE 4.19 System menu from a program window

If you see the menu, you just have to press the underlined letter from the menu option you want to select. For example, press the letter x to Maximize or n to Minimize. If you press m to Move or s to Size, you can then use the arrow keys (←, →, ↑, ↓) to move or size the window. Then press Enter when the window is positioned or sized to your liking.