
Using the Default Programs Page
Right-clicking a document’s icon and choosing Open With is the quick and easy way to set a default program on-the-fly. But it’s not the only method. And you’re not limited to setting defaults based on file types either. You can also set defaults for protocols. A protocol is a standardized way of doing things. Different Internet services use different protocols. For example, the web uses HTTP, which stands for Hypertext Transfer Protocol.
You can also set default actions for CDs, DVDs, and devices you connect to your computer. Use the Default Programs page in the Control Panel to set all of these different kinds of defaults. To get there, use whichever method is easiest for you:
- From the desktop, press Windows+X and choose Control Panel
 Programs Default Programs.
 - From the Windows 8 Start screen, display the Charms and click Search. On the Apps screen choose Default Programs.
You’ll see the options shown in Figure 41.4 and summarized here.
FIGURE 41.4 Setting programs in the Default Programs tool
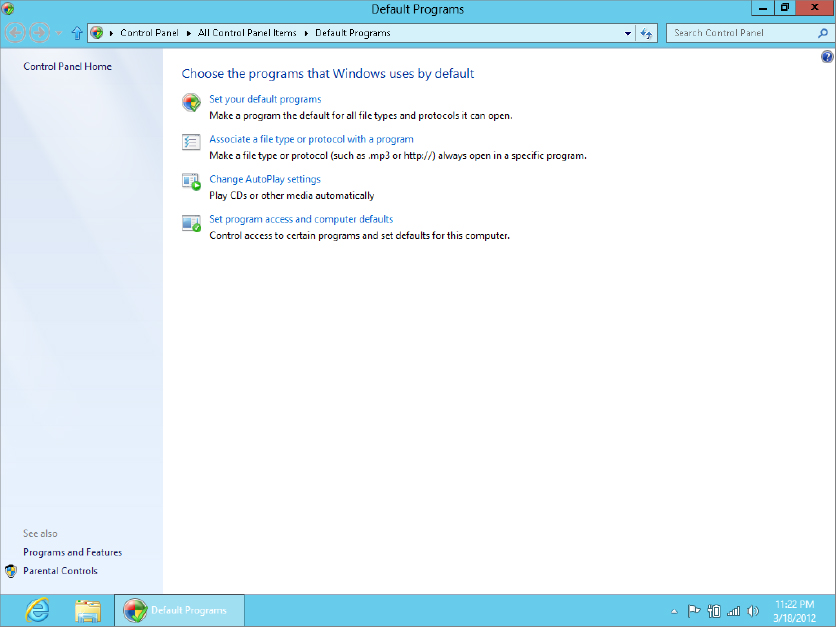
- Set Your Default Programs: Use this option to choose default programs for your user account only.
- Associate A File Type Or Protocol With A Program: Like the preceding item, except you start by choosing a file type or protocol rather than a program.
- Change AutoPlay Settings: Use this option to change what happens when you insert a CD or DVD or connect a camera to your computer.
- Set Program Access And Computer Defaults: This one is strictly for administrators. It sets defaults for Internet access and media players for all user accounts.
The sections that follow describe each option.
Setting your default programs
The first item in Default Programs lets you pick and choose which file types and protocols you want to associate with programs. When you click Set Your Default Programs, you’re taken to a page like the one in Figure 41.5.
FIGURE 41.5 Setting programs as defaults for file types and protocols
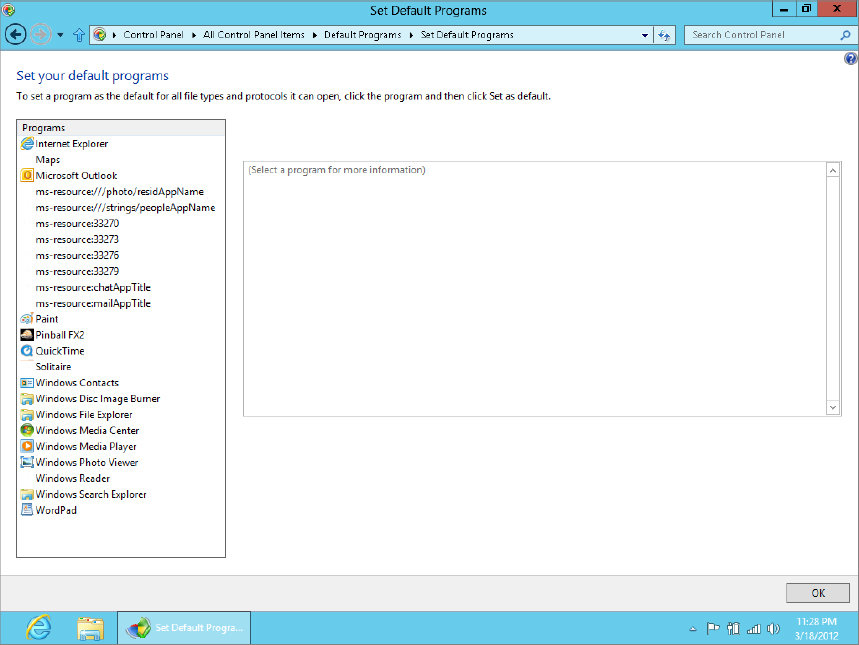
Click a program name in the left column to see a description of that program in the right column. Then you can choose one of the following options below that description:
- Set This Program As Default: Choose this option to make the selected program the default for all file types and protocols it can handle.
- Choose Defaults For This Program: Limit the program to act as the default for only certain file types and protocols.
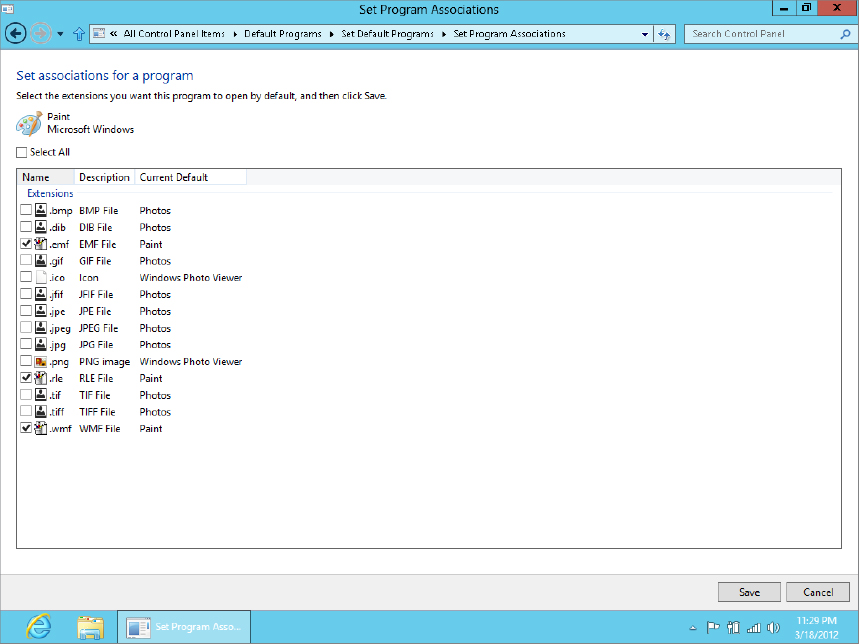
Choosing the second option takes you to a list of all the file types and protocols that the program supports, as in Figure 41.6. You can scroll through the list and select the file types and protocols for which the program should act as default. Clear the checkbox of any file type or protocol for which you want some other program to act as the default. Then click Save to return to the previous page.
FIGURE 41.6 Setting file type associations for a program
When you’ve finished choosing defaults for programs, click OK to return to the main Default Programs page.
Associating a file type or protocol with a specific program
The second option in Default Programs is similar to the first. But rather than starting with a program, you start with a file type or protocol. When you click Associate A File Type Or Protocol With A Specific Program, you see options similar to those in Figure 41.7.
FIGURE 41.7 Setting file types with specific programs

File types are listed first, in alphabetical order. Protocols are separate at the bottom of the list. Use the scroll bar to scroll through the list. To assign a default program to a file type or protocol, first click the item you want to change and click the Change Program button. Then use the Open With dialog box that opens to choose a program.
Changing AutoPlay settings
AutoPlay is a Windows feature that lets you choose what program you want to use to play content on CDs, DVDs, and devices (such as MP3 devices). Chances are you’ve already seen the AutoPlay screen at least once, after you inserted a CD or DVD, or connected a camera or disk drive. Figure 41.8 shows an example.
FIGURE 41.8 The Windows 8 AutoPlay screen appears at the top of the window

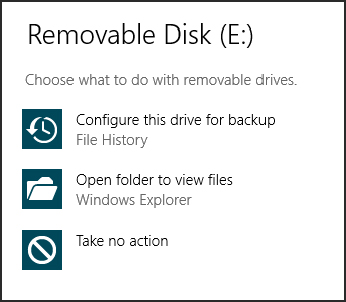
Click the AutoPlay screen to see a list of actions to take. The AutoPlay dialog box lets you choose the action you want to take with the selected media. For a removable device that always has pictures on it, you might choose one of the Import Pictures And Videos options. Or, as the example in Figure 41.9 shows, the actions for the USB flash drive that we inserted include using the drive for backup purposes or showing the contents of the drive. Until you set a default AutoPlay option, however, Windows continues to ask you what you want to do when you attach the device.
FIGURE 41.9 Selecting an action to take when inserting a USB flash drive
When you click View More AutoPlay Options in the Control Panel, you get to see all of your current AutoPlay default settings, as in Figure 41.10. You can also get there by clicking Change AutoPlay Settings in the Default Programs item in the Control Panel. Scroll to the bottom of the list to find icons for devices you connect to your computer, such as digital cameras.
FIGURE 41.10 Setting AutoPlay options for each type of media or device you attach to your PC
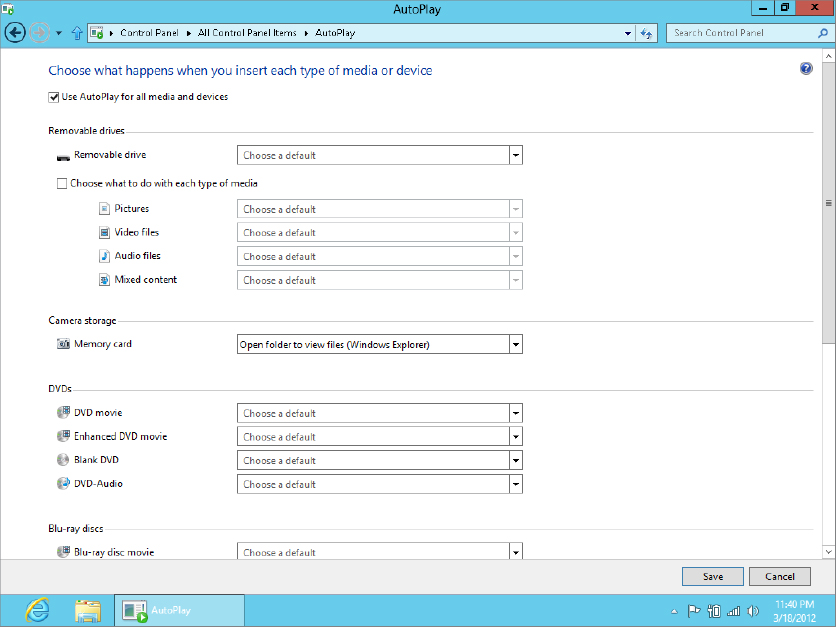
To change the default action for any item, click the current action and choose the action you want from the menu that drops down. Click Save after making your changes to return to Program Defaults.
Setting program access and computer defaults
Anybody who has a user account can choose defaults using any of the methods described in this chapter. The Set Program Access And Computer Defaults option is strictly for computer administrators. It sets defaults that apply to all user accounts, and can even be used to limit programs that they can use. This is most often used in corporate settings when administrators want very tight control over how staff members use their computers. But anyone with an administrative user account on a home computer can use it to control family members’ program use as well.
Because the Set Program Access And Computer Defaults option can so severely limit what all users can do, you need administrative privileges just to start it. If you’re in a standard user account, you’ll need to log out. Then log in to an administrative account to open that option. When you first open it, you’ll see three options:
- Microsoft Windows: Choose this option if you want to set the Internet programs that came with Windows 8 as the default programs.
- Non-Microsoft: Choose this option if you don’t want to use any Microsoft Internet programs.
- Custom: Choose this option if you want to use a combination of Microsoft and non-Microsoft Internet programs.
After you choose one of these options, you’ll see more options under that category. The exact options vary depending on what you choose. But they work in a similar manner. We’ll use the Custom category, shown in Figure 41.11, as an example, because it offers the most options.
FIGURE 41.11 Setting program access and computer defaults
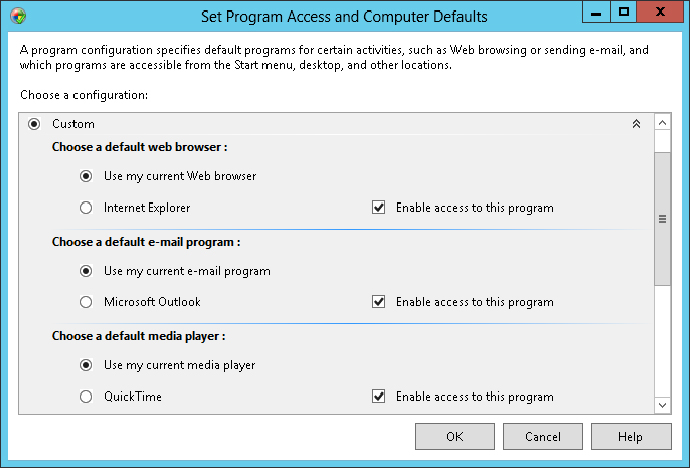
As you can see in Figure 41.11, the first options let you choose the default web browser, e-mail client, and media player for online music and video. Scrolling down enables you to choose a default instant messaging program and Java virtual machine. The options available to you depend on what programs you have installed on your computer at the moment. For each program, you have the following options:
- Use My Current: Choose this option to keep whatever program you’re currently using as the default program. This will be the only option when you don’t have multiple programs to choose from.
- <Program Name>: To specify a program as the default, click the option button to the left of its name.
- Enable Access To This Program: Choosing this option allows users to run the program. Clearing the checkbox hides the program’s icon on the Start menu and elsewhere, preventing users from running the program.
There will be times when you can’t choose exactly the option you want. Or when you choose an option, the selected program doesn’t comply. That’s because the programmers who create these programs aren’t required to make them work with the Program Defaults selections. If that’s a problem, your only recourse is to contact the program publisher. They may have a newer version that’s compatible with setting program defaults in Windows 8.
Click OK when you’ve finished making your selections. You might see a message stating that your choices might not work because of current file associations. If you click Yes, Windows 8 will try to change the file associations to go with the new default program automatically. If it doesn’t work, you can change file associations manually.