
More on Playlists
In Media Player, you can include videos and photos in any music playlists you create. This is mostly useful for creating Auto Playlists for syncing to devices that support music, photos, and video. (When you play the playlist in Media Player, the videos and photos play in sequence, not simultaneously, so you’ll still see only a visualization or album art when music is playing.)
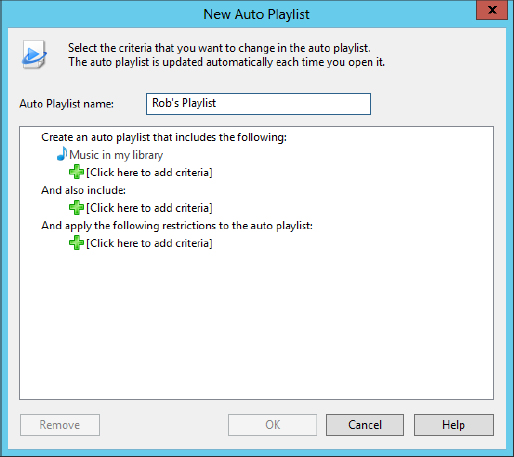
To create an Auto Playlist that includes music, photos, and/or videos, click the arrow beside the Create Playlist button in the toolbar and choose Create Auto Playlist. Or, right-click the name of an existing Auto Playlist and choose Edit. In the New Auto Playlist dialog box (as shown in Figure 25.8), name the playlist however you like. Under Music In My Library, add your criteria for music. Then, under And Also Include, set criteria for Pictures, TV, and Video as you see fit.
FIGURE 25.8 Creating an Auto Playlist in Windows Media Player.
You can use that Auto Playlist to keep your portable media player up-to-date with media content on your computer on a daily basis. To update manually, connect your device and click the Sync tab. Drag the playlist name from the Navigation pane into the List pane. Then click the Start Sync button.
To use the daily Auto Playlist for automatic syncing, first connect your device. Then right-click the device in the Navigation pane and choose Set Up Sync. Choose Sync This Device Automatically. Then add the Auto Playlist to the Playlists To Sync column. Remove any other playlists that are in that Playlists To Sync column.
Limiting playlist size
If you discover that your Auto Playlists are too large, containing more content than you can fit on your portable player, you can limit the amount of content the playlist contains. Open the playlist for editing, and at the bottom of the Auto Playlist, click the + sign under And Apply The Following Restrictions To The Auto Playlist. You’ll see the options shown in Figure 25.9 and described here:
FIGURE 25.9 Options for restricting an Auto Playlist
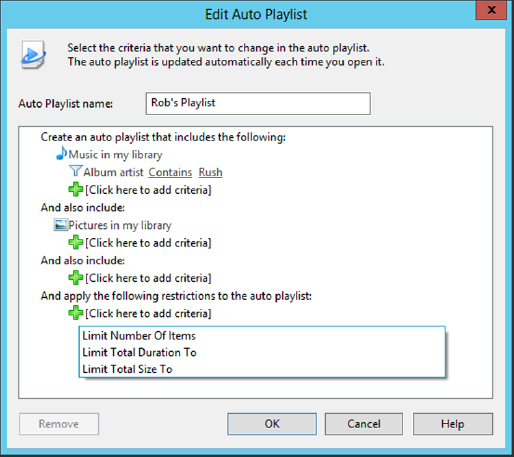
- Limit Number Of Items: Choose this option to limit the number of items the playlist may contain. For example, if you choose 10, the Auto Playlist will list only the first 10 items that meet the criterion.
- Limit Total Duration To: Choose this option to set a maximum time limit to match the time duration of the disk to which you’ll be copying items. For example, if you’ll be copying playlist items to an Audio CD, the time limit is 80 minutes.
- Limit Total Size To: When syncing to portable devices, choose this option to limit the playlist items to the storage capacity of your device in kilobytes (KB), megabytes (MB), or gigabytes (GB).
Click OK when you’ve finished setting criteria. To see which items the Auto Playlist includes, click its name under Playlists in the Navigation pane. Or click Playlists in the Navigation pane, and then double-click the playlist name in the Details pane. To use your new playlist for auto syncing, connect your portable device to the computer. Then right-click the device in the Navigation pane and click Set Up Sync. Choose the Sync This Device Automatically check box and remove any items listed in the Playlists To Sync column. Then add your new playlist to that same column.
Limiting playlists to favorite items
When you manually create playlists by dragging items to the List pane, criteria you set in an Auto Playlist have no effect. But you can limit manual playlists to favorite items, providing you rate your items before dragging them over.
First, before you drag an album or category to the List pane, open the album or group and rate the songs. To rate a song, right-click its title in the contents pane and choose Rate. Or select several songs to which you want to apply the same rating, right-click any one selected song, and choose Rate. Give a four- or five-star rating to any songs you do want copied to playlists. Give a three-star or lower rating to songs you don’t want copied.
To copy only favorites from the category to the playlist, right-click the album’s icon or category name and choose “<playlist name> (Favorites Only).” Only the 4- and 5-star rated items appear in the List pane.
Skipping playlist items
When you’re playing items in a playlist, you can skip over any item by clicking the Next button in the play controls. Media Player can remember which items you skipped and then skip them automatically the next time you play the list. It can also automatically omit skipped items when you save the playlist.
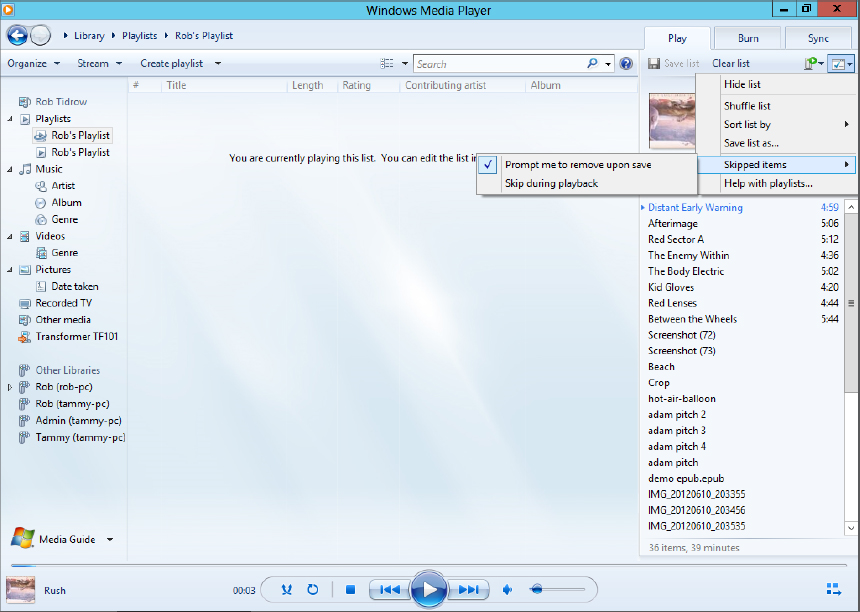
To choose how Media Player treats skipped items, click the List Options button above the list (shows an icon with a checkmark on it) and choose Skipped Items, as in Figure 25.10. A selected option is active; an unselected option is inactive. You can click the option to activate or deactivate it. The following section describes how those options work.
FIGURE 25.10 Options for skipping items
Prompt Me to Remove Upon Save
Activating the Prompt Me To Remove Upon Save option causes a message to appear whenever you save a playlist that contains skipped items. You can choose whether you want to leave the skipped items in the saved playlist or omit them. If you choose to keep the items in the playlist, you can choose Skip During Playback to have the songs skipped over the next time you play the playlist.
If you choose the Don’t Show This Message Again option, Media Player automatically saves the playlist, and skipped songs will be skipped over on playback. Clear this option if you want to be prompted about these skipped items again.