
Regional and Language Settings
Different regions and languages show numbers, dollar amounts, dates, and times in different ways. For example, in the United States, dollar amounts are shown in $1,234.56 format. The United Kingdom uses a £1,234.56 format. French Canada would show that as 1 234,56 $. If your computer isn’t showing numbers, dollar amounts, times, or dates correctly for your region, you can fix that. First, you need to open the Region dialog box. Press Windows+X; click Control Panel ![]() Clock, Language, And Region
Clock, Language, And Region ![]() Region.
Region.
The dialog box opens, looking something like Figure 16.7. Click the Formats tab (shown in the figure) to change your regional settings.
FIGURE 16.7 Formats tab of the Region dialog box
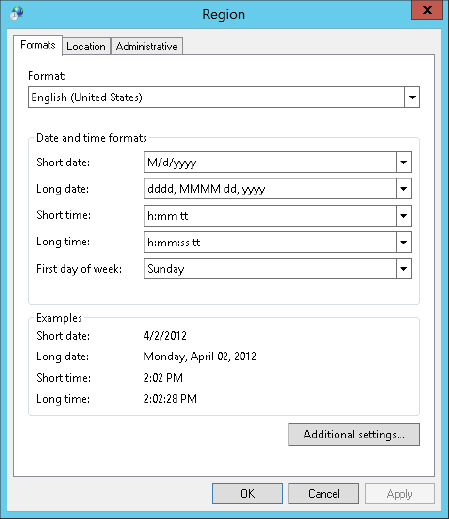
Change how numbers, dates, and times look
The Formats tab of Regional and Language Options shows how numbers, currency values, dates, and times are displayed on your screen. You’re not stuck with those formats, however. To change them, follow these steps:
You might want to take a look at the next section before you close the dialog box.
Modifying Location and Multiple Language Options
Some programs and online services tailor their content to match the location in which your computer is located. If that information seems incorrect, click the Location tab in the Region dialog box. Choose your actual location from the drop-down button and then click Apply and then OK.
For people who work in multiple languages, Windows 8 offers some handy options for adjusting your keyboard to work in a specific language. These features are especially useful for translators who need to switch from one language to another.
To add a language, use the following steps:
FIGURE 16.8 Add a language
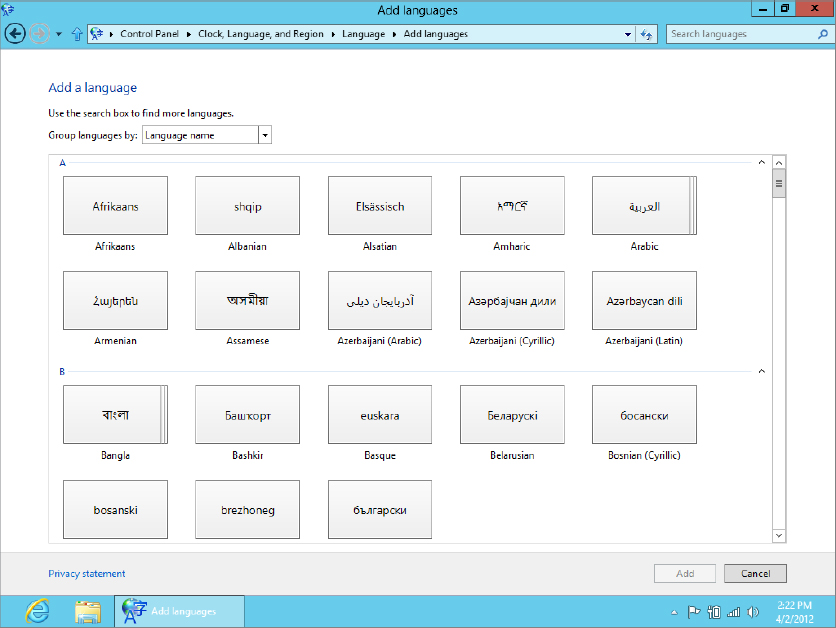
You can install as many languages and keyboards as you wish. You don’t have to do them all in one fell swoop, either. You can add them on an as-needed basis.
Switching languages and keyboards
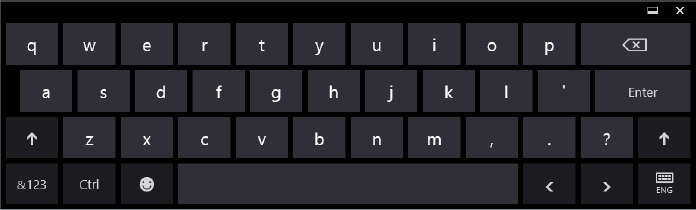
When you have two or more input languages installed, only one is active at any given time. You need to be in a program that can use alternative languages, such as WordPad, Word, or the onscreen Touch Keyboard, for the active language list to be relevant at all. When that program is in the active window, you see which language is currently in use for that program. Figure 16.9 shows how the language list looks in Windows 8’s Touch Keyboard. The three-letter abbreviation (in this example ENG) shows on the bottom-right row of the keyboard. A similar language list shows on the taskbar next to the clock. To change the language, click one of those items and choose a new language.
FIGURE 16.9 Language list appearing on the Windows 8 Touch Keyboard
When you choose a different language and keyboard from the language list, the symbols on your keyboard’s keys don’t change to show the keyboard you’ve selected. (They do on the onscreen Touch Keyboard, however.) Ideally, you would want to plug in a keyboard that already has the keys in the right layout, or at least use some kind of template that shows how keys are laid out. In a pinch, you can use the Touch Keyboard or an onscreen layout to see the keyboard layout. You can find small layouts for the screen by browsing to www.microsoft.com with Internet Explorer and searching for “windows keyboard layouts.”
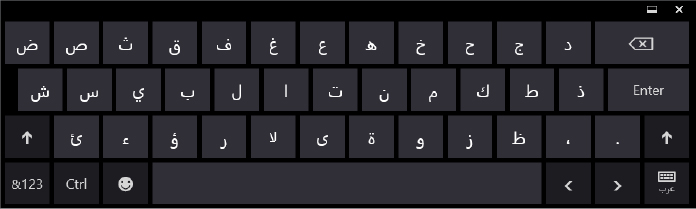
Figure 16.10 shows an example in which I selected the Touch Keyboard and then chose Arabic (Syria) as the keyboard. The keyboard characters look nothing like the standard English keyboard except for a few keys (Enter, Ctrl, and the numbers key).
FIGURE 16.10 Onscreen Arabic keyboard
Removing input languages
Removing an input language follows much the same process as adding one. Get back to the Languages window. Click the language or keyboard you want to remove and then click the Remove button.