Installing and Configuring Scale-Out File Servers
Before you can install and configure SOFS, you need to make several deployment decisions, as well as understand the prerequisites:
- You will need to decide the number of nodes within your SOFS cluster (this is from two to eight nodes).
- Determine what kind of converged network you will have in place to support your SOFS cluster.
- Determine what kind of storage you will have in place to support your SOFS cluster (Storage Spaces or SAN based).
- Before you can implement SOFS, you will need to install features that are included in the File and Storage Services role and the Failover Clustering feature.
- You will need to ensure that the cluster passes validation, create your Windows failover cluster, configure networking, and add storage (one of more CSV LUNs).
Complying with Installation Prerequisites
SOFS requires the File Server role and the Failover Clustering feature to be installed on each node that will be a part of the SOFS. The File Server role and the Failover Clustering feature can be installed independently of each other, or at the same time, using either Server Manager or the appropriate PowerShell command.
Installing Roles and Features
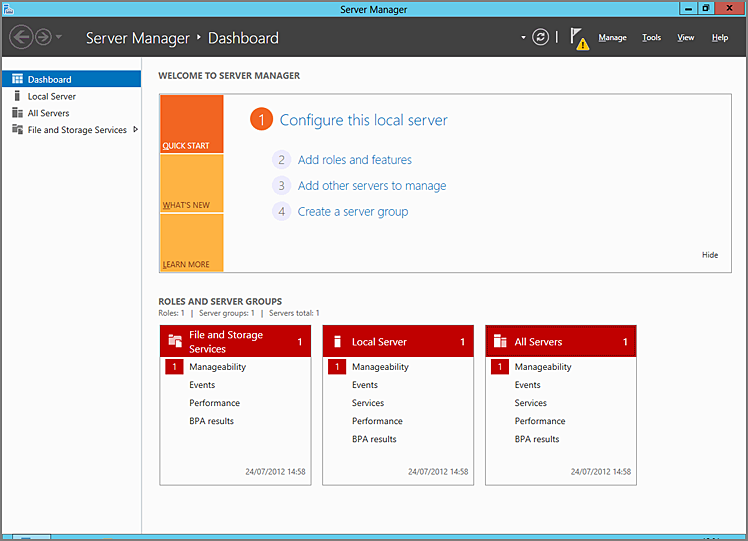
Use the following procedure to install the File Server role and the Failover Clustering feature using Server Manager:
Figure 7-5 Server Manager dashboard
To install the prerequisite roles and features by using PowerShell, run the following Windows Server Manager PowerShell command:
Add-WindowsFeature –name File-Services,Failover-Clustering `
-IncludeManagementTools
Verifying a Successful Installation
Verify the successful installation of the prerequisite roles and features by running the following Windows Server Manager PowerShell command:
Get-WindowsFeature | Where {$_.installed}Configuring Failover Clustering
The next task on the road to implementing SOFS is to implement Windows Failover Clustering. The cluster will provide support for a highly available SMB file share that can then be used by applications such as SQL Server and for workloads running on Hyper-V. Before you can install and configure Windows Failover Clustering, consider the following:
- You will need to run the cluster validation process and ensure that it completes, without reporting any failures.
- After the successful creation of your multi-node cluster, you will need to verify that the Core Cluster Resources group and any shared storage have come online.
- If the shared storage was added prior to the cluster being formed, all the LUNs except for the Witness Disk will have automatically been added to the Available Storage Group and will be brought online. SOFS requires the storage to be a CSV LUN, and the CSV namespace is now enabled by default in Windows Server 2012.
- If the storage is added after the cluster has been formed or the check box Add All Available Storage To The Cluster was not selected, then the storage will need to be added manually.
Validating a Cluster
Cluster validation is a process that is designed to identify any potential hardware, software, or general configuration issues prior to configuring your cluster and placing that cluster into production. After the validation is complete, you can create the cluster. Use the following procedure to validate your cluster:
To validate the hardware, software, and general configuration of your Windows Failover Cluster by using PowerShell, run the following Windows Failover Cluster PowerShell command:
Test-Cluster –Node fs1.demo.internal, fs2.demo.internalMake sure to separate each node of the cluster with a comma.
Creating a Cluster
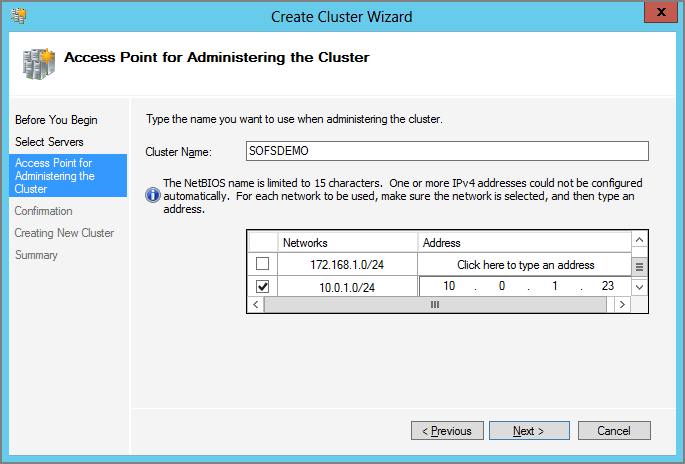
After installing the required roles and features to support SOFS and validating your configuration, the next step is to create a new cluster. Creating a cluster can be accomplished either with the Failover Cluster Manager MMC or the appropriate PowerShell cmdlet. Use the following procedure to create your cluster:
Figure 7-6 Access point for administering the cluster
To create your Windows Failover Cluster by using PowerShell, run the following Windows Failover Cluster PowerShell command:
New-Cluster -Name SOFSDEMO -Node FS1.DEMO.INTERNAL,FS2.DEMO.INTERNAL -NoStorage `
-StaticAddress 10.0.1.23
Configuring Networking
Communication between SOFS cluster nodes is critical for smooth operation. Therefore, it is important to configure the networks that you will use for SOFS cluster communication and ensure that they are configured in the most optimal way for your environment.
At least two of the cluster networks must be configured to support heartbeat communication between the SOFS cluster nodes, and this will avoid any single points of failure. To do so, configure the roles of these networks as Allow Cluster Network Communications On This Network. Typically, one of these networks should be a private interconnect dedicated to internal communication. However, if you have only two physical NICs, rather than two LBFO pairs, these two NICs should be enabled for both cluster use and client access.
Additionally, each SOFS cluster network must fail independently of all other cluster networks. This means that two cluster networks must not have a component in common that could cause a common simultaneous failure, such as the use of a multiport (dual- or quad-port) network adapter. To attach a node to two separate SOFS cluster networks, you would need to ensure that independent NICs are used.
To eliminate possible communication issues, remove all unnecessary network traffic from the NIC that is set to Internal Cluster communications only (this adapter is also known as the heartbeat or private network adapter) and consider the following:
- Remove NetBIOS from the NIC.
- Do not register in DNS.
- Specify the proper cluster communication priority order.
- Set the proper adapter binding order.
- Define the proper network adapter speed and mode.
- Configure TCP/IP correctly.
Adding Storage
After going through the process of creating your cluster, the next step is to add storage to Cluster Shared Volumes. SOFS requires the storage to be a CSV LUN, with the benefit here being that the CSV LUN can be accessed by more than one node at a time. You can add a CSV LUN by using Failover Cluster Manager. Use the following procedure to add your storage to the cluster:
To add available storage to Cluster Shared Volumes by using PowerShell, run the following Windows Failover Cluster PowerShell command (note that “Cluster Disk 2” represents the disk number that you want to add and may differ in your setup):
Add-ClusterSharedVolume "Cluster Disk 2"Configuring Scale-Out File Services
SOFS requires that you configure the File Server role, as well as create a continuously available file share, on your CSV LUN. Use the following procedure to configure SOFS and add your continuously available file share to your cluster:
To configure the File Server role by using PowerShell, run the following Windows Failover Cluster PowerShell command:
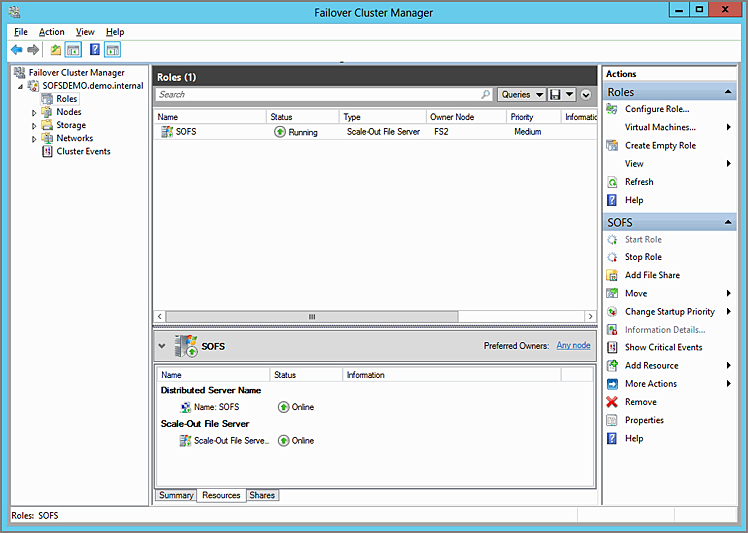
Add-ClusterScaleOutFileServerRole -Name SOFS -Cluster SOFSDEMOWhen complete, the SOFS Role should be online on one of the nodes within your cluster. The group will contain a DNN and the SOFS resource (see Figure 7-7).
Figure 7-7 SOFS role dependency list
Configuring a Continuously Available File Share
After going through the process of configuring your SOFS role, the next step is to add a continuously available file share to the CSV LUN. Use the following procedure to add your continuously available file share to your cluster:
Figure 7-8 Selecting a Profile in the New Share Wizard
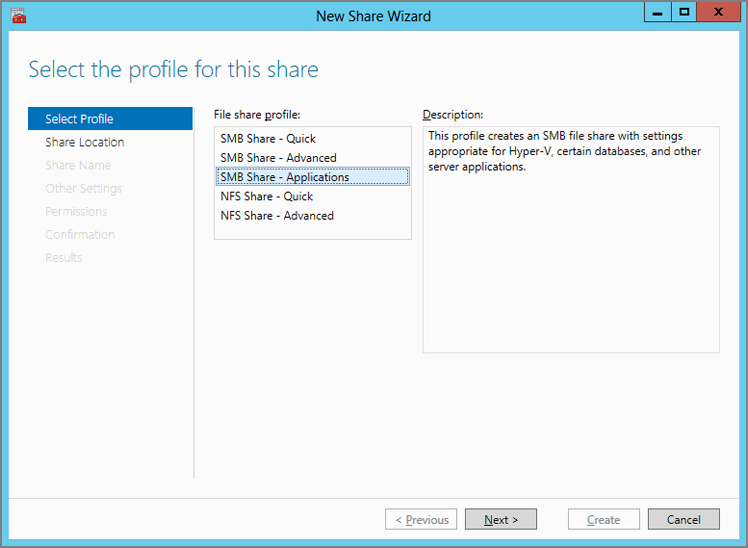
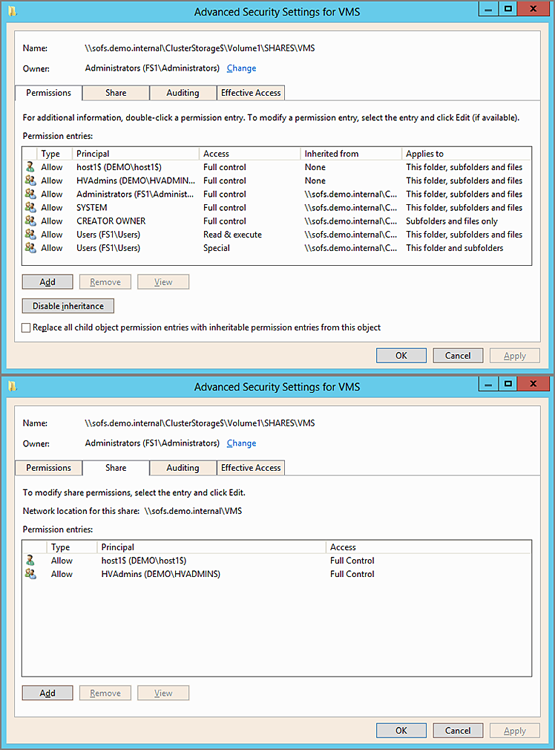
Figure 7-9 Advanced security settings—stand-alone host