
When you have the infrastructure in place, as spelled out in Chapter 4 of this minibook, you still need to do one more thing to get Core Data up and running: You need to actually create the Managed Object Context in your application.
After you do that, you need to send a message to the Managed Object Context to create and delete objects as well as support iPhone's Shake feature to do undos and redos. You'll also create fetch requests to retrieve data using the Managed Object Context.
I show you how to do all of that in this chapter. But before you start, I want to explain the last major concept you need to understand to use Core Data: the fetch request.
A fetch request is an object that specifies what data you want, for example, "all Hotels ordered by city," or "all Hotels in Needles, California."
A fetch request has three parts:
The name of an entity. (You can only fetch one type of entity at a time.)
A predicate object that specifies conditions that objects must match.
An array of sort descriptor objects that specifies the order in which the objects should appear.
You send a fetch request to a Managed Object Context, which gets the objects that match your request (possibly none), adds them to the Managed Object Context, and returns them to the application. If a context already contains a managed object for an object returned from a fetch, then the existing managed object is returned in the fetch results.
The framework tries to be as efficient as possible — you get only the objects you asked for. If you follow a relationship to an object that hasn't yet been fetched, it's fetched automatically for you. If you stop using an object, by default it will be deallocated. (This is, of course, not the same as deleting it.)
Unless you really need all the objects of a particular entity, you can also use a predicate to limit the number of objects returned to those you're actually interested in.
In addition, your fetch request can also cache the results so that if the same data is subsequently needed, the work doesn't have to be repeated. (I explain caching later as well.)
If you're displaying objects in a table view, you can use a fetched results controller, NSFetchedResultsController. It, too, tries to minimize the amount of data held in memory. It efficiently manages the results returned from a Core Data fetch request to provide data for a UITableView object. You use this class to get the objects you need to create cells in such an object, as well as to determine the number of sections you need and the number of rows in each section.
Finally, as you'll soon see, a fetch request controller can monitor changes to objects and report changes to a delegate, which can then do what's necessary to update the table view accordingly (including reloading the data).
By the way, you just happen to create and use a fetched results controller later in this chapter.
To get everything up and going, you need to actually instantiate (or create) the Core Data Stack you added in the last chapter. You do that in the Trip initialization method.
Modify initWithName in Trip.m by using the bolded code in Listing 5-1.
Example 5-1. Modifying initWithName and Synthesizing Hotels
@synthesize hotels;- (id) initWithName:(NSString*) theTrip { if ((self = [super init])) {[self managedObjectContext];tripName = theTrip; [tripName retain]; carInformation = [[CarInformation alloc] initWithTrip:self]; carServicing = [[CarServicing alloc] initWithTrip:self]; weather = [[Weather alloc] init]; [self loadSights];[self loadHotels];map =[[Map alloc] initWithTrip:self]; } return self; }
Walking through the code, you see that you create the Core Data Stack by simply making a reference to the managedObjectContext.
[self managedObjectContext];
As explained in the last chapter, that statement invokes the managedObjectContext property's getter method which you have overridden. In that method, you create an NSManagedObjectContext (if it doesn't already exist), which in turn references the persistentStoreCoordinator, whose property getter method you also override. In this method, you create the NSPersistentStoreCoordinator (if it doesn't exist) and reference the managedObjectModel property. You override that method, and managedObjectModel getter creates the NSManagedObjectModel if it doesn't exist.
Further down in Listing 5-1, you'll notice that you synthesize a property called hotels — you'll use this to hold an array of Hotel objects.
Finally, in the initWithName method in Trip.m, you send a message to yourself to loadHotels.
Not bad for a start. Now, enter the code in Listing 5-2 to implement load-Hotels.
Example 5-2. loadHotels
-(void) loadHotels{
  NSFetchRequest *fetchRequest =
                            [[NSFetchRequest alloc] init];
  // Edit the entity name as appropriate.
  NSEntityDescription *entity = [NSEntityDescription
   entityForName:@"Hotel" inManagedObjectContext:managedObject
   Context];
  [fetchRequest setEntity:entity];

  // Set the batch size to a suitable number.
  [fetchRequest setFetchBatchSize:20];

  // Create the sort descriptors array.
  NSSortDescriptor *sortDescriptor =
                 [[NSSortDescriptor alloc]
                 initWithKey:@"city" ascending:YES];
  NSArray *sortDescriptors =
    [[NSArray alloc] initWithObjects:sortDescriptor, nil];
  [fetchRequest setSortDescriptors:sortDescriptors];

 // Execute the fetch.
  NSError *error = nil;
  NSMutableArray *mutableFetchResults =
   [[managedObjectContext executeFetchRequest:fetchRequest
                               error:&error] mutableCopy];
  if (mutableFetchResults == nil) {
     // Handle the error.
  }
  [self setHotels:mutableFetchResults];

  [fetchRequest release];
  [sortDescriptor release];
  [sortDescriptors release];
}
I've based this code on the templates provided in Xcode. Now I can take you through it step by step.
First you start by creating and initializing an NSFetchRequest.
NSFetchRequest *fetchRequest =
                            [[NSFetchRequest alloc] init];
You then create an NSEntityDescription object with the name of the entity (Hotel) and the Managed Object Context and bind the object to the fetch request.
NSEntityDescription *entity = [NSEntityDescription
   entityForName:@"Hotel" inManagedObjectContext:managedObject
   Context];
[fetchRequest setEntity:entity];
This takes care of the first part of a fetch request.
Next, you set the estimated batch size. Here, I tell the Managed Object Context that the most I want "fetched" is the first 20 Hotel objects.
[fetchRequest setFetchBatchSize:20];
You can use this feature to control the memory footprint of your application. The default value of 0 is treated as infinite. But, if you set a non-zero batch size, the collection of objects returned when the fetch is executed is broken into batches — and no more than batchSize objects' data will be fetched from the persistent store at a time. If you need an object that isn't in the batch, Core Data will go out and get it for you. (Okay, part 2 done.)
Then, you create the sort descriptor arrays and specify that you want the returned fetch to be sorted by city (initWithKey:@"city") in ascending order (ascending:YES), add then the sort descriptor and bind it to the fetch request. This task completes the third part of the fetch request.
NSSortDescriptor *sortDescriptor =
        [[NSSortDescriptor alloc] initWithKey:@"city"
                                          ascending:YES];
NSArray *sortDescriptors =
    [[NSArray alloc] initWithObjects:sortDescriptor, nil];
fetchRequest setSortDescriptors:sortDescriptors];
You won't be working with a predicates here, so you finish up by executing the fetch.
NSError *error = nil;
NSMutableArray *mutableFetchResults =
   [[managedObjectContext executeFetchRequest:fetchRequest
                               error:&error] mutableCopy];
if (mutableFetchResults == nil) {
  // Handle the error.
}
Finally, you set the hotels property to the mutable fetch results you just created.
[self setHotels:mutableFetchResults];
And then clean up after yourself.
[fetchRequest release];
[sortDescriptor release];
[sortDescriptors release];
To finish up with all the changes you need to make to Trip, add the code in Listing 5-3 to Trip.h. You're adding the hotels property that you used to hold all your various Hotel objects and then declaring the loadHotels method you just coded.
Example 5-3. Modifying Trip.h
#import <MapKit/MapKit.h>
#import <Foundation/Foundation.h>
@class Weather;
@class CarServicing;
@class CarInformation;
@class Map;
@class MapController;

@interface Trip : NSObject  {

  NSString                     *tripName;
  CarServicing                 *carServicing;
  CarInformation               *carInformation;
  Weather                      *weather;
  NSMutableArray               *sights;
  Map                          *map;
  MapController                *mapController;
  NSMutableArray               *hotels;


  // Core Data Stack
  NSManagedObjectModel         *managedObjectModel;
  NSManagedObjectContext       *managedObjectContext;
  NSPersistentStoreCoordinator *persistentStoreCoordinator;

}

@property (nonatomic, retain) NSMutableArray *sights;
@property (nonatomic, retain) Map* map;
@property (nonatomic, retain) MapController *mapController;
 @property (nonatomic, retain) NSMutableArray * hotels;


- (id) initWithName:(NSString*) theTripName;
- (CLLocationCoordinate2D) initialCoordinate;
- (NSString*) mapTitle;
- (id) returnSightDelegate:(int) index;
- (id) returnWeatherDelegate;
- (id) returnCarInformationDelegate;
- (id) returnCarServicingDelegate;
- (void) loadHotels;
// Core data properties and method
@property (nonatomic, retain, readonly) NSManagedObjectModel
*managedObjectModel;
@property (nonatomic, retain, readonly)
NSManagedObjectContext *managedObjectContext;
@property (nonatomic, retain, readonly)
NSPersistentStoreCoordinator *persistentStoreCoordinator;
- (NSString *)applicationDocumentsDirectory;
@endIn Chapter 3 of this minibook, you did a lot of work to make adding annotations to the map easy. Now your work will start to pay off. All you need to do to have the Hotel object's annotations appear on the map when you fetch them from the store is make the modifications bolded in Listing 5-4 to createAnnotations in Map.m.
Example 5-4. Loading the Annotation Objects
- (void) createAnnotations {

  [annotations removeAllObjects];
  [annotations addObjectsFromArray:trip.sights ];
  for (Hotel* aHotel in trip.hotels) {
    [annotations addObject:aHotel.annotation ];
  }
}
This code gets the Annotation object referenced by a Hotel and adds it to the annotations array that the Map view will then use to display the annotations.
You also need to add the following to Map.m.
#import "Hotel.h"
Finally, you need to enable the selection of the HotelController in the RootViewController. I know, I know, I haven't even coded the HotelController yet, but I want to get the mundane out of the way. Add the code in Listing 5-5 to tableView:didSelectRowAtIndexPath in RootViewController.m that uncomments out the selection of the HotelController.
Example 5-5. Uncommenting Out HotelController Selection
- (void)tableView:(UITableView *)tableView
        didSelectRowAtIndexPath:(NSIndexPath *)indexPath {

  RoadTripAppDelegate *appDelegate =
              (RoadTripAppDelegate *)
             [[UIApplication sharedApplication] delegate];
  [appDelegate.lastView replaceObjectAtIndex:0 withObject:
          [NSNumber numberWithInteger:indexPath.section]];
  [appDelegate.lastView replaceObjectAtIndex:1 withObject:
          [NSNumber numberWithInteger:indexPath.row]];

  [tableView deselectRowAtIndexPath:indexPath
                                            animated:YES];

  int menuOffset =
             [self menuOffsetForRowAtIndexPath:indexPath];
  UIViewController *targetController =
             [[menuList objectAtIndex:menuOffset]
                             objectForKey:kControllerKey];

  if (targetController == nil) {
    BOOL realtime = !appDelegate.useStoredData;

    switch (menuOffset) {
      case 0:
        if (realtime) targetController =
                [[MapController alloc] initWithTrip:trip];
        else [self displayOfflineAlert:
                [[menuList objectAtIndex:menuOffset]
                                objectForKey:kSelectKey]];
        break;
      case 1:
        targetController =
          [[SightListController alloc] initWithTrip:trip];
        break;
      case 2:
        targetController =
              [[HotelController alloc] initWithTrip:trip];
        break;
      case 3:
        if  (realtime) targetController = [[WebViewController
   alloc] initWithTrip:trip tripSelector:@
   selector(returnWeather:)
           webControl:YES title:NSLocalizedString(@"Weather",
                                             @"Weather")];
        else [self displayOfflineAlert:
             [[menuList objectAtIndex:menuOffset]
                                objectForKey:kSelectKey]];
        break;
      case 4:
targetController = [[WebViewController alloc]
initWithTrip:trip tripSelector:@selector(returnCarServicing
Information:)
webControl:NO
title:NSLocalizedString (@"Car Servicing", @"Car
Servicing")];
break;
case 5:
targetController = [[WebViewController alloc]
initWithTrip:trip
tripSelector:@selector(returnCarInformation:)
webControl:NO
title:NSLocalizedString (@"The Car", @"Car
Information")];
break;
}
if (targetController) {
[[menuList objectAtIndex:menuOffset]
setObject:targetController forKey:kControllerKey];
}
}
if (targetController) {
[[self navigationController]
pushViewController:targetController animated:YES];
[targetController release];
}
}You also have to add the import to RootViewController.m.
#import "HotelController.h"
All that lovely coding in the preceding section got you to the point where you can select an entry in the table view that creates a HotelController. It's time to add the code that creates a HotelController when you make that selection.
This is the last piece of the puzzle you need in order to create and display Hotel objects.
As I explain in Chapter 4 of this minibook, if you had selected that Use Core Data for Storage check box in your Navigation-based Application template right at the beginning of your project, your RootViewController would have been generated with code to use Core Data. So, in the same spirit of copy and paste that you used in Chapter 4 to add the Core Data Stack, you'll add the code generated by the template to your HotelController.
But first you need to create the controller:
In the RoadTrip project window, select the Classes folder and then choose File

In the left column of the dialog, select Cocoa Touch Classes under the iPhone OS heading, select the UIViewController subclass template in the top-right pane, and then click Next.
Be sure the
UITableViewControllersubclass is selected and the With XIB for User Interface is also selected.You see a new dialog asking for some more information.
Enter HotelController.m in the File Name field and then click Finish.
Tip
To make things easier to find, I keep my HotelController.m and .h classes in the Classes folder. I also move the HotelController.xib to the Resources folder
Start with the interface file. Modify HotelController.h with the bolded code in Listing 5-6.
Example 5-6. HotelController.h
@class Trip;@class Hotel;@interface HotelController : UITableViewController<NSFetchedResultsControllerDelegate> {NSFetchedResultsController *fetchedResultsController;Trip *trip;Hotel *hotel;}@property (nonatomic, retain) NSFetchedResultsController*fetchedResultsController;- (id) initWithTrip: (Trip*) aTrip;@end
First of all, you have made HotelController an NSFetchedResultsControllerDelegate here. You'll see why you did that in the "Creating a fetched results controller" section, later in this chapter.
You've also declared three instance variables. One of them holds a reference to Trip, the second will hold a reference to a new Hotel object when you do finally create one, and the third is the instance variable behind the fetchedResultsController property that you also add.
Finally, you declare the initWithTrip: method you're going to add to HotelController.m.
To implement initWithTrip:, add the bolded code in Listing 5-7 to HotelController.m.
Example 5-7. initWithTrip
#import "HotelController.h"#import "MapController.h"#import "Trip.h"#import "Hotel.h"#import "Annotation.h"#import "Geocoder.h"@implementation HotelController@synthesize fetchedResultsController;- (id) initWithTrip: (Trip*) aTrip{if (self = [super initWithNibName:@"HotelController"bundle:nil]) {trip = aTrip;[trip retain];}return self;}
You'll notice I had you add a number of #import statements. You don't need them now, but you will need them later, so why not get that out of the way?
Working in the same spirit of copy and paste that you used in Chapter 4 of this minibook to add the Core Data Stack, you'll add the template code to HotelController. Here's how:
Open the CoreData project you created in the last chapter.
Select all the code in the
RootViewController, starting withviewDidLoad.Delete all the code after
initWithTrip:inHotelController.mand replace it with the code you copied fromRootViewControllerin theCoreDataproject.
Admittedly, your work isn't done yet, but this copy and paste stuff has gotten you pretty far, even if you still need to make some (minor) modifications to some of the code. You'll start with viewDidLoad.
Note
You may notice some stylistic differences in the code I'm about to have you work with. That's because, as much as possible, I've retained the code that would have been generated by using a Core Data template when you first set up your project.
Make the modifications indicated in bold in Listing 5-8 to the copy of viewDidLoad in HotelController.m.
Example 5-8. Modifying viewDidLoad
- (void)viewDidLoad {
  [super viewDidLoad];

// Set up the edit and add buttons.
//self.navigationItem.leftBarButtonItem =
                                 self.editButtonItem;
self.title = @"Hotels";

UIBarButtonItem *addButton = [[UIBarButtonItem alloc]
   initWithBarButtonSystemItem:UIBarButtonSystemItemAdd
 target:self action:@selector(insertNewObject)];
self.navigationItem.rightBarButtonItem = addButton;
[addButton release];
self.tableView.sectionHeaderHeight = 40.0;


NSError *error = nil;
if (![[self fetchedResultsController]
                                 performFetch:&error]) {

  //Replace this implementation with code to handle the
  // error appropriately.
  SLog(@"Unresolved error %@, %@", error,
                                       error userInfo]);
  abort(); //$$ not in production
  }
}
Looking at Listing 5-8, you see that the template code you got from your CoreData project adds an Edit button, which you won't be using, so I have you delete that. It also adds an Add button, which the user taps to add a new hotel. This Add button has the insertNewObject method as its target.
I also have you add a line of code to set the title of the Navigation bar to "Hotels."
The default table view is plain, and that's what you'll be using. You can, however, also have section titles, but I find the default Height value a little cramped, so I have you set it here.
self.tableView.sectionHeaderHeight = 40.0;
As I mention in the opening of this chapter, if you're using a table view, a fetched results controller (NSFetchedResultsController) can make your life much easier. It, too, tries to minimize the amount of data held in memory by efficiently managing the results returned from a Core Data fetch request to provide data for a UITableView object. You use this class to get the objects you need to create cells in a UITableView, as well as to determine both the number of sections you need and the number of rows for each section.
You create an instance of this class by using a fetch request that specifies the entity, an array containing at least one sort ordering, and optionally a filter predicate. You can also specify a sectionNameKeyPath argument that the controller will use to split the results into sections, or you can pass nil to indicate that the controller should generate a single section. After creating an instance, you invoke performFetch: to actually execute the fetch.
To get all this to work for you, make the modifications in bold in Listing 5-9 to fetchedResultsController method in HotelController.m.
Example 5-9. fetchedResultsController
- (NSFetchedResultsController *)fetchedResultsController {

  if (fetchedResultsController != nil) {
    return fetchedResultsController;
  }

// Create the fetch request for the entity.
  NSFetchRequest *fetchRequest =
                            [[NSFetchRequest alloc] init];
   // Edit the entity name as appropriate.
// NSEntityDescription *entity = [NSEntityDescription
   entityForName:@"Event" inManagedObjectContext:managed
   ObjectContext];
  NSEntityDescription *entity = [NSEntityDescription
        entityForName:@"Hotel"
       inManagedObjectContext:trip.managedObjectContext];
[fetchRequest setEntity:entity];
// Set the batch size to a suitable number.
[fetchRequest setFetchBatchSize:20];
// Edit the sort key as appropriate.
//NSSortDescriptor *sortDescriptor =
[[NSSortDescriptor alloc] initWithKey:@"timestamp
NSSortDescriptor *sortDescriptor = [[NSSortDescriptor
alloc] initWithKey:@"city" ascending:NO];
NSArray *sortDescriptors = [[NSArray alloc]
initWithObjects:sortDescriptor, nil];
[fetchRequest setSortDescriptors:sortDescriptors];
// Edit the section name key path and cache name
// nil for section name key path means "no sections".
//NSFetchedResultsController *aFetchedResultsController =
[[NSFetchedResultsController alloc] initWithFetchRequest
:fetchRequest managedObjectContext:managedObjectContext
sectionNameKeyPath:nil cacheName:@"Root"];
NSFetchedResultsController *aFetchedResultsController =
[[NSFetchedResultsController alloc] initWithFetchRequest:
fetchRequest managedObjectContext:trip.managedObjectContext
sectionNameKeyPath:@"city" cacheName:@"Root"];
aFetchedResultsController.delegate = self;
self.fetchedResultsController =
aFetchedResultsController;
[aFetchedResultsController release];
[fetchRequest release];
[sortDescriptor release];
[sortDescriptors release];
return fetchedResultsController;
}The first thing you do to set up your very own fetched results controller is create the fetch request for the entity. For all practical purposes, this is the same thing you did in loadHotels, so if you aren't clear on what you've just accomplished in that regard with Listing 5-9, refer to the discussion following Listing 5-3.
What's new here is that, after you've created the fetch request, you create the fetched results controller, specify the section name key path and cache name, and then set self as the delegate.
NSFetchedResultsController *aFetchedResultsController =
   [[NSFetchedResultsController alloc] initWithFetchRequest:f
   etchRequest managedObjectContext:trip.managedObjectContext
   sectionNameKeyPath:@"city" cacheName:@"Root"];
aFetchedResultsController.delegate = self;
With this lovely bit of coding, you create an NSFetchedResults Controller, initializing it with the fetchRequest you just created and configured, the managedObjectContext and two other arguments — sectionNameKeyPath and cacheName.
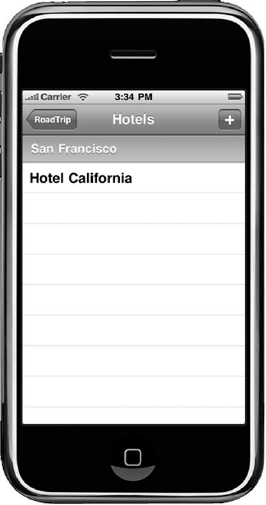
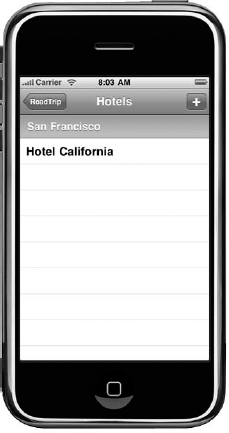
By passing in the sectionNameKeyPath argument @"city", you're telling Core Data you want to assign Hotel objects to sections in the table view based on the City key. That means that when you're done, your HotelController will display hotels by cities, as shown in Figure 5-1.
Giving a (optional) cacheName of @"Root" and a delegate — aFetched ResultsController.delegate = self;, (earlier you had the HotelController adopt the NSFetchedResultsControllerDelegate protocol) tells Core Data to cache its results so that if the same data is subsequently asked for again, the work doesn't have to be repeated.
Finally, you clean up by releasing the objects:
self.fetchedResultsController = aFetchedResultsController;
[aFetchedResultsController release];
[fetchRequest release];
[sortDescriptor release];
[sortDescriptors release];

return fetchedResultsController;
Now that you have the fetched results controller set up, it will be easier to understand what you do when you actually add a hotel.
The most exciting method in the HotelController is the one that adds a new object. The insertNewObject method is the target of the Add button you added in Listing 5-8. Although I've added to this method, it is essentially the same one used in the template. In the template, you simply add a new Event object with a single attribute — a time stamp — which you initialize it with. You will be extending that to create the Hotel object and its Annotation and then add it to the managed object context.
To avoid making things more complicated than they need to be, you won't be developing the user interface in this chapter to do that. The Hotel object and its Annotation are hard coded — that will make it easier for you to follow the logic.
In Book VII, however, I'll have you add a user interface as well as show you how you'll be able to use existing contacts in your Address Book to add hotels or, alternatively, add your new hotel to your Address Book contacts.
I've indicated in bold the changes you'll need to make to the template code to add a new Hotel object and its Annotation object. I've left out or summarized most of the comments you'll see in the template code.
Make the modifications in Listing 5-10 to insertNewObject in HotelController.m.
Example 5-10. Adding a New Hotel
#pragma mark -
#pragma mark Add a new object

- (void)insertNewObject {

// Create a new instance of the entity managed by the fetched
   results controller.
//NSManagedObjectContext *context =[fetchedResultsController managedObjectContext];NSEntityDescription *entity = [[fetchedResultsController fetchRequest] entity];//NSManagedObject *newManagedObject =[NSEntityDescription insertNewObjectForEntityForName:[entity name] inManagedObjectContext:context];hotel = [NSEntityDescriptioninsertNewObjectForEntityForName:[entity name]inManagedObjectContext:trip.managedObjectContext];// If appropriate, configure the new managed object.// [newManagedObject setValue:[NSDate date]forKey:@"timeStamp"];[hotel setValue:@"Hotel California" forKey:@"name"];[hotel setValue:@"1 Dr. Carlton B. Goodlett Place"forKey:@"street"];[hotel setValue:@"San Francisco" forKey:@"city"];[hotel setValue:@"California" forKey:@"state"];[hotel setValue:@"94102" forKey:@"zip"];Annotation *annotation = [NSEntityDescriptioninsertNewObjectForEntityForName:@"Annotation"inManagedObjectContext:trip.managedObjectContext];[annotation setTitle:@"Annotation"];[annotation setHotel:hotel];[hotel setAnnotation:annotation];Geocoder * geocoder = [[Geocoder alloc] init];NSString* geocodeString = [[NSString alloc ]initWithFormat: @" %@ %@ %@ %@",hotel.street, hotel.city, hotel.state, hotel.zip];CLLocationCoordinate2D theCoordinate =[geocoder geocodeLocation:geocodeString];hotel.annotation.latitude =[NSNumber numberWithDouble: theCoordinate.latitude];hotel.annotation.longitude =[NSNumber numberWithDouble: theCoordinate.longitude];hotel.annotation.title = hotel.name;// Save the context. NSError *error = nil; if (![trip.managedObjectContext save:&error]) { // Replace this implementation with code to handle the // error appropriately. NSLog(@"Unresolved error %@, %@", error, [error userInfo]); abort(); }[trip loadHotels];[trip.mapController refreshAnnotations];}
Looking at Listing 5-10, you see that you start by creating a new instance of the Hotel entity managed by the fetched results controller. (Remember, when you set up the fetch results controller in the previous section you specified the entity you wanted was Hotel.)
NSEntityDescription *entity =
      [[fetchedResultsController fetchRequest] entity];
Then you create a new object using the entity name Hotel in the managed object context you created in Trip.
hotel = [NSEntityDescription
       insertNewObjectForEntityForName:[entity name]
       inManagedObjectContext:trip.managedObjectContext];
Then you set the attributes for the object. (Later you will be doing this in a dialog where the user can enter the information.)
[hotel setValue:@"Hotel California" forKey:@"name"];
[hotel setValue:@"1 Dr. Carlton B. Goodlett Place"
                                       forKey:@"street"];
[hotel setValue:@"San Francisco" forKey:@"city"];
[hotel setValue:@"California" forKey:@"state"];
[hotel setValue:@"94102" forKey:@"zip"];
Next, you need to create and configure the Annotation.
Note
Creating an object doesn't automatically create the objects it has relationships to.
Annotation *annotation = [NSEntityDescription
       insertNewObjectForEntityForName:@"Annotation"
       inManagedObjectContext:trip.managedObjectContext];
[annotation setTitle:@"Annotation"];
[annotation setHotel:hotel];
[hotel setAnnotation:annotation];
Then you use your old friend the geocoder to get the coordinates needed for the Annotation as well as set them.
Geocoder * geocoder = [[Geocoder alloc] init];
NSString* geocodeString = [[NSString alloc ]
        initWithFormat: @" %@ %@ %@ %@",
        hotel.street, hotel.city, hotel.state, hotel.zip];
CLLocationCoordinate2D theCoordinate =
                 [geocoder geocodeLocation:geocodeString];
hotel.annotation.latitude =
      [NSNumber numberWithDouble: theCoordinate.latitude];
hotel.annotation.longitude =
      [NSNumber numberWithDouble: theCoordinate.longitude];
hotel.annotation.title = hotel.name;NSError *error = nil;
if (![trip.managedObjectContext save:&error]) {
// Replace this implementation with code to handle the
// error appropriately.
NSLog(@"Unresolved error %@, %@", error,
[error userInfo]);
abort();
}and then load the new Hotel into the hotels array used by Map's createAnnotation method and then send a message to the MapController to refresh the annotations.
[trip loadHotels];
[trip.mapController refreshAnnotations];
Here's where your previous work really pays off — you already have the logic in place to dynamically add and delete annotations as needed.
At this point you have created the infrastructure necessary to add a hotel. Of course, this superb piece of engineering isn't worth much until you add the code to the RoadTrip app that actually displays the hotel you have added.
That's what you will do in this section.
Next you need to make some changes to the default table view methods. You'll start with tableView:cellForRowAtIndexPath:. Make the modifications to HotelController.m shown in bold in Listing 5-11.
Example 5-11. tableView:cellForRowAtIndexPath
- (UITableViewCell *)tableView:(UITableView *)tableView cellF
   orRowAtIndexPath:(NSIndexPath *)indexPath {

  static NSString *CellIdentifier = @"Cell";

  UITableViewCell *cell = [tableView dequeueReusableCellWithI
   dentifier:CellIdentifier];
  if (cell == nil) {
    cell = [[[UITableViewCell alloc] initWithStyle:UITabl
   eViewCellStyleDefault reuseIdentifier:CellIdentifier]
   autorelease];
  }
// Configure the cell.
NSManagedObject *managedObject = [fetchedResultsController
objectAtIndexPath:indexPath];
//cell.textLabel.text =_
[[managedObject valueForKey:@"timeStamp"]
description];
cell.textLabel.text = [[managedObject valueForKey:@"name"]
description];
return cell;
}Fetched results controllers are very helpful in table views because they make it easy to get the right number of sections and rows, as well as the information needed to create the cells. Here, as you can see, all you have to do is pass the fetched results controller the index path you get in this method and then it will return the object that has the data (the name of the hotel) you want to display in the cell.
NSManagedObject *managedObject =
 [fetchedResultsController objectAtIndexPath:indexPath];
You set the text in the cell to the name of the hotel.
cell.textLabel.text =
       [[managedObject valueForKey:@"name"] description];
The template code doesn't come with section heads, so you need to add the method in Listing 5-12 to HotelController.m to take care of the section heads we need.
Example 5-12. tableView:titleForHeaderInSection:
- (NSString *)tableView:(UITableView *)tableView titleForHead
   erInSection:(NSInteger)section {
  return [[[fetchedResultsController sections]
   objectAtIndex:section] name];
}
Bunches of other table view methods are available out there, but I'll leave you to explore them on your own. I do, however, come back and revisit table View:didSelectRowAtIndexPath: in the "Adding Delete" section, later in the chapter.
If you set a delegate for a fetched results controller, the controller registers to receive change notifications from its managed object context. (I glossed over that when I discussed caching earlier.) Any change in the managed object context to objects or section information needs to be processed and the display in the table view updated accordingly. The controller notifies the delegate when result objects change location or when sections are modified.
Listing 5-13 shows the simplest case — yes, just reloading the table view counts as change.
Example 5-13. Reloading the Table View
- (void)controllerDidChangeContent:
            (NSFetchedResultsController *)controller {
   // In the simplest, most efficient, case, reload the table
   view.
   [self.tableView reloadData];
}
This is what you'll be using. There are also a number of other methods available that are beyond the scope of this book. You can read the comments in the generated code and see how they're implemented in the Core Data samples Apple provides.
Finally, because you don't create the managed object context (it is created in Trip), you don't want to delete it either. Make the modifications shown in bold in Listing 5-14 to dealloc in HotelController.m to make sure your managed object context doesn't get tossed.
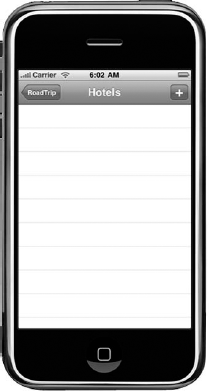
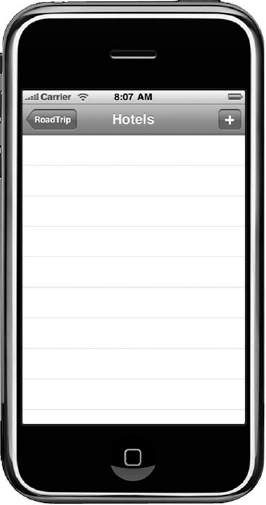
At this point, you can compile and run the code. If you select Hotels in the main menu of your RoadTrip app, you'll be faced with the blank screen you see in Figure 5-2.
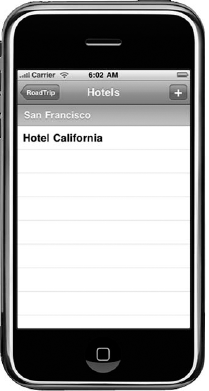
If you select the Add button (+), you'll see in Figure 5-3 that you have now successfully added a hotel.
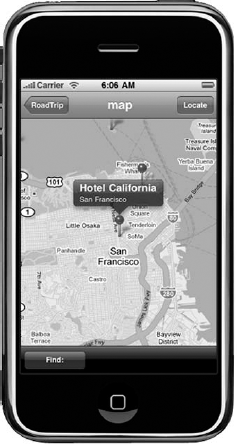
Even cooler than that, if you go back to the Map view, you'll see (in Figure 5-4) that the hotel is now nicely displayed — with it annotation no less!
One of the great things about Core Data is that it makes it easy to support the iPhone's Shake to Undo functionality.
Now, managed objects are always associated with a Managed Object Context, which doesn't sound too surprising. But did you know that each managed object context has an Undo manager? Now that's cool. You can, for example, change a managed object's properties using an accessor method (or key-value coding, or custom key-value-observing compliant methods) and the Managed Object Context uses key-value observing to keep track of modifications to its registered objects. The place where the managed object context registers all its modification events is with its Undo manager.
To undo an operation, you simply send the context an Undo message; to redo an operation, you send the context — you guessed it — a Redo message. (You can also roll back all changes made since the last save operation by using rollback, as well as other standard Undo manager functionality, such grouping undo events. — something I won't cover here).
To begin all the undoing, the strategy here is to set up the Undo manager when you add a hotel. Make the changes marked in bold/strikeout in Listing 5-15 to the insertNewObject method in HotelController.h.
Example 5-15. Adding the Code to a New Object
#pragma mark -
#pragma mark Add a new object

- (void)insertNewObject {

// Create a new instance of the entity managed by the fetched
   results controller.
  NSEntityDescription *entity =
      [[fetchedResultsController fetchRequest] entity];
  hotel = [NSEntityDescription
       insertNewObjectForEntityForName:[entity name]
       inManagedObjectContext:trip.managedObjectContext];
  [self setUpUndoManager];
  [hotel setValue:@"Hotel California" forKey:@"name"];
  [hotel setValue:@"600 Sutter Street" forKey:@"street"];
  [hotel setValue:@"San Francisco" forKey:@"city"];
  [hotel setValue:@"California" forKey:@"state"];
  [hotel setValue:@"94108" forKey:@"zip"];

  Annotation *annotation = [NSEntityDescription
       insertNewObjectForEntityForName:@"Annotation"
       inManagedObjectContext:trip.managedObjectContext];
  [annotation setTitle:@"Annotation"];
  [annotation setHotel:hotel];
  [hotel setAnnotation:annotation];

  Geocoder * geocoder = [[Geocoder alloc] init];
  NSString* geocodeString = [[NSString alloc ]
        initWithFormat: @" %@ %@ %@ %@",
        hotel.street, hotel.city, hotel.state, hotel.zip];
  CLLocationCoordinate2D theCoordinate =
                 [geocoder geocodeLocation:geocodeString];

  hotel.annotation.latitude =
      [NSNumber numberWithDouble: theCoordinate.latitude];
  hotel.annotation.longitude =
[NSNumber numberWithDouble: theCoordinate.longitude]; hotel.annotation.title = hotel.name;// Save the context.NSError *error = nil;if (![trip.managedObjectContext save:&error]) {// Replace this implementation with code to handle the// error appropriately.NSLog(@"Unresolved error %@, %@", error,[error userInfo]);'Tony Bove' abort();}[trip loadHotels];[trip.mapController refreshAnnotations];}
The modifications spelled out in Listing 5-15 do two things for you. First, you arrange it so that you send a message to yourself to set up the Undo manager.
[self setUpUndoManager];
With that done, you then delete the code you added to save the context and refresh the annotations. That's because you don't want to save or update anything until you're quite sure what the last Undo/Redo action was. I show you later where you'll do that save and update.
Now you will have to implement two methods in HotelController. Start by making the changes to HotelController.h shown in bold in Listing 5-16.
Example 5-16. HotelController.h
@class Trip;
@class Hotel;

@interface HotelController : UITableViewController
   <NSFetchedResultsControllerDelegate> {
  NSFetchedResultsController *fetchedResultsController;
  Trip                       *trip;
  Hotel                      *hotel;
  NSUndoManager              *undoManager;
}
@property (nonatomic, retain) NSFetchedResultsController
   *fetchedResultsController;
 @property (nonatomic, retain) NSUndoManager *undoManager;
- (void)setUpUndoManager;
- (void)cleanUpUndoManager;

@end
Here you have declared two methods to set up (and then clean up) the Undo manager and a property to hold a reference to the Undo manager.
Next, you need to add the two methods setUpUndoManager and cleanUpUndoManager shown in Listings 5-17 and 5-18, respectively, to TripController.m.
Example 5-17. Setting Up the Undo Manager
- (void)setUpUndoManager {
  if (hotel.managedObjectContext.undoManager == nil) {
    hotel.managedObjectContext.undoManager =
                                [[NSUndoManager alloc] init];
    [hotel.managedObjectContext.undoManager setActionName:
                   [NSString stringWithString:@"Add Hotel"]];

                      [hotel.managedObjectContext.undoManager
    setLevelsOfUndo:3];
      [hotel.managedObjectContext.undoManager release];
    }
   self.undoManager = hotel.managedObjectContext.undoManager ;

// Register as an observer of the hotel's context's undo
   manager.
  NSNotificationCenter *dnc =
                  [NSNotificationCenter defaultCenter];
 [dnc addObserver:self selector:@
   selector(undoManagerDidUndo:) name:NSUndoManagerDidUndoCha
   ngeNotification object:undoManager];
 [dnc addObserver:self
           selector:@selector(undoManagerDidRedo:) name:NSUnd
   oManagerDidRedoChangeNotification object:undoManager];
}
If the Hotel object's Managed Object Context doesn't already have an Undo manager, then create one and set it for the context and self.
if (hotel.managedObjectContext.undoManager  == nil) {
NSUndoManager *anUndoManager =
                           [[NSUndoManager alloc] init];
You also set what the Undo alert will display (it'll display Add Hotel) and the level of undo (up to 3 undos).
[anUndoManager setActionName:
              [NSString stringWithString:@"Add Hotel"]];
[anUndoManager setLevelsOfUndo:3];The view controller needs to keep a reference to the Undo manager it creates so that it can determine whether to remove the Undo manager when editing finishes (in the case of a table view that supports editing) or when the view unloads (in our case). You also assign the newly created Undo manager to the Managed Object Context:
self.undoManager = anUndoManager;
    [anUndoManager release];
    hotel.managedObjectContext.undoManager = undoManager;
Then you register as an observer of the Hotel object's Managed Object Context's Undo manager. You tell the notification center to send the undo ManagerDidUndo: message to self when an undo occurs and the undo ManagerDidRedo: message when a redo occurs.
NSNotificationCenter *dnc =
                  [NSNotificationCenter defaultCenter];
 [dnc addObserver:self selector:@
   selector(undoManagerDidUndo:) name:NSUndoManagerDidUndoCha
   ngeNotification object:undoManager];
 [dnc addObserver:self
   selector:@selector(undoManagerDidRedo:) name:NSUndoManager
   DidRedoChangeNotification object:undoManager];
}
When you no longer need the Undo manager, you'll clean up after yourself. Enter the code in Listing 5-18 to HotelController.m.
Example 5-18. Cleaning Up the Undo Manager
- (void)cleanUpUndoManager {

// Remove self as an observer.
  [[NSNotificationCenter defaultCenter]
                                     removeObserver:self];

  if (hotel.managedObjectContext.undoManager ==
                                            undoManager) {
  hotel.managedObjectContext.undoManager = nil;
  self.undoManager = nil;
  }
}
You'll remove self as an observer and set the properties to nil.
You registered with the notification center to have a message sent whenever there was an undo or redo. Add the code in Listing 5-19 to HotelController.m to implement those methods.
Example 5-19. undoManagerDidUndo and undoManagerDidRedo
- (void)undoManagerDidUndo:(NSNotification *)
                                            notification {
  [self.tableView reloadData];
}


- (void)undoManagerDidRedo:(NSNotification *)
                                            notification {

  [self.tableView reloadData];
}
In both cases, you simply reload the table view to either remove (or add back) the entry.
Finally, a little housekeeping. The view controller must be first responder in order to be able to receive Shake events for undo. To do that, add the code in Listing 5-20 to HotelController.h.
Example 5-20. Setting the Correct First Responder Status
- (BOOL)canBecomeFirstResponder {

  return YES;
}


- (void)viewDidAppear:(BOOL)animated {

  [super viewDidAppear:animated];
  [self becomeFirstResponder];
}
Finally, when the view unloads and undos and redos are no longer possible, you need to save the current Managed Object Context and resign as first responder. Add the code in Listing 5-21 HotelController.m to send the cleanUpUndoManager message.
Example 5-21. viewWillDisappear:
- (void)viewWillDisappear:(BOOL)animated {
  [super viewWillDisappear:animated];
  [self cleanUpUndoManager];
  // Save the context.
  if (trip.managedObjectContext.hasChanges) {
    NSError *error = nil;
    if (![trip.managedObjectContext save:&error]) {
  /*
   Replace this implementation with code to handle the error
   appropriately.
  */
      NSLog(@"Unresolved error %@, %@", error,
                                        [error userInfo]);
    abort();
    }
  }
  [trip loadHotels];
  [trip.mapController refreshAnnotations];
  [self resignFirstResponder];
}
The viewWillDisappear: message is sent to the view controller, well, when the view is going to disappear. This is the place where you want to commit the changes. First, you send the cleanUpUndoManager method you implemented in Listing 5-18. Then you save the context, and then send the loadHotels and refreshAnnotations messages to ensure that the hotel will appear on the map — this is simply the code you had in insertNewObject previously and does the same thing here. You also resign as first responder because you're ending the Undo/Redo cycle (and the view is disappearing anyway).
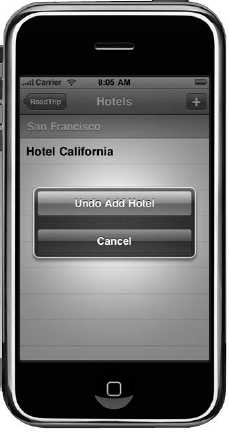
When you compile this code, go ahead and add a hotel using the Add button, as I have in Figure 5-5.
At this point, you can only add the hotel you hard coded in the insertNew Object method — but patience, you'll add the code and the user interface in Book VII, Chapter 1 that will allow the user to decide where he or she wants to stay.
Then either shake the device, or choose Hardware
If you touch Undo Add Hotel, your added hotel will be undone, as you can see in Figure 5-7.
After you add a Hotel, it would also be nice if you could delete it if you change your mind. Normally, you'd do that using the Edit function in the table view or a Delete button when displaying the details of the Hotel. Although you don't have either of those available yet, I still want to show you what you need to do as far as Core Data is concerned to delete an object. To do that, you'll make the Hotel entry in the HotelController selectable, and when it's selected for an entry, you will delete it.
Don't worry, I show you how to deal with delete the right way in Book VII, when I show you how to enter the hotel data in a view and interface to your Address book.
Note
I want to point out that I won't be implementing undo for delete. I leave that as an exercise for you.
To start with, you need to modify the default tableView:didSelectRowAtIndexPath: method supplied in the CoreData template you pasted into your application in the previous section.
Make the modification shown in bold in Listing 5-22 to tableView:didSelectRowAtIndexPath: in HotelController.m. It was really just a stub with comments. I've omitted the comments and you can delete them if you would like.
Example 5-22. HotelController.m
- (void)tableView:(UITableView *)tableView didSelectRowAtInde
   xPath:(NSIndexPath *)indexPath {
  [tableView deselectRowAtIndexPath:indexPath
                                            animated:YES];
  hotel = [[self fetchedResultsController]
                              objectAtIndexPath:indexPath];
  [trip deleteHotel:hotel];
  hotel = nil;
}
The first thing you do in Listing 5-22 is deselect the row, and then get the Hotel object you're going to delete from the fetchedResultsController using the indexPath to determine which object that is. (The fetchedResultsController really does make things easier when you are using table view.)
[tableView deselectRowAtIndexPath:indexPath animated:YES];
hotel = [[self fetchedResultsController]
                             objectAtIndexPath:indexPath];
Then you send the deleteHotel: message to Trip, passing the Hotel you want to delete as an argument and setting the hotel instance variable to nil.
[trip deleteHotel:hotel];hotel = nil;
Finally, you have to implement the deleteHotel: method. Add the code in Listing 5-23 to Trip.m.
Example 5-23. deleteHotel:
- (void) deleteHotel:(Hotel*) theHotel {

  [hotels removeObject:theHotel];
  [managedObjectContext deleteObject:theHotel];
  // Save the context.
  NSError *error;
  if (![managedObjectContext save:&error]) {
// Replace this implementation with code to handle the error
appropriately.
NSLog(@"Unresolved error %@, %@", error,
[error userInfo]);
abort();
}
[self loadHotels];
if (self.mapController) [self.mapController
refreshAnnotations];
}The first thing you do is remove the Hotel you're deleting for the hotels array:
[hotels removeObject:theHotel];
Then you remove the Hotel from the Managed Object Context:
[managedObjectContext deleteObject:theHotel];
Then you save the Managed Object Context:
if (![managedObjectContext save:&error]) {

    // Replace this implementation with code to handle the
   error appropriately.


    NSLog(@"Unresolved error %@, %@", error, [error
   userInfo]);
    abort();
  }
Again, as I mention earlier, when it comes to production code, you shouldn't simply abort when your code confronts an error.
Lastly, you reload the (remaining) hotels and then send a message to the mapController to refresh the annotations.
[self loadHotels];
  if (self.mapController) [self.mapController
                                      refreshAnnotations];
You also have to add the following to Trip.h:
@class Hotel;
as well as the method declaration for deleteHotel:
- (void) deleteHotel:(Hotel*) theHotel;
This chapter completes your introduction to Core Data, but there are some things you still need to add to to the RoadTrip application.
For one, you'd like to be able to enter the name and address of the Hotel, instead of always having to stay at the same place. It would also be nice if you could save all that information as a contact in your Address Book. Conversely, if the information is already in your Address Book, you'd like to use that for the Hotel.
When you're on the road, you'd also like to send e-mail about where you are.
And you might like to know, at any point in time, by simply shaking your phone, how far you are from Apple Computer headquarters. (Others would like to know how far you are from a destination or sight.)
I cover all this in Book VI.