
Chapter 3
Creating Access Tables
IN THIS CHAPTER
- Creating a new table
- Modifying the design of a table
- Working with field properties
- Specifying the primary key
- Adding indexes
- Documenting a table's design
- Saving a new table
- Working with tables
- Adding data to a table
- Using attachment fields
In this chapter, you learn how to create a new Access database and its tables. You establish the database container to hold your tables, forms, queries, reports, and code that you build as you learn Access. Finally, you create the actual tables used by the Collectible Mini Cars database.
Table Types
To Access, a table is always just a table. But to your Access application, different tables serve different purposes. A database table fits into one of three types: object, transaction, or join. Knowing what type of table you're creating helps to determine how you create it.
Object tables
Object tables are the most common. Each record of this type of table holds information that relates to a real-world object. A customer is a real-world object, and a record in a table named tblCustomers holds information about that customer. The fields in an object table reflect the characteristics of the object they represent. A City field describes one characteristic of the customer—namely, the actual city where the customer is. When creating an object table, think about the characteristics of that object that make it unique or that are important.
Transaction tables
The next most common type of table is a transaction table. Each record of a transaction table holds information about an event. Placing an order for a book is an example of an event. To hold the details of all the orders, you might have a table named tblBookOrders. Transaction tables almost always have a Date/Time field because when the event happened is usually an important piece of information to record. Another common type of field is a field that refers to an object table, such as a reference to the customer in tblCustomers that placed the order. When creating a transaction table, think about the information created by the event and who was involved.
Join tables
Join tables are the easiest to design and are vitally important to a well-designed database. Usually relating two tables is a simple process: A customer orders a book, for instance, and you can easily relate that order to that customer. But sometimes the relationship isn't so clear. A book may have many authors. And an author may have many books. When this relationship exists, called a many-to-many relationship, a join table sits in the middle of the two tables. A join table usually has a name that reflects the association, such as tblAuthorBook. A join table generally has only three fields: a unique field to identify each record, a reference to one side of the association, and a reference to the other side of an association.
Creating a New Table
Creating database tables is as much art as it is science. Acquiring a good working knowledge of the user's requirements is a fundamental step for any new database project.
In this chapter, I show you the steps required to create basic Access tables. In the following sections, you'll study the process of adding tables to an Access database, including the relatively complex subject of choosing the proper data type to assign to each field in a table.
It's always a good idea to plan tables first, before you use the Access tools to add tables to the database. Many tables, especially small ones, really don't require a lot of forethought before adding them to the database. After all, not much planning is required to design a table holding lookup information, such as the names of cities and states. However, more complex entities, such as customers and products, usually require considerable thought and effort to implement properly.
Although you can design the table without any forethought as you create it in Access, carefully planning a database system is a good idea. You can make changes later, but doing so wastes time; generally, the result is a system that's harder to maintain than one that you've planned well from the beginning.
In the following sections, I explore the new, blank table added to the Chapter03.accdb database. It's important to understand the steps required to add new tables to an Access database.
Designing tables
Designing a table is a multistep process. By following the steps in order, your table design can be created readily and with minimal effort:
- Create the new table.
- Enter field names, data types, properties, and (optionally) descriptions.
- Set the table's primary key.
- Create indexes for appropriate fields.
- Save the table's design.
Generally speaking, some tables are never really finished. As users' needs change or the business rules governing the application change, you might find it necessary to open an existing table in Design view. This book, like most books on Access, describes the process of creating tables as if every table you ever work on is brand new. The truth is, however, that most of the work that you do on an Access application is performed on existing objects in the database. Some of those objects you've added yourself, while other objects may have been added by another developer at some time in the past. However, the process of maintaining an existing database component is exactly the same as creating the same object from scratch.
Begin by selecting the Create tab on the Ribbon at the top of the Access screen. The Create tab (shown in Figure 3.1) contains all the tools necessary to create not only tables, but also forms, reports, and other database objects.

Figure 3.1 The Create tab contains tools necessary for adding new objects to your Access database.
There are two main ways to add new tables to an Access database, both of which are invoked from the Tables group on the Create tab:
- Clicking the Table button: Adds a table in Datasheet view to the database with one AutoNumber field named ID
- Clicking the Table Design button: Adds a table in Design view to the database
For this example, I'll be using the Table Design button, but first, let's take a look at the Table button.
Clicking the Table button adds a new table to the Access environment. The new table appears in Datasheet view in the area to the right of the Navigation Pane. The new table is shown in Figure 3.2. Notice that the new table appears in Datasheet view, with an ID column already inserted and a Click to Add column to the right of the ID field.
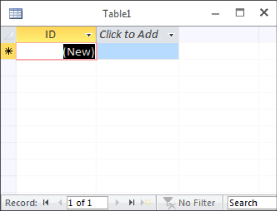
Figure 3.2 The new table in Datasheet view.
The Click to Add column is intended to permit users to quickly add fields to a table. All you have to do is begin entering data in the new column. You assign the field a name by right-clicking the field's heading, selecting Rename Field, and entering a name for the field. In other words, building an Access table can be very much like creating a spreadsheet in Excel.
Once you've added the new column, the tools on the Fields tab of the Ribbon (shown in Figure 3.3) allow you to set the specific data type for the field, along with its formatting, validation rules, and other properties.

Figure 3.3 Field design tools are located on the Fields tab of the Ribbon.
The second method of adding new tables is to click the Table Design button in the Tables group on the Create tab. Access opens a new table in Design view, allowing you to add fields to the table's design. Figure 3.4 shows a new table's design after a few fields have been added. Table Design view provides a somewhat more deliberate approach to building Access tables.

Figure 3.4 A new table added in Design view.
The Table Designer is quite easy to understand, and each column is clearly labeled. At the far left is the Field Name column, where you input the names of fields you add to the table. You assign a data type to each field in the table and (optionally) provide a description for the field. Data types are discussed in detail later in this chapter.
For this exercise, you create the Customers table for the Collectible Mini Cars application. The basic design of this table is outlined in Table 3.1. I cover the details of this table's design in the “Creating tblCustomers” section, later in this chapter.
Table 3.1 The Collectible Mini Cars Customers Table
| Field Name | Data Type | Description |
| CustomerID | AutoNumber | Primary key |
| Company | Short Text | Contact's employer or other affiliation |
| Address | Short Text | Contact's address |
| City | Short Text | Contact's city |
| State | Short Text | Contact's state |
| ZipCode | Short Text | Contact's zip code |
| Phone | Short Text | Contact's phone |
| Fax | Short Text | Contact's fax |
| Short Text | Contact's e-mail address | |
| WebSite | Short Text | Contact's web address |
| OrigCustomerDate | DateTime | Date the contact first purchased something from Collectible Mini Cars |
| CreditLimit | Currency | Customer's credit limit in dollars |
| CurrentBalance | Currency | Customer's current balance in dollars |
| CreditStatus | Short Text | Description of the customer's credit status |
| LastSalesDate | DateTime | Most recent date the customer purchased something from Collectible Mini Cars |
| TaxRate | Number (Double) | Sales tax applicable to the customer |
| DiscountPercent | Number (Double) | Customary discount provided to the customer |
| Notes | Long Text | Notes and observations regarding this customer |
| Active | Yes/No | Whether the customer is still buying or selling to Collectible Mini Cars |
The Short Text fields in the preceding table use the default 255 character Field Size. While it's unlikely that anyone's name will occupy 255 characters, there's no harm in providing for very long names. Access only stores as many characters as are actually entered into a text field. So, allocating 255 characters doesn't actually use 255 characters for every name in the database.
Looking once again at Figure 3.4, you see that the Table Design window consists of two areas:
- The field entry area: Use the field entry area, at the top of the window, to enter each field's name and data type. You can also enter an optional description.
- The field properties area: The area at the bottom of the window is where the field's properties are specified. These properties include field size, format, input mask, and default value, among others. The actual properties displayed in the properties area depend upon the data type of the field. You learn much more about these properties in the “Assigning field properties” section, later in this chapter.
Using the Design tab
The Design tab of the Access Ribbon (shown in Figure 3.5) contains many controls that assist in creating a new table definition.

Figure 3.5 The Design tab of the Ribbon.
The controls on the Design tab affect the important table design considerations. Only a few of the controls shown in Figure 3.5 are described in the following sections. You'll learn much more about the other buttons in the “Creating tblCustomers” section, later in this chapter, and in subsequent chapters of this book.
Primary Key
Click this button to designate which of the fields in the table you want to use as the table's primary key. Traditionally, the primary key appears at the top of the list of fields in the table, but it could appear anywhere within the table's design. Primary keys are discussed in detail in the “Setting the Primary Key” section later in this chapter.
Insert Rows
Although it makes little difference to the database engine, many developers are fussy about the sequence of fields in a table. Many of the wizards in Access display the fields in the same order as the table. Keeping an address field above a city field, for example, can make development easier.
Clicking the Insert Rows button inserts a blank row just above the position occupied by the mouse cursor. For example, if the cursor is currently in the second row of the Table Designer, clicking the Insert Row button inserts an empty row in the second position, moving the existing second row to the third position.
Delete Rows
Clicking the Delete Rows button removes a row from the table's design.
Property Sheet
Clicking the Property Sheet button opens the Property Sheet for the entire table (shown in Figure 3.6). These properties enable you to specify important table characteristics, such as a validation rule to apply to the entire table, or an alternate sort order for the table's data.

Figure 3.6 The Property Sheet.
Indexes
Indexes are discussed in much more detail in the “Indexing Access Tables” section, later in this chapter. Clicking the Indexes button opens the Indexes dialog box, which enables you to specify the details of indexes on the fields in your table.
Working with fields
You create fields by entering a field name and a field data type in the upper entry area of the Table Design window. The (optional) Description property can be used to indicate the field's purpose. The description appears in the status bar at the bottom of the screen during data entry and may be useful to people working with the application. After entering each field's name and data type, you can further specify how each field is used by entering properties in the property area.
Naming a field
A field name should be descriptive enough to identify the field to you as the developer, to the user of the system, and to Access. Field names should be long enough to quickly identify the purpose of the field, but not overly long. (Later, as you enter validation rules or use the field name in a calculation, you'll want to save yourself from typing long field names.)
To enter a field name, position the pointer in the first row of the Table Design window under the Field Name column. Then type a valid field name, observing these rules:
- Field names can be from 1 to 64 characters in length.
- Field names can include letters, numbers, and special characters, except period (.), exclamation point (!), accent grave (`), and brackets ([]).
- Field names can include spaces. Spaces should be avoided in field names for some of the same reasons you avoid them in table names.
- Field names can't include a period (.), exclamation point (!), brackets ([ ]), or accent grave (`).
- You can't use low-order ASCII characters—for example Ctrl+J or Ctrl+L (ASCII values 0 through 31).
- You can't start with a blank space.
You can enter field names in uppercase, lowercase, or mixed case. If you make a mistake while typing the field name, position the cursor where you want to make a correction and type the change. You can change a field name at any time, even if the table contains data.
Specifying a data type
When you enter a field, you must also decide what type of data each of your fields will hold. In Access, you can choose any of several data types. The available data types are shown in Table 3.2.
Table 3.2 Data Types Available in Microsoft Access
| Data Type | Type of Data Stored | Storage Size |
| Short Text | Alphanumeric characters | 255 characters or fewer |
| Long Text | Alphanumeric characters | 1GB of characters or less |
| Number | Numeric values | 1, 2, 4, or 8 bytes; 16 bytes for Replication ID (GUID) |
| Date/Time | Date and time data | 8 bytes |
| Currency | Monetary data | 8 bytes |
| AutoNumber | Automatic number increments | 4 bytes; 16 bytes for Replication ID (GUID) |
| Yes/No | Logical values: Yes/No, True/False | 1 bit (0 or –1) |
| OLE Object | Pictures, graphs, sound, video | Up to 1GB (disk space limitation) |
| Hyperlink | Link to an Internet resource | 1GB of characters or less |
| Attachment | A special field that enables you to attach external files to an Access database | Varies by attachment |
| Lookup Wizard | Displays data from another table | Generally 4 bytes |
Figure 3.7 shows the Data Type drop-down list used to select the data type for the field you just created.

Figure 3.7 The Data Type drop-down list.
One of these data types must be assigned to each of your fields. Some of the data types have addition options, such as Field Size for Short Text fields and Number fields.
Here are the basic questions to consider when choosing the data type for new fields in your tables:
- What is the data type? The data type should reflect the data stored in the field. For example, you should select one of the numeric data types to store numbers like quantities and prices. Don't store data like phone numbers or Social Security numbers in numeric fields, however; your application won't be performing numeric operations like addition or multiplication on phone numbers. Instead, use text fields for common data, such as Social Security numbers and phone numbers.
- What are the storage requirements of the data type you've selected? Although you can use the Long Integer data type in place of Integer or Byte, the storage requirements of a Long Integer (4 bytes) are twice that of Integer. This means that twice as much memory is required to use and manipulate the number and twice as much disk space is required to store its value. Whenever possible, use Byte or Integer data types for simple numeric data.
- Will you want to sort or index the field? Because of their binary nature, Long Text and OLE Object fields can't be sorted or indexed. Use Long Text fields sparingly. The overhead required to store and work with Long Text fields is considerable.
- What is the impact of the data type on sorting requirements? Numeric data sorts differently from sorting text data. Using the numeric data type, a sequence of numbers will sort as expected: 1, 2, 3, 4, 5, 10, 100. The same sequence stored as text data will sort like this: 1, 10, 100, 2, 3, 4, 5. If it's important to sort text data in a numeric sequence, you'll have to first apply a conversion function to the data before sorting.
-
Is the data text or date data? When working with dates, you're almost always better off storing the data in a Date/Time field than as a Short Text field. Text values sort differently from dates (dates are stored internally as numeric values), which can upset reports and other output that rely on chronological order.
Don't be tempted to store dates in one Date/Time field and time in another Date/Time field. The Date/Time field is specifically designed to handle both dates and times, and, as you'll see throughout this book, it's quite easy to display only the date or time portion of a Date/Time value.
A Date/Time field is also meant to store a discrete date and time, and not a time interval. If keeping track of durations is important, you could use two Date/Time fields—one to record the start and the other at the end of a duration—or one Long Integer field to store the number of elapsed seconds, minutes, hours, and so forth.
- What reports will be needed? You won't be able to sort or group Long Text or OLE data on a report. If it's important to prepare a report based on Long Text or OLE data, add a Tag field like a date or sequence number, which can be used to provide a sorting key, to the table.
Short Text
The Short Text data type holds information that is simply characters (letters, numbers, punctuation). Names, addresses, and descriptions are all text data, as are numeric data that are not used in a calculation (such as telephone numbers, Social Security numbers, and zip codes).
Although you specify the size of each Short Text field in the property area, you can enter no more than 255 characters of data in any Short Text field. Access uses variable length fields to store text data. If you designate a field to be 25 characters wide and you use only 5 characters for each record, then only enough room to store 5 characters is used in your database.
You'll find that the ACCDB database file might quickly grow quite large, but text fields are usually not the cause. However, it's good practice to limit Short Text field widths to the maximum you believe is likely for the field. Names can be quite tricky because fairly long names are common in some cultures. However, it's a safe bet that a postal code will be fewer than 12 characters, while a U.S. state abbreviation is always 2 characters. By limiting a Short Text field's width, you also limit the number of characters users can enter when the field is used in a form.
Long Text
The Long Text data type holds a variable amount of data up to 1GB. Long Text fields use only as much memory as necessary for the data stored. So, if one record uses 100 characters, another requires only 10, and yet another needs 3,000, you use only as much space as each record requires.
You don't specify a field size for the Long Text data type. Access allocates as much space as necessary for the data.
Number data type
The Number data type enables you to enter numeric data—that is, numbers that will be used in mathematical calculations or represent scalar quantities such as inventory counts. (If you have data that will be used in monetary calculations, you should use the Currency data type, which performs calculations without rounding errors.)
The exact type of numeric data stored in a number field is determined by the Field Size property. Table 3.3 lists the various numeric data types, their maximum and minimum ranges, the decimal points supported by each numeric data type, and the storage (bytes) required by each numeric data type.
Table 3.3 Numeric Field Settings
| Field Size Setting | Range | Decimal Places | Storage Size |
| Byte | 0 to 255 | None | 1 byte |
| Integer | –32,768 to 32,767 | None | 2 bytes |
| Long Integer | –2,147,483,648 to 2,147,483,647 | None | 4 bytes |
| Double | –1.797 × 10308 to 1.797 × 10308 | 15 | 8 bytes |
| Single | –3.4 × 1038 to 3.4 × 1038 | 7 | 4 bytes |
| Replication ID | N/A | N/A | 16 bytes |
| Decimal | –9.999 x 1027 to 9.999 x 1027 | 15 | 8 bytes |
Design your tables very conservatively and allow for larger values than you ever expect to see in your database. This is not to say that using the Double data type for all numeric fields is a good idea. The Double data type is very large (8 bytes) and might be somewhat slow when used in calculations or other numeric operations. Instead, the Single data type is probably best for most floating-point calculations, and Long Integer is a good choice where decimal points are irrelevant.
Date/Time
The Date/Time data type is a specialized number field for holding dates or times (or dates and times). When dates are stored in a Date/Time field, it's easy to calculate days between dates and other calendar operations. Date data stored in Date/Time fields sort and filter properly as well. The Date/Time data type holds dates from January 1, 100, to December 31, 9999.
Currency
The Currency data type is another specialized number field. Currency numbers are not rounded during calculations and preserve 15 digits of precision to the left of the decimal point and 4 digits to the right. Because Currency fields use a fixed decimal point position, they're faster in numeric calculations than doubles.
AutoNumber
The AutoNumber field is another specialized Number data type. When an AutoNumber field is added to a table, Access automatically assigns a long integer (32-bit) value to the field (beginning at 1) and increments the value each time a record is added to the table. Alternatively (determined by the New Values property), the value of the AutoNumber field is a random integer that is automatically inserted into new records.
Only one AutoNumber field can appear in a table. Once assigned to a record, the value of an AutoNumber field can't be changed programmatically or by the user. AutoNumber fields are stored as a Long Integer data type and occupy 4 bytes. AutoNumber fields can accommodate up to 4,294,967,296 unique numbers—more than adequate as the primary key for most tables.
Yes/No
Yes/No fields accept only one of two possible values. Internally stored as -1 (Yes) or 0 (No), the Yes/No field is used to indicate yes/no, on/off, or true/false. A Yes/No field occupies a single bit of storage.
OLE Object
The OLE Object field stores OLE data, highly specialized binary objects such as Word documents, Excel spreadsheets, sound or video clips, and images. The OLE object is created by an application that Windows recognizes as an OLE server and can be linked to the parent application or embedded in the Access table. OLE objects can be displayed only in bound object frames in Access forms and reports. OLE fields can't be indexed.
Attachment
The Attachment data type was introduced in Access 2007. In fact, the Attachment data type is one of the reasons Microsoft changed the format of the Access data file. The older MDB format is unable to accommodate attachments.
The Attachment data type is relatively complex, compared to the other types of Access fields, and it requires a special type of control when displayed on Access forms. For details on this interesting type of field, turn to “Understanding Attachment Fields,” later in this chapter.
Hyperlink
The Hyperlink data type field holds combinations of text and numbers stored as text and used as a hyperlink address. It can have up to three parts:
- The text that appears in a control (usually formatted to look like a clickable link).
- The address—The path to a file or web page.
- Any sub-address within the file or page. An example of a sub-address is a picture on a web page. Each part of the hyperlink's address is separated by the pound sign (
#).
Access hyperlinks can even point to forms and reports in other Access databases. This means that you can use a hyperlink to open a form or report in an external Access database and display the form or report on the user's computer.
Lookup Wizard
The Lookup Wizard data type inserts a field that enables the end user to choose a value from another table or from the results of a SQL statement. The values may also be presented as a combo box or list box. At design time, the Lookup Wizard leads the developer through the process of defining the lookup characteristics when this data is assigned to a field.
As you drag an item from the Lookup Wizard field list, a combo box or list box is automatically created on the form. The list box or combo box also appears on a query datasheet that contains the field.
Entering a field description
The field description is completely optional; you use it only to help you remember a field's uses or to let another developer understand the field's purpose. Often, you don't use the Description column at all, or you use it only for fields whose purpose is not obvious. If you enter a field description, it appears in the status bar whenever you use that field in Access—in the datasheet or in a form. The field description can help clarify a field whose purpose is ambiguous or give the user a more complete explanation of the appropriate values for the field during data entry.
Specifying data validation rules
The last major design decision concerns data validation, which becomes important as users enter data. You want to make sure that only good data (data that passes certain defined tests) gets into your system. You have to deal with several types of data validation. You can test for known individual items, stipulating that the Gender field can accept only the values Male, Female, or Unknown, for example. Or you can test for ranges, specifying that the value of Weight must be between 0 and 1,500 pounds. You'll read more about validation rules in the “Validation Rule and Validation Text” section, later in this chapter.
Creating tblCustomers
Working with the different data types, you should be ready to create the final working copy of tblCustomers.
Using AutoNumber fields
Access gives special considerations to AutoNumber fields. You can't change a previously defined field from another type to AutoNumber if any data has been added to the table. If you try to change an existing field to an AutoNumber, you'll see an error that says:
Once you enter data in a table, you can't change the data type of any
field to AutoNumber, even if you haven't yet added data to that field.
You'll have to add a new AutoNumber field and begin working with it instead of changing an existing field to AutoNumber.
Completing tblCustomers
With tblCustomers in Design view, you're ready to finalize its design. Table 3.1, shown earlier in this chapter, lists the field definitions for tblCustomers. Enter the field names and data types as shown in Table 3.1. The next few pages explain how to change existing fields (which includes rearranging the field order, changing a field name, and deleting a field).
Here are the steps for adding fields to a table structure:
- Place the cursor in the Field Name column in the row where you want the field to appear.
- Enter the field name and press Enter or Tab to move to the Data Type column.
- Select the field's data type from the drop-down list in the Data Type column.
- If desired, add a description for the field in the Description column.
Repeat each of these steps to create each of the data entry fields for tblCustomers. You can press the down arrow (↓) key to move between rows, or use the mouse and click on any row. Pressing F6 switches the focus from the top to the bottom of the Table Design window, and vice versa.
Changing a Table Design
Even the best planned table may require changes from time to time. You might find that you want to add another field, remove a field, change a field name or data type, or simply rearrange the order of the field names.
Although a table's design can be changed at any time, special considerations must be given to tables containing data. Be careful of making changes that damage data in the table, such as making text fields smaller or changing the Field Size property of Number fields. You can always add new fields to a table without problems, but changing existing fields might be an issue. And, with very few exceptions, it's almost always a bad idea to change a field's name after a table has been put into use in an application.
Inserting a new field
To insert a new field, in the Table Design window, place your cursor on an existing field, right-click on a field in the table's design surface, and select Insert ![]() Rows, or just click the Insert Rows button in the Ribbon. A new row is added to the table, and existing fields are pushed down. You can then enter a new field definition. Inserting a field doesn't disturb other fields or existing data. If you have queries, forms, or reports that use the table, you might need to add the field to those objects as well.
Rows, or just click the Insert Rows button in the Ribbon. A new row is added to the table, and existing fields are pushed down. You can then enter a new field definition. Inserting a field doesn't disturb other fields or existing data. If you have queries, forms, or reports that use the table, you might need to add the field to those objects as well.
Deleting a field
There are three ways to delete a field. While the table is in Design view:
- Select the field by clicking the row selector and then press Delete.
- Right-click the selected field and choose Delete Rows from the shortcut menu.
- Select the field and click the Delete Rows button from the Tools group on the Design tab of the Ribbon.
When you delete a field containing data, you'll see a warning that you'll lose data in the table for the selected field. If the table contains data, make sure that you want to eliminate the data for that field (column). You'll also have to delete the same field from queries, forms, reports, macros, and VBA code that use the field name.
If you delete a field, you must also fix all references to that field throughout Access. Because you can use a field name in forms, queries, reports, and even table data validation, you must examine your system carefully to find any instances in which you might have used the specific field name.
Changing a field location
The order of your fields, as entered in the table's Design view, determines the left-to-right column sequence in the table's Datasheet view. If you decide that your fields should be rearranged, click on a field selector and use the mouse to drag the field to its new location.
Changing a field name
You change a field's name by selecting the field's name in the Table Design window and entering a new name. Access updates the table design automatically. As long as you're creating a new table, this process is easy. For existing tables that are referenced elsewhere in your application, changing the field name can cause problems, as discussed in the “Designing tables” section earlier in this chapter.
Changing a field size
Making a field size larger is simple in a table design. You simply increase the Field Size property for text fields or specify a different field size for number fields. You must pay attention to the decimal-point property in number fields to make sure you don't select a new size that supports fewer decimal places than you currently have.
Handling data conversion issues
If, in spite of your best efforts, it becomes necessary to change the data type of a field containing data, you might suffer data loss as the data-type conversion occurs. You should be aware of the effects of a data-type conversion on existing data:
- Any data type to AutoNumber: Can't be done. The AutoNumber field type must be created fresh in a new field.
- Short Text to Number, Currency, Date/Time, or Yes/No: In most cases, the conversion will be made without damaging the data. Inappropriate values are automatically deleted. For instance, a Text field containing “January 28, 2012” will be faithfully converted to a Date/Time field. If, however, you change a field containing “January 28, 2012” to a Yes/No data type, its value will be deleted.
- Long Text to Short Text: A straightforward conversion with no corruption of data. Any text longer than the field size specified for the Short Text field is truncated and lost.
- Number to Short Text: No loss of information. The number value is converted to text using the General Number format.
- Number to Currency: Because the Currency data type uses a fixed decimal point, some precision may be lost as the number is truncated.
- Date/Time to Short Text: No loss of information. Date and time data are converted to text with the General Date format.
- Currency to Short Text: No loss of information. The currency value is converted to text without the currency symbol.
- Currency to Number: Simple, straightforward conversion. Some data may be lost as the currency value is converted to fit the new number field. For example, when converting Currency to Long Integer, the decimal portion is truncated (cut off).
- AutoNumber to Short Text: Conversion occurs without loss of data, except in a case where the width of the text field is inadequate to hold the entire AutoNumber value. In this case, the number is truncated.
- AutoNumber to Number: Simple, straightforward conversion. Some data may be lost as the AutoNumber value is converted to fit the new number field. For example, an AutoNumber larger than 32,767 will be truncated if it is converted to an Integer field.
- Yes/No to Short Text: Simple conversion of Yes/No value to text. No loss of information.
Assigning field properties
The field properties built into Access tables are powerful allies that can help you manage the data in your tables. In most cases, the field property is enforced by the database engine, which means the property is consistently applied wherever the field's value is used. For example, if you've set the Default Value property in the table design, the default value is available in the table's Datasheet view, on forms, and in queries.
In fact, field properties are among the many differences between Access tables and Excel worksheets. Understanding field properties is just one of several skills necessary to begin using Access tables to store data, rather than Excel worksheets.
Each field data type has its own set of properties. For example, Number fields have a Decimal Places property, and Text fields have a Text Align property. Although many data types share a number of properties (such as Name) in common, there are enough different field properties to make it easy to become confused or to incorrectly use the properties. The following sections discuss some of the more important and frequently used field properties.
Common properties
Here's a list of all the general properties (note that they may not all be displayed, depending on which data type you chose):
- Field Size: When applied to Short Text fields, limits the size of the field to the specified number of characters (1–255). The default is 255.
- New Values: Applies to AutoNumber fields. Allows specification of Increment or Random type.
- Format: Changes the way data appears after you enter it (uppercase, dates, and so on). There are many different types of formats that may be applied to Access data. Many of these differences are explained in the “Format” section, later in this chapter.
- Input Mask: Used for data entry into a predefined format (phone numbers, zip codes, Social Security numbers, dates, customer IDs). Applicable to both Number and Text data types.
- Decimal Places: Specifies the number of decimal places for the Currency and the Single, Double, and Decimal Number data types.
- Caption: Optional label for form and report fields. Access uses the Caption property instead of the field name when creating a control on a form or report.
- Default Value: The value automatically provided for new data entry into the field. This value can be any value appropriate for the field's data type. A default is no more than an initial value; you can change it during data entry. To specify a default value, simply enter the desired value into the DefaultValue property setting. A default value can be an expression, as well as a number or a text string.
- Validation Rule: Ensures that data entered into the field conforms to some business rule, such as “greater than zero,” “date must occur after January 1, 2000,” and so on.
- Validation Text: The message displayed when data fails validation.
- Required: Specifies whether you must enter a value into a field.
- Allow Zero Length: Determines whether you may enter an empty string (“”) into a Short Text or Long Text field to distinguish it from a null value.
- Indexed: Speeds up data access and (if desired) limits data to unique values. Indexing is explained in greater detail later in this chapter.
- Unicode Compression: Used for multilanguage applications. Requires about twice the data storage but enables Office documents, including Access reports, to be displayed correctly no matter what language or symbols are used. Generally speaking, Unicode is of no value unless the application is likely to be used in Asian environments.
- IME Mode: Also known as the Kanji conversion mode property, this is used to show whether the Kanji mode is maintained when the control is lost. The setting has no relevance in English or European-language applications.
- IME Sentence Mode: Used to determine the Sequence mode of fields of a table or controls of a form that switch when the focus moves in or out of the field. The setting has no relevance in English or European-language applications.
Format
The Format property specifies how the data contained in table fields appears whenever the data is displayed or printed. When set at the table level, the format is in effect throughout the application. There are different format options for each data type.
Access provides built-in format option for most field data types. The exact format used to display field values is influenced by the Region and Language settings in the Control Panel.
The Format property affects only the way a value is displayed and not the value itself or how the value is stored in the database.
If you elect to build a custom format, construct a string in the field's Format property box. There are a number of different symbols you use for each data type. Access provides global format specifications to use in any custom format:
- (space): Displays spaces as characters.
- “SomeText”: Displays the text between the quotes as literal text.
- ! (exclamation point): Left-aligns the display.
- * (asterisk): Fills empty space with the next character.
- (backslash): Displays the next character as literal text. Use the backslash to display characters that otherwise have special meaning to Access.
- [color]: Displays the output in the color (black, blue, green, cyan, red, magenta, yellow, or white) indicated between the brackets.
The Format property takes precedence when both a format and an input mask have been defined.
Number and Currency field formats
There is a wide variety of valid formats for Number and Currency fields. You can use one of the built-in formats or construct a custom format of your own:
- General Number: The number is displayed in the format in which it was entered. (This is the default format for numeric data fields.)
- Currency: Add a thousands separator (usually a comma), add a decimal point with two digits to the right of the decimal, and enclose negative numbers in parentheses. A Currency field value is shown with the currency symbol (such as a dollar sign or euro sign) specified by the Region and Language settings in the Control Panel.
- Fixed: Always display at least one digit to the left and two digits to the right of the decimal point.
- Standard: Use the thousands separator with two digits to the right of the decimal point.
- Percent: The number value is multiplied by 100 and a percent sign is added to the right. Percent values are displayed with two decimal places to the right of the decimal point.
- Scientific: Scientific notation is used to display the number.
- Euro: Prefixes the euro currency symbol to the number.
The built-in numeric formats are summarized in Table 3.4.
Table 3.4 Numeric Format Examples
| Format Type | Number as Entered | Number as Displayed | Format Defined |
| General | 987654.321 | 987654.321 | #.### |
| Currency | 987654.321 | $987,654.32 | $#,##0.00;($#,##0.00) |
| Euro | 987654.321 | €987,654.32 | €#,##0.00; (€#,##0.00) |
| Fixed | 987654.321 | 987654.32 | #.## |
| Standard | 987654.321 | 987,654.32 | #,##0.00 |
| Percent | .987 | 98.70% | #.##% |
| Scientific | 987654.321 | 9.88E+05 | 0.00E+00 |
All the previous formats are the default formats based on setting the Decimal Places property to AUTO. The exact format applied also depends on the Field Size and Region and Language settings in the Control Panel.
Custom numeric formats
Custom formats are created by combining a number of symbols to create a format. The symbols used with Number and Currency fields are listed here:
- . (period): Specifies where the decimal point should appear.
- , (comma): The thousands separator.
- 0 (zero): A placeholder for 0 or a digit.
- # (pound sign): A placeholder for nothing or a digit.
- $ (dollar sign): Displays the dollar sign character.
- % (percent sign): Multiplies the value by 100 and adds a percent sign.
- E– or e–: Uses scientific notation to display the number. Uses a minus sign to indicate a negative exponent and no sign for positive exponents.
- E+ or e+: Uses scientific notation to display the number. Uses a plus sign to indicate a positive exponent.
You create custom formats by composing a string made up of one to four sections separated by semicolons. Each section has a different meaning to Access:
- First section: The format for positive values
- Second section: The format for negative values
- Third section: The format for zero values
- Fourth section: The format for null values
Each section is a combination of a numeric formatting string and an optional color specification. Here's an example of a custom format:
0,000.00[Green];(0,000.00)[Red];"Zero";"—"This format specifies showing the number with zeros in all positions (even if the number is less than 1,000), using the comma thousands separator, enclosing negative numbers in parentheses, using "Zero" to indicate zero values, and using a dash for null values.
Built-in Date/Time formats
The following are the built-in Date/Time formats. Note that these examples are based on the “English (United States)” Region and Language settings in the Control Panel.
- General Date: If the value contains a date only, don't display a time value, and vice versa. Dates are displayed in the built-in Short Date format (m/d/yyyy), while time data is displayed in the Long Time format.
- Long Date: Thursday, November 12, 2015
- Medium Date: 12-Nov-15
- Short Date: 11/12/2015
- Long Time: 5:34:23 PM
- Medium Time: 5:34 PM
- Short Time: 17:34
Date and time formats are influenced by the Region and Language settings in the Control Panel.
Custom Date/Time formats
Custom formats are created by constructing a specification string containing the following symbols:
- : (colon): Separates time elements (hours, minutes, seconds)
- / (forward slash): Separates date elements (days, months, years)
- c: Instructs Access to use the built-in General Date format
- d: Displays the day of the month as one or two digits (1–31)
- dd: Displays the day of the month using two digits (01–31)
- ddd: Displays the day of the week as a three-character abbreviation (Sun, Mon, Tue, Wed, Thu, Fri, Sat)
- dddd: Uses the full name of the day of the week (Sunday, Monday, Tuesday, Wednesday, Thursday, Friday, Saturday)
- ddddd: Uses the built-in Short Date format
- dddddd: Uses the built-in Long Date format
- w: Uses a number to indicate the day of the week
- ww: Shows the week of the year
- m: Displays the month of the year using one or two digits
- mm: Displays the month of the year using two digits (with a leading zero if necessary)
- mmm: Displays the month as a three-character abbreviation (Jan, Feb, Mar, Apr, May, Jun, Jul, Aug, Sep, Oct, Nov, Dec)
- mmmm: Displays the full name of the month (for example, January)
- q: Displays the date as the quarter of the year
- y: Displays the day of the year (1 through 366)
- yy: Displays the year as two digits (for example, 15)
- yyyy: Displays the year as four digits (2015)
- h: Displays the hour using one or two digits (0–23)
- hh: Displays the hour using two digits (00–23)
- n: Displays the minutes using one or two digits (0–59)
- nn: Displays the minutes using two digits (00–59)
- s: Displays the seconds using one or two digits (0–59)
- ss: Displays the seconds using two digits (00–59)
- ttttt: Uses the built-in Long Time format
- AM/PM: Uses a 12-hour format with uppercase AM or PM
- am/pm: Uses a 12-hour format with lowercase am or pm
- A/P: Uses a 12-hour format with uppercase A or P
- a/p: Uses a 12-hour format with lowercase a or p
Short Text and Long Text field formats
When applied to Short Text fields, formats help clarify the data contained within the fields. tblCustomers uses several formats. The State text field has a > in the Format property to display the data entry in uppercase. The Active field has a Yes/No format with lookup Display Control property set to Text Box.
Short Text and Long Text fields are displayed as plain text by default. If a particular format is to be applied to Short Text or Long Text field data, use the following symbols to construct the format:
- @: A character or space is required.
- &: A character is optional (not required).
- <: Force all characters to their lowercase equivalents.
- >: Force all characters to their uppercase equivalents.
The custom format may contain as many as three different sections, separated by semicolons:
- First section: Format for fields containing text
- Second section: Format for fields containing zero-length strings
- Third section: Format for fields containing null values
If only two sections are given, the second section applies to both zero-length strings and null values. For example, the following format displays None when no string data is contained in the field and Unknown when a null value exists in the field. Otherwise, the simple text contained in the field is displayed:
@;"None";"Unknown"Several examples of custom text formats using the “English (United States)” Regional Settings are presented in Table 3.5.
Table 3.5 Format Examples
| Format Specified | Data as Entered | Formatted Data as Displayed |
| > | Adam Smith | ADAM SMITH |
| < | Adam Smith | adam smith |
| @@-@@ | Adam | Ad-am |
| &-@@ | Ad | -Ad |
| @;”Empty” | “” | Empty |
| @;”Empty” | Null | Empty |
Yes/No field formats
A Yes/No field displays Yes, No, True, False, On, or Off, depending on the value stored in the field and the setting of the Format property for the field. Access predefines these rather obvious format specifications for the Yes/No field type:
- Yes/No: Displays
YesorNo - True/False: Displays
TrueorFalse - On/Off: Displays
OnorOff
Yes, True, and On all indicate the same “positive” value, while No, False, and Off indicate the opposite (“negative”) value.
Access stores Yes/No data in a manner different from what you might expect. The Yes data is stored as –1, whereas No data is stored as 0. You'd expect it to be stored as 0 for No and 1 for Yes, but this isn't the case. Without a format setting, Access will display –1 or 0, and it will be stored and displayed that way.
Regardless of the format set, you can enter data into a Yes/No field using any of the words in the built-in formats or as numbers. To enter No, you can enter False, No, Off, or 0. To enter Yes, you can enter True, Yes, On, or any number other than zero. If you enter a number other than 0 or –1, Access converts it to –1.
You're also able to specify a custom format for Yes/No fields. For example, assume you've got a table with a field that indicates whether the employee has attended an orientation meeting. Although a yes or no answer is appropriate, you might want to get a little fancy with the field's display. By default, a check box is used to indicate the value of the Yes/No field (checked means Yes). To customize the appearance of the Yes/No field, set its Format property according to the following pattern:
;"Text for Yes values";"Text for No values"Notice the placeholder semicolon at the front of this string. Also, notice that each text element must be surrounded by quotes. In the case of the employee table, you might use the following Format property specifier:
;"Attendance OK";"Must attend orientation"You must also set the Yes/No field's Display Control property to Text Box in order to change the default check box display to text.
Hyperlink field format
Access also displays and stores hyperlink data in a manner different from what you would expect. The format of this type is comprised of up to three parts, separated by pound signs (#):
- Display Text: The text that is displayed as a hyperlink in the field or control
- Address: The path to a file (UNC) or page (URL) on the Internet
- Sub-Address: A specific location within a file or page
The Display Text property is the text that is visible in the field or control, while the address and sub-address are hidden. In the following example, “Microsoft MSN Home Page” is the displayed text, while http://www.msn.com is the hyperlink's address.
Microsoft MSN Home Page#http://www.msn.comInput Mask
The Input Mask property makes it easier for users to enter the data in the correct format. An input mask limits the way the user inputs data into the application. For example, you can restrict entry to only digits for phone numbers, Social Security numbers, and employee IDs. An input mask for a Social Security number might look like “000-00-0000.” This mask requires input into every space, restricts entry to digits only, and does not permit characters or spaces.
A field's input mask is applied anywhere the field appears (query, form, report).
The Input Mask property value is a string containing as many as three semicolon-separated sections:
- First section: Contains the mask itself, comprised of the symbols shown later.
- Second section: Tells Access whether to store the literal characters included in the mask along with the rest of the data. For example, the mask might include dashes to separate the parts of the Social Security number, while a phone number might include parentheses and dashes. Using a zero tells Access to store the literal characters as part of the data while 1 tells Access to store only the data itself.
- Third section: Defines the “placeholder” character that tells the user how many characters are expected in the input area. Many input masks use pound signs (#) or asterisks (*) as placeholders.
The following characters are used to compose the input mask string:
- 0: A digit is required, and plus (+) and minus (–) signs are not permitted.
- 9: A digit is optional, and plus (+) and minus (–) signs are not permitted.
- #: Optional digit or space. Spaces are removed when the data is saved in the table. Plus and minus signs are allowed.
- L: A letter from A to Z is required.
- ?: A letter from A to Z is optional.
- A: A character or digit is required.
- a: A character or digit is optional.
- &: Permits any character or space (required).
- C: Permits any character or space (optional).
- . (period): Decimal placeholder.
- , (comma): Thousands separator.
- : (colon): Date and time separator.
- ; (semicolon): Separator character.
- – (dash): Separator character.
- / (forward slash): Separator character.
- < (less-than sign): Converts all characters to lowercase.
- > (greater-than sign): Converts all characters to uppercase.
- ! (exclamation point): Displays the input mask from right to left. Characters fill the mask from right to left.
- (back slash): Displays the next character as a literal.
The same masking characters are used on a field's Property Sheet in a query or form.
An input mask is ignored when importing data or adding data to a table with an action query.
An input mask is overridden by the Format property assigned to a field. In this case, the input mask is in effect only as data is entered and reformatted according to the Format when the entry is complete.
The Input Mask Wizard
Although you can manually enter an input mask, you can easily create an input mask for Text or Date/Time type fields with the Input Mask Wizard. When you click the Input Mask property, a Builder button (three periods) appears in the property's input box. Click the Builder button to start the wizard. Figure 3.8 shows the first screen of the Input Mask Wizard.

Figure 3.8 The Input Mask Wizard for creating input masks for Text field types.
The Input Mask Wizard shows not only the name of each predefined input mask, but also an example for each name. You can choose from the list of predefined masks. Click in the Try It text box and enter a test value to see how data entry will look. After you choose an input mask, the next wizard screen enables you to refine the mask and specify the placeholder symbol (perhaps a # or @). Another wizard screen enables you to decide whether to store special characters (such as the dashes in a Social Security number) with the data. When you complete the wizard, Access adds the input mask characters in the field's Property Sheet.
Enter as many custom masks as you need. You can also determine the international settings so that you can work with multiple country masks. A custom input mask you create in one database is available in other databases.
Caption
The Caption property determines what appears in the default label attached to a control created by dragging the field from the field list onto a form or report. The caption also appears as the column heading in Datasheet view for tables or queries that include the field.
Captions can be as long as 2,048 characters, more than adequate for all but the most verbose descriptions.
Validation Rule and Validation Text
The Validation Rule property establishes requirements for input into the field. Enforced by the ACE database engine, the Validation Rule ensures that data entered into the table conforms to the requirements of the application.
Validation properties are a great way to enforce business rules, such as ensuring that a product is not sold for zero dollars, or requiring that an employee review date come after her hire date. And, like other field properties, validation rules are enforced wherever the field is used in the application.
The value of the Validation Rule property is a string containing an expression that is used to test the user's input. The expression used as a field's Validation Rule property can't contain user-defined functions or any of the Access domain or aggregate functions (DCount, DSum, and so on). A field's Validation Rule property can't reference forms, queries, or other tables in the application. (These restrictions don't apply to validation rules applied to controls on a form, however.) Field validation rules can't reference other fields in the table, although a rule applied to a record in a table can reference fields in the same table (a record-level validation rule is set in the table's Property Sheet, rather than in an individual field).
The Validation Text property contains a string that is displayed in a message box when the user's input doesn't satisfy the requirements of the Validation Rule property. The maximum length of the Validation Text property value is 255 characters.
When using the Validation Rule property, you should always specify a Validation Text value to avoid triggering the generic message box Access displays when the rule is violated. Use the Validation Text property to provide users with a helpful message that explains acceptable values for the field. Figure 3.9 shows the message box displayed when the value specified by the Validation Rule attached to the CreditLimit field is exceeded.

Figure 3.9 A data-validation warning box appears when the user enters a value in the field that does not match the rule specified in the design of the table.
The Validation Rule property doesn't apply to check boxes, option buttons, or toggle buttons within an option group on a form. The option group itself has a Validation Rule property that applies to all the controls within the group.
Validation properties are often used to ensure that certain dates fall after other dates (for example, an employee's retirement date must fall after his starting date), that nonnegative numbers are entered for values such as inventory quantities, and that entries are restricted to different ranges of numbers or text.
Dates used in Access expressions, such as a Validation Rule property, are surrounded, or delimited, by pound signs (#). If you want to limit the LastSalesDate data entry to dates between January 1, 2015, and December 31, 2016, enter Between #1/1/2015# And #12/31/2016#.
When a field is dragged onto a form, the Validation Rule property of the new control is not set to the field's Validation Rule. Unless you enter a new Validation Rule value in the control's Property Sheet, Access enforces the rule set at the table level.
Field and control Validation Rule properties are enforced when the focus leaves the table field or form control. Validation Rule properties applied to both a field and a control bound to the field are enforced for both entities. The table-level rule is applied as data is edited on the bound control and as focus leaves the control.
You can't create table-level Validation Rule properties for linked “foreign” tables, such as FoxPro, Paradox, or dBASE. Apply Validation Rule properties to controls bound to fields in linked foreign tables.
Required
The Required property instructs Access to require input into the field. When set to Yes, input is required in the field within a table or in a control on a form bound to the field. The value of a required field can't be Null.
The Required property is invalid for AutoNumber fields. By default, all AutoNumber fields are assigned a value as new records are created.
The Access database engine enforces the Required property. An error message is generated if the user tries to leave a Text Box control bound to a field with its Required property set to Yes.
The Required property can be used in conjunction with the AllowZeroLength property to determine when the value of a field is unknown or doesn't exist.
AllowZeroLength
The AllowZeroLength property specifies whether you want a zero-length string ("") to be a valid entry for a Short Text or Long Text field. AllowZeroLength accepts the following values:
- Yes: A zero-length string is a valid entry.
- No: The table will not accept zero-length strings, and instead inserts a Null value into the field when no valid text data is supplied.
Combining the AllowZeroLength and Required properties enables you to differentiate between data that doesn't exist (which you'll probably want to represent as a zero-length string) and data that is unknown (which you'll want to store as a null value). In some cases, you'll want to store the proper value in the Short Text or Long Text field.
An example of data that doesn't exist is the case of a customer who doesn't have an e-mail address. The e-mail address field should be set to an empty (zero-length) string, indicating that you know the user doesn't have an e-mail address. Another customer who is entirely new to the company should have a null value in the e-mail address field, indicating that you don't know whether the customer has an e-mail address.
An input mask can help your application's users distinguish when a field contains a null value. For example, the input mask could be set to display No email when the field contains a zero-length string and Unknown when the value is null.
The Required property determines whether a null value is accepted by the field, while the AllowZeroLength property permits zero-length strings in the field. Together, these independent properties provide the means to determine whether a value is unknown or absent for the field.
The interaction between Required and AllowZeroLength can be quite complicated. Table 3.6 summarizes how these two properties combine to force the user to input a value, or to insert either a null or zero-length string into a field.
Table 3.6 Required and AllowZeroLength Property Combinations
| AllowZeroLength | Required | Data Entered by User | Value Stored in Table |
| No | No | Null | Null |
| No | No | Space | Null |
| No | No | Zero-length string | Disallowed |
| Yes | No | Null | Null |
| Yes | No | Space | Null |
| Yes | No | Zero-length string | Zero-length string |
| No | Yes | Null | Disallowed |
| No | Yes | Space | Disallowed |
| No | Yes | Zero-length string | Disallowed |
| Yes | Yes | Null | Disallowed |
| Yes | Yes | Space | Zero-length string |
| Yes | Yes | Zero-length string | Zero-length string |
Indexed
The Indexed property tells Access that you want to use a field as an index in the table. Indexed fields are internally organized to speed up queries, sorting, and grouping operations. If you intend to frequently include a certain field in queries (for example, the employee ID or Social Security number) or if the field is frequently sorted or grouped on reports, you should set its Indexed property to Yes.
The valid settings for the Indexed property are as follows:
- No: The field is not indexed (default).
- Yes (Duplicates OK): The field is indexed and Access permits duplicate values in the column. This is the appropriate setting for values such as names, where it's likely that names like Smith will appear more than once in the table.
- Yes (No Duplicates): The field is indexed and no duplicates are permitted in the column. Use this setting for data that should be unique within the table, such as Social Security numbers, employee IDs, and customer numbers.
Indexes are discussed in more detail later in this chapter.
In addition to the primary key, you can index up to 31 other fields to provide optimum performance. Keep in mind that each index extracts a small performance hit as new records are added to the table. Access dynamically updates the indexing information each time a new record is added. If a table includes an excessive number of indexes, a noticeable delay might occur as each new record is added.
The Indexed property is set in the field's Property Sheet or on the table's Property Sheet. You must use the table's Property Sheet to set multifield indexes. Multifield indexes are discussed later in this chapter.
The AutoIndex option
The Access Options dialog box (File ![]() Options
Options ![]() Object Designers) contains an entry (AutoIndex on Import/Create) that directs Access to automatically index certain fields as they're added to a table's design. By default, fields that begin or end with ID, key, code, or num (for example, EmployeeID or TaskCode) are automatically indexed as the field is created. Every time a new record is added to the table, the field's value is added to the field's index. If there are other field name patterns you'd like Access to automatically index, add new values to the Auto Index on Import/Create checkbox on the Object Designers tab in the Access Options dialog box (see Figure 3.10).
Object Designers) contains an entry (AutoIndex on Import/Create) that directs Access to automatically index certain fields as they're added to a table's design. By default, fields that begin or end with ID, key, code, or num (for example, EmployeeID or TaskCode) are automatically indexed as the field is created. Every time a new record is added to the table, the field's value is added to the field's index. If there are other field name patterns you'd like Access to automatically index, add new values to the Auto Index on Import/Create checkbox on the Object Designers tab in the Access Options dialog box (see Figure 3.10).

Figure 3.10 The Table Design View area on the Options screen contains a box for setting the AutoIndex on Import/Create options.
When to index
Generally speaking, you should index fields that are frequently searched or sorted. Remember that indexes slow down certain operations, such as inserting records and some action queries.
Long Text and OLE Object fields can't be indexed. It would be impossible for Access to maintain an index on these complex data types.
An index should not be used if a field contains very few unique values. For example, you won't see a significant benefit from indexing a field containing a person's sex or a Yes/No field. Because there is a limited range of values in such fields, Access easily sorts the data in these fields.
Use a multiple-field index in situations where sorts are often simultaneously performed on multiple fields (for example, first and last names). Access will have a much easier time sorting such a table.
Understanding tblCustomers Field Properties
After you enter the field names, data types, and field descriptions, you may want to go back and further refine each field. Every field has properties, and these are different for each data type. In tblCustomers, you must enter properties for several data types. Figure 3.11 shows the property area for the field named CreditLimit. Notice that there are two tabs on the property box: General and Lookup.

Figure 3.11 The property area for the Currency field named CreditLimit.
Pressing F6 switches between the field entry grid and the Field Properties pane. (You may have to press F6 several times before you reach the desired pane.) You can also move between panes by clicking the desired pane. Some properties display a list of possible values, along with a downward-pointing arrow when you move the pointer into the field. When you click the arrow, the values appear in a drop-down list.
The Field Properties pane of the Table Design window has a second tab: the Lookup tab. After clicking this tab, you may see a single property, the Display Control property. This property is used for Short Text, Number, and Yes/No fields.
Figure 3.12 shows the Lookup Property window for the Active Yes/No field where Display Control is the only property. This property has three choices: Check Box, Text Box, and Combo Box. Choosing one of these determines which control type is used when a particular field is added to a form. Generally, all controls are created as text boxes except Yes/No fields, which are created as check boxes by default. For Yes/No data types, however, you may want to use the Text Box setting to display Yes/No, True/False, or another choice that you specifically put in the format property box.

Figure 3.12 The Lookup tab for a Yes/No field.
If you're working with Short Text fields instead of a Yes/No field and know a certain Short Text field can only be one of a few combinations, select the combo box choice for the display control. Figure 3.13 shows the Lookup tab when combo box has been selected as the display control for the Credit Status field. There are only two acceptable values for Credit Status: OK and Not OK. These two values (separated by a semicolon) are specified as the combo box's Row Source, and the Row Source Type is set to Value List.
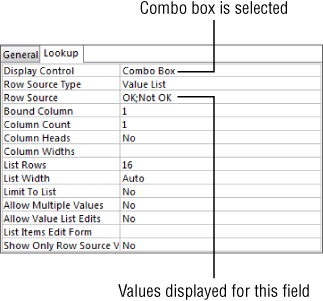
Figure 3.13 Setting up a combo box as the display control for Credit Status.
Although Figure 3.13 shows a combo box using a value list for its items, you could also specify a query or SQL statement as the combo box's Row Source.
Figure 3.14 shows how the Credit Status field appears when tblCustomers is displayed as a datasheet. The user can select only OK or Not OK as the credit status, and the same combo box appears when the field is added to an Access form.

Figure 3.14 Using a combo box as a lookup control to restrict user input on a field.
The properties for a Lookup field are different for each data type. The Yes/No data type fields differ from Text fields or Number fields. Because a Lookup field is really a combo box, the standard properties for a combo box are displayed when you select a Lookup field data type.
Setting the Primary Key
Every table should have a primary key—one field or a combination of fields with a unique value for each record. (This principle is called entity integrity in the world of database management.) In tblCustomers, the CustomerID field is the primary key. Each customer has a unique CustomerID value so that the database engine can distinguish one record from another. CustomerID 17 refers to one and only one record in the Contacts table. If you don't specify a primary key (unique value field), Access can create one for you.
Choosing a primary key
Without the CustomerID field, you'd have to rely on another field or combination of fields for uniqueness. You couldn't use the Company field because two customers could easily have the same company name. In fact, you couldn't even use the Company and City fields together (in a multifield key), for the same reason—it's entirely possible that two customers with the same name exist in the same city. You need to come up with a field or combination of fields that makes every record unique.
The easiest way to solve this problem is to add an AutoNumber field to serve as the table's primary key. The primary key in tblCustomers is CustomerID, an AutoNumber field.
If you don't designate a field as a primary key, Access can add an AutoNumber field and designate it as the table's primary key. AutoNumber fields make very good primary keys because Access creates the value for you, the number is never reused within a table, and you can't change the value of an AutoNumber field.
Good primary keys:
- Uniquely identify each record.
- Cannot be null.
- Must exist when the record is created.
- Must remain stable. (Never change a primary key value once it's established.)
- Should be simple and contain as few attributes as possible.
In addition to uniquely identifying rows in a table, primary keys provide other benefits:
- A primary key is always an index.
- An index maintains a presorted order of one or more fields that can greatly speed up queries, searches, and sort requests.
- When you add new records to your table, Access checks for duplicate data and doesn't allow any duplicates for the primary key field.
- By default, Access displays a table's data in the order of its primary key.
By designating a field such as CustomerID as the primary key, data is displayed in a meaningful order. In our example, because the CustomerID field is an AutoNumber, its value is assigned automatically by Access in the order that a record is put into the system.
The ideal primary key is, then, a single field that is immutable and guaranteed to be unique within the table. For these reasons, the Collectible Mini Cars database uses the AutoNumber field exclusively as the primary key for all tables.
Creating the primary key
The primary key can be created in any of three ways. With a table open in Design view:
- Select the field to be used as the primary key and click the Primary Key button (the key icon) in the Tools group on the Design tab of the Ribbon.
- Right-click the field and select Primary Key from the shortcut menu.
- Save the table without creating a primary key, and allow Access to automatically create an AutoNumber field.
After you designate the primary key, a key icon appears in the gray selector area to the left of the field's name to indicate that the primary key has been created.
Creating composite primary keys
You can designate a combination of fields to be used as a table's primary key. Such keys are often referred to as composite primary keys. As indicated in Figure 3.15, select the fields that you want to include in the composite primary key; then click the key icon on the Tools tab of the Ribbon. To create a primary key from fields that are not next to each other, hold down Ctrl while selecting the fields.
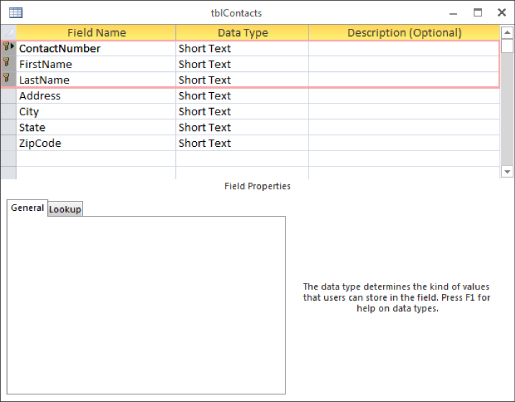
Figure 3.15 Creating a composite primary key.
Composite primary keys are primarily used when the developer strongly feels that a primary key should be comprised of data that occurs naturally in the database. There was a time when all developers were taught that every table should have a natural primary key (data that occurs naturally in the table).
Composite primary keys are seldom used these days because developers have come to realize that data is highly unpredictable. Even if your users promise that a combination of certain fields will never be duplicated in the table, things have a way of turning out differently from planned. Using a surrogate primary key (a key field that does not naturally occur in the table's data, such as an Employee ID), such as an AutoNumber, separates the table's design from the table's data. The problem with natural primary keys is that, eventually, given a large enough data set, the values of fields chosen as the table's primary key are likely to be duplicated.
Furthermore, when using composite keys, maintaining relationships between tables becomes more complicated because the fields comprising the primary key must be duplicated in all the tables containing related data. Using composite keys simply adds to the complexity of the database without adding stability, integrity, or other desirable features.
Indexing Access Tables
Data is rarely, if ever, entered into tables in a meaningful order. Usually, records are added to tables in random order (with the exception of time-ordered data). For example, a busy order-entry system will gather information on a number of different customer orders in a single day. Most often, this data will be used to report orders for a single customer for billing purposes or for extracting order quantities for inventory management. The records in the Orders table, however, are in chronological order, which is not necessarily helpful when preparing reports detailing customer orders. In that case, you'd rather have data entered in customer ID order.
To further illustrate this concept, consider the Rolodex card file many people use to store names, addresses, and phone numbers. Assume for a moment that the cards in the file were fixed in place. You could add new cards, but only to the end of the card file. This limitation would mean that “Jones” might follow “Smith,” which would in turn be followed by “Baker.” In other words, there is no particular order to the data stored in this file.
An unsorted Rolodex like this would be very difficult to use. You'd have to search each and every card looking for a particular person, a painful and time-consuming process. Of course, this isn't how you use address card files. When you add a card to the file, you insert it into the Rolodex at the location where it logically belongs. Most often, this means inserting the card in alphabetical order, by last name, into the Rolodex.
Records are added to Access tables as described in the fixed card file example earlier. New records are always added to the end of the table, rather than in the middle of the table where they may logically belong. However, in an order-entry system, you'd probably want new records inserted next to other records on the same customer. Unfortunately, this isn't how Access tables work. The natural order of a table is the order in which records were added to the table. This order is sometimes referred to as entry order or physical order to emphasize that the records in the table appear in the order in which they were added to the table.
Using tables in natural order is not necessarily a bad thing. Natural order makes perfect sense if the data is rarely searched or if the table is very small. Also, there are situations where the data being added to the table is highly ordered to start with. If the table is used to gather sequential data (like readings from an electric meter) and the data will be used in the same sequential order, there is no need to impose an index on the data.
But for situations where natural order doesn't suffice, Access provides indexing to help you find and sort records faster. You specify a logical order for the records in a table by creating an index on that table. Access uses the index to maintain one or more internal sort orders for the data in the table. For example, you may choose to index the LastName field that will frequently be included in queries and sorting routines.
Access uses indexes in a table as you use an index in a book: To find data, Access looks up the data's location in the index. Most often, your tables will include one or more simple indexes. A simple index is one that involves a single field in the table. Simple indexes may arrange the table's records in ascending or descending order. Simple indexes are created by setting the field's Indexed property to one of the following values:
- Yes (Duplicates OK)
- Yes (No Duplicates)
By default, Access fields are not indexed, but it's hard to imagine a table that doesn't require some kind of index. The next section discusses why indexing is important to use in Access tables.
The importance of indexes
Microsoft's data indicates that more than half of all tables in Access databases contain no indexes. This number doesn't include the tables that are improperly indexed—it includes only those tables that have no indexes at all. It appears that a lot of people don't appreciate the importance of indexing the tables in an Access database.
The buttons run each test ten times and display the results in the list box below the button. The indexed table consistently finds a word in ten to 30 milliseconds, while the unindexed search takes between 300 and 350 milliseconds. Displaying the results you see in Figure 3.16 takes almost no time at all and doesn't contribute to the overall time required to run the query. It goes without saying that the actual time required to run a query depends very much on the computer's hardware, but performance enhancements of 500 percent and more are not at all uncommon when adding an index to a field.
Because an index means that Access maintains an internal sort order on the data contained in the indexed field, you can see why query performance is enhanced by an index. You should index virtually every field that is frequently involved in queries or is frequently sorted on forms or reports.
Without an index, Access must search each and every record in the database looking for matches. This process is called a table scan and is analogous to searching through each and every card in a Rolodex file to find all the people who work for a certain company. Until you reach the end of the deck, you can't be sure you've found every relevant card in the file.
As mentioned earlier in this chapter, a table's primary key field is always indexed. This is because the primary key is used to locate records in the table. Indexing the primary key makes it much easier for Access to find the required tables in either the current table or a foreign table related to the current table. Without an index, Access has to search all records in the related table to make sure it has located all the related records.
Multiple-field indexes
Multiple-field indexes (also called composite indexes) are easy to create. In Design view, click the Indexes button on the Design tab of the Ribbon. The Indexes dialog box (shown in Figure 3.17) appears, allowing you to specify the fields to include in the index.

Figure 3.17 Multiple-field (composite) indexes can enhance performance.
Enter a name for the index (CityState in Figure 3.17) and tab to the Field Name column. Use the drop-down list to select the fields to include in the index. In this example, City and State are combined as a single index. Any row appearing immediately below this row that does not contain an index name is part of the composite index. Access considers both these fields when creating the sort order on this table, speeding queries and sorting operations that include both the City and State fields.
As many as ten fields can be included in a composite index. As long as the composite index is not used as the table's primary key, any of the fields in the composite index can be empty.
Figure 3.18 shows how to set the properties of an index. The cursor is placed in the row in the Indexes dialog box containing the name of the index. Notice the three properties appearing in the bottom half of the Indexes dialog box.
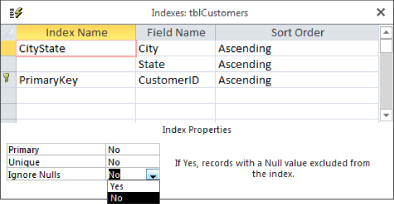
Figure 3.18 It's easy to set the properties of an index.
The index properties are quite easy to understand (these properties apply to single-field and composite indexes equally):
- Primary: When set to Yes, Access uses this index as the table's primary key. More than one field can be designated as the primary key, but keep the rules governing primary keys in mind, particularly those requiring each primary key value to be unique and that no field in a composite primary key can be empty. The default for the Primary property is No.
- Unique: When set to Yes, the index must be unique within a table. A Social Security number field is a good candidate for a unique index because the application's business rules may require one and only one instance of a Social Security number in the table. In contrast, a last name field should not be uniquely indexed, because many last names, like Smith and Jones, are very common, and having a unique index on the last name field will only cause problems.
When applied to composite keys, the combination of field values must be unique—each field within the composite key can duplicate fields found within the table.
- Ignore Nulls: If a record's index field contains a null value (which happens in a composite index only if all fields in the composite index are null) the record's index won't contribute anything to the overall indexing. In other words, unless a record's index contains some kind of value, Access doesn't know where to insert the record in the table's internal index sort lists. Therefore, you might want to instruct Access to ignore a record if the index value is null. By default, the Ignore Nulls property is set to No, which means Access inserts records with a Null index value into the indexing scheme along with any other records containing Null index values.
You should test the impact of the index properties on your Access tables and use the properties that best suit the data handled by your databases.
A field can be both the primary key for a table and part of a composite index. You should index your tables as necessary to yield the highest possible performance without worrying about over-indexing or violating some arcane indexing rules. For example, in a database such as Collectible Mini Cars, the invoice number in tblSales is frequently used in forms and reports and should be indexed. In addition, there are many situations in which the invoice number is used in combinations with other fields, such as the sales date or salesperson ID. You should consider adding composite indexes combining the invoice number with sales date, and salesperson ID, to the sales table.
When to index tables
Depending on the number of records in a table, the extra overhead of maintaining an index may not justify creating an index beyond the table's primary key. Though data retrieval is somewhat faster than it is without an index, Access must update index information whenever you enter or change records in the table. In contrast, changes to nonindexed fields do not require extra file activity. You can retrieve data from nonindexed fields as easily (although not as quickly) as from indexed fields.
Generally, it's best to add secondary indexes when tables are quite large and when indexing fields other than the primary key speeds up searches. Even with large tables, however, indexing can slow performance if the records in tables will be changed often or new records will be added frequently. Each time a record is changed or added, Access must update all indexes in the table.
Given all the advantages of indexes, why not index everything in the table? What are the drawbacks of indexing too many fields? Is it possible to over-index tables?
First, indexes increase the size of the Access database somewhat. Unnecessarily indexing a table that doesn't really require an index eats up a bit of disk space for each record in the table. More important, indexes extract a performance hit for each index on the table every time a record is added to the table. Because Access automatically updates indexes each time a record is added (or removed), the internal indexing must be adjusted for each new record. If you have ten indexes on a table, Access makes ten adjustments to the indexes each time a new record is added or an existing record is deleted, causing a noticeable delay on large tables (particularly on slow computers).
Sometimes changes to the data in records cause adjustments to the indexing scheme. This is true if the change causes the record to change its position in sorting or query activities. Therefore, if you're working with large, constantly changing data sets that are rarely searched, you may choose not to index the fields in the table, or to minimally index by indexing only those few fields that are likely to be searched.
As you begin working with Access tables, you'll probably start with the simplest one-field indexes and migrate to more complex ones as your familiarity with the process grows. Keep in mind, however, the trade-offs between greater search efficiency and the overhead incurred by maintaining a large number of indexes on your tables.
It's also important to keep in mind that indexing does not modify the physical arrangement of records in the table. The natural order of the records (the order in which the records were added to the table) is maintained after the index is established.
Printing a Table Design
You can print a table design by clicking the Database Documenter button in the Analyze group on the Database Tools tab of the Ribbon. The Analyze group contains a number of tools that make it easy to document your database objects. When you click the Database Documenter button, the Documenter dialog box appears, letting you select objects to print. In Figure 3.19, tblCustomers is selected on the Tables tab of the Documenter dialog box.
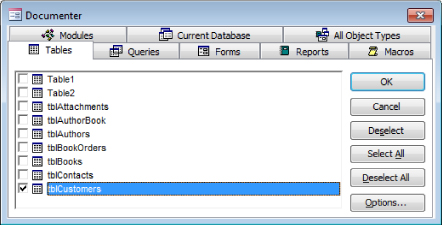
Figure 3.19 The Documenter dialog box.
You can also set various options for printing. When you click the Options button, the Print Table Definition dialog box (shown in Figure 3.20) appears, enabling you to select which information from the Table Design to print. You can print the various field names, all their properties, the indexes, and even network permissions.

Figure 3.20 Printing options in the Print Table Definition dialog box.
After you select the options you want, Access generates a report. You can view the report in a Print Preview window or send it to a printer. You may want to save the report within the database as part of the application's documentation.
Saving the Completed Table
You can save the completed table design by choosing File ![]() Save or by clicking the Save button on the Quick Access toolbar in the upper-left corner of the Access environment. If you're saving the table for the first time, Access asks for its name. Table names can be up to 64 characters long and follow standard Access object naming conventions: They may include letters and numbers, can't begin with a number, and can't include punctuation. You can also save the table when you close it.
Save or by clicking the Save button on the Quick Access toolbar in the upper-left corner of the Access environment. If you're saving the table for the first time, Access asks for its name. Table names can be up to 64 characters long and follow standard Access object naming conventions: They may include letters and numbers, can't begin with a number, and can't include punctuation. You can also save the table when you close it.
If you've saved this table before and want to save it with a different name, choose File ![]() Save As
Save As ![]() Save Object As, click the Save As button, and enter a different table name. This action creates a new table design and leaves the original table with its original name untouched. If you want to delete the old table, select it in the Navigation pane and press the Delete key.
Save Object As, click the Save As button, and enter a different table name. This action creates a new table design and leaves the original table with its original name untouched. If you want to delete the old table, select it in the Navigation pane and press the Delete key.
Manipulating Tables
As you add many tables to your database, you may want to use them in other databases or make copies of them as backups. In many cases, you may want to copy only the table's design and not include all the data in the table. You can perform many table operations in the Navigation pane, including:
- Renaming tables
- Deleting tables
- Copying tables in a database
- Copying a table to another database
You perform these tasks by direct manipulation or by using menu items.
Renaming tables
Rename a table by right-clicking its name in the Navigation pane and selecting Rename from the shortcut menu. After you change the table name, it appears in the Tables list, which re-sorts the tables in alphabetical order.
Deleting tables
Delete a table by right-clicking its name in the Navigation pane and selecting Delete from the shortcut menu or by selecting the table in the Navigation pane and pressing the Delete key. Like most delete operations, you have to confirm the delete by clicking Yes in a confirmation box.
Copying tables in a database
The copy and paste options in the Clipboard group on the Home tab allow you to copy any table in the database. When you paste the table back into the database, the Paste Table As dialog box appears, asking you to choose from three options:
- Structure Only: Clicking the Structure Only button creates a new, empty table with the same design as the copied table. This option is typically used to create a temporary table or an archive table to which you can copy old records.
- Structure and Data: When you click Structure and Data, a complete copy of the table design and all its data is created.
- Append Data to Existing Table: Clicking the Append Data to Existing Table button adds the data of the selected table to the bottom of another table. This option is useful for combining tables, such as when you want to add data from a monthly transaction table to a yearly history table.
Follow these steps to copy a table:
- Right-click the table name in the Navigation pane and choose Copy from the shortcut menu, or click the Copy button in the Clipboard group on the Home tab.
- Choose Paste from the shortcut menu, or click the Paste button in the Clipboard group on the Home tab. The Paste Table As dialog box appears (see Figure 3.21).

Figure 3.21 Pasting a table opens the Paste Table As dialog box.
- Enter the name of the new table. When you're appending data to an existing table (see the next step), you must type the name of an existing table.
- Choose one of the Paste options—Structure Only, Structure and Data, or Append Data to Existing Table—from the Paste Table As dialog box.
- Click OK to complete the operation.
Copying a table to another database
Just as you can copy a table within a database, you can copy a table to another database. There are many reasons why you may want to do this. Maybe you share a common table among multiple systems, or maybe you need to create a backup copy of your important tables within the system.
When you copy tables to another database, the relationships between tables are not copied. Access copies only the table design and the data to the other database. The method for copying a table to another database is essentially the same as for copying a table within a database:
- Right-click the table name in the Navigation pane and choose Copy from the shortcut menu, or click the Copy button in the Clipboard group on the Home tab.
- Open the other Access database and choose Edit Paste from the shortcut menu, or click the Copy button in the Clipboard group on the Home tab. The Paste Table As dialog box appears.
- Enter the name of the new table.
- Choose one of the Paste options: Structure Only, Structure and Data, or Append Data to Existing Table.
- Click OK to complete the operation.
Adding Records to a Database Table
Adding records to a table is as simple as clicking the table in the Navigation pane to open the table in Datasheet view. Once the table is opened, enter values for each field. Figure 3.22 shows adding records in Datasheet view to the table.

Figure 3.22 Using Datasheet view to add records to a table.
You can enter information into all fields except CustomerID. AutoNumber fields automatically provide a number for you.
Although you can add records directly into the table through the Datasheet view, it isn't the recommended way. Adding records using forms is better because code behind a form can dynamically provide default values (perhaps based on data already added to the form) and communicate with the user during the data entry process.
Understanding Attachment Fields
Microsoft recognizes that database developers must deal with many different types of data. Although the traditional Access data types (Text, Currency, OLE Object, and so on) are able to handle many different types of data, until recently there was no way to accommodate complete files as Access data without performing some transformation on the file (such as conversion to OLE data).
Since Access 2010, Access has included the Attachment data type, enabling you to bring entire files into your Access database as “attachments” to a table. When you click an attachment field, a small Attachments dialog box (shown in Figure 3.23) appears, enabling you to locate files to attach to the table.

Figure 3.23 Managing attachments in an Attachment field.
The Add button in Figure 3.23 opens the familiar Choose File dialog box, enabling you to search for one or more files to attach to the field. The selected files are added to the list you see in Figure 3.23. Notice also that the Attachments dialog box includes buttons for removing attachments from the field, and for saving attachments back to the computer's disk.
The significant thing to keep in mind about the Attachment data type is that a single attachment field in a table can contain multiple files of different types. It's entirely possible to store a Word document, several audio or video clips, and a number of photographs, within a single attachment field.