
In this section, you'll learn about the C programming language, the language supported by the Arduino IDE. In this section, we are going to cover some basic concepts. If you are new to programming, there are a number of different websites that provide tutorials. If you'd like to practice some of the basic programming concepts in C, try www.cprogramming.com/tutorial.html or http://www.learn-c.org/.
In this section, we'll cover how to create a basic sketch. We'll also cover how to enter some C code, compile the code, and upload the code to your Arduino.
To open a new sketch from the IDE that contains the minimum basic code, navigate to File | Examples | 01.Basics | BareMinimum. You should now see this in your sketch as shown in the following screenshot:
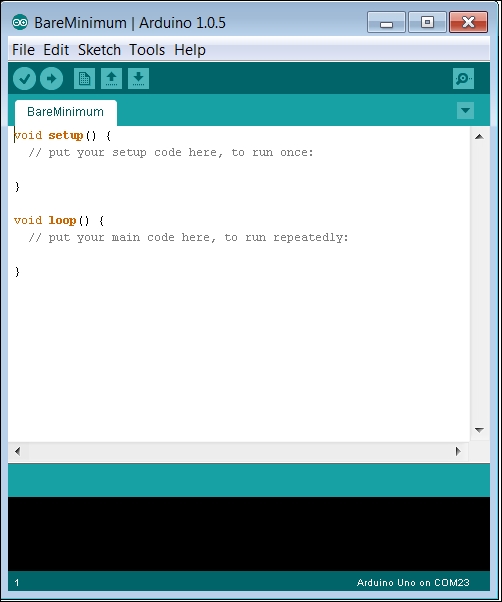
This basic sketch provides two functions; a function is simply an organized set of instructions that Arduino will execute. When Arduino is powered on, it begins to execute a list of instructions one by one. These start in the bootloader that configures everything and gets Arduino to a state that you can use it. Once Arduino has completed executing the bootloader, it looks for the setup() function. In this function, you will specify any additional setup activity that you need Arduino to do. Arduino will then move to the loop() function and begin executing the statements there. This loop() function will be run not once, but over and over again until the power is turned off.
Now that you have context, you can actually start writing some code in the setup() and loop() functions. Start by putting something in the setup() function. Change the setup() function to look like the code in the following screenshot:
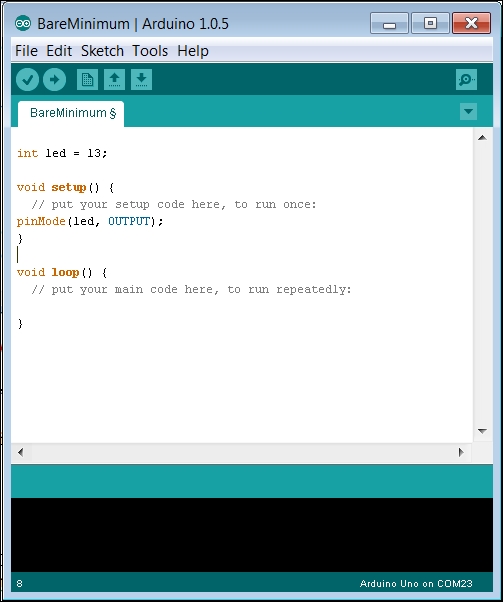
There are two changes that should have been made. The first change is adding the int led = 13; statement. This statement sets up a storage location in the memory named led and puts the value 13 into this variable. Since this variable is declared outside of any function, it is a global variable. Global variables are available to all functions. This particular variable will hold the value of the output pin that will light up your LED. Note that you need to declare the type of variable that tells Arduino how big a storage location to set aside for the variable. There are many types available but you'll use just a few; int for the value that has no decimal, float for values that have a decimal, char for character variables, and bool for values that are just true or false. The second change is adding the pinMode(led, OUTPUT); statement. This statement calls the pinMode function and passes led and OUTPUT to the values in the function's argument.
Now you might be a bit confused because the pinMode(led, OUTPUT) function is nowhere to be found in your code. This is a library function provided by the Arduino system. This particular function takes two arguments: the value of the pin to be set and the INPUT or OUTPUT state. In this case, you want pin 13 (the value stored in LED) to be an OUTPUT. The GPIO pin on Arduino can be configured as input or output, that is, they can either accept or send a signal.
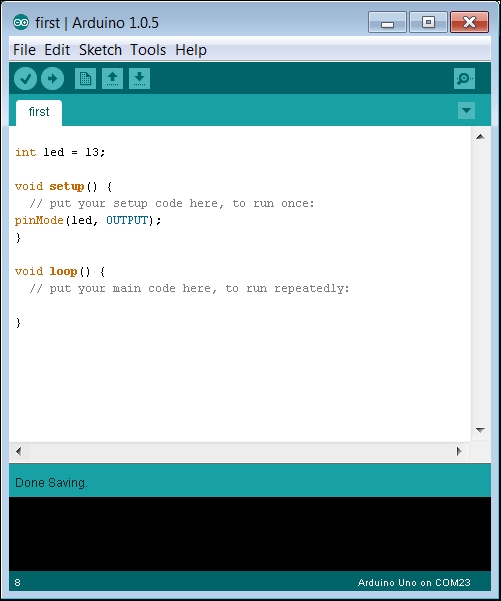
Now you can compile and verify your code. However, save your code under the file name first. To do this, click on File and then click on Save As.... This will open a dialog window, enter first, and then click on Save. Your IDE should now look something like this:
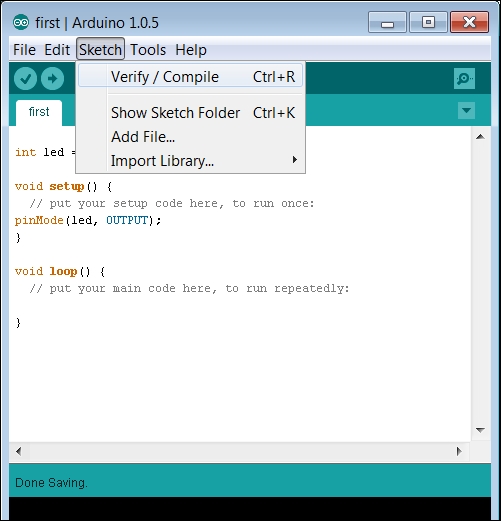
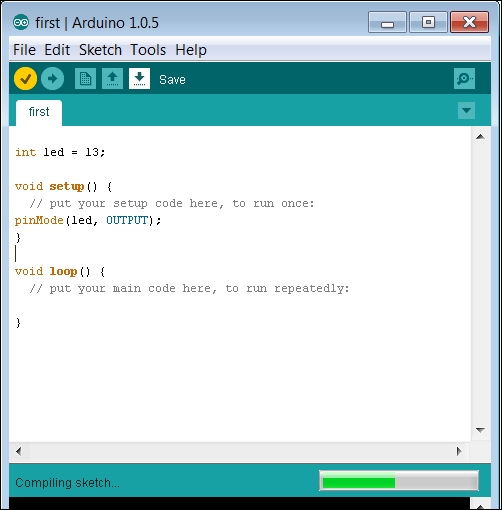
Now compile and verify your code, just to make sure you've typed in everything correctly. To do this, navigate to Sketch | Verify / Compile, as shown in the following screenshot:
You should see something like this:
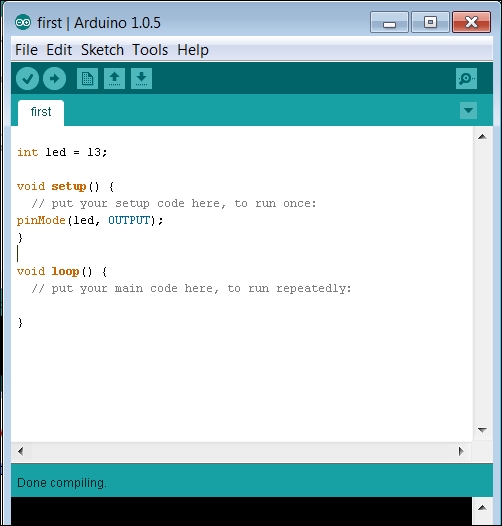
When the compile is complete, you should see something like the following screenshot:
You could also upload and run your program, but it won't do anything yet, as you have not added enough functionality. You've only defined pin 13 (the one connected to the LED) as OUTPUT. To actually see something on your Arduino, you'll need to add some code to the loop() function. Now add the code shown in the following screenshot to the loop() function:
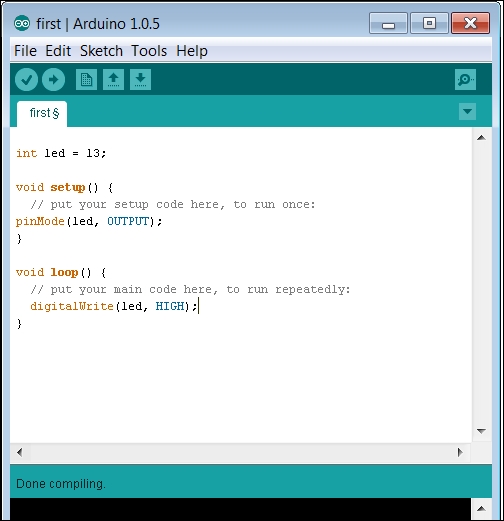
You have added the digitalWrite(led, HIGH); statement to your loop. This is another function that is available from the standard Arduino library. This will, each time through the loop, tell the pin 13 (defined with the pinMode(led, OUTPUT); statement) to go high or low. Save your file, and this time you can compile and upload your code by navigating to File | Upload. You can also use the Upload button.
This selection will compile your code and upload it to Arduino. If everything went as it should, your Arduino's orange LED should be solidly lit. Now, you can add a bit more code to make it blink. Change your code and add the following lines of code to the loop() function:
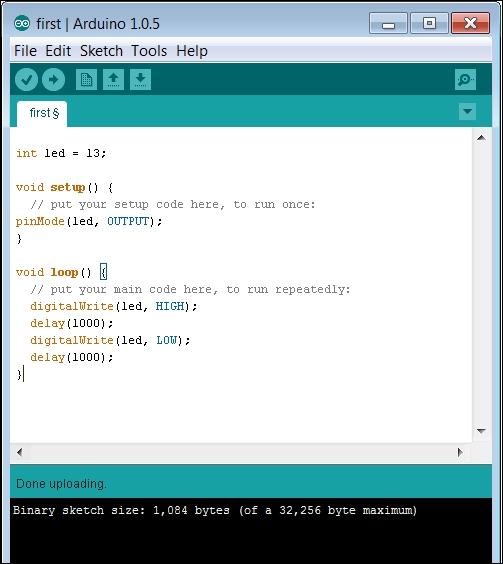
The delay(1000); function is another function that is provided by the standard Arduino library and this pauses the program for 1000 msec (there are a 1000 msec in a second). The digitalWrite(led, LOW); function then writes a 0 to the output pin, which should turn the LED off. The delay(1000); function pauses the program again. The 1000 in the parentheses is an excellent example of an argument that you pass to a function. In this case, each time you call the delay() function you send it a number that tells it how long to pause. This loop() function will be called continually, so this should turn the LED on and off. Upload this code as you did the last time, and you will now see the orange LED flash on and off.
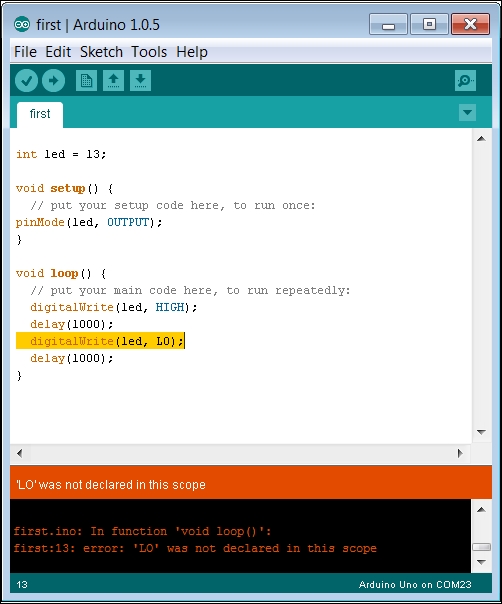
It might be helpful to show you what happens when you make a mistake. If I type LO instead of LOW in the second digitalWrite(led, LO); function and tried the upload, I would see something like the following screenshot:
You now know the details behind your first sketch! Play with different values of the argument in the delay(1000) function, and your LED should flash at different rates.