
We've covered all kinds of mobile robots. In this chapter, for a change of pace, you'll learn how to build small Arduino-based projects. By small, I mean not only small in size, but small in effort. In this chapter, you'll learn the following topics:
- How to modify a small, walking robot by adding Arduino
- How to build wearable projects that can add style and flair to your robot
First, let's build some really small robots with Arduino.
We covered some large robots in the earlier chapters; in this section, you'll build much smaller robots. You can build these small robots from scratch, but I've found that it is much easier and less expensive to take toy robots, which provide the basic capabilities, and add Arduino to them to make them significantly more powerful.
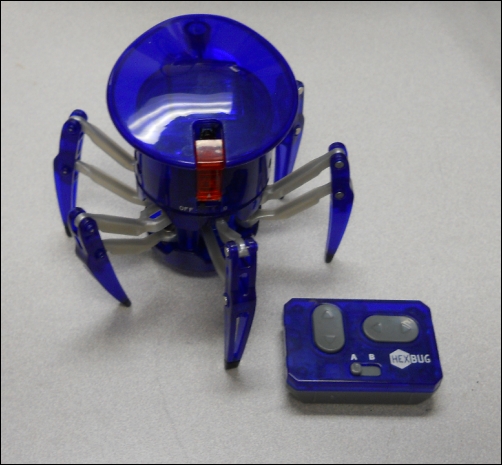
In this first project, you will start with a commercially available robot without a lot of autonomous capability, and then, you'll add Arduino and a sonar sensor and expand the capability of the robot. The robot you'll start with is the Hexbug Spider, which is available at many toy stores and from most online retailers. For specifics, here's the website: www.hexbug.com/mechanical/spider/.
The following is an image of one such unit:
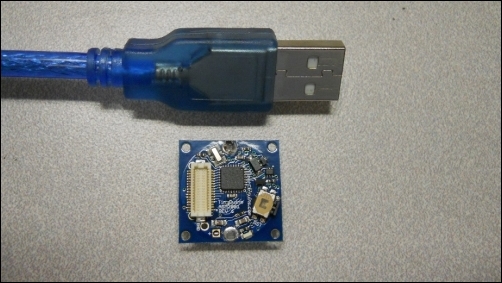
As this robot is very small, you're going to need a very small Arduino so that you don't load the system down too much. One possible choice is an extremely small implementation of Arduino, the TinyDuino. This is available at www.tiny-circuits.com. The following is an image of the TinyDuino processor board with a standard USB connector to give you some idea of the size:
You'll need to order the USB programmer board as well so that you can program your TinyDuino. You'll also need some other additional pieces to complete this project. The Hexbug operates by controlling two motors. The first motor spins the top of the device, and when it stops, the spider will go in the new direction as defined by the new location. The other motor moves the spider forward and backward. Although the motors can go both directions, the motor that moves the top of the device goes a full 360 degrees, so you can drive both motors in the forward direction and your Hexbug can still go in any direction you'd like it to go. So, you can drive the Hexbug directly from Arduino (although if you'd like, you can add the motor driver board from TinyCircuits). You will need a proto board so that you can connect to the motors and access the sonar sensor. The TinyDuino provides one of these as well. You'll stack this on top of the TinyDuino and the USB interface board.
Perform the following steps to add Arduino to the Hexbug:
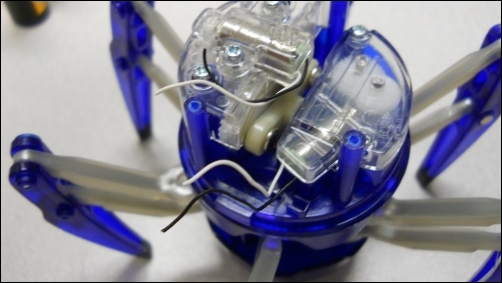
- The first step is to open up the spider and disconnect the control board. Do this by first unscrewing the top plate in the same way you'd unscrew it to change the batteries on the spider. Then, take out the three screws that are part of the top plate and expose the insides of the robot. You'll find a small controller board with six connections. Two of these connections, the white and black wire combinations, go to the two motors that control the direction and the forward/backward motion of the spider. From the top plate comes a red and black wire that supplies the power. Cut these wires. This is what the bottom part of the robot should now look like:
- You'll want to add extension wires onto each of the six wires, so you can connect them to the TinyDuino that you'll mount on top of the robot. Once you have done this, route these wires out the hole to the left by removing the small controller board, and then reattach the top of the robot and the top plate.
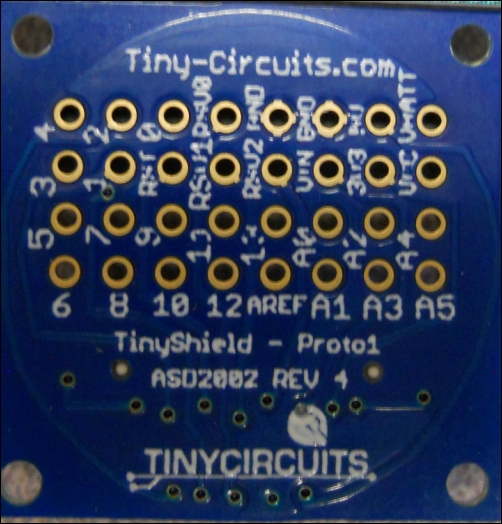
- You'll mount your TinyDuino and the associated shields on the top of the robot. You can do this by mounting the TinyDuino shields together using the TinyDuino mounting kit available at tinycircuits.com. However, you'll first want to solder some wires to the proto shield so that you can talk to the other sensors you'll want on the robot. For this project, you'll need to control two DC motors and the sonar sensor. The specifics for the sonar sensor were covered in Chapter 8, Avoiding Obstacles Using Sensors. Based on this information, you'll need access to pins 9 and 10 for the two motors and VCC, GND, and pins 12 and 11 for the sonar sensor.
- You'll need to solder wires to the proto shield. The following is an image of the shield, which will give you an indication of where to add the wires:
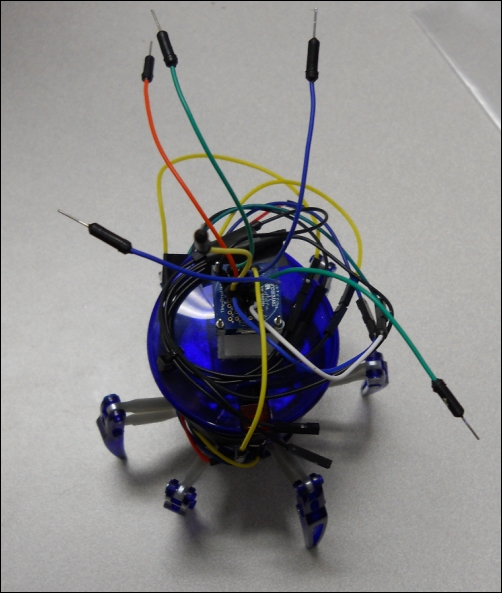
- When you have these wires attached to the proto board, you can connect all the TinyCircuits parts together. Now, you can start connecting the Hexbug to the TinyDuino. Let's start by controlling the two motors. You'll need to connect the rotating motor to pin 9 and GND and then connect the movement motor to pin 10 and GND on the proto board. You'll need to make several connections to the GND connection on the proto board, four to be exact, so you may want to make a four-to-one wire connector for this purpose. The following is an image of the board mounted and connected to the two motors:
Now, let's try and see whether the spider's movement is again functional—this time, driven by the TinyDuino. To do this, you'll need to create just a bit of code:
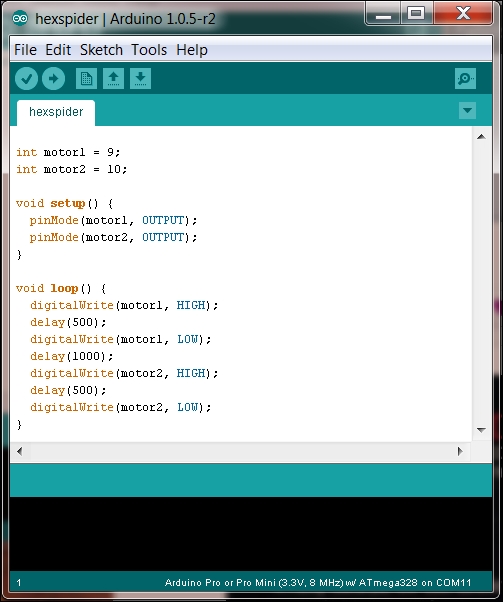
When you upload the code, your robot should move forward slightly, then turn, move forward again, then turn, and so on. You can adjust the amount of movement and turn by changing the delay (500); statement in the code. Now, your robot can move around.
If you put a battery into the holder on the TinyDuino, your robot can even move when disconnected from the computer. I like to keep my USB connection board in this configuration; it makes it easier to hook up and modify the code.
Now, you can move around, but you'll certainly still bump into barriers. So, let's add the sonar sensor. To add the sensor, make the following connections:
|
Arduino pin |
Sensor pin |
|---|---|
|
5 V |
VCC |
|
GND |
GND |
|
12 |
Trig |
|
11 |
Echo |
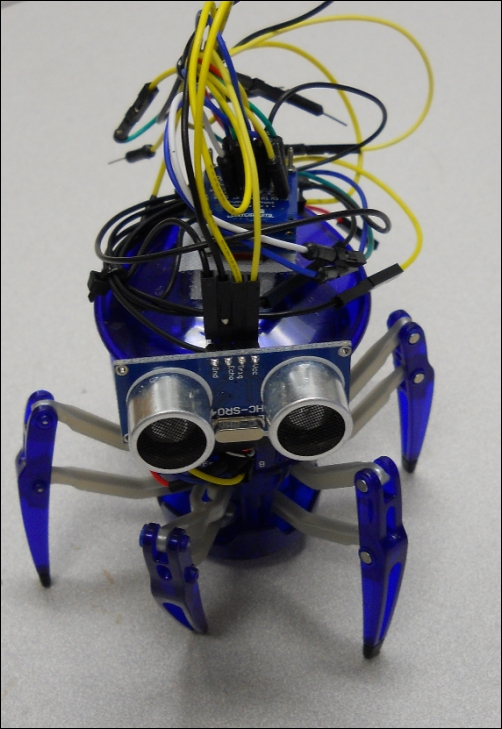
You can mount your sonar sensor on the front of your Hexbug using velcro. The following is an image of the Hexbug with the sensor mounted:
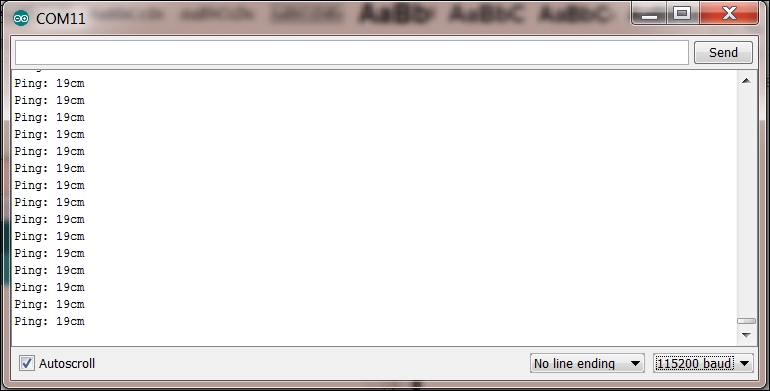
Now, let's see whether the sensor is functional. Navigate to Examples | NewPing | NewPingExample. Select the Serial Monitor tab, and you should see the following screenshot:
You can now sense barriers. It is straightforward to create a sketch that uses the motor control and sonar sensor. The following is a simple sketch that combines program statements for both, the DC motor control and sensor control:
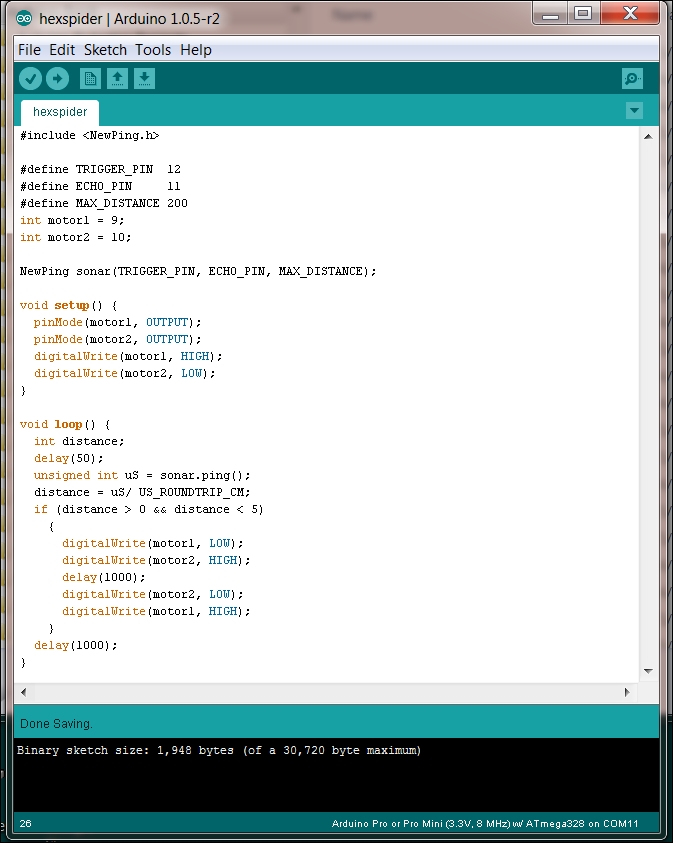
The NewPing sonar(TRIGGER_PIN, ECHO_PIN, MAX_DISTANCE); statement sets up the sonar sensor so that it knows about the proper trigger and echo pins. In the
setup() function, you are going to set the OUTPUT mode for the two pins that will control the DC motors and then turn one motor on (the motor that powers the walking) and the other motor off (the motor that turns the device).
The loop() function checks the sonar sensor using the sonar.ping() command. When the distance is greater than 0 and less than 5, you will turn the walking motor off, turn the turning motor on for one second, and then turn the turning motor off and turn the walking motor back on. When the spider encounters an object, the program should turn the walking motor off, turn the spider by about 90 degrees, and then turn the walking motor back on.
Now, upload your program. Your robot should now move forward, and when it senses a barrier, it stops and turns and then moves in the new direction. Your robot can move around and sense barriers! Implementing the intelligence to go between points A and B while avoiding barriers is an interesting and complex problem that you can now explore. There are algorithms that show how to program your robot to respond when it senses a barrier by moving efficiently around it. For more information on this, see research.ncl.ac.uk/game/mastersdegree/gametechnologies/aipathfinding/AI%20Pathfinding%20Tutorial.pdf and biorob.epfl.ch/files/content/users/175246/files/Public/Pictures/ReportMaster.pdf.
Now that you have learned how to build small robots, let's turn to an entirely different application for Arduino—fashion.