
Now that your robot is mobile and has several ways of sensing the outside world, you'll want to disconnect it from the tether cable that you have been using to communicate with it. In this chapter, you'll learn how to communicate wirelessly with your robot. Depending on your choice of method, you'll be able to communicate across the room or across a distance of up to a mile. Specifically, we'll cover the following topics:
As your Arduino will now be remote, you'll need to power it with an external source. Your Arduino will need at least 250 mA, but you might want to consider providing 500 mA to 1 A based on your project. To supply this from a battery, you can use one of several different choices. One choice is a 4 AA battery pack, like the one used to power the DC motors on the wheeled robot in Chapter 6, Controlling DC Motors. Alternatively, you can also use an RC LiPo 2S battery, like the one you used to power the quadruped robot in Chapter 7, Controlling Servos with Arduino.
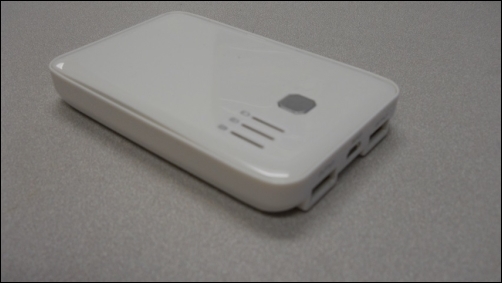
You can also use a simple USB battery, like the ones used to charge cell phones during an emergency, as shown in the following image:
Let's start by connecting to Arduino with a simple RF interface. For this exercise, it will be easiest if you connect your development machine to Arduino with an RF interface and then connect to another Arduino with a similar RF transceiver. There are some very inexpensive modules available at online retailers such as ebay.com, but you will need to be a bit careful and watch what frequency your devices use, as they may violate your country's frequency usage rules. Each country regulates who can use what frequencies. For more information, visit www.wired.com/2010/09/wireless-explainer/. For example, 433 MHz is fine for Europe, but can't be used in the US unless you have the proper amateur radio license. 915 MHz is available in the US but not in Europe. 2.4 GHz is fine in either case, so you might want to go with a transceiver that operates at 2.4 GHz.
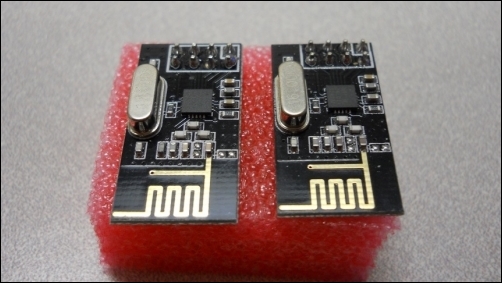
The following is an image of a 2.4 GHz device, which is the nRF24L01+ 2.4 GHz wireless transceiver, available at many online retailers, including amazon.com:
You will want to purchase two of these devices. Initially, to try the example, connect each of the pair to your Arduino. You will also need to connect each device to a host computer so that you can monitor the Serial Monitor port. Eventually, when you have the system up and working, disconnect one of the devices from the host computer and connect it to a battery so that it can run without a host connection. To connect the devices to Arduino, connect to the pins on the back of the device. The following is an image of the connections on the back of the device:
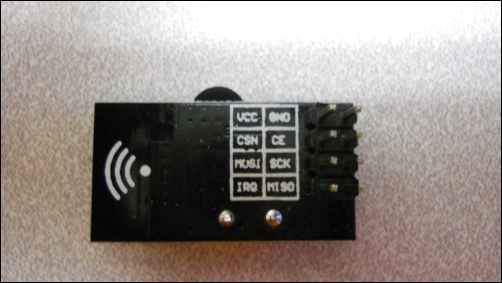
The following table shows the connections between the device and Arduino:
|
Arduino pin |
Receiver pin |
|---|---|
|
5 V |
5 V |
|
GND |
GND |
|
12 |
MISO |
|
11 |
MOSI |
|
13 |
SCK |
|
8 |
CE |
|
7 |
CSN |
Connect the second Arduino in the same way as the first. Now, you are ready to access two Arduino IDEs, one for each of these two Arduinos.