
Let's first set up the Arduino IDE for XBee that will be connected to your Arduino. Once you have connected all the shields to your Arduino, simply connect your Arduino with the USB cable to one of the computers. Bring up the Arduino IDE and then type in the following code into the sketch window:
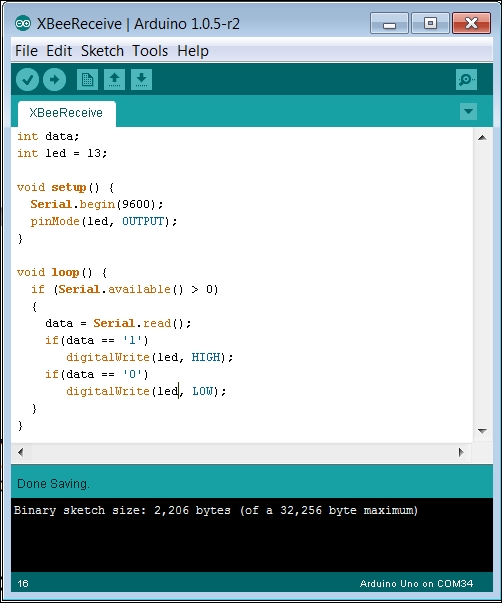
This sketch is quite simple; you can turn on the on-board LED with remote commands, 1 to turn it on and 0 to turn it off. Once you have compiled and uploaded this code, disconnect the USB cable from the computer. You'll need to physically change a switch setting on the wireless shield so that the device will now accept commands from your XBee controller. It is on the opposite end of the shield and looks like the following image:
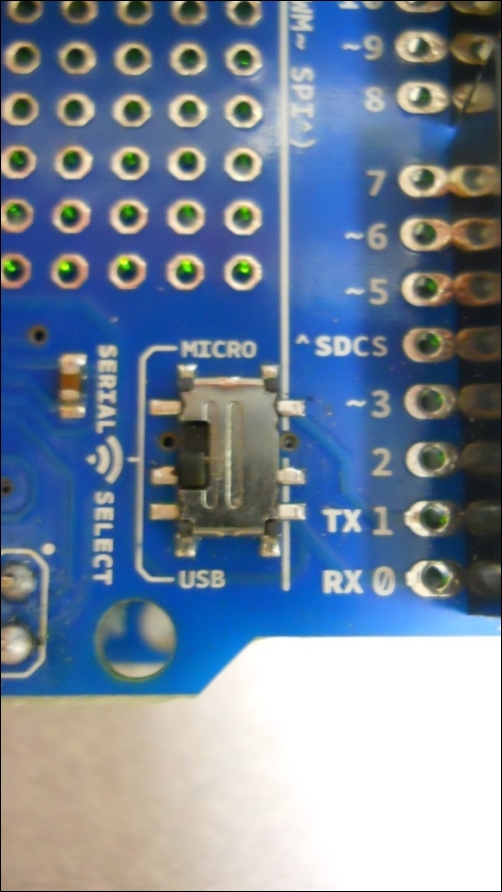
When you are programming the device, you'll want this switch to be in the USB location. When you are ready to communicate with the device, you'll want to switch this to the MICRO setting. So, change it to the MICRO setting once your sketch has finished compiling and uploading to Arduino. Then, connect your Arduino to a battery.
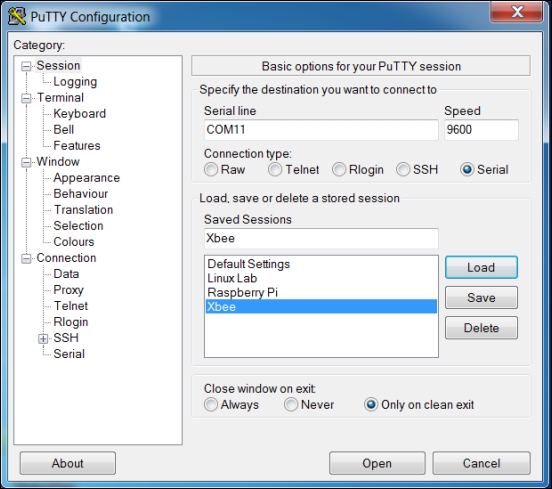
Now, connect the other XBee device via the small Xbee-specific USB shield to the computer. Open PuTTY or any other terminal emulator window. Make sure that you set the terminal emulator data rate to 9800 baud. In PuTTY, your configuration will look like the following screenshot:
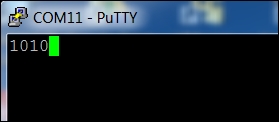
Now, open the terminal window. You should now be able to type 1 and the LED on the remote Arduino will turn on. Typing 0 should turn off the LED. Your PuTTY window should look like the following screenshot if you select Force on in the Local echo option and if the Implicit CR in every LF and Implicit LF in every CR options are checked:
Now, if your system is not working, there are a couple of ways to try and determine what is going wrong. First and foremost, make sure Arduino is turned on and is executing the correct code. Second, check to see that characters are being typed in the PuTTY window. Third, check the baud rate of the PuTTY window. If this is too high, you will see characters come through the system, but they will not be interpreted correctly on Arduino.