
Now that you have the set of tools, let's build some amazing robots. Let's start by exploring robots that can go either in or under water. I won't cover every detail in this chapter, but I will discuss some additional capabilities that you'll need in order to complete these more advanced projects. In this chapter, you'll learn the following:
Let's start by sailing!
Certainly, one of the most impressive ways to navigate the waters is in a sailing vessel. Let's start with an RC sailboat. These are available at many hobby stores, either retail or online. The following is an image of one such platform:
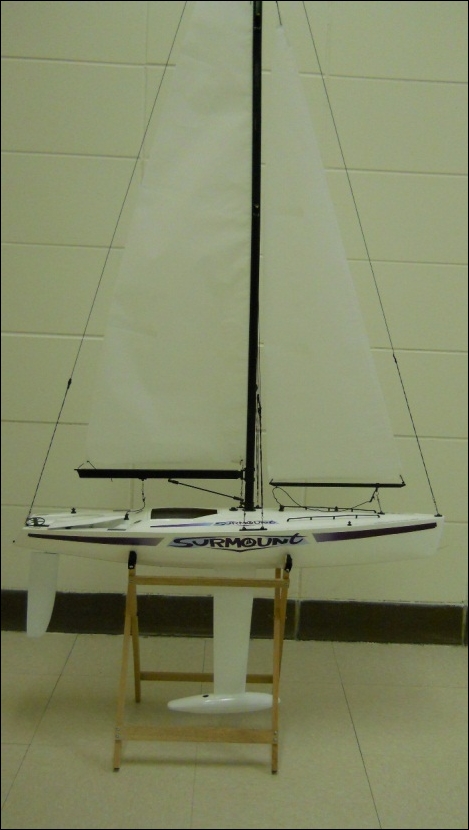
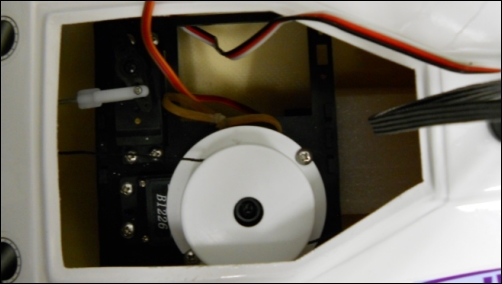
This sailboat is ready to sail via radio control. This means that it has two servos mounted inside: one to control the sail and the other to control the rudder. The following is an image of these two servos that are connected to the sail and rudder:
In order for your sailboat to sail itself, it will need several key capabilities. First, it should be able to control the servos; you'll use the techniques you learned in Chapter 7, Controlling Servos with Arduino, to move the rudder and trim the sails. You might want to add the GPS capability that you discovered in Chapter 11, Using a GPS Device with Arduino. You will want to control the system without a wired connection, so you can use the principles that you learned in Chapter 10, Going Truly Mobile – the Remote Control of Your Robot.
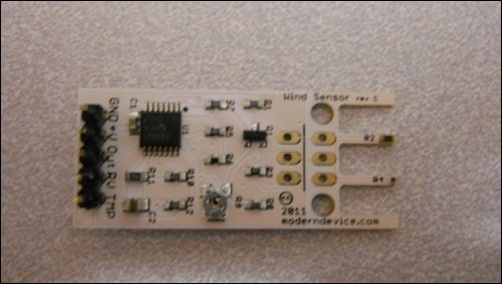
One additional item that you might want to add for a fully automated system is a wind sensor. The following is an image of a wind sensor. A fairly inexpensive one is available at www.moderndevice.com:
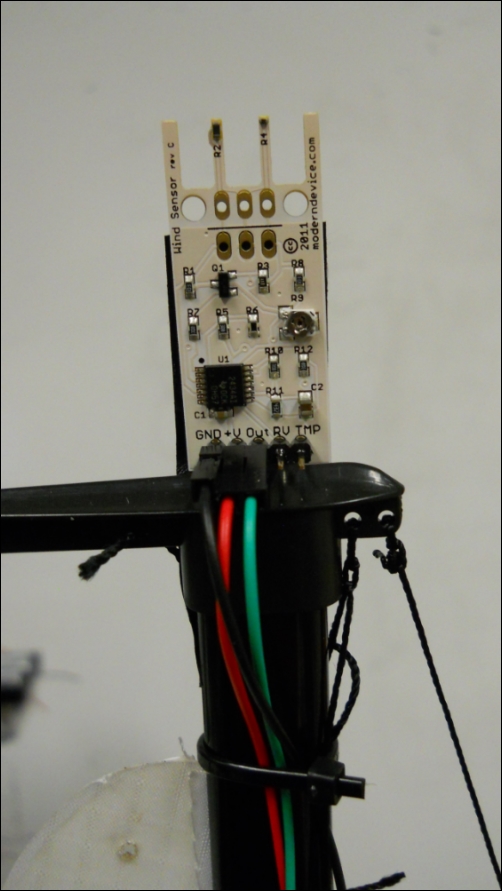
You can mount the wind sensor on the mast if you'd like; I used a small piece of heavy-duty tape and mounted it on the top of the mast, as shown in the following image:
To add this to your system, you'll also need a way to take the analog input from the sensor and send it to Arduino. Notice that the device has three connections that you'll be using: GND, +V, and Out. Connect your Arduino to the wind sensor using the following connections:
|
Arduino pin |
Wind sensor pin |
|---|---|
|
5V |
+V |
|
GND |
GND |
|
A1 |
RV |
|
A0 |
TMP |
Accessing the device in a sketch is straightforward; in fact, the manufacturer has included an example sketch at github.com/moderndevice/Wind_Sensor. Unzip, open, and upload the WindSensor sketch. Then, open Serial Port, set the baud rate to 57600 baud, and blow with your mouth on the sensor. You should see something like the following screenshot:
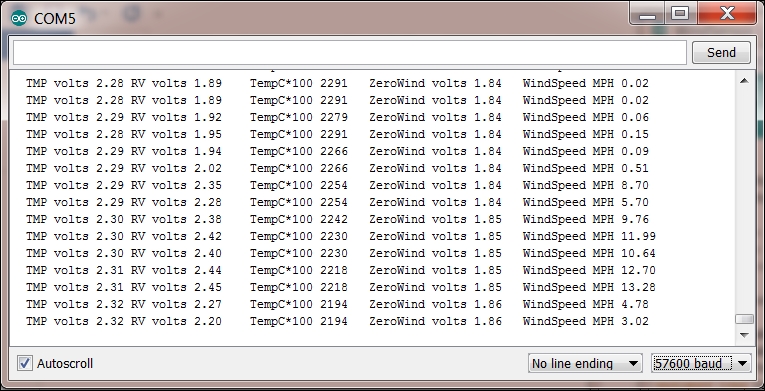
Now you have a way to measure the wind!
By the way, here is where you can take advantage of the stackable nature of the devices. The following is an image of my Arduino board, the Wireless SD shield with an XBee device, and the GPS shield, all connected:

The wind sensor is connected to the holes available on the Wireless SD shield. You'll also need to add the servo control, but now, you have all the capabilities you need to build your Arduino-controlled sailing vessel. However, Arduino is not limited to just sailing above the water. Let's see how you can build a robot that can go under water.