
In this chapter, we'll cover robots that can fly. As with the last chapter, we won't cover every detail in this chapter, but we will again discuss how to bring all the different capabilities that we have covered to our new projects. We'll also discuss the additional capability that you will need. In this chapter, you'll learn the following:
- How to build an Arduino-operated RC airplane
- How to build an Arduino-operated quadcopter
Let's get started!
At this point, you have all the tools you need to add Arduino to an RC-controlled airplane. So, let's tackle that project. You're going to add control so that you can control your RC plane from a phone, tablet, or any device with Bluetooth capability. Then, you'll learn how to add some of the additional sensors you've used in other projects, such as GPS, to make your RC plane even more intelligent by making it autonomous.
First, find an RC airplane. They are available at most RC hobby stores and online. I ordered this one from amazon.com:
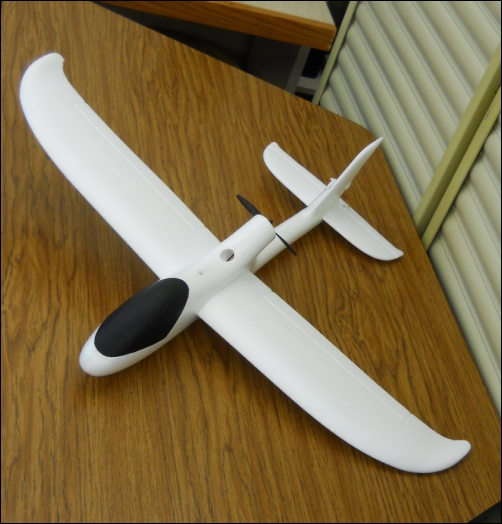
You could use one of the many different makes and models of RC planes for this project, as long as they meet a few requirements. If you are new to RC airplanes and how they operate, you might first read about them at www.instructables.com/id/Beginners-Guide-to-Radio-Control-Airplanes/. The first requirement for this project is that the plane must be RC controlled and the RC unit must control the servos and speed of the unit. The second requirement is that it should be large enough so that Arduino can fit on the plane without taking up too much room. As the programming required for this project is minimal, you can use a fairly small Arduino to control the plane. Finally, I chose a plane with a rear-facing propeller. We have found that many times, the plane will come down nose first, and having a rear-facing propeller helps the plane survive more crash landings. You will have several of those.
If this is your first project, you may want to order an RC airplane with simple controls, perhaps with two control surfaces and a speed control. These will often be referred to as 3 Channel RC airplanes.
The first step will be to locate your control servos, speed control, and the wires that are connected to them. In this particular airplane, the servos are integrated with the receiver, so you'll need to remove the entire board and replace it with two micro servos. A suitable micro servo is the HS-55 from Hitec, available at many hobby stores and most electronics online retailers.
I placed my micro servos using velcro, and they fit very nicely in the opening. The following image shows all the control connections for this particular RC airplane after replacing the servos:
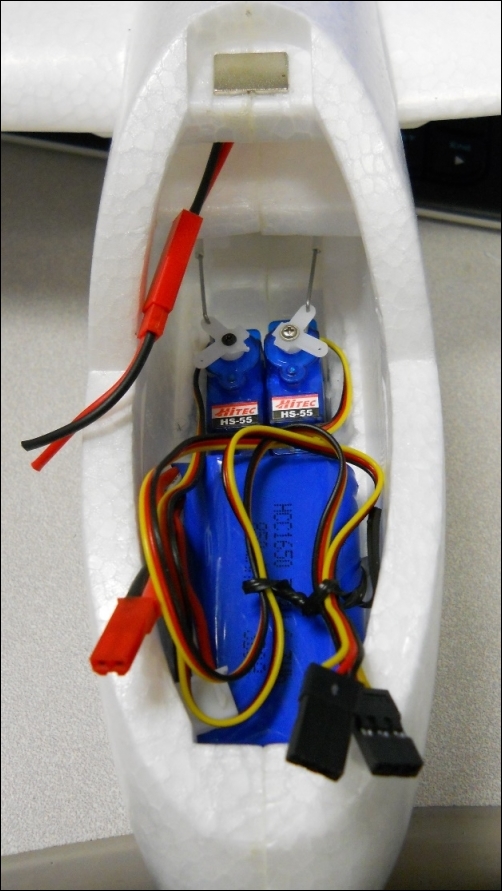
You'll need to connect the two servos, the red and black wires from the motor, and the red and black wires from the battery to your Arduino. The control signals you'll need to provide with your Arduino are the two servos for the control surfaces, and the DC motor that is attached to your propeller is the control for speed.
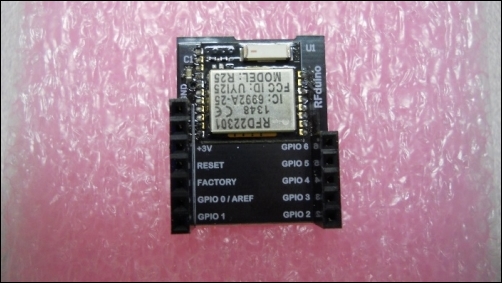
Now, you'll need to add your Arduino. You can certainly use one of the standard Arduinos that you've used in the previous projects, but there are also some special-purpose Arduinos that are excellent for this particular application. One in particular is small and comes with wireless communication; it is called the RFduino.
This device uses Bluetooth technology to communicate with other devices. It is available at several online electronics retailers. The following is an image of the unit:
You'll also need a couple of the shields that are available for the RFduino, in particular, the USB development shield, the battery shield, and the servo control shield. The following is an image of all three:
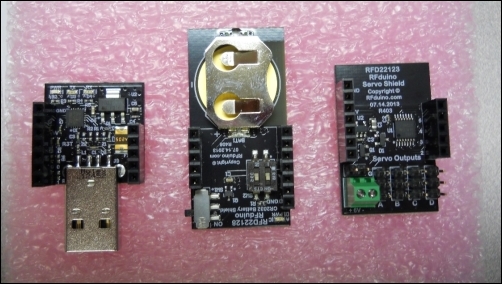
Each shield performs an important function, as follows:
So, let's start building.
First, plug the RFduino into the USB shield, and then plug the servo control shield into the RFduino. Now, plug the USB into the USB port of your computer. Then, follow the instructions at www.rfduino.com/wp-content/uploads/2014/04/RFduino.Quick_.Start_.Guide_.pdf to get the entire system up and connected. You'll need to download a beta version of the Arduino IDE, Version 1.5; however, you may want to keep the current released version as well. Just make sure you remember which version is in which location.
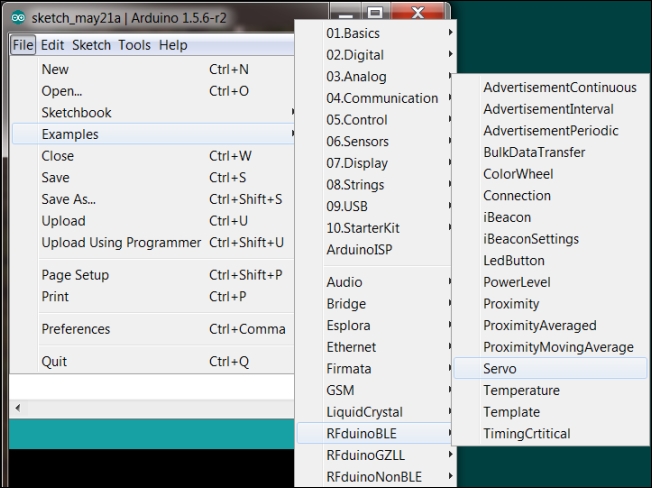
For your application, let's start by opening a simple example program that allows the RFduino to control the servos. To do this, navigate to Examples | RFduinoBLE | Servo as shown in the following screenshot:
The code is very simple, and it is as follows:
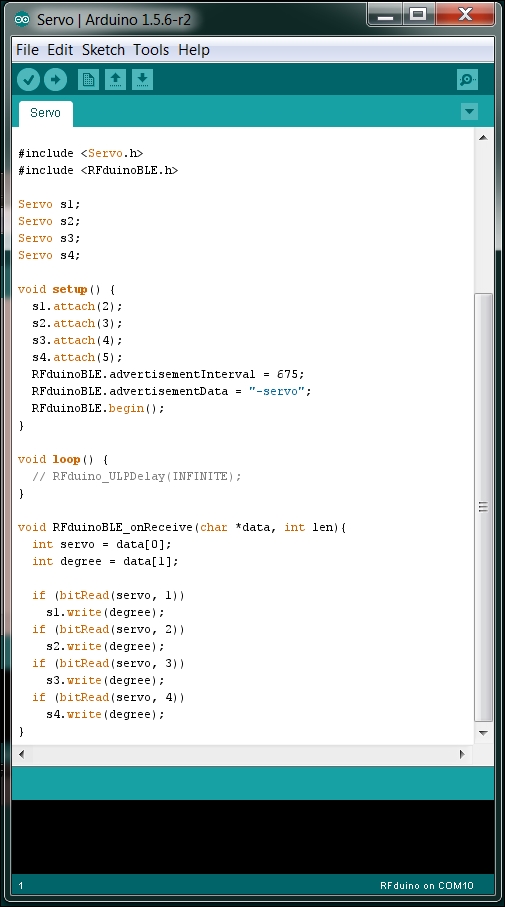
The sketch takes in the Bluetooth input and then translates it into a selection to control the servo. If you need to, review the information in Chapter 7, Controlling Servos with Arduino. You'll be controlling your servos using the servo controller, setting the servo and the angle desired by your RC plane. For the speed, you'll also use the servo controller; plug the black ground connection into the GND on the servo controller and the red control signal into the control signal connector spot on the servo controller. Just remember that 0 to 180 is the speed control value.
You'll now need an application on your tablet or phone to control the RFduino over the Bluetooth link. If you are adventurous enough to develop your own application, visit http://www.rfduino.com/download-rfduino-library/ for example programs. Most of these example programs are already created and on the iPhone app page. To test your control, you can download these apps and run them. The RFduino servo control app should allow you to control your servos and speed so that you can control your plane remotely.
The RFduino team has not yet created an Android app, but if you have an Android device, there are already several Android BT Arduino control applications on the Google Play store that can be of use. For example, the Arduino BT Joystick PRO app can be used to communicate with your device. You'll need to translate the Bluetooth commands as they come in from the Bluetooth interface and then send control signals to the various control surfaces of your airplane, but this will give you more control over your airplane.
This will take a bit of Android development programming, and you'll need to make changes so that the up, down, left, and right arrows adjust the control surfaces of your airplane appropriately. Also, be careful; Bluetooth does have a limited range. So, don't get much more than 50 meters from your plane, or it might just fly away.
Once you have your plane flying, you can add the digital compass discussed in Chapter 9, Even More Useful Sensors. If you know direction and calibrate your speed, your Arduino can even have a sense of where it is. You could even, in the absence of any control commands from the Bluetooth interface, fly your airplane in circles.
Even more interesting would be to add the accelerometer/gyro capability from the same chapter. Connecting and calibrating the device would give your Arduino information on when the airplane was flying level or when it is going up or down or rolling on its side. You can then use your controls to force the plane back into the desired position. The specifics on this type of control are too complex to detail in this chapter, so for more information, visit www.instructables.com/id/Intro-to-Model-Airplane-Autopilot/ and hacknmod.com/hack/make-a-uav-spyplane-using-the-arduino/.