
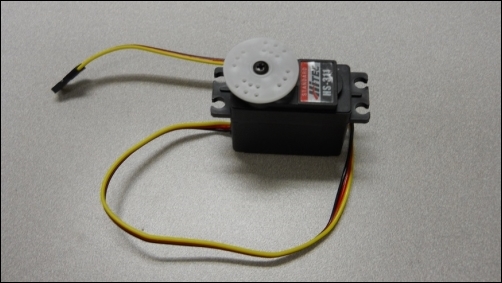
The first step in connecting a servo motor to Arduino is to actually obtain a servo motor. The following figure shows a typical servo motor, the Hitec HS-311, available at most hobby or RC Control stores:
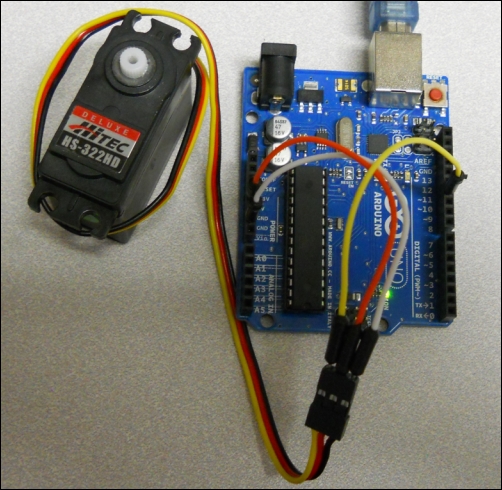
In order to connect this servo motor to your Arduino, you'll need some of those male-to-male solderless jumper cables that you used in the previous chapters. You'll notice that there are three wires coming from the servo. Two of these supply the voltage and current to the servo. The third provides a control signal that tells the servo where and how to move. You'll connect these three wires to the pins on Arduino. The black wire on the servo is ground; you'll connect that to the GND pin on Arduino. The red wire on the servo is the VCC connection; connect that to the 5 V pin on Arduino. The orange pin is the control pin on the servo; connect that to one of the DIGITAL (PWM~) pins on Arduino, for example, pin 11, as shown in the following figure:
Just a word of caution, this works well with a single servo; you will not want to use the method for more than just one or two servos. Now that you have made these connections, you are ready to write the code to make your servo move.