
Ok! We have seen how to present our work in Balsamiq, but what if we want to share our work outside of the application? Well, I am sure you already know what I am going to say. With Balsamiq, that's easy to do!
Using Balsamiq's exporting functionality , we can share our work as a PDF, a PNG, or even as raw XML code.
Let's review each method.
Exporting your wireframes to PDF allows you to take your work offline and present it in a printable form. In addition, you can also share a PDF online as a downloadable document. The best part is, if your wireframe contains links then your PDF will too! Now that's useful and impressive! Let's export your entire project as a PDF document.
To do this, you must first open all of your project files and make sure the pages are opened in the correct order, that is, project_mockups_1, project_mockups_2, project_mockups_2b, project_mockups_2c, project_mockups_2d, project_mockups_3, project_mockups_4.
As a reminder, Balsamiq does not know the order of your pages. When you export to PDF, the order of the pages in your PDF will be in the same order as they are in the file browser. Take a moment to ensure that your pages are in the correct order, as shown in the following screenshot:
If not, rearrange them by clicking-and-dragging the tabs in the file browser until they are.
With the pages arranged, perform the following steps:
- Choose File | Export all Mockups to PDF.
- Keep the default settings in the PDF Export Options dialogue box that appears, as shown in the following screenshot:
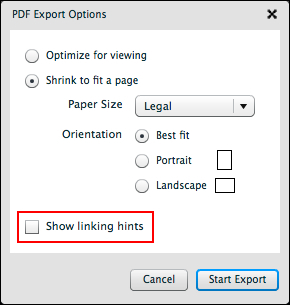
Since exporting to PDF retains all of your links, the export popup offers an optional way to view them. By clicking in the checkbox called Show linking hints, your PDF will display visible links, so you and your users will know where to click.
- Click on the Start Export button.
- Choose where you want to save the PDF.
Once saved, open the PDF to make sure all your pages look correct and are in the correct order. Click on the links to make sure they work too!
Another way to get your wireframes out of Balsamiq is as a PNG image file. As with PDFs, you can export to PNG as a single page or you can export the entire contents of your project folder.
Exporting a single page to PNG is perhaps the most common use of this functionality.
To use it, perform the following steps:
- Select the page you want to export.
- Select File | Export to PNG Image.
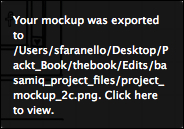
You will see where the PNG file went via the small black box that appears in the lower-right corner of your screen. If you find it hard to follow the path specified, you can simply double-click on the box and it will open the folder where the file was placed.
In addition to exporting full pages as PNG, you can choose to export individual elements on the page as well.
Perform the following steps:
- Select a few individual elements on a page.
- Select File | Export to PNG Image.
- Choose Export Selected in the dialogue box that appears, as shown in the following screenshot:
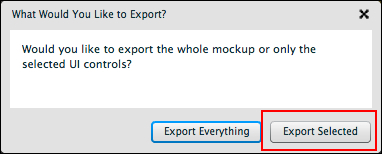
The subsequent PNG image will contain only the elements you selected. Open the one you just created and you will see what I mean.
Unlike exporting to PDF, which saves all of your open pages as a single, multi-page document, exporting an entire project to PNG will save all of your pages as individual PNG files.
If they are not open already, open all of your wireframe files, once again, and select File | Export All Mockups to PNG. You will find that you now have multiple PNG files saved for each of your wireframe pages.
Exporting an image to the clipboard works very much the same as exporting to PNG, with some differences.
Firstly, instead of saving a PNG file to your hard drive, File | Export Image to Clipboard saves the widget to the clipboard. From there, it can be pasted from the clipboard in one of two ways:
- As an image pasted into MS Word, onto your desktop, or into any other application that accepts images
- Directly into Balsamiq
When using the second option, pasting into Balsamiq will activate a popup dialogue box that asks you to name the file, as shown in the following screenshot:
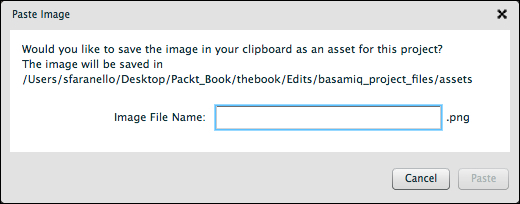
When you click the Paste button, the image is automatically saved to your assets folder.
Lastly, keep in mind that as you work in Balsamiq, you cannot simply copy items to your clipboard using Command + C/Ctrl + C, like you would in most other applications. Balsamiq actually reserves Command + C/Ctrl + C for another very special use. As a matter of fact, this is a great segue into the next section.