
It is easy to see how useful and beneficial icons are to your wireframe. Now let's take a closer look at images.
With project_mockup_2.bmml still open on your screen, perform the following steps:
- Place an Image widget on the canvas.
- Set Pos:
125,121. - Set Size:
146x164. - Double-click on the widget to open the Load Image dialogue window, as shown in the following screenshot:
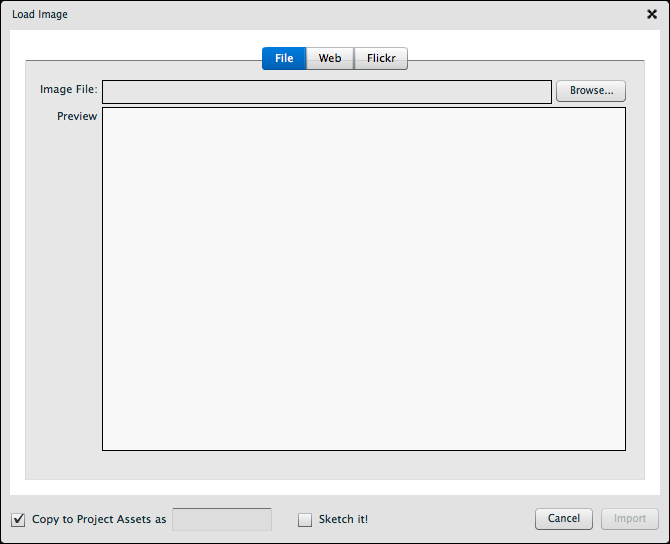
The Load Image dialogue window offers three ways to import images: File, Web, and Flickr.
- File allows you to import images from your hard drive
- Web provides a URL text field to type in the address of an image from an online source
- Flickr allows you to type in key words that return related images from the Flickr database of images
For the purposes of our exercise, we will import an image from the images folder that you downloaded earlier.
With the Load Image dialogue window open, perform the following steps:
- Select the File tab, if it's not already selected.
- Click on the Browse button, and navigate to the folder: balsamiq_project_files | assets.
- Select
profile_image.png. - Click on the Import button.
When the image loads, click on the Show Border checkbox in the Property Inspector to give your new image a border, to separate it more clearly from the rest of the page, as shown in the following screenshot:

That's really all there is to it. It's that simple. Now that you know how to import an image file from your computer, try it again using the Web and Flickr import methods.
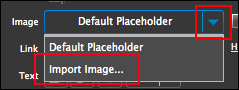
For the record, you can also activate the Load Image dialogue window via the Property Inspector.
To do that, perform the following steps:
- Click on an Image on the canvas to expose the Property Inspector.
- Click on the down arrow in the Image drop-down menu.
- Select Import Image, as shown in the following screenshot:
If you recall back in Chapter 3, Working with Symbols, we discussed the assets folder. This is where Balsamiq stores all of your files, symbols, images, and so on, that are not your wireframe files.
In case you missed it, Balsamiq actually references the assets folder within the Load Image dialogue window. By clicking on it, you can load images into the assets folder automatically.
Perform the following steps:
- Re-activate the Load Image dialogue window by double-clicking on an image on the canvas.
- With the File tab selected, browse for any image on your computer's hard drive.
- Before you press the Import button, click the checkbox in the lower-left corner of the window titled Copy to Project Assets, as shown in the following screenshot:
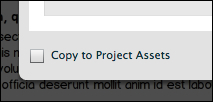
When you check the box, the title of the image will also appear in the text field. You can rename it or leave it as is.
- Press the Import button to place the image on the canvas.
As you do this, the image is simultaneously saved to your project's
assetsfolder.Tip
If you load an image in the Load Image dialogue and find that the Import button in the lower right is disabled, it could mean one of two things: Either an image with the same name already exists in the folder, in which case you need to rename the new one, or Balsamiq does not recognize the file extension. For example, Balsamiq does not recognize .
jpeg. To fix it, change the extension to.jpg. Doing either of these will activate the Import button.
Before moving on, I have one more important piece of information to share with you. Once you place an image onto the canvas from your hard drive, that image must remain in that location. Move it and Balsamiq will have no idea where it went.
Instead, you will see the following screenshot:

This is perhaps the best argument for keeping your wireframe images as an icon collection in the assets folder. It is equally compelling if you decide to share your wireframe files with friends and associates.
A new feature in recent versions of Balsamiq is the crop feature. This can be a very handy tool for doing simple editing tasks and, if for nothing else, it keeps you working in the application, rather than having to open an external image-editing application like Photoshop.
The following steps demonstrate how to use it:
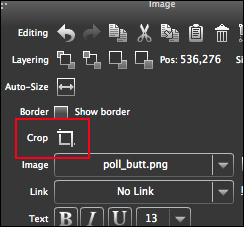
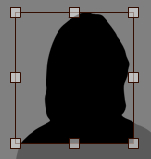
- Select the image you placed earlier on the canvas and click on the Crop icon in the Property Inspector, as shown in the following screenshot:
When clicked, the canvas will go dark except for the area that is cropped. You will also see a series of squares around the crop box. These are resizing handles.
- Click-and-drag any one of them to resize the crop area, as shown in the following screenshot:
In addition to the grab handles, you will also see a green bar at the top of the canvas with two buttons and a crop size measurement, as shown in the following screenshot:
They are used to perform the following functions:
- Crop Image is used when you have a satisfactory crop around an image and you are ready to submit the changes. Pressing Return/Enter on the keyboard will perform the same action.
- Cancel is used when you want to escape out of crop mode with no changes. Pressing the Esc key will perform the same action.
- Cropped size displays the height and width of the image crop area. The number changes on the fly as you resize the crop area.