
Upload Your First Sketch
Now that you have installed the drivers and the IDE and you have the correct board and ports selected, it's time to upload an example sketch to the Arduino to test that everything is working properly before moving on to the first project.
First, click the File menu (Figure 1-10) and then click Examples.
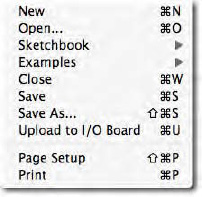
Figure 1-10. The File menu
You will be presented with a huge list of examples to try out. Let's try a simple one. Click on Basics, and then Blink (Figure 1-11). The Blink sketch will be loaded into the IDE.
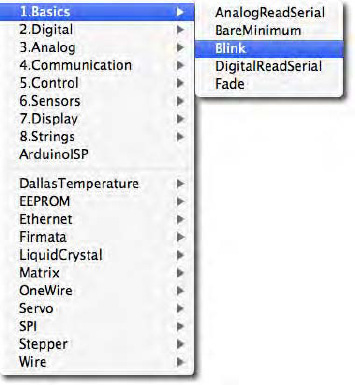
Figure 1-11. The Examples menu
Next, click the Upload button (sixth button from the left) and look at your Arduino. (If you have an Arduino Mini, NG, or other board, you may need to press the reset button on the board prior to pressing the Upload button.) The RX and TX lights should start to flash to show that data is being transmitted from your computer to the board. Once the sketch has successfully uploaded, the words “Done uploading” will appear in the IDE status bar and the RX and TX lights will stop flashing.
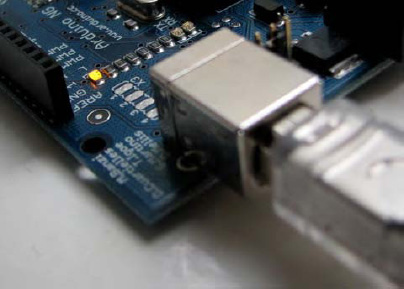
After a few seconds, you should see the Pin 13 LED (the tiny LED next to the RX and TX LEDs) start to flash on and off at one second intervals. If it does, you have just successfully connected your Arduino, installed the drivers and software, and uploaded an example sketch. The Blink sketch is a very simple sketch that blinks LED 13 shown in Figure 1-12, the tiny green (or orange) LED soldered to the board (and also connected to Digital Pin 13 from the microcontroller).
Before you move onto Project 1, let's take a look at the Arduino IDE. I'll explain each part of the program.